
Operating Instructions
Page 1
3-865-553-12(1) Compact Hi-Fi Stereo System Operating Instructions LBT-DR8AV LBT-DR7AV LBT-W900AV LBT-XB800AV ©1998 by Sony Corporation
3-865-553-12(1) Compact Hi-Fi Stereo System Operating Instructions LBT-DR8AV LBT-DR7AV LBT-W900AV LBT-XB800AV ©1998 by Sony Corporation
Operating Instructions
Page 2
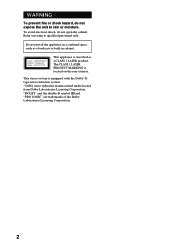
Refer servicing to rain or moisture. The CLASS 1 LASER PRODUCT MARKING is equipped with the Dolby* Btype noise reduction system. * Dolby noise reduction manufactured under license from Dolby Laboratories Licensing Corporation. This stereo system is located on the rear exterior. Do not install the appliance in cabinet. WARNING To prevent fire or shock hazard...
Refer servicing to rain or moisture. The CLASS 1 LASER PRODUCT MARKING is equipped with the Dolby* Btype noise reduction system. * Dolby noise reduction manufactured under license from Dolby Laboratories Licensing Corporation. This stereo system is located on the rear exterior. Do not install the appliance in cabinet. WARNING To prevent fire or shock hazard...
Operating Instructions
Page 10
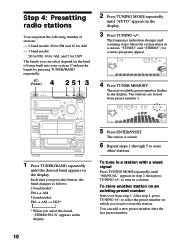
..."TUNED" and "STEREO" (for UKV The bands you want to tune in the display. To tune in a station with a weak signal Press TUNING MODE repeatedly until "MANUAL" appears in the display. 5 Press ENTER/NEXT. The frequency indication changes and scanning stops when the system tunes in the...10 to store the station. to store other stations. Step 4: Presetting radio stations You can preset the following number of tuner built into your system. Confirm the bands by pressing TUNER/BAND repeatedly. 1/u (Power) 4 2 51 3 2 Press TUNING MODE repeatedly until the desired band appears...
..."TUNED" and "STEREO" (for UKV The bands you want to tune in the display. To tune in a station with a weak signal Press TUNING MODE repeatedly until "MANUAL" appears in the display. 5 Press ENTER/NEXT. The frequency indication changes and scanning stops when the system tunes in the...10 to store the station. to store other stations. Step 4: Presetting radio stations You can preset the following number of tuner built into your system. Confirm the bands by pressing TUNER/BAND repeatedly. 1/u (Power) 4 2 51 3 2 Press TUNING MODE repeatedly until the desired band appears...

Operating Instructions
Page 15
... display. VOL +/- PRESET +/- Preset Tuning Before using this function, preset radio stations in the tuner's memory (see "Step 4: Presetting radio stations" on page 10). 1/u (Power) STEREO/MONO 2 VOLUME 13 To stop recording Press p on deck B or on the · button (for the reverse side) lights up green. 6 Press DIRECTION repeatedly until...
... display. VOL +/- PRESET +/- Preset Tuning Before using this function, preset radio stations in the tuner's memory (see "Step 4: Presetting radio stations" on page 10). 1/u (Power) STEREO/MONO 2 VOLUME 13 To stop recording Press p on deck B or on the · button (for the reverse side) lights up green. 6 Press DIRECTION repeatedly until...
Operating Instructions
Page 16
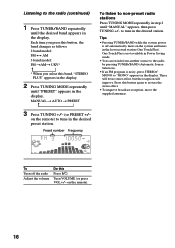
...Press TUNER/BAND repeatedly until the desired band appears in the display. Tips • Pressing TUNER/BAND while the system power is off the radio Adjust the volume Do this band, "STEREO PLUS" appears in the display. 2 Press TUNING MODE repeatedly until "MANUAL" appears, then press TUNING +/- One...Source Selection). • If an FM program is not available in the display. There will be no stereo effect, but the reception will improve. Preset number Frequency To Turn off automatically turns on the system and tunes in the display. n n 3 Press TUNING +/- (or PRESET +/- Turn VOLUME (or...
...Press TUNER/BAND repeatedly until the desired band appears in the display. Tips • Pressing TUNER/BAND while the system power is off the radio Adjust the volume Do this band, "STEREO PLUS" appears in the display. 2 Press TUNING MODE repeatedly until "MANUAL" appears, then press TUNING +/- One...Source Selection). • If an FM program is not available in the display. There will be no stereo effect, but the reception will improve. Preset number Frequency To Turn off automatically turns on the system and tunes in the display. n n 3 Press TUNING +/- (or PRESET +/- Turn VOLUME (or...
Operating Instructions
Page 33
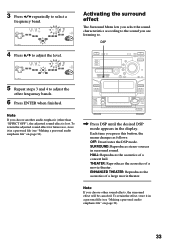
... file" on page 34). / Press DSP until the desired DSP mode appears in surround sound. 3 Press B/b repeatedly to select a frequency band. 4 Press V/v to . SURROUND: Reproduces stereo sources in the display. Note If you are listening to adjust the level. ENHANCED THEATER: Reproduces the acoustics of a large movie theater. Each time you...
... file" on page 34). / Press DSP until the desired DSP mode appears in surround sound. 3 Press B/b repeatedly to select a frequency band. 4 Press V/v to . SURROUND: Reproduces stereo sources in the display. Note If you are listening to adjust the level. ENHANCED THEATER: Reproduces the acoustics of a large movie theater. Each time you...
Operating Instructions
Page 38
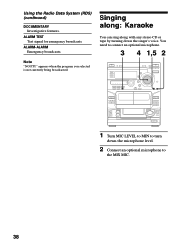
ALARM TEST Test signal for emergency broadcasts. Singing along: Karaoke You can sing along with any stereo CD or tape by turning down the microphone level. 2 Connect an optional microphone to turn down the singer's voice. ALARM-ALARM Emergency broadcasts. Using the Radio Data System (RDS) (continued) DOCUMENTARY Investigative features. Note "NO PTY" appears when the program you selected is not currently being broadcasted. You need to connect an optional microphone. 3 4 1,5 2 1 Turn MIC LEVEL to MIN to the MIX MIC. 38
ALARM TEST Test signal for emergency broadcasts. Singing along: Karaoke You can sing along with any stereo CD or tape by turning down the microphone level. 2 Connect an optional microphone to turn down the singer's voice. ALARM-ALARM Emergency broadcasts. Using the Radio Data System (RDS) (continued) DOCUMENTARY Investigative features. Note "NO PTY" appears when the program you selected is not currently being broadcasted. You need to connect an optional microphone. 3 4 1,5 2 1 Turn MIC LEVEL to MIN to the MIX MIC. 38
Operating Instructions
Page 47
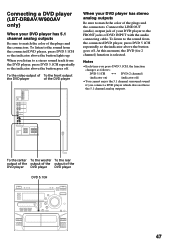
... changes as follows: DVD 5.1CH ˜ DVD (2 channel) (indicator on) (indicator off) • You cannot enjoy the 5.1 channel surround sound if you listen to a stereo sound track from the connected DVD player, press DVD 5.1CH so the indicator above the button goes off . To the video output of To the... the DVD player of the DVD player When your DVD player to the FRONT jacks of the plugs and the connectors. Connecting a DVD player (LBT-DR8AV/W900AV only) When your DVD player has 5.1 channel analog outputs Be sure to match the color of the DVD player DVD player DVD player DVD 5....
... changes as follows: DVD 5.1CH ˜ DVD (2 channel) (indicator on) (indicator off) • You cannot enjoy the 5.1 channel surround sound if you listen to a stereo sound track from the connected DVD player, press DVD 5.1CH so the indicator above the button goes off . To the video output of To the... the DVD player of the DVD player When your DVD player to the FRONT jacks of the plugs and the connectors. Connecting a DVD player (LBT-DR8AV/W900AV only) When your DVD player has 5.1 channel analog outputs Be sure to match the color of the DVD player DVD player DVD player DVD 5....
Operating Instructions
Page 49
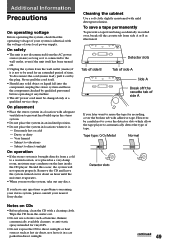
... directly from being accidentally recorded over, break off the cassette tab of your nearest Sony dealer. On placement • Place the stereo system in a location with adhesive tape. If you move the system, take out any questions or problems concerning your stereo system, please consult your local power supply. Subject to reuse the tape for an...
... directly from being accidentally recorded over, break off the cassette tab of your nearest Sony dealer. On placement • Place the stereo system in a location with adhesive tape. If you move the system, take out any questions or problems concerning your stereo system, please consult your local power supply. Subject to reuse the tape for an...
Operating Instructions
Page 50
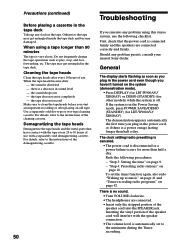
... There is automatically set the timer function again, also redo "Waking up any problem persist, consult your nearest Sony dealer. Otherwise the tape may get entangled inside the tape deck and become dirty - The demonstration appears automatically ...LBT-W900AV/ XB800AV). Redo the following checklist. Precautions (continued) Before placing a cassette in the tape deck Take up to 30 hours of use with the speaker connection. •The volume level is no sound. •Turn VOLUME clockwise. •The headphones are connected correctly and firmly. When using this stereo system...
... There is automatically set the timer function again, also redo "Waking up any problem persist, consult your nearest Sony dealer. Otherwise the tape may get entangled inside the tape deck and become dirty - The demonstration appears automatically ...LBT-W900AV/ XB800AV). Redo the following checklist. Precautions (continued) Before placing a cassette in the tape deck Take up to 30 hours of use with the speaker connection. •The volume level is no sound. •Turn VOLUME clockwise. •The headphones are connected correctly and firmly. When using this stereo system...

Operating Instructions
Page 51
...not play , or there is no sound from the center speaker. •Set the CENTER LEVEL to the stereo system. The remote does not function. • There is an obstacle between the remote and the system. • The remote is inserted label side down . If the color irregularity still persists, place the ... Play mode. DAILY and REC do not appear when you press t/CLOCK SET. • Set the timer correctly. • Set the clock. Move the stereo system away from the TV set once, then turn off the TV set . Press PRO LOGIC to 30 minutes. Press PLAY MODE repeatedly until the moisture...
...not play , or there is no sound from the center speaker. •Set the CENTER LEVEL to the stereo system. The remote does not function. • There is an obstacle between the remote and the system. • The remote is inserted label side down . If the color irregularity still persists, place the ... Play mode. DAILY and REC do not appear when you press t/CLOCK SET. • Set the timer correctly. • Set the clock. Move the stereo system away from the TV set once, then turn off the TV set . Press PRO LOGIC to 30 minutes. Press PLAY MODE repeatedly until the moisture...
Operating Instructions
Page 52
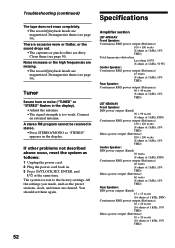
... Plug the power cord back in the display. If other problems not described above occur, reset the system as the preset stations, clock, and timer are magnetized. The system is too weak. Clean them again. You should set them (see page 50). Noise increases or ..., 10% THD) 52 Tuner Severe hum or noise ("TUNED" or "STEREO" flashes in the display). •Adjust the antenna. •The signal strength is reset to the factory settings. Connect an external antenna. Specifications Amplifier section LBT-W900AV Front Speaker: Continuous RMS power output (Reference) 100 + 100 watts (8...
... Plug the power cord back in the display. If other problems not described above occur, reset the system as the preset stations, clock, and timer are magnetized. The system is too weak. Clean them again. You should set them (see page 50). Noise increases or ..., 10% THD) 52 Tuner Severe hum or noise ("TUNED" or "STEREO" flashes in the display). •Adjust the antenna. •The signal strength is reset to the factory settings. Connect an external antenna. Specifications Amplifier section LBT-W900AV Front Speaker: Continuous RMS power output (Reference) 100 + 100 watts (8...
Operating Instructions
Page 53
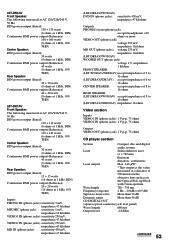
...to 16 ohms (LBT-DR7AV/XB800AV) impedance 16 ohms Video section Inputs VIDEO1 IN (phono jacks): 1 V p-p, 75 ohms VIDEO2 IN (phono jacks): 1 V p-p, 75 ohms Output VIDEO OUT (phono jack):1 V p-p, 75 ohms CD player section System Compact disc and digital audio system Laser Semiconductor laser ... (stereo phone jack): accepts headphones of 8 ohms or more VIDEO OUT (phono jack): voltage 250 mV, impedance 1 kilohm MD OUT (phono jacks): voltage 250 mV, impedance 1 kilohm (LBT-DR8AV/W900AV) WOOFER OUT (phono jack): voltage 1 V, impedance 1 kilohm FRONT SPEAKER: (LBT-W900AV/XB800AV...
...to 16 ohms (LBT-DR7AV/XB800AV) impedance 16 ohms Video section Inputs VIDEO1 IN (phono jacks): 1 V p-p, 75 ohms VIDEO2 IN (phono jacks): 1 V p-p, 75 ohms Output VIDEO OUT (phono jack):1 V p-p, 75 ohms CD player section System Compact disc and digital audio system Laser Semiconductor laser ... (stereo phone jack): accepts headphones of 8 ohms or more VIDEO OUT (phono jack): voltage 250 mV, impedance 1 kilohm MD OUT (phono jacks): voltage 250 mV, impedance 1 kilohm (LBT-DR8AV/W900AV) WOOFER OUT (phono jack): voltage 1 V, impedance 1 kilohm FRONT SPEAKER: (LBT-W900AV/XB800AV...
Operating Instructions
Page 54
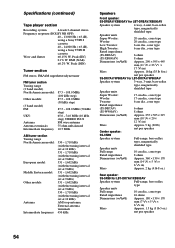
...player section Recording system 4-track 2-channel stereo Frequency response (DOLBY NR OFF) 40 - 13,000 Hz ( ±3 dB), using a Sony TYPE I cassette 40 - 14,000 Hz ( ±3 dB), using a Sony TYPE II cassette Wow and flutter ±0.15% W. Peak (IEC) 0.1% W. Peak (DIN) Tuner section FM stereo, FM/AM... (11 1/2 × 23 1/2 × 17 5/8 in) Mass Approx. 16 kg (35 lb 8oz.) net per speaker SS-DR7AV/W900AV for LBT-DR7AV/W900AV Speaker system 3-way, 3-unit, bass-reflex type, magnetically shielded type Speaker units Super Woofer: 17 cm dia., cone type Woofer: 17 cm dia.,...
...player section Recording system 4-track 2-channel stereo Frequency response (DOLBY NR OFF) 40 - 13,000 Hz ( ±3 dB), using a Sony TYPE I cassette 40 - 14,000 Hz ( ±3 dB), using a Sony TYPE II cassette Wow and flutter ±0.15% W. Peak (IEC) 0.1% W. Peak (DIN) Tuner section FM stereo, FM/AM... (11 1/2 × 23 1/2 × 17 5/8 in) Mass Approx. 16 kg (35 lb 8oz.) net per speaker SS-DR7AV/W900AV for LBT-DR7AV/W900AV Speaker system 3-way, 3-unit, bass-reflex type, magnetically shielded type Speaker units Super Woofer: 17 cm dia., cone type Woofer: 17 cm dia.,...


