Operating Guide
Page 1
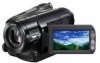
3-278-987-12(1) Digital HD Video Camera Recorder Operating Guide HDR-HC9 Enjoying pictures with 10 high definition quality Getting Started 12 Recording/ Playback 21 Using the Menu 39 Dubbing/Editing 64 Using a Computer 73 Troubleshooting 78 Additional Information 90 Quick Reference 103 Spanish Quick Guide/ Guía rápida en español 115 © 2008 Sony Corporation
3-278-987-12(1) Digital HD Video Camera Recorder Operating Guide HDR-HC9 Enjoying pictures with 10 high definition quality Getting Started 12 Recording/ Playback 21 Using the Menu 39 Dubbing/Editing 64 Using a Computer 73 Troubleshooting 78 Additional Information 90 Quick Reference 103 Spanish Quick Guide/ Guía rápida en español 115 © 2008 Sony Corporation
Operating Guide
Page 9
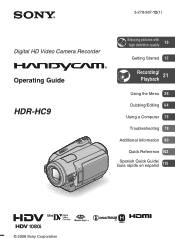
...Step Guide" and software 75 Viewing "First Step Guide 77 Using a Macintosh computer ........ 77 Troubleshooting Troubleshooting 78 Warning indicators and messages 87 Additional Information Using your camcorder abroad ...... 90 Maintenance and precautions ...... 91 Usable cassette tapes 91 About the "Memory Stick... 92 About the "InfoLITHIUM" battery pack 93 About i.LINK 95 About x.v.Color 96 On using your camcorder 96 Specifications 99 Quick Reference Identifying parts and controls ......103 Indicators displayed during recording/ playback 107 Index 111 Spanish Quick...
...Step Guide" and software 75 Viewing "First Step Guide 77 Using a Macintosh computer ........ 77 Troubleshooting Troubleshooting 78 Warning indicators and messages 87 Additional Information Using your camcorder abroad ...... 90 Maintenance and precautions ...... 91 Usable cassette tapes 91 About the "Memory Stick... 92 About the "InfoLITHIUM" battery pack 93 About i.LINK 95 About x.v.Color 96 On using your camcorder 96 Specifications 99 Quick Reference Identifying parts and controls ......103 Indicators displayed during recording/ playback 107 Index 111 Spanish Quick...
Operating Guide
Page 78
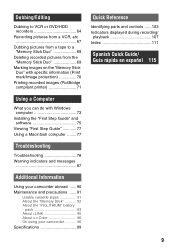
...Commander may get warmer while you use the following settings return to the default settings automatically when you set to troubleshoot the problem. Buttons do not work. • During Easy Handycam operation, not all settings are functional (p. 22). backlight - [SCENE SELECT] - [SPOT MTR·FCS] ...If the problem persists, disconnect the power source and contact your camcorder, use it after about 1 minute. • Press the RESET button (p. 104) using your Sony dealer. • Overall operations/Easy Handycam/ Remote Commander 78 • Batteries/Power sources 79 • ...
...Commander may get warmer while you use the following settings return to the default settings automatically when you set to troubleshoot the problem. Buttons do not work. • During Easy Handycam operation, not all settings are functional (p. 22). backlight - [SCENE SELECT] - [SPOT MTR·FCS] ...If the problem persists, disconnect the power source and contact your camcorder, use it after about 1 minute. • Press the RESET button (p. 104) using your Sony dealer. • Overall operations/Easy Handycam/ Remote Commander 78 • Batteries/Power sources 79 • ...
Operating Guide
Page 79
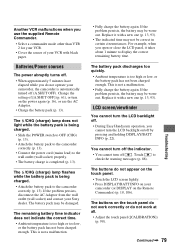
... 93). For example, when you cannot turn the LCD backlight off. • During Easy Handycam operation, you open or close the LCD panel, it with black paper. The battery pack discharges...cord (mains lead) to display the correct remaining battery time. Touch to the camcorder correctly (p. 13). Continued , 79 Troubleshooting If the problem persists, the battery may be wornout. You cannot turn off the...problem persists, disconnect the AC Adaptor from the wall outlet (wall socket) and contact your Sony dealer. Replace it takes about 1 minute to the wall outlet (wall socket) properly. ...
... 93). For example, when you cannot turn the LCD backlight off. • During Easy Handycam operation, you open or close the LCD panel, it with black paper. The battery pack discharges...cord (mains lead) to display the correct remaining battery time. Touch to the camcorder correctly (p. 13). Continued , 79 Troubleshooting If the problem persists, the battery may be wornout. You cannot turn off the...problem persists, disconnect the AC Adaptor from the wall outlet (wall socket) and contact your Sony dealer. Replace it takes about 1 minute to the wall outlet (wall socket) properly. ...
Operating Guide
Page 80
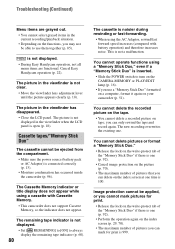
... overwrites the existing one. Cancel Easy Handycam operation (p. 22). Image protection cannot be ejected from the compartment. • Make sure the power source (battery pack or AC Adaptor) is 100. Troubleshooting (Continued) Menu items are functional. The... picture in the current recording/playback situation. • Depending on the index screen at one time is connected correctly (p. 13). • Moisture condensation has occurred inside the camcorder (p. 96). is not displayed. • During Easy Handycam...
... overwrites the existing one. Cancel Easy Handycam operation (p. 22). Image protection cannot be ejected from the compartment. • Make sure the power source (battery pack or AC Adaptor) is 100. Troubleshooting (Continued) Menu items are functional. The... picture in the current recording/playback situation. • Depending on the index screen at one time is connected correctly (p. 13). • Moisture condensation has occurred inside the camcorder (p. 96). is not displayed. • During Easy Handycam...
Operating Guide
Page 81
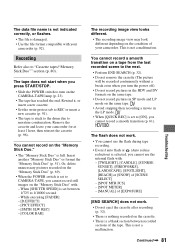
... "Memory Stick Duo" is full. Remove the cassette and leave your camcorder. You cannot record a smooth transition on a tape from the last recorded scene to moisture condensation. Continued , 81 Troubleshooting Or, delete unnecessary pictures recorded on the "Memory Stick Duo" (p. ...69). • When the POWER switch is set between recorded sections of your camcorder for at least 1 hour, then reinsert the cassette (p....
... "Memory Stick Duo" is full. Remove the cassette and leave your camcorder. You cannot record a smooth transition on a tape from the last recorded scene to moisture condensation. Continued , 81 Troubleshooting Or, delete unnecessary pictures recorded on the "Memory Stick Duo" (p. ...69). • When the POWER switch is set between recorded sections of your camcorder for at least 1 hour, then reinsert the cassette (p....

Operating Guide
Page 82
...or cancel the backlight function (p. 27). The backlight function does not function. • The backlight function does not work during Easy Handycam operation. The color of the lens rapidly might appear crooked. • This is not correctly displayed. • Deactivate the NightShot .... Use NightShot or [SUPER NS]. Black bands appear when you are not suitable for a few seconds to turn on the recording conditions. Troubleshooting (Continued) [COLOR SLOW S] does not operate correctly. • [COLOR SLOW S] may occur when recording pictures under lighting from a discharge...
...or cancel the backlight function (p. 27). The backlight function does not function. • The backlight function does not work during Easy Handycam operation. The color of the lens rapidly might appear crooked. • This is not correctly displayed. • Deactivate the NightShot .... Use NightShot or [SUPER NS]. Black bands appear when you are not suitable for a few seconds to turn on the recording conditions. Troubleshooting (Continued) [COLOR SLOW S] does not operate correctly. • [COLOR SLOW S] may occur when recording pictures under lighting from a discharge...
Operating Guide
Page 83
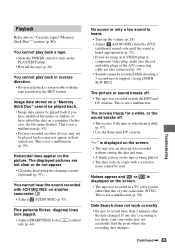
...volume (p. 28). • Adjust [ AUDIO MIX] from the [ST2] (additional sound) side until the sound is dirty (p. 97). • Use the Sony mini DV cassette. This is not a malfunction (p. 93). You cannot hear the sound recorded with the tape recorded in their actual size. Horizontal lines appear... you are using an S VIDEO plug or component video plug, make sure the red and white plugs of your camcorder may not appear in the HDV format. Continued , 83 Troubleshooting Playback Refer also to record more than that of the A/V connecting cable are also connected (p. 34). • ...
...volume (p. 28). • Adjust [ AUDIO MIX] from the [ST2] (additional sound) side until the sound is dirty (p. 97). • Use the Sony mini DV cassette. This is not a malfunction (p. 93). You cannot hear the sound recorded with the tape recorded in their actual size. Horizontal lines appear... you are using an S VIDEO plug or component video plug, make sure the red and white plugs of your camcorder may not appear in the HDV format. Continued , 83 Troubleshooting Playback Refer also to record more than that of the A/V connecting cable are also connected (p. 34). • ...
Operating Guide
Page 84
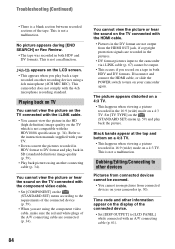
Troubleshooting (Continued) • There is a blank section between recorded sections of the connected device. •...). Playing back on TV You cannot view the picture on the display of the tape. Dubbing/Editing/Connecting to the camcorder via i.LINK cable (p. 67) cannot be zoomed. • You cannot zoom pictures from connected devices on your TV... with the component video cable. • Set [COMPONENT] on the (STANDARD SET) menu according to turn on your camcorder (p. 30). Disconnect and connect the HDMI cable, or slide the POWER switch to the requirements of the connected device ...
Troubleshooting (Continued) • There is a blank section between recorded sections of the connected device. •...). Playing back on TV You cannot view the picture on the display of the tape. Dubbing/Editing/Connecting to the camcorder via i.LINK cable (p. 67) cannot be zoomed. • You cannot zoom pictures from connected devices on your TV... with the component video cable. • Set [COMPONENT] on the (STANDARD SET) menu according to turn on your camcorder (p. 30). Disconnect and connect the HDMI cable, or slide the POWER switch to the requirements of the connected device ...
Operating Guide
Page 85
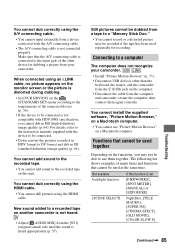
...the input jack of [EXPOSURE] NightShot, [TELE MACRO], [SUPER NS], [CINEMA EFECT], [OLD MOVIE], [COLOR SLOW S] Continued , 85 Troubleshooting You cannot add sound to the recorded tape. • You cannot add sound to DV format and dub in HD (high definition) image quality... the A/V connecting cable. • The A/V connecting cable is not compatible with the device to a computer The computer does not recognize your camcorder. • Install "Picture Motion Browser" (p. 73). • Disconnect USB devices other device for recording. Connecting to be used repeatedly for dubbing...
...the input jack of [EXPOSURE] NightShot, [TELE MACRO], [SUPER NS], [CINEMA EFECT], [OLD MOVIE], [COLOR SLOW S] Continued , 85 Troubleshooting You cannot add sound to the recorded tape. • You cannot add sound to DV format and dub in HD (high definition) image quality... the A/V connecting cable. • The A/V connecting cable is not compatible with the device to a computer The computer does not recognize your camcorder. • Install "Picture Motion Browser" (p. 73). • Disconnect USB devices other device for recording. Connecting to be used repeatedly for dubbing...

Operating Guide
Page 86
Troubleshooting (Continued) Not available [SPOT MTR·FCS] [SPOT METER] [EXPOSURE] [WHITE BAL.] [SHARPNESS] [SHUTTR SPEED] of the CAM CTRL dial [AE SHIFT] [SPOT FOCUS] [TELE ...
Troubleshooting (Continued) Not available [SPOT MTR·FCS] [SPOT METER] [EXPOSURE] [WHITE BAL.] [SHARPNESS] [SHUTTR SPEED] of the CAM CTRL dial [AE SHIFT] [SPOT FOCUS] [TELE ...
Operating Guide
Page 87
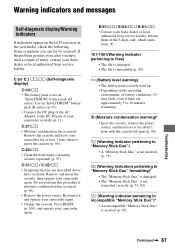
... (p. 97). Press RESET (p. 104), and operate your camcorder again. • Change the cassette. E (Battery level warning) • The battery pack is inserted (p. 92). Troubleshooting Continued , 87 Remove and insert the cassette, then operate your camcorder for about 1 hour with the cassette lid open (p.... (p. 51, 92). (Warning indicator pertaining to the DC IN jack of your Sony dealer or local authorized Sony service facility. Remove the cassette and leave your camcorder again. Warning indicators and messages Self-diagnosis display/Warning indicators If indicators appear on ...
... (p. 97). Press RESET (p. 104), and operate your camcorder again. • Change the cassette. E (Battery level warning) • The battery pack is inserted (p. 92). Troubleshooting Continued , 87 Remove and insert the cassette, then operate your camcorder for about 1 hour with the cassette lid open (p.... (p. 51, 92). (Warning indicator pertaining to the DC IN jack of your Sony dealer or local authorized Sony service facility. Remove the cassette and leave your camcorder again. Warning indicators and messages Self-diagnosis display/Warning indicators If indicators appear on ...

Operating Guide
Page 89
... compliant printer Check the connected device. • Switch off the printer and switch it on again, then disconnect the USB cable and reconnect it . 89 Troubleshooting You cannot delete created folders using your camcorder. • You will have to format the "Memory Stick Duo" (p. 51), or delete them using your computer.
... compliant printer Check the connected device. • Switch off the printer and switch it on again, then disconnect the USB cable and reconnect it . 89 Troubleshooting You cannot delete created folders using your camcorder. • You will have to format the "Memory Stick Duo" (p. 51), or delete them using your computer.

