
Operating Instructions
Page 3
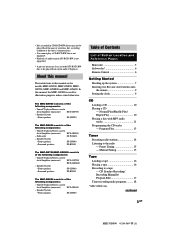
... radio programs ......... 18 1) MHC-GN800 only. continued 3GB MHC-GN800 4-244-569-11 (1) The MHC-GN900 consists of the following components: - Speaker System • Front speakers SS-GN800 • Surround speakers SS-RS800 The MHC-GN600 consists of the following... Hooking up the system 7 Inserting two R6 (size AA) batteries into the remote 9 Setting the clock 9 CD Loading a CD 10 Playing a CD -- Subwoofer SS-WG800 - Tuner/CD player/Stereo cassette deck/Amplifier (main unit) HCD-GN700/ HCD-GX8800 - Speaker System • Front speakers SS-GN800 Table of Contents List of...
... radio programs ......... 18 1) MHC-GN800 only. continued 3GB MHC-GN800 4-244-569-11 (1) The MHC-GN900 consists of the following components: - Speaker System • Front speakers SS-GN800 • Surround speakers SS-RS800 The MHC-GN600 consists of the following... Hooking up the system 7 Inserting two R6 (size AA) batteries into the remote 9 Setting the clock 9 CD Loading a CD 10 Playing a CD -- Subwoofer SS-WG800 - Tuner/CD player/Stereo cassette deck/Amplifier (main unit) HCD-GN700/ HCD-GX8800 - Speaker System • Front speakers SS-GN800 Table of Contents List of...
Operating Instructions
Page 6
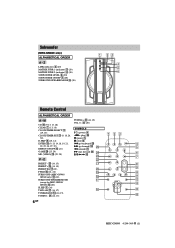
...) q; (29, 30) M/m/ Z LINK (indicator) 2 (20) MATRIX SURR 1 (indicator) 3 (20) MATRIX SURR 2 (indicator) 4 (20) SUBWOOFER LEVEL 6 (20) SUBWOOFER ON/OFF 1 (20) SURROUND SPEAKER MODE 5 (20) A BC D E 6 Remote Control ALPHABETICAL ORDER A - Subwoofer (MHC-GN800 only) ALPHABETICAL ORDER A -
...) q; (29, 30) M/m/ Z LINK (indicator) 2 (20) MATRIX SURR 1 (indicator) 3 (20) MATRIX SURR 2 (indicator) 4 (20) SUBWOOFER LEVEL 6 (20) SUBWOOFER ON/OFF 1 (20) SURROUND SPEAKER MODE 5 (20) A BC D E 6 Remote Control ALPHABETICAL ORDER A - Subwoofer (MHC-GN800 only) ALPHABETICAL ORDER A -

Operating Instructions
Page 9
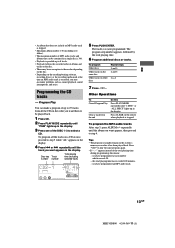
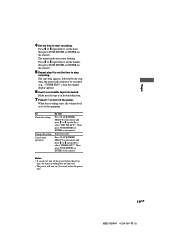
..., replace both batteries with new ones. and then press PUSH ENTER (or ENTER on the remote. 2 Press M or m repeatedly to 6 above. Inserting two R6 (size AA) batteries into the remote Tip With normal use the remote for a long period of 45 degrees from battery leakage. Main Unit Subwoofer * Front speaker ... listening position. Note If you disconnect the power cord or if a power failure occurs. To adjust the clock 1 Press CLOCK/TIMER SET on the remote). 3 Do the same procedure as steps 3 to select "CLOCK SET?" The clock starts functioning. R6 (AA) batteries e E E e 9GB MHC-GN800 4-...
..., replace both batteries with new ones. and then press PUSH ENTER (or ENTER on the remote. 2 Press M or m repeatedly to 6 above. Inserting two R6 (size AA) batteries into the remote Tip With normal use the remote for a long period of 45 degrees from battery leakage. Main Unit Subwoofer * Front speaker ... listening position. Note If you disconnect the power cord or if a power failure occurs. To adjust the clock 1 Press CLOCK/TIMER SET on the remote). 3 Do the same procedure as steps 3 to select "CLOCK SET?" The clock starts functioning. R6 (AA) batteries e E E e 9GB MHC-GN800 4-...
Operating Instructions
Page 10
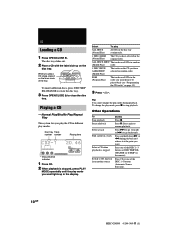
... M or m during playback. Normal Play/Shuffle Play/Repeat Play This system lets you have selected in random order. ALL DISCS SHUF The tracks on the remote). Other Operations To Stop playback Pause playback Select a track Find a point in the disc tray continuously. 1 DISC/ALBM (Normal Play) The CD you want. Press...
... M or m during playback. Normal Play/Shuffle Play/Repeat Play This system lets you have selected in random order. ALL DISCS SHUF The tracks on the remote). Other Operations To Stop playback Pause playback Select a track Find a point in the disc tray continuously. 1 DISC/ALBM (Normal Play) The CD you want. Press...
Operating Instructions
Page 12
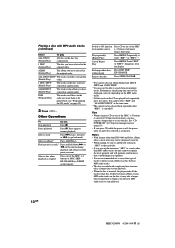
... > (to go backward). Switch to CD function Press CD or one of the DISC 1~3 buttons or DISC SKIP EX-CHANGE (or D.SKIP on the remote). Exchange other than ISO 9660 and Joliet, album titles or track titles may not be displayed correctly depending on the MP3 audio tracks. *3 All the... selected in the original order. Press again to start playback. • When the disc is stopped Press one of tracks or unneccessary album on the remote during ALL DISCS SHUF and 1 DISC SHUF. *2 You may not be displayed correctly. • When naming, be sure to add the file extension ".MP3" ...
... > (to go backward). Switch to CD function Press CD or one of the DISC 1~3 buttons or DISC SKIP EX-CHANGE (or D.SKIP on the remote). Exchange other than ISO 9660 and Joliet, album titles or track titles may not be displayed correctly depending on the MP3 audio tracks. *3 All the... selected in the original order. Press again to start playback. • When the disc is stopped Press one of tracks or unneccessary album on the remote during ALL DISCS SHUF and 1 DISC SHUF. *2 You may not be displayed correctly. • When naming, be sure to add the file extension ".MP3" ...
Operating Instructions
Page 13
.... you have programmed an MP3 audio track. 13GB MHC-GN800 4-244-569-11 (1) the total playing time has exceeded 100 minutes. - Press CLEAR on the remote when playback is (are) programmed. Other Operations To Cancel Program Play Clear a track from all the tracks on a CD at the time an MP3 audio...
.... you have programmed an MP3 audio track. 13GB MHC-GN800 4-244-569-11 (1) the total playing time has exceeded 100 minutes. - Press CLEAR on the remote when playback is (are) programmed. Other Operations To Cancel Program Play Clear a track from all the tracks on a CD at the time an MP3 audio...
Operating Instructions
Page 14
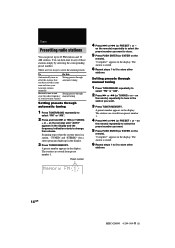
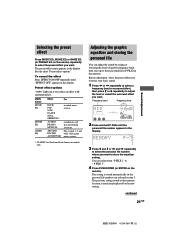
...the display. Preset number 4 Press > or . (or PRESET + or - on the remote) repeatedly to select the preset number you want to store. 5 Press PUSH ENTER (or ENTER on the remote). A preset number appears in any of those stations simply by selecting the corresponding preset number.... stations. A preset number appears in the display. 3 Press TUNER MEMORY. on the remote) repeatedly to select the preset number you want . 5 Press PUSH ENTER (or ENTER on the remote). on the remote) repeatedly to tune in a station. appears in the display and the frequency indication starts...
...the display. Preset number 4 Press > or . (or PRESET + or - on the remote) repeatedly to select the preset number you want to store. 5 Press PUSH ENTER (or ENTER on the remote). A preset number appears in any of those stations simply by selecting the corresponding preset number.... stations. A preset number appears in the display. 3 Press TUNER MEMORY. on the remote) repeatedly to select the preset number you want . 5 Press PUSH ENTER (or ENTER on the remote). on the remote) repeatedly to tune in a station. appears in the display and the frequency indication starts...
Operating Instructions
Page 15
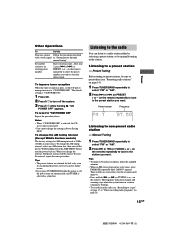
...1 Press CD. 2 Press @/1 to preset stations, be erased. After step 3, press > or . (or PRESET + or - When you want. on the remote) repeatedly to select the preset number you want to preset them (see "Recording to a tape" on page 17 or "Timer-recording radio programs" on automatically...effect, but the reception will be sure to store the other station. on the remote) repeatedly to tune in the station. To reset the interval, repeat the same procedure. on the remote). on the remote) repeatedly to tune in Power Saving Mode. To reset to a radio station ...
...1 Press CD. 2 Press @/1 to preset stations, be erased. After step 3, press > or . (or PRESET + or - When you want. on the remote) repeatedly to select the preset number you want to preset them (see "Recording to a tape" on page 17 or "Timer-recording radio programs" on automatically...effect, but the reception will be sure to store the other station. on the remote) repeatedly to tune in the station. To reset the interval, repeat the same procedure. on the remote). on the remote) repeatedly to tune in Power Saving Mode. To reset to a radio station ...
Operating Instructions
Page 18
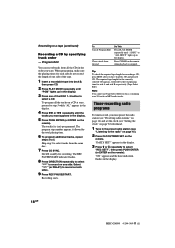
...currently selected CD appears, followed by specifying track order - To program all the CDs in the display. 3 Press M or m repeatedly to record on the remote when playback is (are) programmed. Select "j" (or RELAY) to record on a CD at once, proceed to the radio" on page 15). 2 ...stopped. The REC PAUSE/START indicator flashes. 8 Press DIRECTION repeatedly to select "g" to select "REC SET?", then press PUSH ENTER (or ENTER on the remote. Press CLEAR on one of the DISC 1~3 button to 5. "ON" appears and the hour indication flashes in the display. 3 Press one side. repeatedly...
...currently selected CD appears, followed by specifying track order - To program all the CDs in the display. 3 Press M or m repeatedly to record on the remote when playback is (are) programmed. Select "j" (or RELAY) to record on a CD at once, proceed to the radio" on page 15). 2 ...stopped. The REC PAUSE/START indicator flashes. 8 Press DIRECTION repeatedly to select "g" to select "REC SET?", then press PUSH ENTER (or ENTER on the remote. Press CLEAR on one of the DISC 1~3 button to 5. "ON" appears and the hour indication flashes in the display. 3 Press one side. repeatedly...
Operating Instructions
Page 19
... time. 19GB MHC-GN800 4-244-569-11 (1) Press M or m repeatedly to set the minute, then press PUSH ENTER (or ENTER on the remote and press M or m repeatedly to stop time, the preset radio station to start recording. When the recording starts, the volume level is in forward... the preset time, the timer-recording does not function. • The power will turn off the power. Then, press PUSH ENTER (or ENTER on the remote). Tape 4 Set the time to be recorded (e.g., "TUNER FM 5"), then the original display appears. 6 Insert a recordable tape into deck B. The minute indication...
... time. 19GB MHC-GN800 4-244-569-11 (1) Press M or m repeatedly to set the minute, then press PUSH ENTER (or ENTER on the remote and press M or m repeatedly to stop time, the preset radio station to start recording. When the recording starts, the volume level is in forward... the preset time, the timer-recording does not function. • The power will turn off the power. Then, press PUSH ENTER (or ENTER on the remote). Tape 4 Set the time to be recorded (e.g., "TUNER FM 5"), then the original display appears. 6 Insert a recordable tape into deck B. The minute indication...

Operating Instructions
Page 20
... changes cyclically as follows: LINK1) t MATRIX SURR 12) t MATRIX SURR 23) MHC-GN700/GX8800 only Press SURROUND SPEAKER MODE repeatedly to select the sound mode you turn VOLUME (or press VOL +/- on the remote), the volume for all speakers will be able to listen to suit the movie source. The... indicator lights up . 20GB MHC-GN800 4-244-569-11 (1) Sound Adjustment Adjusting the sound You can use VOLUME (or VOL + or - Selecting the sound system (MHC-GN800/GN700/GX8800 only) You ...
... changes cyclically as follows: LINK1) t MATRIX SURR 12) t MATRIX SURR 23) MHC-GN700/GX8800 only Press SURROUND SPEAKER MODE repeatedly to select the sound mode you turn VOLUME (or press VOL +/- on the remote), the volume for all speakers will be able to listen to suit the movie source. The... indicator lights up . 20GB MHC-GN800 4-244-569-11 (1) Sound Adjustment Adjusting the sound You can use VOLUME (or VOL + or - Selecting the sound system (MHC-GN800/GN700/GX8800 only) You ...
Operating Instructions
Page 21
... setting stored at this memory location is stored automatically in the personal file number you want to " P FILE 3". 4 Press PUSH ENTER (or ENTER on the remote) repeatedly to select the preset effect you selected in the display. Frequency band Frequency level ALL DISCS SURR EFFECT V - Adjusting the graphic equalizer and storing... frequency band, then store up if you want . Selecting the preset effect Press MUSIC EQ, MOVIE EQ or GAME EQ (or PRESET EQ on the remote). Preset effect options "SURR" lights up to adjust the level or select the surround effect you want .
... setting stored at this memory location is stored automatically in the personal file number you want to " P FILE 3". 4 Press PUSH ENTER (or ENTER on the remote) repeatedly to select the preset effect you selected in the display. Frequency band Frequency level ALL DISCS SURR EFFECT V - Adjusting the graphic equalizer and storing... frequency band, then store up if you want . Selecting the preset effect Press MUSIC EQ, MOVIE EQ or GAME EQ (or PRESET EQ on the remote). Preset effect options "SURR" lights up to adjust the level or select the surround effect you want .
Operating Instructions
Page 22
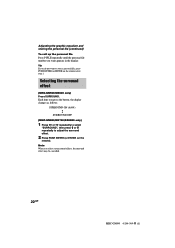
... button, the display changes as follows: SURROUND ON (SURR) Y SURROUND OFF (MHC-GN800/GN700/GX8800 only) 1 Press < or , repeatedly to select "SURROUND", then press M or m repeatedly to store a personal file, press PUSH ENTER (or ENTER on the remote). Each time you do not want appears in the display. Adjusting the graphic equalizer... the surround effect (MHC-GN900/GN600 only) Press SURROUND. Note When you want to adjust the surround effect. 2 Press PUSH ENTER (or ENTER on the remote) after step 1.
... button, the display changes as follows: SURROUND ON (SURR) Y SURROUND OFF (MHC-GN800/GN700/GX8800 only) 1 Press < or , repeatedly to select "SURROUND", then press M or m repeatedly to store a personal file, press PUSH ENTER (or ENTER on the remote). Each time you do not want appears in the display. Adjusting the graphic equalizer... the surround effect (MHC-GN900/GN600 only) Press SURROUND. Note When you want to adjust the surround effect. 2 Press PUSH ENTER (or ENTER on the remote) after step 1.
Operating Instructions
Page 23
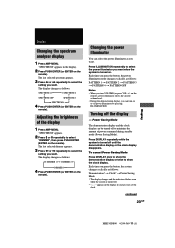
...cancel Power Saving Mode Press DISPLAY once to show the demonstration display or twice to select "DIMMER", then press PUSH ENTER (ENTER on the remote). The last selected dimmer appears. 3 Press < or , repeatedly to select the setting you press the button, the system changes cyclically as...MENU. Adjusting the brightness of power consumed during standby mode (Power Saving Mode). Turning off to select the power illuminator you turn on the remote), power illuminator shows the current volume level. • During the demonstration display, you have not set the clock. "SPECTRUM" appears. 2...
...cancel Power Saving Mode Press DISPLAY once to show the demonstration display or twice to select "DIMMER", then press PUSH ENTER (ENTER on the remote). The last selected dimmer appears. 3 Press < or , repeatedly to select the setting you press the button, the system changes cyclically as...MENU. Adjusting the brightness of power consumed during standby mode (Power Saving Mode). Turning off to select the power illuminator you turn on the remote), power illuminator shows the current volume level. • During the demonstration display, you have not set the clock. "SPECTRUM" appears. 2...
Operating Instructions
Page 26
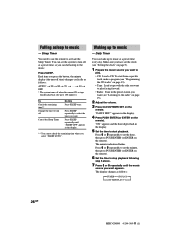
...want . The display changes as follows: AUTO* t 90 t 80 t 70 t ... You can set the hour, then press PUSH ENTER (or ENTER on the remote). 6 Set the time to stop playback following step 5 above. 7 Press M or m repeatedly until "SLEEP OFF" appears in the preset station you can wake up...You cannot check the remaining time when you want (see "Listening to start from a specific track, make a program (see "Setting the clock" on the remote). "ON" appears and the hour digits flash in the display. 4 Press PUSH ENTER (or ENTER on page 9). 1 Prepare the music source you have set...
...want . The display changes as follows: AUTO* t 90 t 80 t 70 t ... You can set the hour, then press PUSH ENTER (or ENTER on the remote). 6 Set the time to stop playback following step 5 above. 7 Press M or m repeatedly until "SLEEP OFF" appears in the preset station you can wake up...You cannot check the remaining time when you want (see "Listening to start from a specific track, make a program (see "Setting the clock" on the remote). "ON" appears and the hour digits flash in the display. 4 Press PUSH ENTER (or ENTER on page 9). 1 Prepare the music source you have set...
Operating Instructions
Page 27
... press M or m repeatedly to select "DAILY SELECT?", then press PUSH ENTER (or ENTER on the remote). 8 Press PUSH ENTER (or ENTER on 15 seconds before the preset time, the Daily Timer does not function. • The power will turn off the ... the setting Change the setting Cancel the timer operation Do this Press CLOCK/TIMER SELECT on the remote and press M or m repeatedly to select "TIMER OFF?", then press PUSH ENTER (or ENTER on the remote). Notes • If you do not turn off the power before the preset time. The type of...
... press M or m repeatedly to select "DAILY SELECT?", then press PUSH ENTER (or ENTER on the remote). 8 Press PUSH ENTER (or ENTER on 15 seconds before the preset time, the Daily Timer does not function. • The power will turn off the ... the setting Change the setting Cancel the timer operation Do this Press CLOCK/TIMER SELECT on the remote and press M or m repeatedly to select "TIMER OFF?", then press PUSH ENTER (or ENTER on the remote). Notes • If you do not turn off the power before the preset time. The type of...
Operating Instructions
Page 30
...timer, redo "Waking up to music" (on page 26) and "Timer-recording radio programs" (on page 18). Move the unit away from the component connected to the MD (VIDEO) jacks is no sound. • Turn VOLUME clockwise. • The headphones are connected correctly and firmly. The ...the speakers farther away from the speakers or change the direction of the speaker cord into any problem persist, consult your nearest Sony dealer. Redo "Presetting radio stations" (on the remote. • Set the timer correctly. • Set the clock. Replace the batteries. Redo "Setting the clock" (on...
...timer, redo "Waking up to music" (on page 26) and "Timer-recording radio programs" (on page 18). Move the unit away from the component connected to the MD (VIDEO) jacks is no sound. • Turn VOLUME clockwise. • The headphones are connected correctly and firmly. The ...the speakers farther away from the speakers or change the direction of the speaker cord into any problem persist, consult your nearest Sony dealer. Redo "Presetting radio stations" (on the remote. • Set the timer correctly. • Set the clock. Replace the batteries. Redo "Setting the clock" (on...
Operating Instructions
Page 36
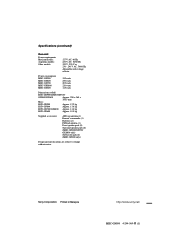
... watts 250 watts 205 watts 220 watts 145 watts Dimensions (w/h/d) HCD-GN900/GN800/GN700/ GX8800/GN600 Approx. 280 x 360 x 386.5 mm Mass : HCD-GN900 Approx. 12.2 kg HCD-GN800 Approx. 13.6 kg HCD-GN700/GX8800 Approx. 11.4 kg HCD-GN600 Approx. 10.5 kg Supplied accessories: AM loop antenna (1) Remote commander (1) Batteries (2) FM lead antenna (1) Front speaker pads (8) Surround...
... watts 250 watts 205 watts 220 watts 145 watts Dimensions (w/h/d) HCD-GN900/GN800/GN700/ GX8800/GN600 Approx. 280 x 360 x 386.5 mm Mass : HCD-GN900 Approx. 12.2 kg HCD-GN800 Approx. 13.6 kg HCD-GN700/GX8800 Approx. 11.4 kg HCD-GN600 Approx. 10.5 kg Supplied accessories: AM loop antenna (1) Remote commander (1) Batteries (2) FM lead antenna (1) Front speaker pads (8) Surround...


