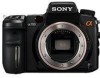

User's Guide
Page 1
Before your operation Using the shooting functions Using the viewing functions Using the menu Using your camera. Digital Single Lens Reflex Camera User's Guide/ Troubleshooting "Read This First" (separate volume) Explains the set-up and basic operations for shooting/ playback with your computer Printing images Troubleshooting Others Index
Before your operation Using the shooting functions Using the viewing functions Using the menu Using your camera. Digital Single Lens Reflex Camera User's Guide/ Troubleshooting "Read This First" (separate volume) Explains the set-up and basic operations for shooting/ playback with your computer Printing images Troubleshooting Others Index
User's Guide
Page 2
For Customers in the literature accompanying the appliance. 2 This symbol is intended to alert the user to the presence of electric shock to persons. This symbol is intended to alert the user to the presence of uninsulated "dangerous voltage" within the product's enclosure that may be of sufficient magnitude to rain or moisture. WARNING To reduce fire or shock hazard, do not expose the unit to constitute a risk of important operating and maintenance (servicing) instructions in the U.S.A.
For Customers in the literature accompanying the appliance. 2 This symbol is intended to alert the user to the presence of electric shock to persons. This symbol is intended to alert the user to the presence of uninsulated "dangerous voltage" within the product's enclosure that may be of sufficient magnitude to rain or moisture. WARNING To reduce fire or shock hazard, do not expose the unit to constitute a risk of important operating and maintenance (servicing) instructions in the U.S.A.
User's Guide
Page 3
If you are not sure of the type of the set near water - The set may touch dangerous voltage points or short out parts that it in. Never cover the slots and openings with a cloth or other similar surface. - Do not place the set . IMPORTANT SAFEGUARDS For your protection, please read these slots and openings must never be operated only from the wall outlet before operating the appliance, and keep this can result in fire or electric shock. If you are provided for cleaning the exterior of electrical power supplied to insert the plug fully into the outlet, try reversing ...
If you are not sure of the type of the set near water - The set may touch dangerous voltage points or short out parts that it in. Never cover the slots and openings with a cloth or other similar surface. - Do not place the set . IMPORTANT SAFEGUARDS For your protection, please read these slots and openings must never be operated only from the wall outlet before operating the appliance, and keep this can result in fire or electric shock. If you are provided for cleaning the exterior of electrical power supplied to insert the plug fully into the outlet, try reversing ...
User's Guide
Page 4
If liquid has been spilled or objects have the same characteristics as the original parts. If the set has been subject to qualified service personnel. When the power cord or plug is left unattended and unused for service. Adjust only those controls that have fallen into the set exhibits a distinct change in fire, electric shock, or other controls may expose you to qualified service personnel under the following the operating instructions. When the set . - Refer all servicing to excessive shock by the manufacturer) to lightning and power-line surges. Unauthorized ...
If liquid has been spilled or objects have the same characteristics as the original parts. If the set has been subject to qualified service personnel. When the power cord or plug is left unattended and unused for service. Adjust only those controls that have fallen into the set exhibits a distinct change in fire, electric shock, or other controls may expose you to qualified service personnel under the following the operating instructions. When the set . - Refer all servicing to excessive shock by the manufacturer) to lightning and power-line surges. Unauthorized ...
User's Guide
Page 5
...help preserve our environment by turning the equipment off and on a circuit different from that may cause undesired operation. This Class B digital apparatus complies with Part 15 of the following measures: - Note: This equipment has been tested and found to radio communications. ... and used rechargeable batteries to operate this first CAUTION Replace the battery with Part 15 of Conformity Trade Name: SONY Model No.: DSLR-A700 Responsible Party: Sony Electronics Inc. For Customers in the U.S.A. For more of the FCC Rules. Battery pack This device complies with...
...help preserve our environment by turning the equipment off and on a circuit different from that may cause undesired operation. This Class B digital apparatus complies with Part 15 of the following measures: - Note: This equipment has been tested and found to radio communications. ... and used rechargeable batteries to operate this first CAUTION Replace the battery with Part 15 of Conformity Trade Name: SONY Model No.: DSLR-A700 Responsible Party: Sony Electronics Inc. For Customers in the U.S.A. For more of the FCC Rules. Battery pack This device complies with...

User's Guide
Page 6
...please refer to the addresses given in the United Kingdom A moulded plug complying with the limits for a digital device pursuant to this equipment for your nearest Sony service station. This symbol on the product or on its packaging indicates that this product is fitted to ... and electronic equipment. By ensuring this product shall not be sure to the applicable collection point for EMC and product safety is Sony Corporation, 1-7-1 Konan Minato-ku Tokyo, 1080075 Japan. The Authorized Representative for the recycling of materials will help to discontinue midway ...
...please refer to the addresses given in the United Kingdom A moulded plug complying with the limits for a digital device pursuant to this equipment for your nearest Sony service station. This symbol on the product or on its packaging indicates that this product is fitted to ... and electronic equipment. By ensuring this product shall not be sure to the applicable collection point for EMC and product safety is Sony Corporation, 1-7-1 Konan Minato-ku Tokyo, 1080075 Japan. The Authorized Representative for the recycling of materials will help to discontinue midway ...
User's Guide
Page 7
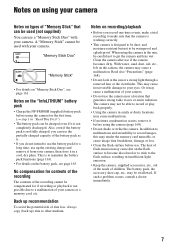
... on recording/playback • Before you do not intend to the flash surface, resulting in sandy or dusty locations may be able to get the camera and lens wet. This may cause a malfunction. Or it may cause dirt on the "InfoLITHIUM" battery pack • Charge the NP-FM500H (supplied) battery...or to stick to use the battery pack for the first time. (t step 1 in "Read This First") • The battery pack can use the camera near a location that generates strong radio waves or emits radiation. This is not possible due to maintain the battery pack functions (page 163). • For...
... on recording/playback • Before you do not intend to the flash surface, resulting in sandy or dusty locations may be able to get the camera and lens wet. This may cause a malfunction. Or it may cause dirt on the "InfoLITHIUM" battery pack • Charge the NP-FM500H (supplied) battery...or to stick to use the battery pack for the first time. (t step 1 in "Read This First") • The battery pack can use the camera near a location that generates strong radio waves or emits radiation. This is not possible due to maintain the battery pack functions (page 163). • For...
User's Guide
Page 8
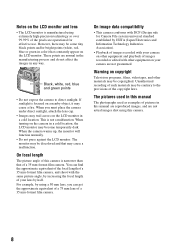
... with the same picture angle, by increasing the focal length of your lens by using a 50 mm lens, you must place the camera under direct sunlight, attach the lens cap. • Images may trail across on copyright Television programs, films, videotapes, and other materials may be ...on the LCD monitor and lens • The LCD monitor is focused on a nearby object, it may cause a fire. These points are operational for Camera File system) universal standard established by JEITA (Japan Electronics and Information Technology Industries Association). • Playback of a 35 mm-format film...
... with the same picture angle, by increasing the focal length of your lens by using a 50 mm lens, you must place the camera under direct sunlight, attach the lens cap. • Images may trail across on copyright Television programs, films, videotapes, and other materials may be ...on the LCD monitor and lens • The LCD monitor is focused on a nearby object, it may cause a fire. These points are operational for Camera File system) universal standard established by JEITA (Japan Electronics and Information Technology Industries Association). • Playback of a 35 mm-format film...
User's Guide
Page 9
... 56 Using the self-timer 57 Shooting images with shutter speed priority mode - Table of contents IMPORTANT SAFEGUARDS 3 Read this first 5 Notes on using your camera 7 Before your operation Identifying parts 14 Indicators on the monitor 19 Switching the recording information display 23 Number of images 24 The number of images...
... 56 Using the self-timer 57 Shooting images with shutter speed priority mode - Table of contents IMPORTANT SAFEGUARDS 3 Read this first 5 Notes on using your camera 7 Before your operation Identifying parts 14 Indicators on the monitor 19 Switching the recording information display 23 Number of images 24 The number of images...

User's Guide
Page 10
ISO Auto min. 10 ISO Auto max. Image processing and color 61 Adjusting the white balance 61 Setting ISO...64 Using the D-Range Optimizer 66 Using a Creative Style 67 Flash ...73 Selecting the flash mode 73 Using the flash compensation 75 Shooting with Slow Sync (Shooting the dark background with flash 77 Using the flash sync terminal 77 Other operations 79 Registering your own settings 79 Using the C (Custom) button 81 Using the viewing functions Viewing images 83 Switching the playback screen 83 Switching to the index screen 84 Displaying the histogram 85 Enlarging images ...
ISO Auto min. 10 ISO Auto max. Image processing and color 61 Adjusting the white balance 61 Setting ISO...64 Using the D-Range Optimizer 66 Using a Creative Style 67 Flash ...73 Selecting the flash mode 73 Using the flash compensation 75 Shooting with Slow Sync (Shooting the dark background with flash 77 Using the flash sync terminal 77 Other operations 79 Registering your own settings 79 Using the C (Custom) button 81 Using the viewing functions Viewing images 83 Switching the playback screen 83 Switching to the index screen 84 Displaying the histogram 85 Enlarging images ...

User's Guide
Page 11
Img.orientation Custom menu 4 113 Custom reset 11 FocusHoldButton Custom menu 2 107 AEL button Ctrl dial setup Dial exp.comp Ctrl dial lock Button ops. Release w/oCard Release w/oLens Custom menu 3 110 Red eye reduc. Exp.comp.set Bracket order Auto review Auto off w/ VF Rec.info.disp. Recording menu 3 101 AF-A setup AF area Priority setup AF illuminator AF w/ shutter Long exp.NR High ISO NR Recording menu 4 104 Memory Rec mode reset Custom menu 1 105 Eye-Start AF EyeStart trigr. AF/MF button AF/MF control AF drive speed AF area disp.
Img.orientation Custom menu 4 113 Custom reset 11 FocusHoldButton Custom menu 2 107 AEL button Ctrl dial setup Dial exp.comp Ctrl dial lock Button ops. Release w/oCard Release w/oLens Custom menu 3 110 Red eye reduc. Exp.comp.set Bracket order Auto review Auto off w/ VF Rec.info.disp. Recording menu 3 101 AF-A setup AF area Priority setup AF illuminator AF w/ shutter Long exp.NR High ISO NR Recording menu 4 104 Memory Rec mode reset Custom menu 1 105 Eye-Start AF EyeStart trigr. AF/MF button AF/MF control AF drive speed AF area disp.

User's Guide
Page 12
Playback menu 1 114 Delete Format Protect DPOF setup Date imprint Index print PlaybackDisplay Playback menu 2 119 Slide show Interval Setup menu 1 120 LCD brightness Info.disp.time Power save Video output HDMI output Language Date/Time setup Setup menu 2 123 Memory card File number Folder name Select folder New folder USB connection MassStrg.card Setup menu 3 125 Menu start Delete confirm. Audio signals Cleaning mode Reset default 12
Playback menu 1 114 Delete Format Protect DPOF setup Date imprint Index print PlaybackDisplay Playback menu 2 119 Slide show Interval Setup menu 1 120 LCD brightness Info.disp.time Power save Video output HDMI output Language Date/Time setup Setup menu 2 123 Memory card File number Folder name Select folder New folder USB connection MassStrg.card Setup menu 3 125 Menu start Delete confirm. Audio signals Cleaning mode Reset default 12
User's Guide
Page 13
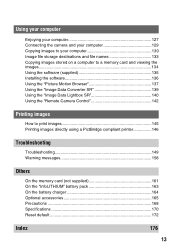
Using your computer Enjoying your computer 127 Connecting the camera and your computer 129 Copying images to your computer 130 Image file storage destinations and file names 133 Copying images stored on a computer to a memory ... software 136 Using the "Picture Motion Browser 137 Using the "Image Data Converter SR 139 Using the "Image Data Lightbox SR 140 Using the "Remote Camera Control 142 Printing images How to print images 145 Printing images directly using a PictBridge compliant printer 146 Troubleshooting Troubleshooting 149 Warning messages 158 Others On...
Using your computer Enjoying your computer 127 Connecting the camera and your computer 129 Copying images to your computer 130 Image file storage destinations and file names 133 Copying images stored on a computer to a memory ... software 136 Using the "Picture Motion Browser 137 Using the "Image Data Converter SR 139 Using the "Image Data Lightbox SR 140 Using the "Remote Camera Control 142 Printing images How to print images 145 Printing images directly using a PictBridge compliant printer 146 Troubleshooting Troubleshooting 149 Warning messages 158 Others On...

User's Guide
Page 14
Before your operation Identifying parts Camera * Do not directly touch these parts. See the pages in parentheses for shoulder strap (17) D Shutter button (t step 5 in "Read This First") N Focus mode lever (...
Before your operation Identifying parts Camera * Do not directly touch these parts. See the pages in parentheses for shoulder strap (17) D Shutter button (t step 5 in "Read This First") N Focus mode lever (...

User's Guide
Page 15
A Viewfinder (t step 5 in "Read This First") B Eyepiece sensors (111) C POWER switch (t step 4 in "Read This First") D MENU button (32) E DISP (Display) button (23, 83) F (Delete) button (t step 6 in "Read This First") G (Playback) button (t step 6 in "Read This First") H LCD monitor (20, 23) I Multi-selector (29) J For shooting: C (Custom) button (81, 98) For viewing: (Histogram) button (85) K For shooting: Fn (Function) button (30) For viewing: (Rotate) button (88) L Accessory shoe (166) M Diopter-adjustment dial (t step 5 in "Read This First") N Metering mode lever (48) O For shooting: AEL...
A Viewfinder (t step 5 in "Read This First") B Eyepiece sensors (111) C POWER switch (t step 4 in "Read This First") D MENU button (32) E DISP (Display) button (23, 83) F (Delete) button (t step 6 in "Read This First") G (Playback) button (t step 6 in "Read This First") H LCD monitor (20, 23) I Multi-selector (29) J For shooting: C (Custom) button (81, 98) For viewing: (Histogram) button (85) K For shooting: Fn (Function) button (30) For viewing: (Rotate) button (88) L Accessory shoe (166) M Diopter-adjustment dial (t step 5 in "Read This First") N Metering mode lever (48) O For shooting: AEL...

User's Guide
Page 16
...buttons (86) M (Delete) button (t step 6 in "Read This First") • With the exception of less than 5.5 mm (7/32 inch), and may damage the camera. Remote Commander A Tripod receptacle • Use a tripod with a screw length of the 2 SEC and SHUTTER buttons, the buttons only work when the... camera is connected to tripods having screws longer than 5.5 mm (7/32 inch). B Battery cover open lever (t step 1 in "Read This First") C Lock lever (t step ...
...buttons (86) M (Delete) button (t step 6 in "Read This First") • With the exception of less than 5.5 mm (7/32 inch), and may damage the camera. Remote Commander A Tripod receptacle • Use a tripod with a screw length of the 2 SEC and SHUTTER buttons, the buttons only work when the... camera is connected to tripods having screws longer than 5.5 mm (7/32 inch). B Battery cover open lever (t step 1 in "Read This First") C Lock lever (t step ...

User's Guide
Page 17
...3 Insert the battery case back into the slit to pull out the battery case. 2 Place a new battery with a Sony CR2025 lithium battery. Attach the other side of the camera. Use of another battery may present a risk of the Remote Commander may shorten, or the Remote Commander may explode if ...mistreated. Do not recharge, disassemble or dispose of in order to operate the camera (page 14). Before your fingernail into the Remote Commander until it clicks. Attach the end of the strap without the remote commander clip ...
...3 Insert the battery case back into the slit to pull out the battery case. 2 Place a new battery with a Sony CR2025 lithium battery. Attach the other side of the camera. Use of another battery may present a risk of the Remote Commander may shorten, or the Remote Commander may explode if ...mistreated. Do not recharge, disassemble or dispose of in order to operate the camera (page 14). Before your fingernail into the Remote Commander until it clicks. Attach the end of the strap without the remote commander clip ...

User's Guide
Page 18
Notched side 18 If the holder ring comes off the strap, put it back on the strap from the notched side. When threading the strap through the holder ring, hold the tip of the strap with your finger, and slide the holder ring rather than the tip of the strap into position to secure the strap.
Notched side 18 If the holder ring comes off the strap, put it back on the strap from the notched side. When threading the strap through the holder ring, hold the tip of the strap with your finger, and slide the holder ring rather than the tip of the strap into position to secure the strap.
User's Guide
Page 19
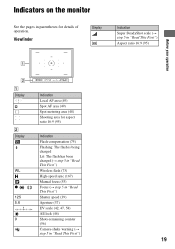
... (53) z Focus (t step 5 in "Read This First") 125 Shutter speed (39) 5.6 Aperture (37) EV scale (42, 47, 58) AE lock (46) 9 Shots-remaining counter (56) Camera-shake warning (t step 5 in "Read This First") Aspect ratio 16:9 (95) Before your operation A Display Indication Local AF area (49) Spot AF area (49) Spot...
... (53) z Focus (t step 5 in "Read This First") 125 Shutter speed (39) 5.6 Aperture (37) EV scale (42, 47, 58) AE lock (46) 9 Shots-remaining counter (56) Camera-shake warning (t step 5 in "Read This First") Aspect ratio 16:9 (95) Before your operation A Display Indication Local AF area (49) Spot AF area (49) Spot...

User's Guide
Page 20
A Display P A S M Indication Register number (79) Mode dial (34) 1/125 F5.6 +2.0 B Display Shutter speed (39) Aperture (37) Exposure (45) AE lock (46) Indication Flash mode (73)/Red-eye reduction (110) Exposure-compensation (45)/Metered Manual (42) Flash-compensation (75) EV scale (42, 47, 58) ISO AUTO ISO sensitivity (64) AF area (49) Metering (48) D-range optimizer (66) Creative Style (67) +1 +1 +1 +1 +1 AWB +1 5500K M1 Contrast, Saturation, Sharpness, Brightness, Zone Matching (68) White balance (Auto, Preset, Color temperature, Color filter, Custom) (61) D Display 90% Indication ...
A Display P A S M Indication Register number (79) Mode dial (34) 1/125 F5.6 +2.0 B Display Shutter speed (39) Aperture (37) Exposure (45) AE lock (46) Indication Flash mode (73)/Red-eye reduction (110) Exposure-compensation (45)/Metered Manual (42) Flash-compensation (75) EV scale (42, 47, 58) ISO AUTO ISO sensitivity (64) AF area (49) Metering (48) D-range optimizer (66) Creative Style (67) +1 +1 +1 +1 +1 AWB +1 5500K M1 Contrast, Saturation, Sharpness, Brightness, Zone Matching (68) White balance (Auto, Preset, Color temperature, Color filter, Custom) (61) D Display 90% Indication ...
