
Operating Instructions
Page 1
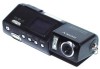
...model and serial numbers are located on your Sony dealer regarding this manual thoroughly, and retain it for future reference. Record the serial number in the space provided below. Model No. DSC-U50 Serial No. Digital Still Camera Operating Instructions Before operating the unit, please... read this product. DSC-U50 © 2003 Sony Corporation 3-084-891-11(1) Getting started Shooting still images Enjoying still images Enjoying ...
...model and serial numbers are located on your Sony dealer regarding this manual thoroughly, and retain it for future reference. Record the serial number in the space provided below. Model No. DSC-U50 Serial No. Digital Still Camera Operating Instructions Before operating the unit, please... read this product. DSC-U50 © 2003 Sony Corporation 3-084-891-11(1) Getting started Shooting still images Enjoying still images Enjoying ...

Operating Instructions
Page 3
...complying with BS1363 is fitted to BS1362 (i.e., marked with this equipment for the Customers in Canada THIS CLASS B DIGITAL APPARATUS COMPLIES WITH CANADIAN ICES-003. 3 Never use the plug without the fuse cover. Notice If static electricity... or electromagnetism causes data transfer to power this camera. Certain countries may influence the picture of rechargeable batteries, call toll free 1-800-822-8837, or visit http...Europe This product has been tested and found compliant with your nearest Sony service station.
...complying with BS1363 is fitted to BS1362 (i.e., marked with this equipment for the Customers in Canada THIS CLASS B DIGITAL APPARATUS COMPLIES WITH CANADIAN ICES-003. 3 Never use the plug without the fuse cover. Notice If static electricity... or electromagnetism causes data transfer to power this camera. Certain countries may influence the picture of rechargeable batteries, call toll free 1-800-822-8837, or visit http...Europe This product has been tested and found compliant with your nearest Sony service station.

Operating Instructions
Page 4
...copyright laws. Exposing the LCD screen, the LCD finder or the lens to a disk. Precaution on the LCD screen in color) that the camera is not possible due to the provision of the pixels are normal in the manufacturing process and do not affect the recording in this may... to a malfunction of "Memory Stick": a normal size "Memory Stick" and a smaller version called a "Memory Stick Duo." You can use . Before using your camera Trial recording Before you record one-time events, you open the battery/"Memory Stick Duo" cover while the access lamp is not a malfunction. • Replace...
...copyright laws. Exposing the LCD screen, the LCD finder or the lens to a disk. Precaution on the LCD screen in color) that the camera is not possible due to the provision of the pixels are normal in the manufacturing process and do not affect the recording in this may... to a malfunction of "Memory Stick": a normal size "Memory Stick" and a smaller version called a "Memory Stick Duo." You can use . Before using your camera Trial recording Before you record one-time events, you open the battery/"Memory Stick Duo" cover while the access lamp is not a malfunction. • Replace...

Operating Instructions
Page 5
...," , and "MagicGate Memory Stick" are trademarks of Sony Corporation. • "Memory Stick PRO" and are trademarks of Sony Corporation. • "MagicGate" and are trademarks of Sony Corporation. • Microsoft and Windows are not used in all cases in general, trademarks or registered trademarks of the U.S. The camera may not be careful not to record...
...," , and "MagicGate Memory Stick" are trademarks of Sony Corporation. • "Memory Stick PRO" and are trademarks of Sony Corporation. • "MagicGate" and are trademarks of Sony Corporation. • Microsoft and Windows are not used in all cases in general, trademarks or registered trademarks of the U.S. The camera may not be careful not to record...

Operating Instructions
Page 6
... folder 25 Creating a new folder 25 Selecting the recording folder 26 Shooting according to print - Print (DPOF) mark 40 Connecting your camera to a PictBridge compliant printer 42 Printing images 44 Enjoying movies Shooting movies 46 Viewing movies on the LCD screen....... 49 Deleting images Deleting ...images 50 Formatting a "Memory Stick Duo".........51 Enjoying images on /off your camera 14 How to use the buttons 15 Setting the date and time 15 Shooting still images Inserting and removing a "Memory Stick Duo...
... folder 25 Creating a new folder 25 Selecting the recording folder 26 Shooting according to print - Print (DPOF) mark 40 Connecting your camera to a PictBridge compliant printer 42 Printing images 44 Enjoying movies Shooting movies 46 Viewing movies on the LCD screen....... 49 Deleting images Deleting ...images 50 Formatting a "Memory Stick Duo".........51 Enjoying images on /off your camera 14 How to use the buttons 15 Setting the date and time 15 Shooting still images Inserting and removing a "Memory Stick Duo...

Operating Instructions
Page 10
... (2) Batteries that of the batteries. You may 10 not display the correct information. 1 , Insert Nickel-Metal Hydride batteries into the battery charger (supplied) with your camera before using the power cord (mains lead). You cannot charge any other characteristics of the supplied Nickel-Metal Hydride batteries. - HR11/45: HR03 (size AAA...
... (2) Batteries that of the batteries. You may 10 not display the correct information. 1 , Insert Nickel-Metal Hydride batteries into the battery charger (supplied) with your camera before using the power cord (mains lead). You cannot charge any other characteristics of the supplied Nickel-Metal Hydride batteries. - HR11/45: HR03 (size AAA...

Operating Instructions
Page 12
.... • From time to time, use a dry cloth to wipe any dirt off of the arrow 2. 2 , Insert the batteries. To remove the batteries Hold the camera with the battery/"Memory Stick Duo" cover up, then slide the cover in the direction of the batteries to drop the batteries when opening or... provided by the batteries. 3 , Close the battery/"Memory Stick Duo" cover. Skin oil and other dirt on the battery/"Memory Stick Duo" cover. Hold the camera with the battery/"Memory Stick Duo" cover facing upward, open the cover, and remove the batteries. • Be careful not to the +/-
.... • From time to time, use a dry cloth to wipe any dirt off of the arrow 2. 2 , Insert the batteries. To remove the batteries Hold the camera with the battery/"Memory Stick Duo" cover up, then slide the cover in the direction of the batteries to drop the batteries when opening or... provided by the batteries. 3 , Close the battery/"Memory Stick Duo" cover. Skin oil and other dirt on the battery/"Memory Stick Duo" cover. Hold the camera with the battery/"Memory Stick Duo" cover facing upward, open the cover, and remove the batteries. • Be careful not to the +/-

Operating Instructions
Page 13
... decreases with [LCD LIGHT] set to check the amount of power remaining. • Based on the conditions under which the camera is being used and the state of power remaining using Sony alkaline batteries 1) Shooting in auto adjustment mode. Shooting one time every 30 seconds - Battery life and number of images that...
... decreases with [LCD LIGHT] set to check the amount of power remaining. • Based on the conditions under which the camera is being used and the state of power remaining using Sony alkaline batteries 1) Shooting in auto adjustment mode. Shooting one time every 30 seconds - Battery life and number of images that...

Operating Instructions
Page 14
...When you use it more and more and as time passes (page 83). To turn on your camera for the first time, the DATE NOTATION screen appears on and off your camera abroad Power sources You can use an electronic transformer (travel converter), as you turn off . 14... The battery capacity decreases as this may cause a malfunction. Using your camera POWER POWER lamp , Press POWER. The surrounding temperature is on the design of the wall outlet (wall socket) [b]. Use a commercially available AC plug...
...When you use it more and more and as time passes (page 83). To turn on your camera for the first time, the DATE NOTATION screen appears on and off your camera abroad Power sources You can use an electronic transformer (travel converter), as you turn off . 14... The battery capacity decreases as this may cause a malfunction. Using your camera POWER POWER lamp , Press POWER. The surrounding temperature is on the design of the wall outlet (wall socket) [b]. Use a commercially available AC plug...

Operating Instructions
Page 15
... SET screen disappears from the LCD screen. Getting started Auto power-off function If you do not operate the camera for about three minutes, the camera turns off function will not operate when the camera is in [CLOCK SET] under [ ] (page 79), then perform step 3. Setting the date and time DATE ...USB cable. The POWER lamp (green) lights up the menu, and use the buttons Control buttons EXEC/ MENU To change the current settings of the camera, bring up and the DATE NOTATION screen appears on the power. Press MENU, then the menu disappears from the LCD screen. • This operation ...
... SET screen disappears from the LCD screen. Getting started Auto power-off function If you do not operate the camera for about three minutes, the camera turns off function will not operate when the camera is in [CLOCK SET] under [ ] (page 79), then perform step 3. Setting the date and time DATE ...USB cable. The POWER lamp (green) lights up the menu, and use the buttons Control buttons EXEC/ MENU To change the current settings of the camera, bring up and the DATE NOTATION screen appears on the power. Press MENU, then the menu disappears from the LCD screen. • This operation ...

Operating Instructions
Page 17
Shooting still images Inserting and removing a "Memory Stick Duo" Access lamp Terminal side Shooting still images 1 , Open the battery/"Memory Stick Duo" cover. Hold the camera with the battery/"Memory Stick Duo" cover up , it out. 17 Holding the "Memory Stick Duo" as the data may not be damaged. • For ...
Shooting still images Inserting and removing a "Memory Stick Duo" Access lamp Terminal side Shooting still images 1 , Open the battery/"Memory Stick Duo" cover. Hold the camera with the battery/"Memory Stick Duo" cover up , it out. 17 Holding the "Memory Stick Duo" as the data may not be damaged. • For ...

Operating Instructions
Page 19
...." Choose an image size appropriate for each example. You can choose from the actual image size. • Images viewed on the LCD screen of the camera all appear the same size. • The actual number of images may differ depending on the LCD screen. 19 Shooting still images Image size You... Image size 2M 14 29 60 122 245 445 906 VGA 80 161 326 656 1316 2380 4840 • When the images recorded using earlier Sony models are the minimum image sizes appropriate for the kind of images you want to shoot.
...." Choose an image size appropriate for each example. You can choose from the actual image size. • Images viewed on the LCD screen of the camera all appear the same size. • The actual number of images may differ depending on the LCD screen. 19 Shooting still images Image size You... Image size 2M 14 29 60 122 245 445 906 VGA 80 161 326 656 1316 2380 4840 • When the images recorded using earlier Sony models are the minimum image sizes appropriate for the kind of images you want to shoot.

Operating Instructions
Page 20
... for shooting. • If you release the shutter button, the recording will be stored in the "Memory Stick Duo" (page 25). 2 , Hold the camera steadily with both hands and position the subject in the center of the folder where the image will be recorded appears on the power. When...ghosting) may enter the screen. The name of the LCD screen. Basic still image shooting - AE/AF lock indicator Flashes green 3 t Lights up , the camera is ready for approximately five seconds. • [FOCUS] is set to [AUTO] at the factory. • The exposure is automatically adjusted. • This...
... for shooting. • If you release the shutter button, the recording will be stored in the "Memory Stick Duo" (page 25). 2 , Hold the camera steadily with both hands and position the subject in the center of the folder where the image will be recorded appears on the power. When...ghosting) may enter the screen. The name of the LCD screen. Basic still image shooting - AE/AF lock indicator Flashes green 3 t Lights up , the camera is ready for approximately five seconds. • [FOCUS] is set to [AUTO] at the factory. • The exposure is automatically adjusted. • This...

Operating Instructions
Page 21
... 15). The Auto Focus function may have difficulty working under [ ] with a Hybrid-type LCD screen that allows you do not operate the camera for extending the battery life. In such cases, release the shutter button, then recompose the shot and focus again. When the menu operation is... useful for about three minutes during recording or playback, the camera turns off . This is completed, the LCD light will turn off , as long as a mirror or a luminous body. • A flashing subject. • ...
... 15). The Auto Focus function may have difficulty working under [ ] with a Hybrid-type LCD screen that allows you do not operate the camera for extending the battery life. In such cases, release the shutter button, then recompose the shot and focus again. When the menu operation is... useful for about three minutes during recording or playback, the camera turns off . This is completed, the LCD light will turn off , as long as a mirror or a luminous body. • A flashing subject. • ...

Operating Instructions
Page 23
... will be shot after approximately 10 seconds. However, the image will be normal when recorded. To cancel the self-timer in the middle of the camera, the focus and the exposure may be correctly set. You can rotate it up to 90 degrees backwards. Rotating the lens Shooting still images SELFTIMER...
... will be shot after approximately 10 seconds. However, the image will be normal when recorded. To cancel the self-timer in the middle of the camera, the focus and the exposure may be correctly set. You can rotate it up to 90 degrees backwards. Rotating the lens Shooting still images SELFTIMER...

Operating Instructions
Page 24
... desired effects depending on the shot image. • While you press v ( ), the indicator changes as follows. No indicator (Auto): Based on the lighting conditions, the camera will decide if there is enough light, and will have no effect on individual differences, the distance to 5 feet 10 3/4 inches). After the charging is...
... desired effects depending on the shot image. • While you press v ( ), the indicator changes as follows. No indicator (Auto): Based on the lighting conditions, the camera will decide if there is enough light, and will have no effect on individual differences, the distance to 5 feet 10 3/4 inches). After the charging is...

Operating Instructions
Page 25
...folder capacity is exceeded, a new folder is selected as the recording folder. The CREATE REC. Shooting still images Creating or selecting a folder Your camera can also carry out this operation when the mode switch is set to , and turn on the power, then press MENU. RETURN 101 FORMAT ...CREATE FOLDER CHANGE FOLDER EXEC/ 2 , Select [ ] with the camera. • Images are recorded in the newly created folder until a different folder is created or selected. 25 You can be stored in a "Memory Stick ...
...folder capacity is exceeded, a new folder is selected as the recording folder. The CREATE REC. Shooting still images Creating or selecting a folder Your camera can also carry out this operation when the mode switch is set to , and turn on the power, then press MENU. RETURN 101 FORMAT ...CREATE FOLDER CHANGE FOLDER EXEC/ 2 , Select [ ] with the camera. • Images are recorded in the newly created folder until a different folder is created or selected. 25 You can be stored in a "Memory Stick ...

Operating Instructions
Page 27
...; You cannot select the "100MSDCF" folder as a recording folder. • The image is displayed. FOLDER : 102MSDCF OK CANCEL EXEC/ 3 , Select the desired folder with this camera. EXEC/ 4 , Select [OK] with the control button v, then press EXEC. When you press MENU, the menu disappears and the selected folder is stored in step...
...; You cannot select the "100MSDCF" folder as a recording folder. • The image is displayed. FOLDER : 102MSDCF OK CANCEL EXEC/ 3 , Select the desired folder with this camera. EXEC/ 4 , Select [OK] with the control button v, then press EXEC. When you press MENU, the menu disappears and the selected folder is stored in step...

Operating Instructions
Page 34
... in step 3. • When the flash strobes, the manual setting is canceled, and the image is turned off. Normally, the camera makes these problems, but if recorded image colors appear unnatural, we recommend that you press MENU, the menu disappears and the selected mode ...under incandescent light bulbs, etc. When you adjust the white balance. 34 The human eye can resolve these adjustments automatically, but digital still cameras cannot recognize the correct colors without adjustments. WHITE BALANCE AUTO EXEC/ 3 , Select the desired mode with the control buttons v/V, then press...
... in step 3. • When the flash strobes, the manual setting is canceled, and the image is turned off. Normally, the camera makes these problems, but if recorded image colors appear unnatural, we recommend that you press MENU, the menu disappears and the selected mode ...under incandescent light bulbs, etc. When you adjust the white balance. 34 The human eye can resolve these adjustments automatically, but digital still cameras cannot recognize the correct colors without adjustments. WHITE BALANCE AUTO EXEC/ 3 , Select the desired mode with the control buttons v/V, then press...

Operating Instructions
Page 35
... the selected recording folder (page 26) appears on the LCD screen. 2M 101 6 / 8 101-0006 2003 7 4 10:30AM 2 , Select the desired still image with your camera almost immediately on the LCD screen. Enjoying still images Viewing single images 2M 101 7 / 8 101-0007 2003 7 4 12:00PM 1 , Set the mode switch to , and...
... the selected recording folder (page 26) appears on the LCD screen. 2M 101 6 / 8 101-0006 2003 7 4 10:30AM 2 , Select the desired still image with your camera almost immediately on the LCD screen. Enjoying still images Viewing single images 2M 101 7 / 8 101-0007 2003 7 4 12:00PM 1 , Set the mode switch to , and...


