
Operating Instructions (primary manual)
Page 1
... it for future reference. Model No. Digital Still Camera Operating Instructions Before operating the unit, please read this product. DSC-P7/P9 Serial No. Record the serial number in the space provided below. DSC-P7/P9 © 2002 Sony Corporation 3-075-896-11(1) Getting started Shooting still images Viewing still images Deleting still images Copying still images to these numbers whenever you...
... it for future reference. Model No. Digital Still Camera Operating Instructions Before operating the unit, please read this product. DSC-P7/P9 Serial No. Record the serial number in the space provided below. DSC-P7/P9 © 2002 Sony Corporation 3-075-896-11(1) Getting started Shooting still images Viewing still images Deleting still images Copying still images to these numbers whenever you...

Operating Instructions (primary manual)
Page 4
However, the ™ or ® marks are not used in this manual are, in this digital camera. Attention for the Customers in the U.S.A. The electromagnetic fields at the specific frequencies may influence the picture and sound of...USB cable again. Trademarks • "Memory Stick," , "MagicGate Memory Stick," and , are trademarks of Sony Corporation. • "MagicGate" and are trademarks of Sony Corporation. • "InfoLITHIUM" is a trademark of Sony Corporation. • Microsoft and Windows are trademarks or registered trademarks of the U.S. and Canada THIS DEVICE ...
However, the ™ or ® marks are not used in this manual are, in this digital camera. Attention for the Customers in the U.S.A. The electromagnetic fields at the specific frequencies may influence the picture and sound of...USB cable again. Trademarks • "Memory Stick," , "MagicGate Memory Stick," and , are trademarks of Sony Corporation. • "MagicGate" and are trademarks of Sony Corporation. • "InfoLITHIUM" is a trademark of Sony Corporation. • Microsoft and Windows are trademarks or registered trademarks of the U.S. and Canada THIS DEVICE ...

Operating Instructions (primary manual)
Page 5
... and the LCD finder are manufactured using extremely highprecision technology so over 99.99% of images recorded or edited with your camera on other equipment on your camera are not actual images shot using this may render the "Memory Stick" unusable or image data breakdown, damage or loss may occur. If moisture condensation...
... and the LCD finder are manufactured using extremely highprecision technology so over 99.99% of images recorded or edited with your camera on other equipment on your camera are not actual images shot using this may render the "Memory Stick" unusable or image data breakdown, damage or loss may occur. If moisture condensation...

Operating Instructions (primary manual)
Page 6
...on/off your camera 15 How to use the control button 15 Setting the date and time 16 Shooting still images Inserting and removing a "Memory Stick 18 Deciding the still image size and quality 19 Basic still image shooting (using auto adjustment mode 22 Checking the last image shot (Quick Review... 28 Shooting with the date and time inserted 29 Shooting according to scene conditions (Scene selection 30 6 Viewing still images Viewing images on the LCD screen of your camera 32 Viewing single images 32 Viewing Index (nine or three images display)........ 33 Viewing images on a TV screen...
...on/off your camera 15 How to use the control button 15 Setting the date and time 16 Shooting still images Inserting and removing a "Memory Stick 18 Deciding the still image size and quality 19 Basic still image shooting (using auto adjustment mode 22 Checking the last image shot (Quick Review... 28 Shooting with the date and time inserted 29 Shooting according to scene conditions (Scene selection 30 6 Viewing still images Viewing images on the LCD screen of your camera 32 Viewing single images 32 Viewing Index (nine or three images display)........ 33 Viewing images on a TV screen...

Operating Instructions (primary manual)
Page 8
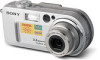
Identifying the parts Attaching the strap A POWER button (15) B POWER lamp (15) C Shutter button (22) D Wrist strap hook E Flash (26) F Speaker (bottom surface) G Finder window H Self-timer lamp (26)/ AF illuminator (27, 93) I Microphone J Lens K Tripod receptacle (bottom surface) 8 1 7 2 8 3 4 5 9 0 6 qa • Use a tripod with a screw length of less than 5.5 mm (7/32 inch). You will be unable to firmly secure the camera to tripods having longer screws, and may damage the camera. • Do not touch the microphone while recording.
Identifying the parts Attaching the strap A POWER button (15) B POWER lamp (15) C Shutter button (22) D Wrist strap hook E Flash (26) F Speaker (bottom surface) G Finder window H Self-timer lamp (26)/ AF illuminator (27, 93) I Microphone J Lens K Tripod receptacle (bottom surface) 8 1 7 2 8 3 4 5 9 0 6 qa • Use a tripod with a screw length of less than 5.5 mm (7/32 inch). You will be unable to firmly secure the camera to tripods having longer screws, and may damage the camera. • Do not touch the microphone while recording.

Operating Instructions (primary manual)
Page 10
...a malfunction. • Clean the DC plug of the AC power adaptor with a piece of the arrow. • When charging the battery pack, make sure the camera is properly inserted, then close the cover. Make sure the battery pack is not turned on the AC power adaptor with a dry cotton bud. You...charge the battery pack. 10 Connect the plug with the v mark facing up. • Do not short the DC plug on (page 15). • The camera operates only with the v mark facing toward the battery compartment as illustrated above . Do not use any other battery pack (page 96). 2 Battery eject lever...
...a malfunction. • Clean the DC plug of the AC power adaptor with a piece of the arrow. • When charging the battery pack, make sure the camera is properly inserted, then close the cover. Make sure the battery pack is not turned on the AC power adaptor with a dry cotton bud. You...charge the battery pack. 10 Connect the plug with the v mark facing up. • Do not short the DC plug on (page 15). • The camera operates only with the v mark facing toward the battery compartment as illustrated above . Do not use any other battery pack (page 96). 2 Battery eject lever...

Operating Instructions (primary manual)
Page 11
... lamp When the /CHG lamp goes out, charging is finished (full charge). • When charging is finished, disconnect the AC power adaptor both from the camera and the wall outlet (wall socket). Battery eject lever Open the battery/"Memory Stick" cover, and push down the battery eject lever in the arrow...
... lamp When the /CHG lamp goes out, charging is finished (full charge). • When charging is finished, disconnect the AC power adaptor both from the camera and the wall outlet (wall socket). Battery eject lever Open the battery/"Memory Stick" cover, and push down the battery eject lever in the arrow...

Operating Instructions (primary manual)
Page 12
... DSC-P7 LCD screen ON OFF ON OFF NP-FC10 (supplied) Battery life (min.) Approx. 80 Approx. 110 Approx. 80 Approx. 110 *** Continuous shooting with an image size of time the camera can be used when image quality is set to charge fully depleted battery pack using the supplied AC-LS1A AC ... adaptor in an environment where the ambient temperature is fully charged. The guidelines for the number of use. 12 Shooting* still images Image size DSC-P9 2272×1704 640×480 DSC-P7 2048×1536 640×480 LCD screen ON OFF ON OFF NP-FC10 (supplied) Battery life (min.) No. ...
... DSC-P7 LCD screen ON OFF ON OFF NP-FC10 (supplied) Battery life (min.) Approx. 80 Approx. 110 Approx. 80 Approx. 110 *** Continuous shooting with an image size of time the camera can be used when image quality is set to charge fully depleted battery pack using the supplied AC-LS1A AC ... adaptor in an environment where the ambient temperature is fully charged. The guidelines for the number of use. 12 Shooting* still images Image size DSC-P9 2272×1704 640×480 DSC-P7 2048×1536 640×480 LCD screen ON OFF ON OFF NP-FC10 (supplied) Battery life (min.) No. ...

Operating Instructions (primary manual)
Page 14
... use an electrical transformer. If something goes wrong while you are using the AC power adaptor, disconnect it from the DC IN jack of the camera. • The set is not disconnected from the AC power source as long as it is connected to the DC IN jack of the wall... outlet (wall socket) [b]. Using your camera in any country or area with the v mark facing up. • Connect the AC power adaptor to an easily accessible wall outlet (wall socket) close...
... use an electrical transformer. If something goes wrong while you are using the AC power adaptor, disconnect it from the DC IN jack of the camera. • The set is not disconnected from the AC power source as long as it is connected to the DC IN jack of the wall... outlet (wall socket) [b]. Using your camera in any country or area with the v mark facing up. • Connect the AC power adaptor to an easily accessible wall outlet (wall socket) close...

Operating Instructions (primary manual)
Page 15
... lights in the following circumstances, even if the battery pack is being used to power the camera, the Auto Power Off function will not work. • Movies are performed for the first...in green, the power is set to SCN, , or the lens comes out. When you turn the power on your camera POWER ON/OFF(CHG) POWER POWER lamp , Press POWER to turn on . For each item, press v/V/b/B to select ... the control button 0EV 0EV EV WB ISO AUTO WHITE BAL ISO To change the current settings of the camera, bring up the menu or the SET UP screen (page 52), and use the control button to make...
... lights in the following circumstances, even if the battery pack is being used to power the camera, the Auto Power Off function will not work. • Movies are performed for the first...in green, the power is set to SCN, , or the lens comes out. When you turn the power on your camera POWER ON/OFF(CHG) POWER POWER lamp , Press POWER to turn on . For each item, press v/V/b/B to select ... the control button 0EV 0EV EV WB ISO AUTO WHITE BAL ISO To change the current settings of the camera, bring up the menu or the SET UP screen (page 52), and use the control button to make...

Operating Instructions (primary manual)
Page 18
Inserting and removing a "Memory Stick" Connector side Shooting still images 1 , Open the battery/"Memory Stick" cover. To remove the "Memory Stick" Open the battery/"Memory Stick" cover, then push the "Memory Stick" to pop ... carried out. 3 Access lamp , Close the battery/"Memory Stick" cover. Slide the cover in until it out. • Whenever the Access lamp is lit, the camera is recording or reading out an image.
Inserting and removing a "Memory Stick" Connector side Shooting still images 1 , Open the battery/"Memory Stick" cover. To remove the "Memory Stick" Open the battery/"Memory Stick" cover, then push the "Memory Stick" to pop ... carried out. 3 Access lamp , Close the battery/"Memory Stick" cover. Slide the cover in until it out. • Whenever the Access lamp is lit, the camera is recording or reading out an image.

Operating Instructions (primary manual)
Page 19
... values chosen here will be preserved even when the camera is completed, press MENU. FINE FINE STANDARD P.QUALITY MODE PFX 3 , Select (P. QUALITY) using b/B on the control button. Shooting still images Deciding the still image size and quality AUTO WHITE BAL ISO 1 MENU... , Set the mode dial to SCN. 2048x1536 2048 (3 : 2) 1600x1200 1280 x 960 640 x 480 IMAGE SIZE 2272x1704 2272 (3 : 2) 1600x1200 1280 x 960 640 x 480 IMAGE SIZE DSC-P7 DSC-P9 2 , Select...
... values chosen here will be preserved even when the camera is completed, press MENU. FINE FINE STANDARD P.QUALITY MODE PFX 3 , Select (P. QUALITY) using b/B on the control button. Shooting still images Deciding the still image size and quality AUTO WHITE BAL ISO 1 MENU... , Set the mode dial to SCN. 2048x1536 2048 (3 : 2) 1600x1200 1280 x 960 640 x 480 IMAGE SIZE 2272x1704 2272 (3 : 2) 1600x1200 1280 x 960 640 x 480 IMAGE SIZE DSC-P7 DSC-P9 2 , Select...

Operating Instructions (primary manual)
Page 21
When the images are shown below. (Units: number of images) Capacity Image size 2272×1704 (DSC-P9) 2272 (3:2) (DSC-P9) 2048×1536 (DSC-P7) 2048 (3:2) (DSC-P7) 1600×1200 1280×960 640×480 8MB 4 (7) 4 (7) 5 (9) 5 (9) 8 (15) 12...;1200) is the screen size used when viewing the images on the LCD screen of the camera, they all look the same size. • Number of shooting images can be saved in... images that can be saved in FINE (STANDARD) mode are viewed on a computer. Shooting still images The number of images** that can be saved in a "Memory Stick" The number of...
When the images are shown below. (Units: number of images) Capacity Image size 2272×1704 (DSC-P9) 2272 (3:2) (DSC-P9) 2048×1536 (DSC-P7) 2048 (3:2) (DSC-P7) 1600×1200 1280×960 640×480 8MB 4 (7) 4 (7) 5 (9) 5 (9) 8 (15) 12...;1200) is the screen size used when viewing the images on the LCD screen of the camera, they all look the same size. • Number of shooting images can be saved in... images that can be saved in FINE (STANDARD) mode are viewed on a computer. Shooting still images The number of images** that can be saved in a "Memory Stick" The number of...

Operating Instructions (primary manual)
Page 22
... the power is turned on. • Do not touch the lens portion while it is operating, such as the AF mode (page 53). The camera beeps. Basic still image shooting (using auto adjustment mode) Mode dial 60min 2272 FINE 4 F2.8 30 1 , Set the mode dial to , and turn on the power or... when the zoom function is working (page 24). • When the mode dial is set to , the exposure and focus are adjusted automatically. 2 , Hold your camera with...
... the power is turned on. • Do not touch the lens portion while it is operating, such as the AF mode (page 53). The camera beeps. Basic still image shooting (using auto adjustment mode) Mode dial 60min 2272 FINE 4 F2.8 30 1 , Set the mode dial to , and turn on the power or... when the zoom function is working (page 24). • When the mode dial is set to , the exposure and focus are adjusted automatically. 2 , Hold your camera with...

Operating Instructions (primary manual)
Page 23
Shooting still images 60min 2272 FINE 4 , Press the shutter button fully down. When the Recording lamp goes out, you can shoot the next image. • When you try to recompose the shot and focus again. • The subject is distant from the camera and dark • The contrast of ... is saved in the following subjects. The shutter clicks, the shooting is completed, and the still image is hard to preserve battery power (page 15). The Auto Focus function may be deleted. 23 Checking the last image shot (Quick Review) 60min REVIEW 2272 8/8 100-0029 2002 7 4 10:30PM , Press b ...
Shooting still images 60min 2272 FINE 4 , Press the shutter button fully down. When the Recording lamp goes out, you can shoot the next image. • When you try to recompose the shot and focus again. • The subject is distant from the camera and dark • The contrast of ... is saved in the following subjects. The shutter clicks, the shooting is completed, and the still image is hard to preserve battery power (page 15). The Auto Focus function may be deleted. 23 Checking the last image shot (Quick Review) 60min REVIEW 2272 8/8 100-0029 2002 7 4 10:30PM , Press b ...

Operating Instructions (primary manual)
Page 26
... being charged, the /CHG lamp flashes. Selecting a flash mode 60min 2272 FINE 4 , Set the mode dial to , and press v ( ) on the lighting conditions, the camera will decide if there is enough light, and will use the flash accordingly. (Forced flash): The flash will be used . • The recommended distance using... menu settings (page 91). • In the Auto or (Forced flash) mode, you look at the LCD screen in a dark place, you may not be shot after approximately 10 seconds. m (19 11/16 inches to select a flash mode. When the zoom is set all the way to the W side, 0.5 to ...
... being charged, the /CHG lamp flashes. Selecting a flash mode 60min 2272 FINE 4 , Set the mode dial to , and press v ( ) on the lighting conditions, the camera will decide if there is enough light, and will use the flash accordingly. (Forced flash): The flash will be used . • The recommended distance using... menu settings (page 91). • In the Auto or (Forced flash) mode, you look at the LCD screen in a dark place, you may not be shot after approximately 10 seconds. m (19 11/16 inches to select a flash mode. When the zoom is set all the way to the W side, 0.5 to ...

Operating Instructions (primary manual)
Page 27
... is a bright light. If you try to 2.8m (9 feet 2 1/4 inches) (wide), 1.6m (5 feet 3 inches) (tele), or the subject has weak contrast, the camera may also reduce the effectiveness of the red-eye reduction process. • Even when the AF illuminator flashes, but when shooting at short distances, do...properly as long as it reaches the subject. • When the focus is additional lighting provided to reduce the red-eye phenomenon. Shooting still images To reduce "red-eye" when shooting live subjects The flash pre-strobes before shooting to assist in focusing when shooting in the SET...
... is a bright light. If you try to 2.8m (9 feet 2 1/4 inches) (wide), 1.6m (5 feet 3 inches) (tele), or the subject has weak contrast, the camera may also reduce the effectiveness of the red-eye reduction process. • Even when the AF illuminator flashes, but when shooting at short distances, do...properly as long as it reaches the subject. • When the focus is additional lighting provided to reduce the red-eye phenomenon. Shooting still images To reduce "red-eye" when shooting live subjects The flash pre-strobes before shooting to assist in focusing when shooting in the SET...

Operating Instructions (primary manual)
Page 29
...shot with the date and time inserted, the date and time cannot be removed later. • When shooting images with the date and time inserted CAMERA MOVING IMAGE : DATE/TIME : DIGITAL ZOOM : RED EYE REDUCTION : AF ILLUMINATOR : MPEG MOVIE OFF O N OFF AUTO SELECT CAMERA MOVING IMAGE : DATE/TIME : DIGITAL... ZOOM : RED EYE REDUCTION : AF ILLUMINATOR : DAY&TIME DATE OFF OK CAMERA MOVING IMAGE : DATE/TIME : DIGITAL ZOOM : RED EYE REDUCTION : AF ILLUMINATOR : MPEG MOVIE DATE O N OFF AUTO PAGE SELECT Shooting still images 1 , Set...
...shot with the date and time inserted, the date and time cannot be removed later. • When shooting images with the date and time inserted CAMERA MOVING IMAGE : DATE/TIME : DIGITAL ZOOM : RED EYE REDUCTION : AF ILLUMINATOR : MPEG MOVIE OFF O N OFF AUTO SELECT CAMERA MOVING IMAGE : DATE/TIME : DIGITAL... ZOOM : RED EYE REDUCTION : AF ILLUMINATOR : DAY&TIME DATE OFF OK CAMERA MOVING IMAGE : DATE/TIME : DIGITAL ZOOM : RED EYE REDUCTION : AF ILLUMINATOR : MPEG MOVIE DATE O N OFF AUTO PAGE SELECT Shooting still images 1 , Set...

Operating Instructions (primary manual)
Page 31
....8 button fully down. r PROCESSING Finally, when "PROCESSING" disappears, the image has been recorded. 31 Shooting still images To eliminate the effects of vibration, use of a tripod is displayed before the shutter speed indication, and the camera automatically changes to than SCN. • The settings made here will be saved even when the...
....8 button fully down. r PROCESSING Finally, when "PROCESSING" disappears, the image has been recorded. 31 Shooting still images To eliminate the effects of vibration, use of a tripod is displayed before the shutter speed indication, and the camera automatically changes to than SCN. • The settings made here will be saved even when the...

Operating Instructions (primary manual)
Page 32
...(nine images display) Nine images will be displayed. 32 Various items of your images. The last image you shoot with this camera almost immediately on the LCD screen. Viewing still images Viewing single images 60min 2272 8/8 100-0028 2002 7 4 10:30PM FILE BACK/NEXT VOLUME 1 , Set the mode... : 1/125 EXPOSURE VALUE : 0.0 ISO : 100 100-0028 2002 7 4 10:30PM • SINGLE DISPLAY • For movies, see the images you shot will be displayed simultaneously in separate panels on the screen. Viewing images on the LCD screen of image information will also be displayed. This...
...(nine images display) Nine images will be displayed. 32 Various items of your images. The last image you shoot with this camera almost immediately on the LCD screen. Viewing still images Viewing single images 60min 2272 8/8 100-0028 2002 7 4 10:30PM FILE BACK/NEXT VOLUME 1 , Set the mode... : 1/125 EXPOSURE VALUE : 0.0 ISO : 100 100-0028 2002 7 4 10:30PM • SINGLE DISPLAY • For movies, see the images you shot will be displayed simultaneously in separate panels on the screen. Viewing images on the LCD screen of image information will also be displayed. This...


