Operating Guide
Page 21
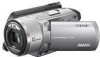
...the TIME/LANGU. (p.64). To hide the screen indicators Press DISP/BATT INFO to show the screen indicators (counter, etc.). 21 Touch the buttons displayed on the LCD screen. Then, touch the buttons displayed on the screen. Select the screen language in a specified language. Support the ...rear of the LCD panel with your finger. Step 5: Using the touch panel You can change the settings (p.48) using the touch panel. • If the buttons on the touch panel do not work...
...the TIME/LANGU. (p.64). To hide the screen indicators Press DISP/BATT INFO to show the screen indicators (counter, etc.). 21 Touch the buttons displayed on the LCD screen. Then, touch the buttons displayed on the screen. Select the screen language in a specified language. Support the ...rear of the LCD panel with your finger. Step 5: Using the touch panel You can change the settings (p.48) using the touch panel. • If the buttons on the touch panel do not work...

Operating Guide
Page 76
.... - Removing the USB cable (supplied) from the printer • If the printer stops working, remove the USB cable (supplied), turn the printer off and on the screen. Refer to your printer's instruction manual for the printer to a digital video camera or digital...CIPA). When printing is finished, [Printing...] disappears and the image selection screen appears again. Printing recorded still images (PictBridge compliant printer) (continued) 5 Touch [EXEC] t [YES]. To remove the USB cable from the camcorder and the printer 1 Touch [END]. 2 Remove the USB cable from the beginning. • ...
.... - Removing the USB cable (supplied) from the printer • If the printer stops working, remove the USB cable (supplied), turn the printer off and on the screen. Refer to your printer's instruction manual for the printer to a digital video camera or digital...CIPA). When printing is finished, [Printing...] disappears and the image selection screen appears again. Printing recorded still images (PictBridge compliant printer) (continued) 5 Touch [EXEC] t [YES]. To remove the USB cable from the camcorder and the printer 1 Touch [END]. 2 Remove the USB cable from the beginning. • ...

Operating Guide
Page 80
... turn the LCD backlight on/off pressing and holding DISP/BATT INFO. Close the LCD screen (p.20). 80 Cancel Easy Handycam operation (p.27). You cannot turn the LCD backlight off. • During Easy Handycam operation (p.24), you change the aspect ratio of the image, the aspect ratio of... switch to the selected one (p.23). The buttons on the touch panel do not work correctly or do not appear on the touch panel. • Touch the LCD screen lightly. • Press DISP/BATT INFO on your camcorder (or DISPLAY on the screen. • They may be warning indicators or messages (p.88)....
... turn the LCD backlight on/off pressing and holding DISP/BATT INFO. Close the LCD screen (p.20). 80 Cancel Easy Handycam operation (p.27). You cannot turn the LCD backlight off. • During Easy Handycam operation (p.24), you change the aspect ratio of the image, the aspect ratio of... switch to the selected one (p.23). The buttons on the touch panel do not work correctly or do not appear on the touch panel. • Touch the LCD screen lightly. • Press DISP/BATT INFO on your camcorder (or DISPLAY on the screen. • They may be warning indicators or messages (p.88)....

Operating Guide
Page 97
...make the LCD screen dirty, use your camcorder is recommended you are using your camcorder but it may cause a malfunction of your camcorder. • If your camcorder at the seaside. • Store the lens in optimum state for a long period of the LCD screen may not work correctly. When ... or dust. • To prevent mold, periodically clean the lens as described above substances on the LCD screen. CALIBRATION 1/3 Touch the "x" CANCEL 4 Touch the "×" displayed on the touch panel may heat up the (PLAY/EDIT) lamp. 2 Remove cables other settings even when the POWER switch...
...make the LCD screen dirty, use your camcorder is recommended you are using your camcorder but it may cause a malfunction of your camcorder. • If your camcorder at the seaside. • Store the lens in optimum state for a long period of the LCD screen may not work correctly. When ... or dust. • To prevent mold, periodically clean the lens as described above substances on the LCD screen. CALIBRATION 1/3 Touch the "x" CANCEL 4 Touch the "×" displayed on the touch panel may heat up the (PLAY/EDIT) lamp. 2 Remove cables other settings even when the POWER switch...


