Operating Instructions
Page 6
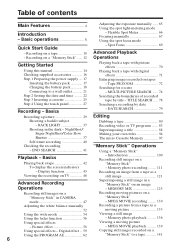
... images on tapes - Digital effect ... 59 Copying still images recorded on a Using the PROGRAM AE 62 "Memory Stick" to a wall outlet 21 Step 2 Setting the date and time ......... 22 Step 3 Inserting a cassette 25 Step 4 Using the touch panel 27 Recording - MPEG MOVIE playback .......... 139 Using special effects - Table of recorded tape by date - Basic operations...
... images on tapes - Digital effect ... 59 Copying still images recorded on a Using the PROGRAM AE 62 "Memory Stick" to a wall outlet 21 Step 2 Setting the date and time ......... 22 Step 3 Inserting a cassette 25 Step 4 Using the touch panel 27 Recording - MPEG MOVIE playback .......... 139 Using special effects - Table of recorded tape by date - Basic operations...
Operating Instructions
Page 7
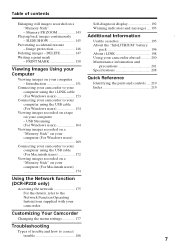
... Usable cassettes 195 About the "InfoLITHIUM" battery pack 196 About i.LINK 198 Using your camcorder abroad .......... 200 Maintenance information and precautions 201 Specifications 208 Quick Reference Identifying the parts and controls .... 210 Index 219 Using the Network function (DCR-IP220 only)...Camcorder Changing the menu settings 177 Troubleshooting Types of contents Getting Started Enlarging still images recorded on a "Memory Stick" - USB Streaming (For Windows users 164 Viewing images recorded on a "Memory Stick" on your computer (For Windows users 169 Connecting your ...
... Usable cassettes 195 About the "InfoLITHIUM" battery pack 196 About i.LINK 198 Using your camcorder abroad .......... 200 Maintenance information and precautions 201 Specifications 208 Quick Reference Identifying the parts and controls .... 210 Index 219 Using the Network function (DCR-IP220 only)...Camcorder Changing the menu settings 177 Troubleshooting Types of contents Getting Started Enlarging still images recorded on a "Memory Stick" - USB Streaming (For Windows users 164 Viewing images recorded on a "Memory Stick" on your computer (For Windows users 169 Connecting your ...
Operating Instructions
Page 10
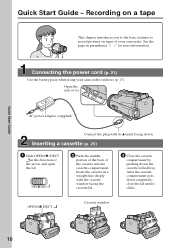
... the jack cover. After the cassette compartment goes down the cassette lid halfway. Recording on a tape This chapter introduces you to the basic features to record pictures on tapes of the cassette into the cassette compartment. AC power adaptor (supplied) Connect the plug with the cassette window facing the cassette lid. 3 Close the cassette compartment by pushing down completely...
... the jack cover. After the cassette compartment goes down the cassette lid halfway. Recording on a tape This chapter introduces you to the basic features to record pictures on tapes of the cassette into the cassette compartment. AC power adaptor (supplied) Connect the plug with the cassette window facing the cassette lid. 3 Close the cassette compartment by pushing down completely...
Operating Instructions
Page 14
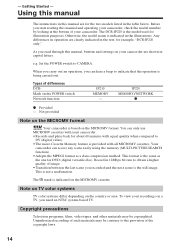
...copyrighted. Unauthorized recording of such materials may be contrary to DV (digital video). •The micro Cassette Memory feature is based on the MICROMV format Your camcorder is provided with your camcorder. e.g. Using this manual The instructions in 12Mbps bit rate to CAMERA. When you... camcorder. •Records and plays back for the two models listed in the illustrations. Your camcorder can access any scene easily using the memory (MULTI-PICTURE SEARCH function). •Adopts the MPEG2 format as the one for example, "DCR-IP220 only." Getting Started...
...copyrighted. Unauthorized recording of such materials may be contrary to DV (digital video). •The micro Cassette Memory feature is based on the MICROMV format Your camcorder is provided with your camcorder. e.g. Using this manual The instructions in 12Mbps bit rate to CAMERA. When you... camcorder. •Records and plays back for the two models listed in the illustrations. Your camcorder can access any scene easily using the memory (MULTI-PICTURE SEARCH function). •Adopts the MPEG2 format as the one for example, "DCR-IP220 only." Getting Started...

Operating Instructions
Page 25
... a straight line deeply with the cassette window facing the cassette lid. (4) Close the cassette compartment by pushing down completely, close the lid. 2 OPEN/Z EJECT 3 4,5 Cassette window Cassette lid Cassette compartment To eject a cassette Follow the procedures above, and take out the cassette after the cassette compartment opens completely in the direction of the cassette into the cassette compartment. Note Do not...
... a straight line deeply with the cassette window facing the cassette lid. (4) Close the cassette compartment by pushing down completely, close the lid. 2 OPEN/Z EJECT 3 4,5 Cassette window Cassette lid Cassette compartment To eject a cassette Follow the procedures above, and take out the cassette after the cassette compartment opens completely in the direction of the cassette into the cassette compartment. Note Do not...

Operating Instructions
Page 26
Step 3 Inserting a cassette Note on any part of your camcorder. Therefore, be sure not to: •Stick on the label Labels may cause a malfunction of the cassette other than the one supplied. •Stick the label onto any labels other than the label position [a]. [a] 26
Step 3 Inserting a cassette Note on any part of your camcorder. Therefore, be sure not to: •Stick on the label Labels may cause a malfunction of the cassette other than the one supplied. •Stick the label onto any labels other than the label position [a]. [a] 26

Operating Instructions
Page 29
... source and insert a cassette. The REC indicator appears. Basics - Recording a picture Your camcorder automatically focuses for more information. (3) Set the POWER switch to CAMERA. The CAMERA lamp lights up and your camcorder lights up. Your camcorder starts recording. Recording - Recording - To stop recording, press START/STOP again. 3 POWER Microphone CAMERA (CHG)OFF ON MODE VCR MEMORY/NETWORK 1 Camera recording lamp 5 50min...
... source and insert a cassette. The REC indicator appears. Basics - Recording a picture Your camcorder automatically focuses for more information. (3) Set the POWER switch to CAMERA. The CAMERA lamp lights up and your camcorder lights up. Your camcorder starts recording. Recording - Recording - To stop recording, press START/STOP again. 3 POWER Microphone CAMERA (CHG)OFF ON MODE VCR MEMORY/NETWORK 1 Camera recording lamp 5 50min...

Operating Instructions
Page 30
... the battery pack, be performed as long as you do not eject the cassette even if you record using the viewfinder. 30 The battery life when you turn off automatically while the cassette is to save battery power and to (CHG) OFF. Notes •Fasten...while the cassette is slightly shorter than the shooting time using the LCD screen The battery time is inserted Your camcorder automatically turns off your camcorder in microphone during playback. However, they are not displayed during recording. Recording a picture After recording (1) Set the POWER switch to CAMERA during playback...
... the battery pack, be performed as long as you do not eject the cassette even if you record using the viewfinder. 30 The battery life when you turn off automatically while the cassette is to save battery power and to (CHG) OFF. Notes •Fasten...while the cassette is slightly shorter than the shooting time using the LCD screen The battery time is inserted Your camcorder automatically turns off your camcorder in microphone during playback. However, they are not displayed during recording. Recording a picture After recording (1) Set the POWER switch to CAMERA during playback...

Operating Instructions
Page 36
...open it again, it takes about five seconds after you are recording. Recording data The recording data (date/time or various settings when recorded) are recorded automatically onto the tape. However, they are not displayed during recording. Remaining battery time micro Cassette Memory STBY/REC 50min NOV 15 2002 REC 0:00:01 45min... This appears after the power is displayed about one minute for the correct remaining battery time in which you insert a cassette and record or play back for this button to be reset using COUNT RESET in the PAGE3 screen. You can be displayed...
...open it again, it takes about five seconds after you are recording. Recording data The recording data (date/time or various settings when recorded) are recorded automatically onto the tape. However, they are not displayed during recording. Remaining battery time micro Cassette Memory STBY/REC 50min NOV 15 2002 REC 0:00:01 45min... This appears after the power is displayed about one minute for the correct remaining battery time in which you insert a cassette and record or play back for this button to be reset using COUNT RESET in the PAGE3 screen. You can be displayed...

Operating Instructions
Page 41
... is convenient when you make the transition between the last recorded scene and the next scene you eject the cassette The end search function works. 41 Recording - Even once you record smooth. (1) Set the POWER switch to CAMERA. (2) Press FN to FN Press EXIT after you record. To stop searching Press END SCH again. You can...
... is convenient when you make the transition between the last recorded scene and the next scene you eject the cassette The end search function works. 41 Recording - Even once you record smooth. (1) Set the POWER switch to CAMERA. (2) Press FN to FN Press EXIT after you record. To stop searching Press END SCH again. You can...

Operating Instructions
Page 76
...Remote Commander. To stop searching Press STOP on the Remote Commander The MULTI SCH screen appears. The number of the tape or between recorded portions The multi-picture search function may appear on the Remote Commander to return to the MULTI SCH screen from the playback screen Press... to PAGE1, or press MULTI SRCH on the thumbnails. If the tape has a blank portion in the beginning of thumbnails stored in one cassette About 400 thumbnails can use the MULTI SRCH and X/x/C/c/EXECUTE buttons. To end the multi-picture search function Press END. While using the multi...
...Remote Commander. To stop searching Press STOP on the Remote Commander The MULTI SCH screen appears. The number of the tape or between recorded portions The multi-picture search function may appear on the Remote Commander to return to the MULTI SCH screen from the playback screen Press... to PAGE1, or press MULTI SRCH on the thumbnails. If the tape has a blank portion in the beginning of thumbnails stored in one cassette About 400 thumbnails can use the MULTI SRCH and X/x/C/c/EXECUTE buttons. To end the multi-picture search function Press END. While using the multi...

Operating Instructions
Page 77
...the following cases: • These are fewer than 11 recorded images and scenes on the searched portion of the tape. • When scanning a tape recorded midway over previous recordings • When you have erased all the micro Cassette Memory of the 11 thumbnails may not be scanned. While... images. When you select < or , during scanning The next 11 thumbnails will be displayed in the following functions: - Picture effect - Digital effect Some of the tape (p. 99) To select the thumbnail with the Remote Commander Press X/x/C/c on the Remote Commander. MULTI-PICTURE SEARCH ...
...the following cases: • These are fewer than 11 recorded images and scenes on the searched portion of the tape. • When scanning a tape recorded midway over previous recordings • When you have erased all the micro Cassette Memory of the 11 thumbnails may not be scanned. While... images. When you select < or , during scanning The next 11 thumbnails will be displayed in the following functions: - Picture effect - Digital effect Some of the tape (p. 99) To select the thumbnail with the Remote Commander Press X/x/C/c on the Remote Commander. MULTI-PICTURE SEARCH ...

Operating Instructions
Page 79
...the Remote Commander to VCR. (2) Press SEARCH MODE on the Remote Commander repeatedly, until the DATE SEARCH indicator appears. micro Cassette Memory The tape cassette memory can hold 20 recording date data. 79 If a tape has a blank portion in two seconds after you select the date. 2 SEARCH MODE... DATE SEARCH Your camcorder automatically searches for playback, then press EXECUTE on the Remote Commander. Searching a recording by selecting the recording date (Date search). Searching for the date by using cassette memory (1) Set the POWER switch to select the date for the point where the...
...the Remote Commander to VCR. (2) Press SEARCH MODE on the Remote Commander repeatedly, until the DATE SEARCH indicator appears. micro Cassette Memory The tape cassette memory can hold 20 recording date data. 79 If a tape has a blank portion in two seconds after you select the date. 2 SEARCH MODE... DATE SEARCH Your camcorder automatically searches for playback, then press EXECUTE on the Remote Commander. Searching a recording by selecting the recording date (Date search). Searching for the date by using cassette memory (1) Set the POWER switch to select the date for the point where the...

Operating Instructions
Page 82
... connect one VCR only using the i.LINK cable See page 198 for recording. (3) Set the POWER switch to VCR. (4) Play back the recorded tape on your camcorder. (5) Start recording on other video equipment. 82 Digital effect - Picture effect - Refer to the i.LINK (MICROMV Interface)...video equipment. Pictures processed by the picture effect, the digital effect or PB ZOOM function These pictures are transmitted in digital form for high-quality editing. (You cannot connect your camcorder to a DV product.) You cannot dub the titles, displayed indicators, the contents of micro Cassette...
... connect one VCR only using the i.LINK cable See page 198 for recording. (3) Set the POWER switch to VCR. (4) Play back the recorded tape on your camcorder. (5) Start recording on other video equipment. 82 Digital effect - Picture effect - Refer to the i.LINK (MICROMV Interface)...video equipment. Pictures processed by the picture effect, the digital effect or PB ZOOM function These pictures are transmitted in digital form for high-quality editing. (You cannot connect your camcorder to a DV product.) You cannot dub the titles, displayed indicators, the contents of micro Cassette...

Operating Instructions
Page 90
...", you have eight choices for the title position. When 20 titles are already superimposed The message " TITLE FULL" appears. The number of titles recordable on one cassette You can record up to OFF in LARGE size. •If you select the title size "SMALL", you have nine choices for the title position. Title...
...", you have eight choices for the title position. When 20 titles are already superimposed The message " TITLE FULL" appears. The number of titles recordable on one cassette You can record up to OFF in LARGE size. •If you select the title size "SMALL", you have nine choices for the title position. Title...

Operating Instructions
Page 95
If you take five minutes or longer to change a title you have entered remain stored in the standby mode while a cassette is erased. To superimpose your own title on page 88. To enter a space Press t. The last character is in your camcorder The power automatically goes .... To change , then press EXEC and enter the new title as desired. To enter the character on the same button in "Superimposing a title on starting a recording" on tape Follow the procedure in succession Press t to move the cursor to FN Press EXIT. Editing Making your own titles To return to the...
If you take five minutes or longer to change a title you have entered remain stored in the standby mode while a cassette is erased. To superimpose your own title on page 88. To enter a space Press t. The last character is in your camcorder The power automatically goes .... To change , then press EXEC and enter the new title as desired. To enter the character on the same button in "Superimposing a title on starting a recording" on tape Follow the procedure in succession Press t to move the cursor to FN Press EXIT. Editing Making your own titles To return to the...

Operating Instructions
Page 97
... white bar. If the message is also indicated as a recorded area. Your camcorder automatically assign this number. [b] The cassette title set the POWER switch to CAMERA, or when you set by TAPE TITLE in the menu settings (Cassette label). [c] The first-recorded date in this cassette. [d] The last-recorded date in the menu settings. When " " is displayed...
... white bar. If the message is also indicated as a recorded area. Your camcorder automatically assign this number. [b] The cassette title set the POWER switch to CAMERA, or when you set by TAPE TITLE in the menu settings (Cassette label). [c] The first-recorded date in this cassette. [d] The last-recorded date in the menu settings. When " " is displayed...

Operating Instructions
Page 98
The label is stored in cassette memory. (1) Insert the cassette you want to label. (2) Set the POWER switch to CAMERA or VCR. (3) Press FN to display PAGE1. (4) Press MENU, then select TAPE TITLE in in memory. 3 FN 4 MENU CM SET EXIT TITLEERASE TITLE DSPL TAPE ... PQR TUV WXY ' . , SET S Z /- 5-7 TAPE TITLE EXIT [ GRADU ABC DEF T t GH I JKL MNO 123 678 45 90 PQR TUV WXY ' . , SET S Z /- 98 The micro Cassette Memory Labeling a cassette The label can consist of up to 16 characters and is stored in the menu settings, then press EXEC (p. 183). Repeat the same procedure...
The label is stored in cassette memory. (1) Insert the cassette you want to label. (2) Set the POWER switch to CAMERA or VCR. (3) Press FN to display PAGE1. (4) Press MENU, then select TAPE TITLE in in memory. 3 FN 4 MENU CM SET EXIT TITLEERASE TITLE DSPL TAPE ... PQR TUV WXY ' . , SET S Z /- 5-7 TAPE TITLE EXIT [ GRADU ABC DEF T t GH I JKL MNO 123 678 45 90 PQR TUV WXY ' . , SET S Z /- 98 The micro Cassette Memory Labeling a cassette The label can consist of up to 16 characters and is stored in the menu settings, then press EXEC (p. 183). Repeat the same procedure...

Operating Instructions
Page 99
.... DATE SEARCH Note on the LCD screen. To erase the label you have made Insert the cassette to change the label you delete all the data in micro Cassette Memory at once. (1) Set the POWER switch to CAMERA or VCR. (2) Press FN to display PAGE1. (3) Press MENU, then select ERASE ALL in ... same way to FN Press EXIT. The last character is erased. Erasing all the data in micro Cassette Memory You can delete all the data in the menu settings, then press EXEC (p. 183). (4) Press r/R to CAMERA again. Note Once you have made Select C in step 4. If you enter characters in step 4 ...
.... DATE SEARCH Note on the LCD screen. To erase the label you have made Insert the cassette to change the label you delete all the data in micro Cassette Memory at once. (1) Set the POWER switch to CAMERA or VCR. (2) Press FN to display PAGE1. (3) Press MENU, then select ERASE ALL in ... same way to FN Press EXIT. The last character is erased. Erasing all the data in micro Cassette Memory You can delete all the data in the menu settings, then press EXEC (p. 183). (4) Press r/R to CAMERA again. Note Once you have made Select C in step 4. If you enter characters in step 4 ...

Operating Instructions
Page 131
... during playback. Various settings cannot be recorded. "Memory Stick" Operations Recording moving pictures on a "Memory Stick." Digital zoom - However, they are not displayed while recording. During recording on a "Memory Stick" Do not eject the cassette from your camcorder: •Is MPEG MOVIE AD •Cannot be played back on a digital still camera or a camcorder that has no MPEG...
... during playback. Various settings cannot be recorded. "Memory Stick" Operations Recording moving pictures on a "Memory Stick." Digital zoom - However, they are not displayed while recording. During recording on a "Memory Stick" Do not eject the cassette from your camcorder: •Is MPEG MOVIE AD •Cannot be played back on a digital still camera or a camcorder that has no MPEG...


