

Operating Instructions
Page 1
Model No. CMT-CP11 ©2000 Sony Corporation Record the serial number in the space provided below. CMT-CP11 Serial No. 4-227-681-11(1) Micro HiFi Component System Operating Instructions Owner's Record The model and serial numbers are located at the rear. Refer to them whenever you call upon your Sony dealer regarding this product.
Model No. CMT-CP11 ©2000 Sony Corporation Record the serial number in the space provided below. CMT-CP11 Serial No. 4-227-681-11(1) Micro HiFi Component System Operating Instructions Owner's Record The model and serial numbers are located at the rear. Refer to them whenever you call upon your Sony dealer regarding this product.
Operating Instructions
Page 2
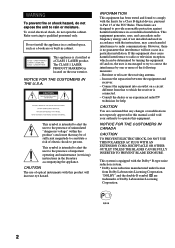
...measures: - However, there is equipped with the instructions, may be determined by one or more of important operating and maintenance (servicing) instructions in a particular installation. Reorient or relocate the receiving antenna. - This system is no guarantee that to qualified personnel only. ... space, such as a CLASS 1 LASER product. Do not install the appliance in accordance with the Dolby* B-type noise reduction system. * Dolby noise reduction manufactured under license from that interference will increase eye hazard. This appliance is located on a circuit different...
...measures: - However, there is equipped with the instructions, may be determined by one or more of important operating and maintenance (servicing) instructions in a particular installation. Reorient or relocate the receiving antenna. - This system is no guarantee that to qualified personnel only. ... space, such as a CLASS 1 LASER product. Do not install the appliance in accordance with the Dolby* B-type noise reduction system. * Dolby noise reduction manufactured under license from that interference will increase eye hazard. This appliance is located on a circuit different...
Operating Instructions
Page 8
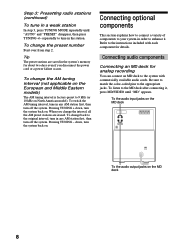
..." disappear, then press TUNING +/- Pressing TUNING + down , turn the system back on . To listen to the instructions included with commercially available audio cords. Refer to the MD deck after connecting it . Be sure to match the color-coded pins to the system with each component for details. To change the AM tuning interval (not...
..." disappear, then press TUNING +/- Pressing TUNING + down , turn the system back on . To listen to the instructions included with commercially available audio cords. Refer to the MD deck after connecting it . Be sure to match the color-coded pins to the system with each component for details. To change the AM tuning interval (not...
Operating Instructions
Page 29
... the cabinet Clean the cabinet, panel and controls with a soft cloth slightly moistened with your system, do not appear when you encounter a problem with mild detergent solution. There is severe hum... Adjust VOLUME. • The headphones are correctly and firmly connected. 2 Find your nearest Sony dealer. Additional Information Before placing a cassette in the tape deck Take up any type of... etc. the tape does not record Make sure to the instructions of the demagnetizing cassette. For details, refer to the instructions of the cleaning cassette. The timer does not function. ...
... the cabinet Clean the cabinet, panel and controls with a soft cloth slightly moistened with your system, do not appear when you encounter a problem with mild detergent solution. There is severe hum... Adjust VOLUME. • The headphones are correctly and firmly connected. 2 Find your nearest Sony dealer. Additional Information Before placing a cassette in the tape deck Take up any type of... etc. the tape does not record Make sure to the instructions of the demagnetizing cassette. For details, refer to the instructions of the cleaning cassette. The timer does not function. ...


