Operating Instructions
Page 1
Model No. CMT-CP1 Serial No. Refer to them whenever you call upon your Sony dealer regarding this product. Record the serial number in the space provided below. CMT-CP1 ©1998 by Sony Corporation 3-865-909-14(1) Micro HiFi Component System Operating Instructions Owner's Record The model and serial numbers are located on the rear of the system.
Model No. CMT-CP1 Serial No. Refer to them whenever you call upon your Sony dealer regarding this product. Record the serial number in the space provided below. CMT-CP1 ©1998 by Sony Corporation 3-865-909-14(1) Micro HiFi Component System Operating Instructions Owner's Record The model and serial numbers are located on the rear of the system.
Operating Instructions
Page 2
...and on the rear exterior. CAUTION The use of optical instruments with the instructions, may be determined by one or more of important operating and maintenance (servicing) instructions in accordance with this equipment does cause harmful interference to radio or television reception...against harmful interference in a particular installation. Reorient or relocate the receiving antenna. - "DOLBY" and the double-D symbol ; This system is connected. - are designed to which can radiate radio frequency energy and, if not installed and used in the literature accompanying ...
...and on the rear exterior. CAUTION The use of optical instruments with the instructions, may be determined by one or more of important operating and maintenance (servicing) instructions in accordance with this equipment does cause harmful interference to radio or television reception...against harmful interference in a particular installation. Reorient or relocate the receiving antenna. - "DOLBY" and the double-D symbol ; This system is connected. - are designed to which can radiate radio frequency energy and, if not installed and used in the literature accompanying ...
Operating Instructions
Page 8
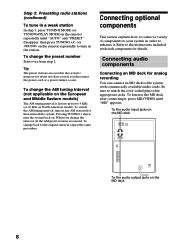
... instructions included with commercially available audio cords. To listen to 9 kHz (or 10 kHz on the European and Middle Eastern models) The AM tuning interval is factory-preset to the MD deck after connecting it . To change the interval, all the AM preset stations are saved in the system's... to enhance it , press MD/VIDEO until "AUTO" and "PRESET" disappear, then press TUNING +/- (or j/J on the remote) repeatedly to the system with each component for about two days even if you change the preset number Start over from step 2. To change the AM tuning interval (not applicable on...
... instructions included with commercially available audio cords. To listen to 9 kHz (or 10 kHz on the European and Middle Eastern models) The AM tuning interval is factory-preset to the MD deck after connecting it . To change the interval, all the AM preset stations are saved in the system's... to enhance it , press MD/VIDEO until "AUTO" and "PRESET" disappear, then press TUNING +/- (or j/J on the remote) repeatedly to the system with each component for about two days even if you change the preset number Start over from step 2. To change the AM tuning interval (not applicable on...
Operating Instructions
Page 31
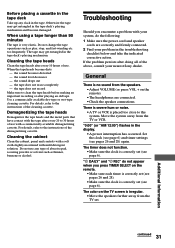
...For details, refer to clean the tape heads before making an important recording or after every 10 hours of the above, consult your nearest Sony dealer. Demagnetizing the tape heads Demagnetize the tape heads and the metal parts that have contact with the tape after doing all of use.... - Use a commercially available dry-type or wet-type cleaning cassette. If the problem persists after every 20 to the instructions of use any slack in the tape. Move the system away from the TV set (see page 6). Troubleshooting Should you press TIMER SELECT on the remote. •Make sure ...
...For details, refer to clean the tape heads before making an important recording or after every 10 hours of the above, consult your nearest Sony dealer. Demagnetizing the tape heads Demagnetize the tape heads and the metal parts that have contact with the tape after doing all of use.... - Use a commercially available dry-type or wet-type cleaning cassette. If the problem persists after every 20 to the instructions of use any slack in the tape. Move the system away from the TV set (see page 6). Troubleshooting Should you press TIMER SELECT on the remote. •Make sure ...


