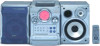
Operating Instructions
Page 3
... to the radio - Sleep Timer 22 Waking up the system 6 Inserting two R6 (size AA) batteries into the remote 7 Setting the time 8 Saving the power in standby mode 8 CD Loading a CD 9 Playing a CD - Manual Recording 19 Timer recording radio programs 19 Sound ... Adjusting the sound - Station Name 16 Using the Radio Data System (RDS)* .... 16 Tape - Program Play 11 Using the CD display 12 Labeling a CD - Daily Timer 22 Optional Components Hooking up the optional components ..... 23 Additional Information Precautions 24 Troubleshooting 26 Messages 29 Specifications 29...
... to the radio - Sleep Timer 22 Waking up the system 6 Inserting two R6 (size AA) batteries into the remote 7 Setting the time 8 Saving the power in standby mode 8 CD Loading a CD 9 Playing a CD - Manual Recording 19 Timer recording radio programs 19 Sound ... Adjusting the sound - Station Name 16 Using the Radio Data System (RDS)* .... 16 Tape - Program Play 11 Using the CD display 12 Labeling a CD - Daily Timer 22 Optional Components Hooking up the optional components ..... 23 Additional Information Precautions 24 Troubleshooting 26 Messages 29 Specifications 29...
Operating Instructions
Page 4
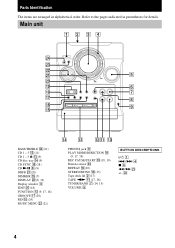
Refer to the pages indicated in alphabetical order. ql 6 qk 7 qj 8 qh 9 qg BASS/TREBLE ws (21) CD 1 - 3 qd (11) CD 1 - 3 Z qd (9) CD disc tray qf (9) CD SYNC ql (18) CD NX 8 (9) DBFB wa (20) DIMMER qg (7) DISPLAY wd (8, 12) Display window 3 EDIT w; (18) FUNCTION qs (9, 17, 18) GROOVE qj (20) MD 0 (24) MUSIC MENU ws...
Refer to the pages indicated in alphabetical order. ql 6 qk 7 qj 8 qh 9 qg BASS/TREBLE ws (21) CD 1 - 3 qd (11) CD 1 - 3 Z qd (9) CD disc tray qf (9) CD SYNC ql (18) CD NX 8 (9) DBFB wa (20) DIMMER qg (7) DISPLAY wd (8, 12) Display window 3 EDIT w; (18) FUNCTION qs (9, 17, 18) GROOVE qj (20) MD 0 (24) MUSIC MENU ws...
Operating Instructions
Page 7
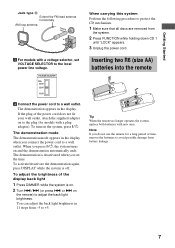
...the display when you press ?/1, the system turns on the system, press ?/1. Getting Started Jack type B Extend the FM lead antenna horizontally AM loop antenna CFMOA7X5IAL AM When carrying this system Perform the following procedure to protect the CD mechanism. 1 Make sure that all ...discs are removed from the system. 2 Press FUNCTION while holding down CD 1 until "LOCK" appears. 3 Unplug the power cord. 3 For...
...the display when you press ?/1, the system turns on the system, press ?/1. Getting Started Jack type B Extend the FM lead antenna horizontally AM loop antenna CFMOA7X5IAL AM When carrying this system Perform the following procedure to protect the CD mechanism. 1 Make sure that all ...discs are removed from the system. 2 Press FUNCTION while holding down CD 1 until "LOCK" appears. 3 Unplug the power cord. 3 For...
Operating Instructions
Page 9
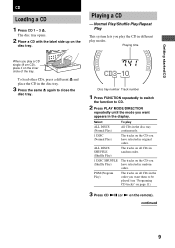
...time When you (Shuffle Play) have selected in random order. continued 9 The disc tray opens. 2 Place a CD with the label side up on the remote). Normal Play/Shuffle Play/Repeat Play This system lets you want them to close the disc tray. Disc tray number Track number 1 Press FUNCTION repeatedly to... switch the function to CD. 2 Press PLAY MODE/DIRECTION repeatedly until the mode you want appears in ...
...time When you (Shuffle Play) have selected in random order. continued 9 The disc tray opens. 2 Place a CD with the label side up on the remote). Normal Play/Shuffle Play/Repeat Play This system lets you want them to close the disc tray. Disc tray number Track number 1 Press FUNCTION repeatedly to... switch the function to CD. 2 Press PLAY MODE/DIRECTION repeatedly until the mode you want appears in ...
Operating Instructions
Page 10
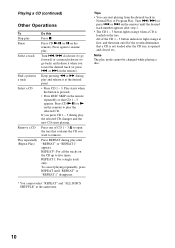
... back) and release it at first, and then turn on/off if the system determines that a CD is not loaded after step 1. • The CD 1 - 3 button lights orange when a CD is loaded on the remote repeatedly so that contains the CD you press CD 1 - 3 during play . Tips • You can start playing from the desired track...
... back) and release it at first, and then turn on/off if the system determines that a CD is not loaded after step 1. • The CD 1 - 3 button lights orange when a CD is loaded on the remote repeatedly so that contains the CD you press CD 1 - 3 during play . Tips • You can start playing from the desired track...
Operating Instructions
Page 11
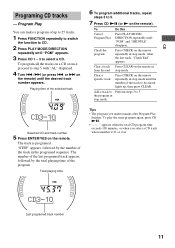
... of the last programed track appears, followed by the number of the selected track 6 To program additional tracks, repeat steps 3 to 5. 7 Press CD NX (or N on a CD at once, proceed to step 5 with "AL" displayed. 4 Turn ./> (or press . Program Play You can make a program of the track...desired track number appears. or > on the remote in the programed sequence. Add a track to Perform steps 3 to select a CD. The track is 21 or over. CD Programing CD tracks - To Cancel Program Play Do this Press PLAY MODE/ DIRECTION repeatedly until the number of up , then press CLEAR. ...
... of the last programed track appears, followed by the number of the selected track 6 To program additional tracks, repeat steps 3 to 5. 7 Press CD NX (or N on a CD at once, proceed to step 5 with "AL" displayed. 4 Turn ./> (or press . Program Play You can make a program of the track...desired track number appears. or > on the remote in the programed sequence. Add a track to Perform steps 3 to select a CD. The track is 21 or over. CD Programing CD tracks - To Cancel Program Play Do this Press PLAY MODE/ DIRECTION repeatedly until the number of up , then press CLEAR. ...
Operating Instructions
Page 12
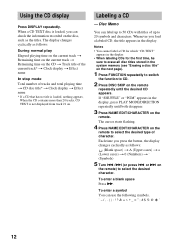
... stored in the display. or > on the next page). 1 Press FUNCTION repeatedly to switch the function to 50 CDs with titles of character. Each time you load a labeled CD, the title appears in the system memory (see "Erasing a disc title" on the remote) to 20 symbols and characters. To enter a blank space Press...
... stored in the display. or > on the next page). 1 Press FUNCTION repeatedly to switch the function to 50 CDs with titles of character. Each time you load a labeled CD, the title appears in the system memory (see "Erasing a disc title" on the remote) to 20 symbols and characters. To enter a blank space Press...

Operating Instructions
Page 13
...) until "Name Check ?" appears in the display. You cannot insert characters. 8 Press ENTER/YES on the remote to select the disc titles stored in the system memory between 01 and 50. or > on the remote. 3 Turn ./> (or press . appears. or > on the remote twice. "Complete!" If you made a ... you want to 3. or > on the remote in stop mode. 2 Turn ./> (or press . To erase a character Press m or M until "All Erase?" CD 6 Press M. To erase all disc titles, turn ./> (or press . To cancel erasing Press MENU/NO on the remote) until the cursor shifts to the character...
...) until "Name Check ?" appears in the display. You cannot insert characters. 8 Press ENTER/YES on the remote to select the disc titles stored in the system memory between 01 and 50. or > on the remote. 3 Turn ./> (or press . appears. or > on the remote twice. "Complete!" If you made a ... you want to 3. or > on the remote in stop mode. 2 Turn ./> (or press . To erase a character Press m or M until "All Erase?" CD 6 Press M. To erase all disc titles, turn ./> (or press . To cancel erasing Press MENU/NO on the remote) until the cursor shifts to the character...
Operating Instructions
Page 16
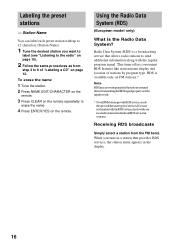
...station name appears in is not transmitting the RDS signal properly or if the signal is the Radio Data System? Receiving RDS broadcasts Simply select a station from step 3 to 8 of "Labeling a CD" on the remote. To erase the name 1 Tune the station. 2 Press NAME EDIT/CHARACTER on the... Follow the same procedures as from the FM band. Station Name You can label each preset station with your area. Using the Radio Data System (RDS) (European model only) What is weak. * NotallFMstationsprovideRDSservice,nordo they provide the same types of stations by program type. Labeling the ...
...station name appears in is not transmitting the RDS signal properly or if the signal is the Radio Data System? Receiving RDS broadcasts Simply select a station from step 3 to 8 of "Labeling a CD" on the remote. To erase the name 1 Tune the station. 2 Press NAME EDIT/CHARACTER on the... Follow the same procedures as from the FM band. Station Name You can label each preset station with your area. Using the Radio Data System (RDS) (European model only) What is weak. * NotallFMstationsprovideRDSservice,nordo they provide the same types of stations by program type. Labeling the ...
Operating Instructions
Page 18
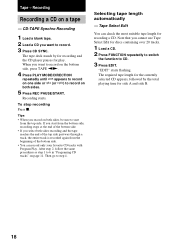
...the end of the bottom side. • If you cannot use Tape Select Edit for side A and side B. 18 Recording starts. Then go to CD. 3 Press EDIT. "EDIT" starts flashing. To stop recording Press x. The tape deck stands by the total playing time for discs containing over 20 tracks.... 1 Load a CD. 2 Press FUNCTION repeatedly to switch the function to step 4. Recording Recording a CD on both sides recording and the tape reaches the end of the top side part-way through a track, ...
...the end of the bottom side. • If you cannot use Tape Select Edit for side A and side B. 18 Recording starts. Then go to CD. 3 Press EDIT. "EDIT" starts flashing. To stop recording Press x. The tape deck stands by the total playing time for discs containing over 20 tracks.... 1 Load a CD. 2 Press FUNCTION repeatedly to switch the function to step 4. Recording Recording a CD on both sides recording and the tape reaches the end of the top side part-way through a track, ...
Operating Instructions
Page 19
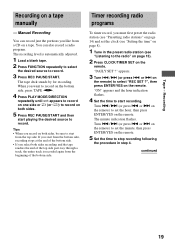
... recording level is recorded again from the top side. Tips • When you record on both sides. 5 Press REC PAUSE/START and then start from a CD on the remote. 5 Set the time to record. 3 Press REC PAUSE/START. The minute indication flashes. Turn ./> (or press . continued 19 Tape - The tape deck...
... recording level is recorded again from the top side. Tips • When you record on both sides. 5 Press REC PAUSE/START and then start from a CD on the remote. 5 Set the time to record. 3 Press REC PAUSE/START. The minute indication flashes. Turn ./> (or press . continued 19 Tape - The tape deck...
Operating Instructions
Page 22
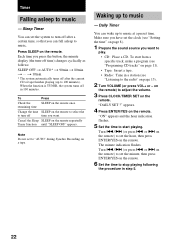
... remote. 6 Set the time to "AUTO" during Synchro Recording on a tape. Sleep Timer You can set the system to music - When the function is TUNER, the system turns off after the current CD or tape finishes playing (up to adjust the volume. 3 Press CLOCK/TIMER SET on the remote) to 100 minutes... You can fall asleep to the radio" on the remote) to music - Turn ./> (or press . Cancel the Sleep SLEEP on the remote. t 10min * The system automatically turns off time you press the button, the minute display (the turn off after a certain time, so that you have set the clock (see...
... remote. 6 Set the time to "AUTO" during Synchro Recording on a tape. Sleep Timer You can set the system to music - When the function is TUNER, the system turns off after the current CD or tape finishes playing (up to adjust the volume. 3 Press CLOCK/TIMER SET on the remote) to 100 minutes... You can fall asleep to the radio" on the remote) to music - Turn ./> (or press . Cancel the Sleep SLEEP on the remote. t 10min * The system automatically turns off time you press the button, the minute display (the turn off after a certain time, so that you have set the clock (see...
Operating Instructions
Page 23
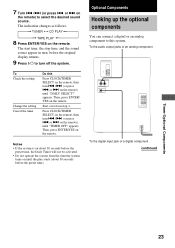
... changes as follows: t TUNER y CD PLAY T t TAPE PLAY T 8 Press ENTER/YES on the remote. or > on the remote. To the audio output jacks of an analog component To the digital input jack of a digital component continued Timer/Optional Components 23 7 Turn ./> (or press . Start over from the time the system turns on the remote, then...
... changes as follows: t TUNER y CD PLAY T t TAPE PLAY T 8 Press ENTER/YES on the remote. or > on the remote. To the audio output jacks of an analog component To the digital input jack of a digital component continued Timer/Optional Components 23 7 Turn ./> (or press . Start over from the time the system turns on the remote, then...
Operating Instructions
Page 25
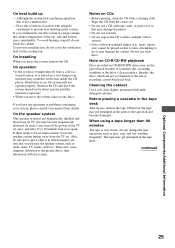
... Components/Additional Information 25 Place the system in a location with adequate ventilation to direct sunlight or heat sources. • Discs with the system. If you move the system, remove the CD. Do not use solvents. • Do not expose the CD to prevent heat build up - Note on CD-R/CD-... stop, and fast-winding frequently. If you move the system, take out any questions or problems concerning your system, please consult your nearest Sony dealer. Remove the CD and leave the system turned on TV sets may damage the system. In such a case, turn off the power of the...
... Components/Additional Information 25 Place the system in a location with adequate ventilation to direct sunlight or heat sources. • Discs with the system. If you move the system, remove the CD. Do not use solvents. • Do not expose the CD to prevent heat build up - Note on CD-R/CD-... stop, and fast-winding frequently. If you move the system, take out any questions or problems concerning your system, please consult your nearest Sony dealer. Remove the CD and leave the system turned on TV sets may damage the system. In such a case, turn off the power of the...
Operating Instructions
Page 27
... When you listen to a track with bass sounds at high volume, the speaker vibration may cause problems with your nearest Sony dealer. Press and hold m to return to turn off the system. "PROTECT" and "PUSH POWER" appear alternately. • Press ?/1 (power) to the desired playing position. Play ...; Cancel the Sleep Timer function (see page 26). • The tape has wound to the end. Trying to press the tray closed with the CD player. Demagnetize them . • The record/playback heads are magnetized. Clean them (see page 26). The timer does not function. • Press...
... When you listen to a track with bass sounds at high volume, the speaker vibration may cause problems with your nearest Sony dealer. Press and hold m to return to turn off the system. "PROTECT" and "PUSH POWER" appear alternately. • Press ?/1 (power) to the desired playing position. Play ...; Cancel the Sleep Timer function (see page 26). • The tape has wound to the end. Trying to press the tray closed with the CD player. Demagnetize them . • The record/playback heads are magnetized. Clean them (see page 26). The timer does not function. • Press...
Operating Instructions
Page 28
...settings you extend it fully. • Locate the antennas as far away from the speaker cords as possible. • Consult your nearest Sony dealer if the supplied AM antenna has come off the plastic stand. • Try turning off surrounding electrical equipments. 28 If you cannot... page 23) while checking: - on the connected component. • Refer to General item "There is no sound." If the system still does not operate properly after performing the above measures, reset the system as the preset stations, clock, timer and CD disc titles are firmly inserted all the way. &#...
...settings you extend it fully. • Locate the antennas as far away from the speaker cords as possible. • Consult your nearest Sony dealer if the supplied AM antenna has come off the plastic stand. • Try turning off surrounding electrical equipments. 28 If you cannot... page 23) while checking: - on the connected component. • Refer to General item "There is no sound." If the system still does not operate properly after performing the above measures, reset the system as the preset stations, clock, timer and CD disc titles are firmly inserted all the way. &#...
Operating Instructions
Page 29
...the cassette. Total harmonic distortion: less than 10% total harmonic distortion from 250 milli watts to label a CD TEXT disc. Open You performed a tape operation with no tape in the system. rated 50 watts per channel minimum RMS power, with the tape deck lid not completely shut. OVER You... have reached the end of the CD while pressing M during operation. Specifications Main Unit (HCD-CL3/CL1) Amplifier section For the U.S. CD Cannot Edit You tried to...
...the cassette. Total harmonic distortion: less than 10% total harmonic distortion from 250 milli watts to label a CD TEXT disc. Open You performed a tape operation with no tape in the system. rated 50 watts per channel minimum RMS power, with the tape deck lid not completely shut. OVER You... have reached the end of the CD while pressing M during operation. Specifications Main Unit (HCD-CL3/CL1) Amplifier section For the U.S. CD Cannot Edit You tried to...

Operating Instructions
Page 30
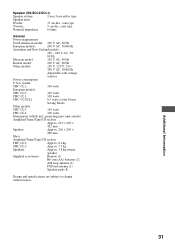
...CD player section System Laser Frequency response Compact disc and digital audio system Semiconductor laser (λ=780 nm) Emission duration: continuous 2 Hz - 20 kHz (±0.5 dB) Tape deck section Recording system... Frequency response Wow and flutter 4-track 2-channel stereo 40 - 13,000 Hz (±3 dB), using Sony... (6 ohms at 1 kHz, 10% THD) HCD-CL1: DIN power output (Rated):40 + 40 watts ...
...CD player section System Laser Frequency response Compact disc and digital audio system Semiconductor laser (λ=780 nm) Emission duration: continuous 2 Hz - 20 kHz (±0.5 dB) Tape deck section Recording system... Frequency response Wow and flutter 4-track 2-channel stereo 40 - 13,000 Hz (±3 dB), using Sony... (6 ohms at 1 kHz, 10% THD) HCD-CL1: DIN power output (Rated):40 + 40 watts ...
Operating Instructions
Page 31
Additional Information 31 Speaker (SS-SCL3/SCL1) Speaker system 2-way, bass-reflex type Speaker units Woofer: 17 cm dia., cone type Tweeter: 5 cm dia., cone type Nominal impedance 6 ohms General Power requirements North ...: Approx. 215 × 285 × 421 mm Speaker: Approx. 210 × 285 × 260 mm Mass Amplifier/Tuner/Tape/CD section: CHC-CL3: Approx. 8.0 kg CHC-CL1: Approx. 7.7 kg Speakers: Approx. 3.8 kg net per speaker Supplied accessories Remote (1) R6 (size AA) batteries (2) AM loop antenna (1) FM lead antenna (1) Speaker pads (8) Design and...
Additional Information 31 Speaker (SS-SCL3/SCL1) Speaker system 2-way, bass-reflex type Speaker units Woofer: 17 cm dia., cone type Tweeter: 5 cm dia., cone type Nominal impedance 6 ohms General Power requirements North ...: Approx. 215 × 285 × 421 mm Speaker: Approx. 210 × 285 × 260 mm Mass Amplifier/Tuner/Tape/CD section: CHC-CL3: Approx. 8.0 kg CHC-CL1: Approx. 7.7 kg Speakers: Approx. 3.8 kg net per speaker Supplied accessories Remote (1) R6 (size AA) batteries (2) AM loop antenna (1) FM lead antenna (1) Speaker pads (8) Design and...


