Sony CHC-CL1 Support Question
Sony CHC-CL1 Support Question
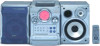
Find answers below for this question about Sony CHC-CL1 - Compact Hi Fi Component System.Need a Sony CHC-CL1 manual? We have 1 online manual for this item!
Question posted by dpage53134 on August 18th, 2011
My Chc-cl1 Drawer For Cds Will Not Open. It Has Been Moved Without The Lock Func
How to cancel LOCK function or what else may be wrong?
Current Answers
Related Sony CHC-CL1 Manual Pages
Operating Instructions - Page 1
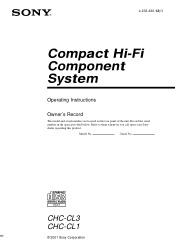
CHC-CL3 CHC-CL1
© 2001 Sony Corporation 4-233-430-12(1)
Compact Hi-Fi Component System
Operating Instructions
Owner's Record
The model and serial numbers are located on the rear panel of the unit. Refer to them whenever you call upon your Sony dealer regarding this product. Serial No. Model No.
Record the serial number in the space provided below.
Operating Instructions - Page 2
... of electric shock to constitute a risk of important operating and maintenance (servicing) instructions in cabinet. registered mark. To prevent fire or shock hazard, do not open the cabinet. This appliance is a U.S. Consult the dealer or an experienced radio/TV technician for a Class B digital device, pursuant to correct the interference by turning...
Operating Instructions - Page 3
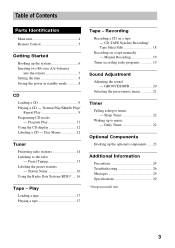
... ..... 23
Additional Information
Precautions 24 Troubleshooting 26 Messages 29 Specifications 29
* European model only
3 Daily Timer 22
Optional Components
Hooking up to music - Recording
Recording a CD on a tape manually - Table of Contents
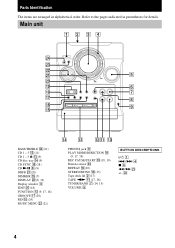
Parts Identification
Main unit 4 Remote Control 5
Getting Started
Hooking up the system 6 Inserting two R6 (size AA) batteries
into ...
Operating Instructions - Page 4
ql
6
qk
7
qj
8
qh
9
qg
BASS/TREBLE ws (21) CD 1 - 3 qd (11) CD 1 - 3 Z qd (9) CD disc tray qf (9) CD SYNC ql (18) CD NX 8 (9) DBFB wa (20) DIMMER qg (7) DISPLAY wd (8, 12) Display window 3 EDIT w; (18) FUNCTION qs (9, 17, 18) GROOVE qj (20) MD 0 (24) MUSIC MENU ws (21)
qf qd
qsqa 0
PHONES jack 9 PLAY MODE/DIRECTION...
Operating Instructions - Page 7
... horizontally
AM loop antenna
CFMOA7X5IAL
AM
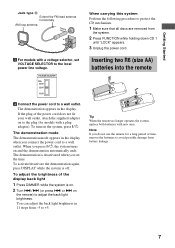
When carrying this system
Perform the following procedure to protect the CD mechanism.
1 Make sure that all discs are removed from
the system.
2 Press FUNCTION while holding down CD 1
until "LOCK" appears.
3 Unplug the power cord.
3 For models with a voltage selector, set the time. When you set VOLTAGE...
Operating Instructions - Page 9
... number
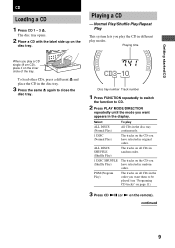
1 Press FUNCTION repeatedly to switch
the function to CD.
2 Press PLAY MODE/DIRECTION
repeatedly until the mode you play the CD in the disc tray.
3 Press the same Z again to be played (see "Programing CD tracks" on page 11).
3 Press CD NX (or N on the
disc tray.
Playing a CD
- The disc tray opens.
2 Place a CD with the label...
Operating Instructions - Page 10
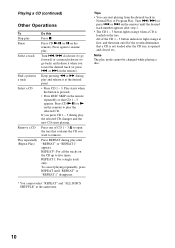
...cancel playing repeatedly, press REPEAT until "REPEAT" or "REPEAT 1" disappears.
* You cannot select "REPEAT" and "ALL DISCS SHUFFLE" at first, and then turn on/off if the system determines that a CD is not loaded after the CD...All of CD 1 - 3 Z to five times.
Press CD NX (or X on the CD up to open the tray that CD 1 - 3 appears. Keep pressing m or M during play the selected CD. REPEAT*:...
Operating Instructions - Page 11
...
Cancel Program Play
Do this
Press PLAY MODE/ DIRECTION repeatedly until the number of up , then press CLEAR.
Add a track to Perform steps 3 to step 5 with "AL" displayed.
4 Turn ./> (or press .
CD
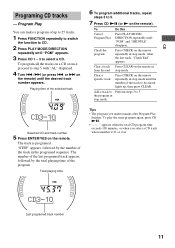
Programing CD tracks
- Program Play
You can make a program of the track to be erased lights up to 25 tracks.
1 Press FUNCTION...
Operating Instructions - Page 12
... the current track t Remaining time on the
remote. If "SHUFFLE" or "PGM" appears in the display, press PLAY MODE/DIRECTION repeatedly until the desired CD appears. or > on the next page).
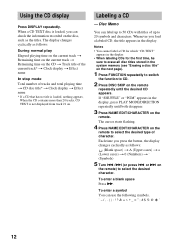
1 Press FUNCTION repeatedly to switch
the function to 20 symbols and characters.
Disc Memo
You can use the following symbols
12 When...
Operating Instructions - Page 13

...or press . or > on the remote during step 1 to select the disc titles stored in the system memory between 01 and 50.
To cancel erasing Press MENU/NO on
the remote) until "Name Erase ?"
appears, then press ENTER/YES on the remote in stop mode. Erasing a ... on the remote.
3 Turn ./> (or press . appears, then press ENTER/YES on the remote in the display.
CD
6 Press M.
Operating Instructions - Page 16
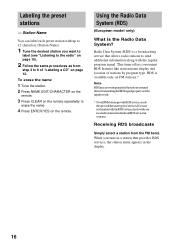
If you are not familiar with the RDS system, check with your area.
Receiving RDS broadcasts
Simply select a station from
step 3 to 8 of "Labeling a CD" on page 12. Using the Radio Data System (RDS)
(European model only)
What is available only on the remote. Labeling the preset stations
-
Radio Data ...
Operating Instructions - Page 17

...Notes • If you do not close to locate tracks quickly. Playing a tape
1 Press FUNCTION repeatedly to switch
the function to TAPE.
2 Press PLAY MODE/DIRECTION
repeatedly until g appears to play one side or h ...tape type, such as shown in the following
cases: - Play
Tape - Play
Loading a tape
1 Open the lid with your hand and insert
a tape. on the
remote). Turn ./> clockwise (or press...
Operating Instructions - Page 18
... A and side B.
18
Note that you want to CD.
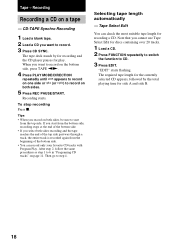
3 Press EDIT. The required tape length for the currently selected CD appears, followed by for recording and the CD player pauses for discs containing over 20 tracks.
1 Load a CD. 2 Press FUNCTION repeatedly to switch
the function to record. 3 Press CD SYNC. Selecting tape length automatically
-
When you cannot...
Operating Instructions - Page 19
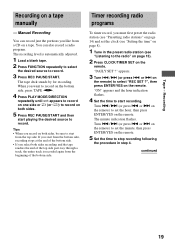
...way through a track, the entire track is automatically adjusted.
1 Load a blank tape. 2 Press FUNCTION repeatedly to select
the desired source to record. You can record just the portions you select both ...bottom side, recording stops at the end of the bottom side. • If you like from a CD on page 8).
1 Tune in step 4.
The recording level is recorded again from the top side. ...
Operating Instructions - Page 22
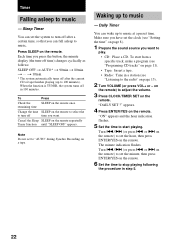
..., the minute display (the turn off after the current
CD or tape finishes playing (up to "AUTO" during Synchro Recording on the remote once. Cancel the Sleep SLEEP on the remote. "ON" appears and...Turn VOLUME (or press VOL+ or - Press SLEEP on the remote repeatedly Timer function until "SLEEP OFF" appears. When the function is TUNER, the system turns off after a certain time, so that you ...
Operating Instructions - Page 25
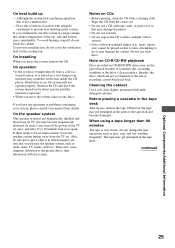
...CD from the center out.
• Do not use solvents. • Do not expose the CD...on CD-R/CD-RW playback
Discs recorded on CD-R/CD-RW...If you move the system, remove the CD. If there... on CDs
• Before playing, clean the CD with ...the tape operations such as audio racks, TV stands, and...• Do not use a CD with the system. Do not...CD and leave the system turned on the lens inside the CD...
Operating Instructions - Page 27
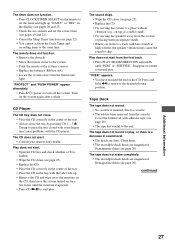
... and 22). • Cancel the Sleep Timer function (see page 25). • Replace the CD. • Place the CD correctly in the center of a stable stand). • Try moving the speakers away from the fluorescent light. Play does not start. • Open the CD tray and check whether a CD is loaded. • Wipe the CD clean (see page 22...
Operating Instructions - Page 29
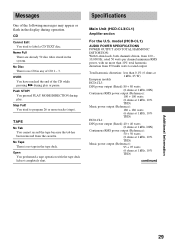
... removed from 120 - 10,000 Hz; No Tape There is no CD in any of CD 1 - 3. model (HCD-CL1)
AUDIO POWER SPECIFICATIONS POWER OUTPUT AND TOTAL HARMONIC DISTORTION: With 6-ohm loads, both...power output (Reference): 95 + 95 watts (6 ohms at 1 kHz, 10% THD)
continued
Additional Information
29 Open You performed a tape operation with no tape in the tape deck.
Push STOP! No Disc There is no...
Operating Instructions - Page 30

... (stereo minijack): accepts headphones of 6 to
16 ohms.
CD player section System Laser
Frequency response
Compact disc and digital audio system Semiconductor laser (λ=780 nm) Emission duration: continuous...Continuous RMS power output (Reference):
100 + 100 watts
(6 ohms at 1 kHz, 10% THD)
HCD-CL1:
DIN power output (Rated):40 + 40 watts (6 ohms at 1 kHz, DIN)
Continuous RMS power output...
Operating Instructions - Page 31
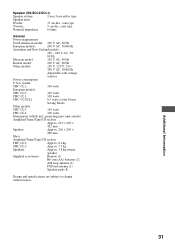
...:
Approx. 215 × 285 ×
421 mm
Speaker:
Approx. 210 × 285 ×
260 mm
Mass
Amplifier/Tuner/Tape/CD section:
CHC-CL3:
Approx. 8.0 kg
CHC-CL1:
Approx. 7.7 kg
Speakers:
Approx. 3.8 kg net per
speaker
Supplied accessories
Remote (1)
R6 (size AA) batteries (2)
AM loop antenna (1)
FM lead antenna (1)
Speaker pads (8)
Design and ...
Similar Questions

Mp3 Cd Compatibility
Can I play a MP3 CD on Sony CHC-CL1-Compact Hi Fi Component System?
Can I play a MP3 CD on Sony CHC-CL1-Compact Hi Fi Component System?
(Posted by vikramkhera6 7 years ago)

Cd Play And Drawer Eject
I got the drawer to open using code --the cds played through all five of them-----and then stopped a...
I got the drawer to open using code --the cds played through all five of them-----and then stopped a...
(Posted by jriker 9 years ago)

Sony Mini Hi Fi Component System Mhc Gx450 Where Do Cds Go
(Posted by fv2edcarm 9 years ago)
Cd Drawer Will Not Open On My Cmt-hpx9 Micro Hifi Component System.
(Posted by Mountainman569 12 years ago)
Cd Drive Not Working
the drive is half way open .it won't close nor will it extend fully to receive any cd.
the drive is half way open .it won't close nor will it extend fully to receive any cd.
(Posted by winstonho 12 years ago)