Operating Instructions
Page 3
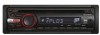
... this manual 4 Welcome 4 Getting Started Resetting the unit (CDX-GT330/GT33W only 4 Preparing the card remote commander (CDX-GT330/GT33W/GT230 only 4 Setting the clock 5 Detaching the front panel 5 Attaching the front panel 5 Location of MP3/WMA files (CDX-GT330/GT33W/GT230 only) . . . . . 12 About MP3 files (CDX-GT330/GT33W/GT230 only) . . . . . 12 About WMA files...
... this manual 4 Welcome 4 Getting Started Resetting the unit (CDX-GT330/GT33W only 4 Preparing the card remote commander (CDX-GT330/GT33W/GT230 only 4 Setting the clock 5 Detaching the front panel 5 Attaching the front panel 5 Location of MP3/WMA files (CDX-GT330/GT33W/GT230 only) . . . . . 12 About MP3 files (CDX-GT330/GT33W/GT230 only) . . . . . 12 About WMA files...
Operating Instructions
Page 4
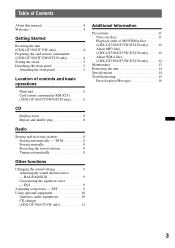
...z z GT230 z GT130 z z z (supplied) (supplied) Welcome ! Type of this Sony Compact Disc Player. BTM (Best Tuning Memory): The unit selects strong signal stations and stores them. • Sound adjustment - Thank you must reset the unit. Preparing the card remote commander (CDX-GT330/GT33W/ GT230 ...only) Before using the card remote commander for the CDX-GT330, GT33W, GT230, and GT130. RESET button Note Pressing the RESET button will erase the clock setting and some stored contents.
...z z GT230 z GT130 z z z (supplied) (supplied) Welcome ! Type of this Sony Compact Disc Player. BTM (Best Tuning Memory): The unit selects strong signal stations and stores them. • Sound adjustment - Thank you must reset the unit. Preparing the card remote commander (CDX-GT330/GT33W/ GT230 ...only) Before using the card remote commander for the CDX-GT330, GT33W, GT230, and GT130. RESET button Note Pressing the RESET button will erase the clock setting and some stored contents.
Operating Instructions
Page 5
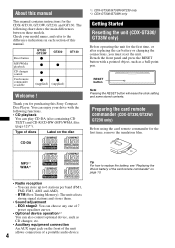
To move the digital indication, press (SEEK) -/+. 5 After setting the minute, press the select button. To display the clock, press (DSPL). Detaching the front panel You can detach the front panel of this unit to the OFF position without detaching the front panel, the ...; Do not drop or put anything on the front panel and display window. • Do not subject the front panel to the previous display. Setting the clock The clock uses a 12-hour digital indication. 1 Press and hold the select button. Press (DSPL) again to return to heat/high temperature or moisture. The setup...
To move the digital indication, press (SEEK) -/+. 5 After setting the minute, press the select button. To display the clock, press (DSPL). Detaching the front panel You can detach the front panel of this unit to the OFF position without detaching the front panel, the ...; Do not drop or put anything on the front panel and display window. • Do not subject the front panel to the previous display. Setting the clock The clock uses a 12-hour digital indication. 1 Press and hold the select button. Press (DSPL) again to return to heat/high temperature or moisture. The setup...
Operating Instructions
Page 8
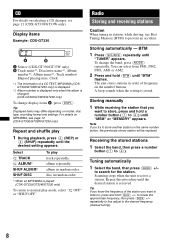
.../artist name*1, Album number*2, Album name*1, Track number/ Elapsed playing time, Clock *1 The information of a CD TEXT, MP3/WMA (CDXGT330/GT33W/GT230 only) is displayed. *2 Album number is displayed only when the album is played. (CDX-GT330/GT33W/GT230 only) To return to normal play mode, select " or...receives a station. Select TRACK ALBUM* SHUF ALBUM* SHUF DISC To play 1 During playback, press (3) (REP) or (4) (SHUF) repeatedly until the desired setting appears. You can select from FM1, FM2, FM3, AM1 or AM2. 2 Press and hold (SEEK) +/- Note If you want to listen to prevent an...
.../artist name*1, Album number*2, Album name*1, Track number/ Elapsed playing time, Clock *1 The information of a CD TEXT, MP3/WMA (CDXGT330/GT33W/GT230 only) is displayed. *2 Album number is displayed only when the album is played. (CDX-GT330/GT33W/GT230 only) To return to normal play mode, select " or...receives a station. Select TRACK ALBUM* SHUF ALBUM* SHUF DISC To play 1 During playback, press (3) (REP) or (4) (SHUF) repeatedly until the desired setting appears. You can select from FM1, FM2, FM3, AM1 or AM2. 2 Press and hold (SEEK) +/- Note If you want to listen to prevent an...
Operating Instructions
Page 9
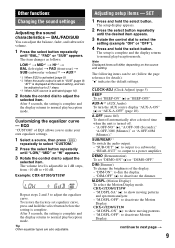
... repeatedly until "LOW," "MID" or "HI" appears. 3 Rotate the control dial to select the setting (example "ON" or "OFF"). 4 Press and hold the select button. CLOCK-ADJ (Clock Adjust) (page 5) BEEP To set "DEMO-ON" (z) or "DEMO-OFF." SUB/REAR*1 To switch the audio output. - DIM (...volume. 1 Press the select button repeatedly until "BAL," "FAD" or "SUB" appears. DEMO (Demonstration) To set "BEEP-ON" (z) or "BEEP-OFF." CDX-GT330/GT33W - "M.DSPL-SA" (z): to adjust the selected item. CDX-GT230/GT130 - EQ3 "CUSTOM" of the display. - A.OFF (Auto Off) To shut off . - continue to a ...
... repeatedly until "LOW," "MID" or "HI" appears. 3 Rotate the control dial to select the setting (example "ON" or "OFF"). 4 Press and hold the select button. CLOCK-ADJ (Clock Adjust) (page 5) BEEP To set "DEMO-ON" (z) or "DEMO-OFF." SUB/REAR*1 To switch the audio output. - DIM (...volume. 1 Press the select button repeatedly until "BAL," "FAD" or "SUB" appears. DEMO (Demonstration) To set "BEEP-ON" (z) or "BEEP-OFF." CDX-GT330/GT33W - "M.DSPL-SA" (z): to adjust the selected item. CDX-GT230/GT130 - EQ3 "CUSTOM" of the display. - A.OFF (Auto Off) To shut off . - continue to a ...


