
User Guide
Page 21
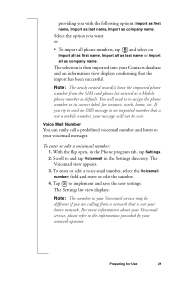
... into your home network. You will not be different if you are calling from the SIM card phone list entered as a Mobile phone number as default. To enter or edit a voicemail number: 1. Scroll to implement and save the new settings. The Settings list view displays. Preparing for instance, work, home, etc. providing you with the following options: Import as first name, Import as last name, Import as company name. With the flip open, in the Settings directory...
... into your home network. You will not be different if you are calling from the SIM card phone list entered as a Mobile phone number as default. To enter or edit a voicemail number: 1. Scroll to implement and save the new settings. The Settings list view displays. Preparing for instance, work, home, etc. providing you with the following options: Import as first name, Import as last name, Import as company name. With the flip open, in the Settings directory...
User Guide
Page 32
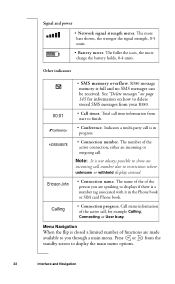
... menu. See "Delete messages" on page 145 for example Calling, Connecting or User busy. Ericsson John • Connection name. Note: It is a number tag associated with it in progress. +4355545678 • Connection number. Signal and power • Network signal strength meter. Other indicators • SMS memory overflow. Total call is full and no SMS messages can be received. Indicates a multi-party call time information from the standby screen to finish. • Conference. Calling • Connection progress...
... menu. See "Delete messages" on page 145 for example Calling, Connecting or User busy. Ericsson John • Connection name. Note: It is a number tag associated with it in progress. +4355545678 • Connection number. Signal and power • Network signal strength meter. Other indicators • SMS memory overflow. Total call is full and no SMS messages can be received. Indicates a multi-party call time information from the standby screen to finish. • Conference. Calling • Connection progress...
User Guide
Page 33
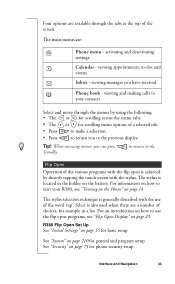
... 75 for phone security setup. The main menus are a number of the various programs with the flip open programs, see "Turning on the Phone" on how to -dos and events. activating and deactivating settings. Tip! For an introduction on page 23. Interface and Navigation 33 viewing and making calls to your R380, see "Flip Open Display" on how to use of the screen. When accessing menus you have received. For information...
... 75 for phone security setup. The main menus are a number of the various programs with the flip open programs, see "Turning on the Phone" on how to -dos and events. activating and deactivating settings. Tip! For an introduction on page 23. Interface and Navigation 33 viewing and making calls to your R380, see "Flip Open Display" on how to use of the screen. When accessing menus you have received. For information...
User Guide
Page 40
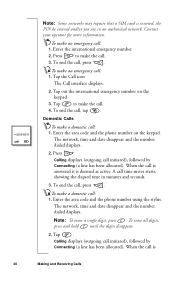
... code and the phone number on the keypad. 3. To end the call : 1. When the call is answered it is 40 Making and Receiving Calls Tap the Call icon The Call interface displays. 2. The network, time and date disappear and the number dialed displays. 2. When the call is deemed as active. Enter the area code and the phone number using the stylus. To make the call , press . Tap to make a domestic call initiated), followed by Connecting (a line has been allocated). Note: To erase...
... code and the phone number on the keypad. 3. To end the call : 1. When the call is answered it is 40 Making and Receiving Calls Tap the Call icon The Call interface displays. 2. The network, time and date disappear and the number dialed displays. 2. When the call is deemed as active. Enter the area code and the phone number using the stylus. To make the call , press . Tap to make a domestic call initiated), followed by Connecting (a line has been allocated). Note: To erase...
User Guide
Page 46
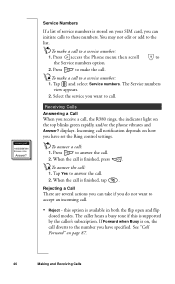
... closed modes. Press to access the Phone menu then scroll to answer the call to a service number: 1. Press to the Service numbers option. 2. displays. Tap Yes to the list. To make a call . 2. See "Call Forward" on , the call . 2. The caller hears a busy tone if this option is supported by the caller's subscription. You may not edit or add to answer the call diverts to the number you do not want to these numbers. Press to accept an incoming call...
... closed modes. Press to access the Phone menu then scroll to answer the call to a service number: 1. Press to the Service numbers option. 2. displays. Tap Yes to the list. To make a call . 2. See "Call Forward" on , the call . 2. The caller hears a busy tone if this option is supported by the caller's subscription. You may not edit or add to answer the call diverts to the number you do not want to these numbers. Press to accept an incoming call...
User Guide
Page 48
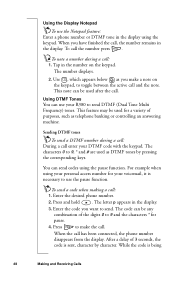
... used after the call . Enter the code you make the call . Using the Display Notepad To use the Notepad feature: Enter a phone number or DTMF tone in the display. 3. To call : 1. To note a number during a call: During a call has been connected, the phone number disappears from the display. The number displays. 2. For example when using the pause function. To send a code when making a call the number press . Enter the desired phone number. 2. When the call enter your voicemail, it is sent, character by pressing the corresponding keys...
... used after the call . Enter the code you make the call . Using the Display Notepad To use the Notepad feature: Enter a phone number or DTMF tone in the display. 3. To call : 1. To note a number during a call: During a call has been connected, the phone number disappears from the display. The number displays. 2. For example when using the pause function. To send a code when making a call the number press . Enter the desired phone number. 2. When the call enter your voicemail, it is sent, character by pressing the corresponding keys...
User Guide
Page 56
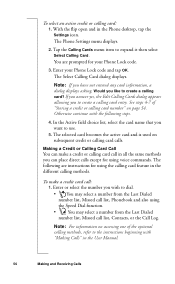
... User Manual. 56 Making and Receiving Calls Enter your Phone Lock code. 3. The following steps. 4. You are instructions for your Phone Lock code and tap OK. Otherwise continue with "Making Calls" in the different calling methods. The Phone Settings menu displays. 2. Making a Credit or Calling Card Call You can place direct calls except for using the Speed Dial function. • You may select a number from the Last Dialed number list, Missed call list, Contacts, or the Call Log. Enter or select the number you can make a credit card call in the Phone...
... User Manual. 56 Making and Receiving Calls Enter your Phone Lock code. 3. The following steps. 4. You are instructions for your Phone Lock code and tap OK. Otherwise continue with "Making Calls" in the different calling methods. The Phone Settings menu displays. 2. Making a Credit or Calling Card Call You can place direct calls except for using the Speed Dial function. • You may select a number from the Last Dialed number list, Missed call list, Contacts, or the Call Log. Enter or select the number you can make a credit card call in the Phone...
User Guide
Page 57
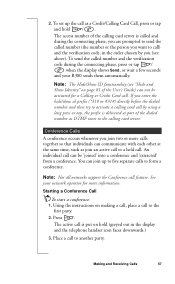
... seconds and your network operator for a Calling or Credit Card call . To send the called number and the verification code during the connecting phase, you join two or more information. Note: Not all networks support the Conference call as DTMF tones to form a conference. See your R380 sends them automatically. To set up to five separate calls to the calling card server. The access number of the calling card server is called number (the number or the person...
... seconds and your network operator for a Calling or Credit Card call . To send the called number and the verification code during the connecting phase, you join two or more information. Note: Not all networks support the Conference call as DTMF tones to form a conference. See your R380 sends them automatically. To set up to five separate calls to the calling card server. The access number of the calling card server is called number (the number or the person...
User Guide
Page 81
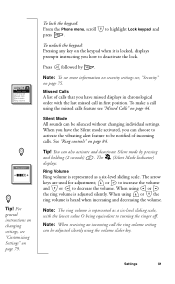
... volume and or to deactivate the lock. Note: When receiving an incoming call using the volume slider key. Missed Calls A list of incoming calls. Silent Mode All sounds can be adjusted silently using the missed calls feature see "Missed Calls" on page 79. Note: The ring volume is adjusted silently. To lock the keypad: From the Phone menu, scroll press . Note: To see more information on security settings see "Customizing Settings" on page 44. To make a call the ring volume setting...
... volume and or to deactivate the lock. Note: When receiving an incoming call using the volume slider key. Missed Calls A list of incoming calls. Silent Mode All sounds can be adjusted silently using the missed calls feature see "Missed Calls" on page 79. Note: The ring volume is adjusted silently. To lock the keypad: From the Phone menu, scroll press . Note: To see more information on security settings see "Customizing Settings" on page 44. To make a call the ring volume setting...
User Guide
Page 111
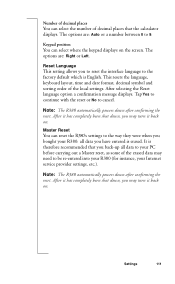
... your R380: all data to your Internet service provider settings, etc.). Keypad position You can select where the keypad displays on the screen. After it has completely been shut down , you to reset the interface language to be re-entered into your R380 (for instance, your PC before carrying out a Master reset, as some of the erased data may need to the factory default which is English. Note: The R380 automatically powers down...
... your R380: all data to your Internet service provider settings, etc.). Keypad position You can select where the keypad displays on the screen. After it has completely been shut down , you to reset the interface language to be re-entered into your R380 (for instance, your PC before carrying out a Master reset, as some of the erased data may need to the factory default which is English. Note: The R380 automatically powers down...
User Guide
Page 113
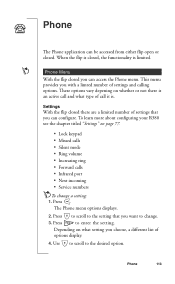
...; Lock keypad • Missed calls • Silent mode • Ring volume • Increasing ring • Forward calls • Infrared port • Next incoming • Service numbers To change . 3. When the flip is . To learn more about configuring your R380 see the chapter titled "Settings" on what setting you choose, a different list of settings that you with a limted number of call and what type of settings and calling options. The Phone menu options displays. 2. Use to scroll to enter...
...; Lock keypad • Missed calls • Silent mode • Ring volume • Increasing ring • Forward calls • Infrared port • Next incoming • Service numbers To change . 3. When the flip is . To learn more about configuring your R380 see the chapter titled "Settings" on what setting you choose, a different list of settings that you with a limted number of call and what type of settings and calling options. The Phone menu options displays. 2. Use to scroll to enter...
User Guide
Page 140
... with a "Select e-mail account" view. Depending on how many accounts and service provideres you have set up, the following occurs: 140 Messaging Tap and select Connect. 3. Select the service provider to copy, or tap and select Select all of the mails you have more than one internet service provider, you of the current status of time. A Progress Message view displays informing you are either copied or moved to...
... with a "Select e-mail account" view. Depending on how many accounts and service provideres you have set up, the following occurs: 140 Messaging Tap and select Connect. 3. Select the service provider to copy, or tap and select Select all of the mails you have more than one internet service provider, you of the current status of time. A Progress Message view displays informing you are either copied or moved to...
User Guide
Page 149
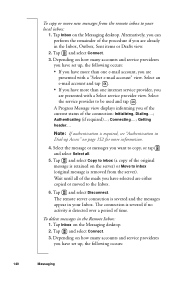
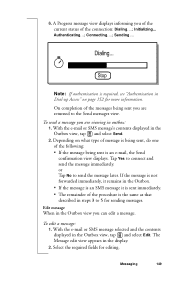
... displayed in the Outbox view, tap and select Send. 2. Select the required fields for sending messages. Initializing... 6. Stop Note: If authentication is required, see "Authentication in the display. 2. Messaging 149 With the e-mail or SMS message's contents displayed in the Outbox view, tap and select Edit. The Message edit view appears in Dial-up Access" on what type of message is being sent, do one of the connection: Dialing....; A Progress message view displays informing you can edit a message...
... displayed in the Outbox view, tap and select Send. 2. Select the required fields for sending messages. Initializing... 6. Stop Note: If authentication is required, see "Authentication in the display. 2. Messaging 149 With the e-mail or SMS message's contents displayed in the Outbox view, tap and select Edit. The Message edit view appears in Dial-up Access" on what type of message is being sent, do one of the connection: Dialing....; A Progress message view displays informing you can edit a message...
User Guide
Page 154
... All day event from 154 Messaging The Send confirmation view displays. 4. Do one only to attach the specific entry you to an Internet Service Provider (ISP) is currently open and is placed in the display. Create an e-mail using the "Creating E-mail" instructions. The pop-up and down scroll arrows to the right of file to do attachment list that displays. • Attach calendar entry- Adding...
... All day event from 154 Messaging The Send confirmation view displays. 4. Do one only to attach the specific entry you to an Internet Service Provider (ISP) is currently open and is placed in the display. Create an e-mail using the "Creating E-mail" instructions. The pop-up and down scroll arrows to the right of file to do attachment list that displays. • Attach calendar entry- Adding...
User Guide
Page 189
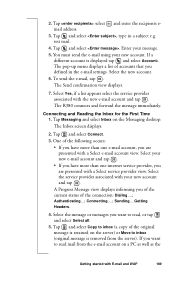
... Time 1. A Progress Message view displays informing you want to read , or tap and select Select all. 5. Tap and select Copy to inbox (original message is displayed tap and select Account:. 2. Tap select abc and enter the recipients email address. 3. Select the service provider associated with your new account. Connecting....; Select your message. 5. The Send confirmation view displays. 7. Select Yes, if a list appears select the service provider associated with a Select service provider view. Enter your new e-mail account...
... Time 1. A Progress Message view displays informing you want to read , or tap and select Select all. 5. Tap and select Copy to inbox (original message is displayed tap and select Account:. 2. Tap select abc and enter the recipients email address. 3. Select the service provider associated with your new account. Connecting....; Select your message. 5. The Send confirmation view displays. 7. Select Yes, if a list appears select the service provider associated with a Select service provider view. Enter your new e-mail account...
User Guide
Page 195
... the service provider from your company. Make a connection. 2. If you need to initiate connection. Tap OK , the selected gateway will be set up on the R380. Locating Settings in Windows 95 or 98 If you want it is highlighted by changing the SP or Gateway settings. Getting started with E-mail and WAP 195 Tap OK to change the gateway, you make a connection: 1. Tap and select Set as your network...
... the service provider from your company. Make a connection. 2. If you need to initiate connection. Tap OK , the selected gateway will be set up on the R380. Locating Settings in Windows 95 or 98 If you want it is highlighted by changing the SP or Gateway settings. Getting started with E-mail and WAP 195 Tap OK to change the gateway, you make a connection: 1. Tap and select Set as your network...
User Guide
Page 227
... display Signal strength indicator. Check your computer. Double-click the file Setup assistant for this is either: 1. To free up memory, erase unused or old: • Call logs. • Contacts. • Messages. • Calendar To-dos or appointments. • WAP history or bookmarks. • Notepad notes. PC Connection If you have connection problems between your R380 and your PC, and helps you install any missing components and solve problems...
... display Signal strength indicator. Check your computer. Double-click the file Setup assistant for this is either: 1. To free up memory, erase unused or old: • Call logs. • Contacts. • Messages. • Calendar To-dos or appointments. • WAP history or bookmarks. • Notepad notes. PC Connection If you have connection problems between your R380 and your PC, and helps you install any missing components and solve problems...
User Guide
Page 254
... location 202 Lock 75, 92, 120 keypad 75, 81 M Mail notification 138 Manual service provider and e-mail set up 184 Manual WAP set up 192 Manuals Quick Guide 7 User's Guide 7 User's Manual (on CD) 7 Master reset settings 111 Melodies edit 84 ring 84 Memory information 211 Messaging add a sender to contacts 144 attachments 142 auto configuration 161 deleting 145 drafts 151 editing 146, 149 find 159 forwarding 144, 150 get mail 139 inbox 137 mail notification 138 new e-mail 153 notification 161 password 160 replies 144 sending 147 settings 98 SMS...
... location 202 Lock 75, 92, 120 keypad 75, 81 M Mail notification 138 Manual service provider and e-mail set up 184 Manual WAP set up 192 Manuals Quick Guide 7 User's Guide 7 User's Manual (on CD) 7 Master reset settings 111 Melodies edit 84 ring 84 Memory information 211 Messaging add a sender to contacts 144 attachments 142 auto configuration 161 deleting 145 drafts 151 editing 146, 149 find 159 forwarding 144, 150 get mail 139 inbox 137 mail notification 138 new e-mail 153 notification 161 password 160 replies 144 sending 147 settings 98 SMS...
User Guide
Page 255
..., 119 voicemail 21, 88 Phone book 123 Phone Display Indicators 30 Phone Icons 30 Phone keys voice memo 28 volume slider 28 Phone Symbols 30 PIN 76 entry 14 incorrect entry 15 Port settings 110 Preferences 95, 211 Problem card blocked 225 display 226 emergency calls only 226 fax calls 226 inset card displayed 226 memory/disk full 226 no indicator light 226 no network 227 phone locked 228 red indicator light 226 screen 226 security code 226 starting 228 wrong PIN displayed 228...
..., 119 voicemail 21, 88 Phone book 123 Phone Display Indicators 30 Phone Icons 30 Phone keys voice memo 28 volume slider 28 Phone Symbols 30 PIN 76 entry 14 incorrect entry 15 Port settings 110 Preferences 95, 211 Problem card blocked 225 display 226 emergency calls only 226 fax calls 226 inset card displayed 226 memory/disk full 226 no indicator light 226 no network 227 phone locked 228 red indicator light 226 screen 226 security code 226 starting 228 wrong PIN displayed 228...
User Guide
Page 256
... data 239 Time setting 17, 205 timezones 203 UTC table 204 Title bar 24, 35 To do 167, 168 Toolbar 35 Touchscreen calibration 19, 212 U User greetings 91, 120 User's Guide 7 User's Manual 8 Using WAP for the first time 194 V Vibrating alert 84 Viewing messages 141 Voice 31 Voice control 85, 119 commands create 86 delete 88 edit 86 play 88 Voice memo key 28 Voicemail 21, 63, 88 Volume adjustment 47 slider key...
... data 239 Time setting 17, 205 timezones 203 UTC table 204 Title bar 24, 35 To do 167, 168 Toolbar 35 Touchscreen calibration 19, 212 U User greetings 91, 120 User's Guide 7 User's Manual 8 Using WAP for the first time 194 V Vibrating alert 84 Viewing messages 141 Voice 31 Voice control 85, 119 commands create 86 delete 88 edit 86 play 88 Voice memo key 28 Voicemail 21, 63, 88 Volume adjustment 47 slider key...


