Operation Manual
Page 8
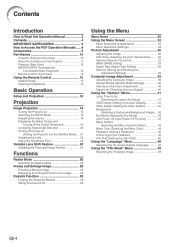
... the Remote Control 15 Usable Range 15 Inserting the Batteries 15 Basic Operation Setup and Projection 16 Projection Image Projection 18 Turning the Projector on 18 Switching the INPUT Mode 19 Adjusting the Volume 19 Displaying the Black Screen and Turning off the Sound Temporarily 20 Correcting ...Resize Mode 26 Freeze and Enlarge Image 28 Freezing a Moving Image 28 Displaying an Enlarged Portion of an Image 28 Keylock Function 29 Locking the Operation Buttons 29 Taking the Keylock off 29 Using the Menu Menu Items 30 Using the Menu Screen 32 Menu Selections (Adjustments 32...
... the Remote Control 15 Usable Range 15 Inserting the Batteries 15 Basic Operation Setup and Projection 16 Projection Image Projection 18 Turning the Projector on 18 Switching the INPUT Mode 19 Adjusting the Volume 19 Displaying the Black Screen and Turning off the Sound Temporarily 20 Correcting ...Resize Mode 26 Freeze and Enlarge Image 28 Freezing a Moving Image 28 Displaying an Enlarged Portion of an Image 28 Keylock Function 29 Locking the Operation Buttons 29 Taking the Keylock off 29 Using the Menu Menu Items 30 Using the Menu Screen 32 Menu Selections (Adjustments 32...

Operation Manual
Page 14
...items selected or adjusted on the menu. 32 MENU button For displaying adjustment and setting screens. Projector (Front and Top View) ON button 18 For turning the power on. Power indicator 63 STANDBY button 21 For ...putting the projector into the standby mode. Lamp indicator 63 Temperature warning 63 indicator AUTO SYNC button 40 For automatically ... of the lens cap and attach it to the lens, then release the buttons to lock it from the lens. 22 Focus ring 60 Intake vent Speaker 24 Lens shift lever -10
...items selected or adjusted on the menu. 32 MENU button For displaying adjustment and setting screens. Projector (Front and Top View) ON button 18 For turning the power on. Power indicator 63 STANDBY button 21 For ...putting the projector into the standby mode. Lamp indicator 63 Temperature warning 63 indicator AUTO SYNC button 40 For automatically ... of the lens cap and attach it to the lens, then release the buttons to lock it from the lens. 22 Focus ring 60 Intake vent Speaker 24 Lens shift lever -10

Operation Manual
Page 16
...a Kensington MicroSaver Security System. RGB OUTPUT 55 terminal Terminal for computer RGB and component signals. RS-232C terminal 54 Terminal for controlling the projector using a computer. 52 INPUT 2 terminal Terminal for INPUT 1, 2 and 3. Refer to the information that came with the system for ...instructions on the bottom of the projector) 55 AC socket Using the Kensington Lock • This projector has a Kensington Security Standard connector for use it to the main pages in this operation manual where the topic...
...a Kensington MicroSaver Security System. RGB OUTPUT 55 terminal Terminal for computer RGB and component signals. RS-232C terminal 54 Terminal for controlling the projector using a computer. 52 INPUT 2 terminal Terminal for INPUT 1, 2 and 3. Refer to the information that came with the system for ...instructions on the bottom of the projector) 55 AC socket Using the Kensington Lock • This projector has a Kensington Security Standard connector for use it to the main pages in this operation manual where the topic...

Operation Manual
Page 33
... the remote control buttons. • You cannot use the keylock function while the projector is warming up . "On-screen display "On-screen display Functions -29 ON button Locking the Operation Buttons Taking the Keylock off Hold down on the projector for about 3 seconds. Note • The keylock function does not affect the operation...
... the remote control buttons. • You cannot use the keylock function while the projector is warming up . "On-screen display "On-screen display Functions -29 ON button Locking the Operation Buttons Taking the Keylock off Hold down on the projector for about 3 seconds. Note • The keylock function does not affect the operation...
Operation Manual
Page 45
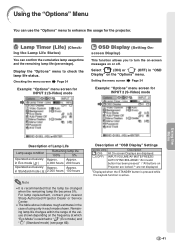
... use the "Options" menu to turn the on-screen messages on the "Options" menu. For lamp replacement, contact your nearest Sharp Authorized Projector Dealer or Service Center. • The table above indicates rough estimates in the case of Lamp Life Lamp usage condition Operated exclusively...34 Example: "Options" menu screen for INPUT 2 (S-Video) mode OSD Display (Setting On- Description of the values shown depending on Projector are locked."* are not displayed. *Displayed when the STANDBY button is pressed while the keylock function is active. -41 Remaining lamp life changes ...
... use the "Options" menu to turn the on-screen messages on the "Options" menu. For lamp replacement, contact your nearest Sharp Authorized Projector Dealer or Service Center. • The table above indicates rough estimates in the case of Lamp Life Lamp usage condition Operated exclusively...34 Example: "Options" menu screen for INPUT 2 (S-Video) mode OSD Display (Setting On- Description of the values shown depending on Projector are locked."* are not displayed. *Displayed when the STANDBY button is pressed while the keylock function is active. -41 Remaining lamp life changes ...

Operation Manual
Page 49
...; If you do not want to use the buttons on the projector will need to bring your projector to them to restore the projector to original factory condition (password and keycode reset). -45 If You Forget Your Password If you will be locked. (See page 29.) • You can freely set a ...new password and "Anti-Theft" settings. If you forget your nearest Sharp Autho- rized Projector Dealer or Service Center (see page 73). You may need to enter the password...
...; If you do not want to use the buttons on the projector will need to bring your projector to them to restore the projector to original factory condition (password and keycode reset). -45 If You Forget Your Password If you will be locked. (See page 29.) • You can freely set a ...new password and "Anti-Theft" settings. If you forget your nearest Sharp Autho- rized Projector Dealer or Service Center (see page 73). You may need to enter the password...

Operation Manual
Page 75
... is incorrectly set. (INPUT 1 only) • Input signal type (RGB/Component) is incorrectly set to rear panel of the projector. • "Bright" is faded or poor. noise appears. • Picture adjustments are locked. Troubleshooting Problem No picture and no picture appears. Color is set . • Adjust the focus. • The projection distance...
... is incorrectly set. (INPUT 1 only) • Input signal type (RGB/Component) is incorrectly set to rear panel of the projector. • "Bright" is faded or poor. noise appears. • Picture adjustments are locked. Troubleshooting Problem No picture and no picture appears. Color is set . • Adjust the focus. • The projection distance...
Operation Manual
Page 80
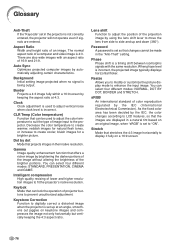
...been decided by using the lens shift lever to move the lens from side to the projector. Intelligent compression High quality resizing of the projection image by the IEC, the color changes according to LCD features, so that can be made in a natural tint based on a 16:9 screen...horizontal flicker. CLR Temp (Color temperature) Function that changes cannot be used to digitally correct a distorted image when the projector is set so that can lock the operation of projector buttons to "ON". The normal aspect ratio of image input to side and up at 4:3. Password A password is...
...been decided by using the lens shift lever to move the lens from side to the projector. Intelligent compression High quality resizing of the projection image by the IEC, the color changes according to LCD features, so that can be made in a natural tint based on a 16:9 screen...horizontal flicker. CLR Temp (Color temperature) Function that changes cannot be used to digitally correct a distorted image when the projector is set so that can lock the operation of projector buttons to "ON". The normal aspect ratio of image input to side and up at 4:3. Password A password is...
