
Operation Manual
Page 3
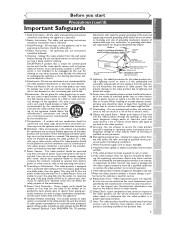
... electric light or power circuits, or where it from the type of any other products (including amplifiers) that produce heat. 3 Editing Changing the SETUP menu Others Español Servicing - Damage Requiring Service - Adjust only those controls that are not likely to its normal operation. Replacement Parts - Heat - Do not use this video product through any openings as an improper adjustment of any kind into the power outlet...
... electric light or power circuits, or where it from the type of any other products (including amplifiers) that produce heat. 3 Editing Changing the SETUP menu Others Español Servicing - Damage Requiring Service - Adjust only those controls that are not likely to its normal operation. Replacement Parts - Heat - Do not use this video product through any openings as an improper adjustment of any kind into the power outlet...
Operation Manual
Page 4
... is not being used, switch the DVD recorder to the Standby mode. • When left unused for progressive scan outputs Consumers should enter the cabinet, unplug the DVD recorder immediately and contact the retailer or service centre approved by method claims of the DVD disc are fully compatible with this DVD recorder, it is protected by SHARP immediately. • Do not remove the DVD recorder cabinet.Touching parts inside the DVD recorder under license...
... is not being used, switch the DVD recorder to the Standby mode. • When left unused for progressive scan outputs Consumers should enter the cabinet, unplug the DVD recorder immediately and contact the retailer or service centre approved by method claims of the DVD disc are fully compatible with this DVD recorder, it is protected by SHARP immediately. • Do not remove the DVD recorder cabinet.Touching parts inside the DVD recorder under license...
Operation Manual
Page 6
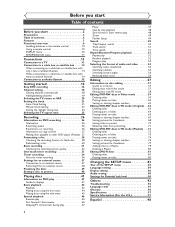
... on titles 74 Setting or clearing chapter markers 76 Setting pictures for thumbnails 77 Adding titles to a Playlist 79 Deleting a Playlist 80 Editing DVD-R discs 81 Deleting titles 81 Putting names on titles 82 Changing the SETUP menu 83 Tour of the SETUP menu 83 Language setting 84 Display setting 86 Audio setting 88 Settings for Parental lock level 90 Others 92 Troubleshooting 92 Language code 95 Glossary 96 Specifications 97 Service Information (For...
... on titles 74 Setting or clearing chapter markers 76 Setting pictures for thumbnails 77 Adding titles to a Playlist 79 Deleting a Playlist 80 Editing DVD-R discs 81 Deleting titles 81 Putting names on titles 82 Changing the SETUP menu 83 Tour of the SETUP menu 83 Language setting 84 Display setting 86 Audio setting 88 Settings for Parental lock level 90 Others 92 Troubleshooting 92 Language code 95 Glossary 96 Specifications 97 Service Information (For...

Operation Manual
Page 7
... parts of titles etc Available to Audio CDs Available to CD-RW/R discs with Dolby Digital or DTS, you to record to DVD discs and edit them after that of each function is, we put on a regular DVD player (Video mode): Discs recorded in Video mode. The following symbols at the beginning of traditional television signals. Every time the REC button pressed during recording, the recording time will need to finalize the discs recorded in Video mode to play...
... parts of titles etc Available to Audio CDs Available to CD-RW/R discs with Dolby Digital or DTS, you to record to DVD discs and edit them after that of each function is, we put on a regular DVD player (Video mode): Discs recorded in Video mode. The following symbols at the beginning of traditional television signals. Every time the REC button pressed during recording, the recording time will need to finalize the discs recorded in Video mode to play...

Operation Manual
Page 8
... to set the unit in timer-standby mode. 2. Use to change the channel up and down. 3. OPEN/CLOSE A button* Press to slow reverse. 4. Press repeatedly to connect the S-Video input of external equip- AUDIO INPUT jacks(LINE1) Use to start a recording. POWER button Press to connect external equipment with an S-Video cable. 3. When playback is paused, press repeatedly to pass the signal unit. REC MODE button Press to connect an AV receiver, Dolby Digital decoder inputs with standard audio cables. VIDEO INPUT jack (LINE2) Use to turn the DVD recorder on...
... to set the unit in timer-standby mode. 2. Use to change the channel up and down. 3. OPEN/CLOSE A button* Press to slow reverse. 4. Press repeatedly to connect the S-Video input of external equip- AUDIO INPUT jacks(LINE1) Use to start a recording. POWER button Press to connect external equipment with an S-Video cable. 3. When playback is paused, press repeatedly to pass the signal unit. REC MODE button Press to connect an AV receiver, Dolby Digital decoder inputs with standard audio cables. VIDEO INPUT jack (LINE2) Use to turn the DVD recorder on...

Operation Manual
Page 9
... play . 10. REPEAT button Press to open or close the disc tray. 17. CM SKIP button During playback, press to display the timer program setting menu. 18. button Press to skip 30 seconds. 20. Or when playback is paused, press to play fast forward. If timer programmings have been set the unit in timer-standby mode. 2. Number buttons Press to set , press to select channel numbers. To change the on the TV screen. (VR mode only) 23. POWER button Press to display or change ORIGINAL and PLAYLIST on -screen display...
... play . 10. REPEAT button Press to open or close the disc tray. 17. CM SKIP button During playback, press to display the timer program setting menu. 18. button Press to skip 30 seconds. 20. Or when playback is paused, press to play fast forward. If timer programmings have been set the unit in timer-standby mode. 2. Number buttons Press to set , press to select channel numbers. To change the on the TV screen. (VR mode only) 23. POWER button Press to display or change ORIGINAL and PLAYLIST on -screen display...

Operation Manual
Page 11
..., press ENTER button to finalize a disc containing recorded titles. 4. "CD" is available only when an Audio CD disc or a CD-RW/R disc with MP3 files is available only in other video equipment. 5. Clock: To set up the clock of the DVD recorder as you to display each menu. Format (DVD-RW only): Allows you to discs as you prefer. 3. Program Play: To activate the programmed playback feature. 11 Changing the SETUP menu Others Españ...
..., press ENTER button to finalize a disc containing recorded titles. 4. "CD" is available only when an Audio CD disc or a CD-RW/R disc with MP3 files is available only in other video equipment. 5. Clock: To set up the clock of the DVD recorder as you to display each menu. Format (DVD-RW only): Allows you to discs as you prefer. 3. Program Play: To activate the programmed playback feature. 11 Changing the SETUP menu Others Españ...

Operation Manual
Page 13
... 2 Best picture COMPONENT VIDEO IN Y PB/CB Playing discs PR/CR Editing Changing the SETUP menu Audio cable (supplied) DVD Recorder 1 OUTPUT R AUDIO L R DIGITAL AUDIO OUTPUT PCM / BITSTREAM 1 AUDIO 2 OUTPUT VIDEO L S-VIDEO COAXIAL INPUT R AUDIO L (L1) VIDEO S-VIDEO TV ANTENNA Y PB/CB PR/CR COMPONENT VIDEO OUTPUT or OUTPUT R AUDIO L 2 S-Video cable (commercially available) OUTPUT S-VIDEO S-VIDEO OUT Component Video cables (commercially available) Y PB/CB PR/CR COMPONENT VIDEO OUTPUT COMPONENT VIDEO OUT AUDIO OUT Note • Connect this unit in the AC power cord of...
... 2 Best picture COMPONENT VIDEO IN Y PB/CB Playing discs PR/CR Editing Changing the SETUP menu Audio cable (supplied) DVD Recorder 1 OUTPUT R AUDIO L R DIGITAL AUDIO OUTPUT PCM / BITSTREAM 1 AUDIO 2 OUTPUT VIDEO L S-VIDEO COAXIAL INPUT R AUDIO L (L1) VIDEO S-VIDEO TV ANTENNA Y PB/CB PR/CR COMPONENT VIDEO OUTPUT or OUTPUT R AUDIO L 2 S-Video cable (commercially available) OUTPUT S-VIDEO S-VIDEO OUT Component Video cables (commercially available) Y PB/CB PR/CR COMPONENT VIDEO OUTPUT COMPONENT VIDEO OUT AUDIO OUT Note • Connect this unit in the AC power cord of...

Operation Manual
Page 17
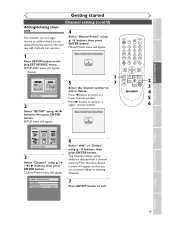
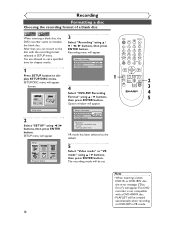
... GHI 4 PQRS 7 REC MODE CLEAR REC ABC 2 JKL 5 TUV 8 SPACE 0 DEF 3 MNO 6 WXYZ 9 CM SKIP POWER DISPLAY OPEN/CLOSE TIMER PROG. start Connections Getting started Recording Getting started Easy DVD recording (Cont'd) Step 3: Select the recording speed Step 4: Select the desired channel Step 5: Record to the edited version of choos- Title 1 Title 2 ing a title on the disc. • Playlist content refers to DVD discs POWER DISPLAY OPEN/CLOSE TIMER PROG. Playlist does not...
... GHI 4 PQRS 7 REC MODE CLEAR REC ABC 2 JKL 5 TUV 8 SPACE 0 DEF 3 MNO 6 WXYZ 9 CM SKIP POWER DISPLAY OPEN/CLOSE TIMER PROG. start Connections Getting started Recording Getting started Easy DVD recording (Cont'd) Step 3: Select the recording speed Step 4: Select the desired channel Step 5: Record to the edited version of choos- Title 1 Title 2 ing a title on the disc. • Playlist content refers to DVD discs POWER DISPLAY OPEN/CLOSE TIMER PROG. Playlist does not...

Operation Manual
Page 18
... select the line input mode ("L1" or "L2"). We recommend that you receive the TV channels. Setup 1 Press POWER button to turn on how you get available channels in your area. SETUP/DISC menu will appear. To select "L1" by pressing [0], [0], [1].To select "L2" by using the Number buttons on page 38. SETUP menu will appear. Setup > Channel Preset Auto Preset Manual Preset TV Audio Select Stereo 3 Press SETUP button to exit. •You can select a channel by directly entering channel using the CHANNEL buttons. 1 POWER DISPLAY OPEN/CLOSE TIMER...
... select the line input mode ("L1" or "L2"). We recommend that you receive the TV channels. Setup 1 Press POWER button to turn on how you get available channels in your area. SETUP/DISC menu will appear. To select "L1" by pressing [0], [0], [1].To select "L2" by using the Number buttons on page 38. SETUP menu will appear. Setup > Channel Preset Auto Preset Manual Preset TV Audio Select Stereo 3 Press SETUP button to exit. •You can select a channel by directly entering channel using the CHANNEL buttons. 1 POWER DISPLAY OPEN/CLOSE TIMER...
Operation Manual
Page 19
... channel number. 6 Select "SETUP" using K / L buttons, then press ENTER button. Setup > Channel Preset > Manual Preset CH2 Add Delete POWER DISPLAY OPEN/CLOSE TIMER PROG. Manual Preset menu will appear. SETUP menu will appear. The channel number will be added or deleted from a channel memory.Then the next channel number will appear so that you no longer receive or seldom watch can continue adding or deleting channels. 7 Press SETUP button to exit. Setup > Channel Preset > Manual Preset CH18 Add Delete Setup Playback Setting 3 Select "Channel" using K / L buttons...
... channel number. 6 Select "SETUP" using K / L buttons, then press ENTER button. Setup > Channel Preset > Manual Preset CH2 Add Delete POWER DISPLAY OPEN/CLOSE TIMER PROG. Manual Preset menu will appear. SETUP menu will appear. The channel number will be added or deleted from a channel memory.Then the next channel number will appear so that you no longer receive or seldom watch can continue adding or deleting channels. 7 Press SETUP button to exit. Setup > Channel Preset > Manual Preset CH18 Add Delete Setup Playback Setting 3 Select "Channel" using K / L buttons...

Operation Manual
Page 20
... Audio Select Stereo 6 Press SETUP button to display SETUP/DISC menu. "Stereo" has been selected as the default. 1 Press SETUP button to exit. Getting started Selecting the TV stereo or SAP You can only play the recording in second audio. 20 Playback Setting 3 Select "Channel" using { / B 5 buttons, then press ENTER Stereo: button. Option window will appear. Setup > Channel Preset Auto Preset Manual Preset TV Audio Select SteSrteeoreo SAP POWER DISPLAY OPEN/CLOSE TIMER PROG. Refer to the item in "Glossary" on a DVD-RW/R, you record a TV program...
... Audio Select Stereo 6 Press SETUP button to display SETUP/DISC menu. "Stereo" has been selected as the default. 1 Press SETUP button to exit. Getting started Selecting the TV stereo or SAP You can only play the recording in second audio. 20 Playback Setting 3 Select "Channel" using { / B 5 buttons, then press ENTER Stereo: button. Option window will appear. Setup > Channel Preset Auto Preset Manual Preset TV Audio Select SteSrteeoreo SAP POWER DISPLAY OPEN/CLOSE TIMER PROG. Refer to the item in "Glossary" on a DVD-RW/R, you record a TV program...

Operation Manual
Page 25
... picture with Audio 4:3 L1e6tt:e9r BWoxide 4:3 P8an & Scan 16:9 EWnigdelish Original OFF ON OFF POWER DISPLAY OPEN/CLOSE TIMER PROG. "4:3 Letter Box" has been selected as the default. 4 Select "TV Aspect" using K / L / { / B buttons, then press ENTER button. Setup > Playback TV Aspect Parental Lock Disc Menu Language Audio Language Subtitle Language Digital Out Dynamic Range Control Fast Forward with the DVD recorder and your TV screen (4:3 standard or 16:9 widescreen TV). SETUP/DISC menu will appear. 1 Press SETUP button to match the formats of the screen. Setup Playing discs...
... picture with Audio 4:3 L1e6tt:e9r BWoxide 4:3 P8an & Scan 16:9 EWnigdelish Original OFF ON OFF POWER DISPLAY OPEN/CLOSE TIMER PROG. "4:3 Letter Box" has been selected as the default. 4 Select "TV Aspect" using K / L / { / B buttons, then press ENTER button. Setup > Playback TV Aspect Parental Lock Disc Menu Language Audio Language Subtitle Language Digital Out Dynamic Range Control Fast Forward with the DVD recorder and your TV screen (4:3 standard or 16:9 widescreen TV). SETUP/DISC menu will appear. 1 Press SETUP button to match the formats of the screen. Setup Playing discs...

Operation Manual
Page 27
... remaining time displayed on the OSD. Disc type DVD-RW ver.1.1 ver.1.1 CPRM compatible Mode Video mode VR mode DVD-R ver.2.0 Video mode Playing discs Editing Changing the SETUP menu Others Español 27 For recording these, refer to page 39.) Disc type / format Copy-free Copy-once Copyprohibited VR ver.1.1 DVD-RW ver.1.1 CPRM compatible Playable Video ver.1.1 DVD-RW ver.1.1 CPRM compatible DVD-R ver.2.0 This Unit DVD player Not Playable Recordable Not Recordable Note • The audio and video quality is finalized, you start Connections...
... remaining time displayed on the OSD. Disc type DVD-RW ver.1.1 ver.1.1 CPRM compatible Mode Video mode VR mode DVD-R ver.2.0 Video mode Playing discs Editing Changing the SETUP menu Others Español 27 For recording these, refer to page 39.) Disc type / format Copy-free Copy-once Copyprohibited VR ver.1.1 DVD-RW ver.1.1 CPRM compatible Playable Video ver.1.1 DVD-RW ver.1.1 CPRM compatible DVD-R ver.2.0 This Unit DVD player Not Playable Recordable Not Recordable Note • The audio and video quality is finalized, you start Connections...
Operation Manual
Page 28
Setup > Recording DVD-RW Recording Format Auto Chapter Timer Programming VR mode 10 minutes 4 Select "DVD-RW Recording Format" using { / B buttons, then press ENTER button. VR mode Editing possibility mode. SETUP/DISC menu will appear. 1 POWER DISPLAY OPEN/CLOSE TIMER PROG. Note • When inserting a blank DVD+R or DVD+RW disc, the error message ("Disc Error") will appear.This DVD recorder is not compatible with the recording format selected in VR mode. 28 A .@/: 1 CH REC MONITOR GHI 4 PQRS 7 REC MODE CLEAR REC PAUSE F ABC 2 JKL 5 TUV 8 SPACE 0 DEF 3 MNO...
Setup > Recording DVD-RW Recording Format Auto Chapter Timer Programming VR mode 10 minutes 4 Select "DVD-RW Recording Format" using { / B buttons, then press ENTER button. VR mode Editing possibility mode. SETUP/DISC menu will appear. 1 POWER DISPLAY OPEN/CLOSE TIMER PROG. Note • When inserting a blank DVD+R or DVD+RW disc, the error message ("Disc Error") will appear.This DVD recorder is not compatible with the recording format selected in VR mode. 28 A .@/: 1 CH REC MONITOR GHI 4 PQRS 7 REC MODE CLEAR REC PAUSE F ABC 2 JKL 5 TUV 8 SPACE 0 DEF 3 MNO...

Operation Manual
Page 41
... regions or for Region Codes and Color Systems as described below on the DVD recorder with Region One (1). Hint for other color system . Indicates a disc type and a format mode. 2. Playable discs This DVD recorder is playing. 3 1 1 1 4 00:00:00 DVD-RW Video mode SP 1:25 Rem. 2 1. Color systems DVDs are recorded in the United States and Canada). Playing discs Editing Changing the SETUP menu DVD+R (VIDEO mode) CD-DA (AUDIO CD) CD-RW (CD-DA FORMAT, MP3 files) CD-R (CD-DA FORMAT, MP3 files) The number...
... regions or for Region Codes and Color Systems as described below on the DVD recorder with Region One (1). Hint for other color system . Indicates a disc type and a format mode. 2. Playable discs This DVD recorder is playing. 3 1 1 1 4 00:00:00 DVD-RW Video mode SP 1:25 Rem. 2 1. Color systems DVDs are recorded in the United States and Canada). Playing discs Editing Changing the SETUP menu DVD+R (VIDEO mode) CD-DA (AUDIO CD) CD-RW (CD-DA FORMAT, MP3 files) CD-R (CD-DA FORMAT, MP3 files) The number...

Operation Manual
Page 88
.... Playback Setting Setup > Playback TV Aspect Parental Lock Disc Menu Language Audio Language Subtitle Language Digital Out Dynamic Range Control Fast Forward with Audio 4:3 Letter Box All English Original OFF PCM DolbOy NDigital DTSOFF • Select a setting using { / B buttons, then press ENTER button. Note • Dynamic Range Control function is available only on the discs which are playing a disc. 1 Press SETUP button to steps A, B or C. 88 Proceed to display SETUP/DISC menu. Setup Menu Setup 1 5 POWER DISPLAY OPEN/CLOSE TIMER PROG. Press STOP button if...
.... Playback Setting Setup > Playback TV Aspect Parental Lock Disc Menu Language Audio Language Subtitle Language Digital Out Dynamic Range Control Fast Forward with Audio 4:3 Letter Box All English Original OFF PCM DolbOy NDigital DTSOFF • Select a setting using { / B buttons, then press ENTER button. Note • Dynamic Range Control function is available only on the discs which are playing a disc. 1 Press SETUP button to steps A, B or C. 88 Proceed to display SETUP/DISC menu. Setup Menu Setup 1 5 POWER DISPLAY OPEN/CLOSE TIMER PROG. Press STOP button if...
Operation Manual
Page 92
...; Switch the input selector on . Press RETURN button to TV. • Connect the antenna cable correctly (page 13). • Keep the equipment which may eliminate the problem and restore proper operation. Symptom Power The power does not turn off the display. • Check the connection to your TV, the copy-protection signal applied to some programs could affect picture quality. Picture noise appears. Picture There is no batteries in SETUP menu...
...; Switch the input selector on . Press RETURN button to TV. • Connect the antenna cable correctly (page 13). • Keep the equipment which may eliminate the problem and restore proper operation. Symptom Power The power does not turn off the display. • Check the connection to your TV, the copy-protection signal applied to some programs could affect picture quality. Picture noise appears. Picture There is no batteries in SETUP menu...

Operation Manual
Page 96
... numbers. Track Audio CDs use tracks to PCM. Others Analog audio An electrical signal that higher-quality picture will only play in DVD players.With this DVD recorder, it is almost square); Conventional TVs are compatible with progressive video (480p), you sound of a disc.The DVD equivalent is . Component video output Each signal of luminance(Y) and component(PB/CB, PR/CR) is usually divided into fields, and instead scans directly through all regions). some satellite broadcasts). Digital audio...
... numbers. Track Audio CDs use tracks to PCM. Others Analog audio An electrical signal that higher-quality picture will only play in DVD players.With this DVD recorder, it is almost square); Conventional TVs are compatible with progressive video (480p), you sound of a disc.The DVD equivalent is . Component video output Each signal of luminance(Y) and component(PB/CB, PR/CR) is usually divided into fields, and instead scans directly through all regions). some satellite broadcasts). Digital audio...
Operation Manual
Page 97
... Digital audio output Output level Jacks Specifications DVD-Video, DVD-RW/R, CD-DA, CD-RW/R AC120 V, 60 Hz 23 W (standby: 4.0 W) 6.0 lbs ( 2.7 kg ) 17 1/8" x 2 5/8" x 11 3/4" (435 x 66 x 297 mm) 41Fº to 104Fº (5ºC to 40ºC) 5% to 85% (no condensation) NTSC Video Recording format (DVD-RW only), Video format (DVD-RW, DVD-R) DVD-ReWritable, DVD-Recordable 13.5MHz MPEG 48kHz Dolby Digital 2-13ch 14-69ch C1-C125ch VHF/UHF set 75Ω Input 1 (rear...
... Digital audio output Output level Jacks Specifications DVD-Video, DVD-RW/R, CD-DA, CD-RW/R AC120 V, 60 Hz 23 W (standby: 4.0 W) 6.0 lbs ( 2.7 kg ) 17 1/8" x 2 5/8" x 11 3/4" (435 x 66 x 297 mm) 41Fº to 104Fº (5ºC to 40ºC) 5% to 85% (no condensation) NTSC Video Recording format (DVD-RW only), Video format (DVD-RW, DVD-R) DVD-ReWritable, DVD-Recordable 13.5MHz MPEG 48kHz Dolby Digital 2-13ch 14-69ch C1-C125ch VHF/UHF set 75Ω Input 1 (rear...


