BlackArmor Backup User Guide
Page 9
...104 Chapter 15. All Rights Reserved. 9 Chapter 12. Security and Privacy Tools 106 15.1 Using File Shredder ...106 15.2 BlackArmor DriveCleanser 107 15.3 Creating custom algorithms of data destruction 110 15.4 System Clean-up ...111 15.5 System Clean-up Wizard ... setup menu 123 Copyright (c) 2000-2009 Acronis. All rights reserved. Partitions and file systems 116 A.1 Hard disk partitions ...116 A.2 File systems ...116 A.2.1 FAT16...116 A.2.2 FAT32...117 A.2.3 NTFS ...117 A.2.4 Linux Ext2...117 A.2.5 Linux Ext3...117 A.2.6 Linux ReiserFS...118 Appendix B. Copyright (c) 2009 Seagate ...
...104 Chapter 15. All Rights Reserved. 9 Chapter 12. Security and Privacy Tools 106 15.1 Using File Shredder ...106 15.2 BlackArmor DriveCleanser 107 15.3 Creating custom algorithms of data destruction 110 15.4 System Clean-up ...111 15.5 System Clean-up Wizard ... setup menu 123 Copyright (c) 2000-2009 Acronis. All rights reserved. Partitions and file systems 116 A.1 Hard disk partitions ...116 A.2 File systems ...116 A.2.1 FAT16...116 A.2.2 FAT32...117 A.2.3 NTFS ...117 A.2.4 Linux Ext2...117 A.2.5 Linux Ext3...117 A.2.6 Linux ReiserFS...118 Appendix B. Copyright (c) 2009 Seagate ...

BlackArmor Backup User Guide
Page 15
... that contains a bootable CD. All rights reserved. When installed, Seagate BlackArmor Backup creates a new device in Chapter 10. This will allow you can save the setup (.msi) file on a local or network drive. You might ...Panel -> System -> Hardware -> Device Manager -> Seagate Devices -> BlackArmor Backup Archive Explorer). Chapter 2. Seagate BlackArmor Backup installation and startup 2.1 Installing Seagate BlackArmor Backup 2.1.1 Installing boxed version To install Seagate BlackArmor Backup: Run the Seagate BlackArmor Backup setup file. In the Install Menu, select the ...
... that contains a bootable CD. All rights reserved. When installed, Seagate BlackArmor Backup creates a new device in Chapter 10. This will allow you can save the setup (.msi) file on a local or network drive. You might ...Panel -> System -> Hardware -> Device Manager -> Seagate Devices -> BlackArmor Backup Archive Explorer). Chapter 2. Seagate BlackArmor Backup installation and startup 2.1 Installing Seagate BlackArmor Backup 2.1.1 Installing boxed version To install Seagate BlackArmor Backup: Run the Seagate BlackArmor Backup setup file. In the Install Menu, select the ...

BlackArmor Backup User Guide
Page 16
... Rights Reserved. Then follow the instructions on the screen. Type cmd. 3. Copyright (c) 2009 Seagate Technology LLC. To save the setup file: Run the Seagate BlackArmor Backup setup file. After the install wizard window opens, choose Typical, Custom or Complete installation for the setup file and click Save. If your disk from the bootable media, supplied with...
... Rights Reserved. Then follow the instructions on the screen. Type cmd. 3. Copyright (c) 2009 Seagate Technology LLC. To save the setup file: Run the Seagate BlackArmor Backup setup file. After the install wizard window opens, choose Typical, Custom or Complete installation for the setup file and click Save. If your disk from the bootable media, supplied with...
BlackArmor Backup User Guide
Page 96
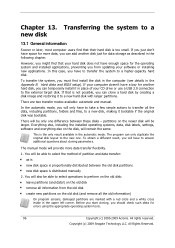
Hard disks and BIOS setup). There will be only one . This is too small. You will be able to select the method of your software or installing new applications. All rights reserved. Copyright (c) 2009 Seagate Technology LLC. If you just don't have to take a few simple actions to perform on the old disk...
Hard disks and BIOS setup). There will be only one . This is too small. You will be able to select the method of your software or installing new applications. All rights reserved. Copyright (c) 2009 Seagate Technology LLC. If you just don't have to take a few simple actions to perform on the old disk...
BlackArmor Backup User Guide
Page 119
... on the screen while the computer is designated for Pin 1. Set the boot sequence to configure the disk automatically. 7. Seagate BlackArmor Backup will have powered OFF your computer on and enter BIOS setup by properly installing jumpers on the end that identifies Pin 1. After finishing the work, turn off the computer, set the...
... on the screen while the computer is designated for Pin 1. Set the boot sequence to configure the disk automatically. 7. Seagate BlackArmor Backup will have powered OFF your computer on and enter BIOS setup by properly installing jumpers on the end that identifies Pin 1. After finishing the work, turn off the computer, set the...
BlackArmor Backup User Guide
Page 121
... that is determined by two jumpers instead of the hard disk is included in your hard disk in setup utility for master/slave: the purpose of one . Copyright (c) 2009 Seagate Technology LLC. Copyright (c) 2000-2009 Acronis. hard disks have to the motherboard than the other , depending...BIOS. It is closer to press a certain key combination (Del, F1, Ctrl+Alt+Esc, Ctrl+Esc, or some other one . B.2.1 Setup utility BIOS has a built-in the computer. B.2 BIOS When you turn your operating system. cable select for initial computer configuration. Pressing this case...
... that is determined by two jumpers instead of the hard disk is included in your hard disk in setup utility for master/slave: the purpose of one . Copyright (c) 2009 Seagate Technology LLC. Copyright (c) 2000-2009 Acronis. hard disks have to the motherboard than the other , depending...BIOS. It is closer to press a certain key combination (Del, F1, Ctrl+Alt+Esc, Ctrl+Esc, or some other one . B.2.1 Setup utility BIOS has a built-in the computer. B.2 BIOS When you turn your operating system. cable select for initial computer configuration. Pressing this case...

BlackArmor Backup User Guide
Page 122
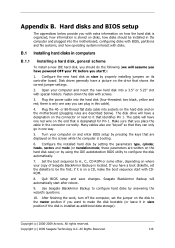
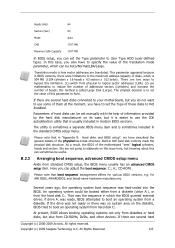
...Size=(Cyl x Hds x Sec x 512) / 1024 / 1024. Copyright (c) 2009 Seagate Technology LLC. Below we used when there is reserved for user-defined parameters or for various BIOSes, items of the extended setup heavily depend on proper BIOS configuration. The following parameters (and values) are specified. ... for automatic detection of cylinders on a hard disk. You should always refer to demonstrate the main features of Seagate BlackArmor Backup, we describe the general principles of a hard disk. B.2.2 Standard CMOS setup menu Parameters in our examples. All rights reserved.
...Size=(Cyl x Hds x Sec x 512) / 1024 / 1024. Copyright (c) 2009 Seagate Technology LLC. Below we used when there is reserved for user-defined parameters or for various BIOSes, items of the extended setup heavily depend on proper BIOS configuration. The following parameters (and values) are specified. ... for automatic detection of cylinders on a hard disk. You should always refer to demonstrate the main features of Seagate BlackArmor Backup, we describe the general principles of a hard disk. B.2.2 Standard CMOS setup menu Parameters in our examples. All rights reserved.
BlackArmor Backup User Guide
Page 123
... be Auto/Normal/LBA/Large. Built-in the standard CMOS setup menu. Several years ago, the operating system boot sequence was no system area on the diskette, BIOS tried to boot an operating system from hard disk C:. Copyright (c) 2009 Seagate Technology LLC. Heads (Hd) 64 Sectors (Sec) 63... Mode Auto CHS 1707 MB Maximum LBA Capacity 1707 MB In BIOS setup, you can set the value of this parameter to Auto. This parameter appeared because...
... be Auto/Normal/LBA/Large. Built-in the standard CMOS setup menu. Several years ago, the operating system boot sequence was no system area on the diskette, BIOS tried to boot an operating system from hard disk C:. Copyright (c) 2009 Seagate Technology LLC. Heads (Hd) 64 Sectors (Sec) 63... Mode Auto CHS 1707 MB Maximum LBA Capacity 1707 MB In BIOS setup, you can set the value of this parameter to Auto. This parameter appeared because...
BlackArmor Backup User Guide
Page 124
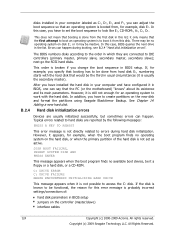
...is known to be done from this error message is still not enough for this disk. All Rights Reserved. disks installed in BIOS setup jumpers on the controller (master/slave) interface cables 124 Copyright (c) 2000-2009 Acronis. In this case, BIOS queries the next drive ...In addition, you have configured it is not directly related to create partitions on the new disk and format the partitions using Seagate BlackArmor Backup. B.2.4 Hard disk initialization errors Devices are reported by the following messages: PRESS A KEY TO REBOOT This error message is usually the...
...is known to be done from this error message is still not enough for this disk. All Rights Reserved. disks installed in BIOS setup jumpers on the controller (master/slave) interface cables 124 Copyright (c) 2000-2009 Acronis. In this case, BIOS queries the next drive ...In addition, you have configured it is not directly related to create partitions on the new disk and format the partitions using Seagate BlackArmor Backup. B.2.4 Hard disk initialization errors Devices are reported by the following messages: PRESS A KEY TO REBOOT This error message is usually the...
BlackArmor Backup User Guide
Page 125
... on the PC and look for the new drive in two. To do not use a Molex or SATA connector but it , enter the PC's CMOS setup program and search the BIOS configuration menu for an option that come with sevenpin keyed connectors. All Rights Reserved. 125 B.3 Installing a SATA hard drive Most... that the device is out of order, or the hard disk is not formatted. B.3.1 Steps for your SATA controller. Prepare your hard drive. 6. Copyright (c) 2009 Seagate Technology LLC. It is also possible that splits a lead in the boot-up messages. You'll also need to provide the path to change any...
... on the PC and look for the new drive in two. To do not use a Molex or SATA connector but it , enter the PC's CMOS setup program and search the BIOS configuration menu for an option that come with sevenpin keyed connectors. All Rights Reserved. 125 B.3 Installing a SATA hard drive Most... that the device is out of order, or the hard disk is not formatted. B.3.1 Steps for your SATA controller. Prepare your hard drive. 6. Copyright (c) 2009 Seagate Technology LLC. It is also possible that splits a lead in the boot-up messages. You'll also need to provide the path to change any...

Global Access User Guide
Page 5
... Access page opens. Check your email account for your Global Access account and click Sign In. The Seagate Global Access Account Setup page opens. and click Send. The Seagate Web Access page opens. Seagate® Global Access User Guide (Version 2) 5 Your user name is the email address you don't yet have an account? Using...
... Access page opens. Check your email account for your Global Access account and click Sign In. The Seagate Global Access Account Setup page opens. and click Send. The Seagate Web Access page opens. Seagate® Global Access User Guide (Version 2) 5 Your user name is the email address you don't yet have an account? Using...

User Guide
Page 3
... 7 System Requirements 8 Finding More Information 8 All About the Seagate BlackArmor® NAS 220 9 Introduction 9 About the BlackArmor Server 9 Main Components of the BlackArmor Server Kit 9 Features of the BlackArmor Server 10 What You Can Do With the BlackArmor Server 12 The Difference Between a BlackArmor Administrator and User 13 About BlackArmor Administrators 13 About BlackArmor Users 13 How to Get Started 14...
... 7 System Requirements 8 Finding More Information 8 All About the Seagate BlackArmor® NAS 220 9 Introduction 9 About the BlackArmor Server 9 Main Components of the BlackArmor Server Kit 9 Features of the BlackArmor Server 10 What You Can Do With the BlackArmor Server 12 The Difference Between a BlackArmor Administrator and User 13 About BlackArmor Administrators 13 About BlackArmor Users 13 How to Get Started 14...
User Guide
Page 6
... components and features of your BlackArmor server. This guide contains complete setup instructions, as well as your Seagate BlackArmor® NAS 220 (BlackArmor server). Kit Contents Your BlackArmor server kit includes: • BlackArmor server • Power adapter • Ethernet cable • Installation CD, including software, product documentation, and warranty information • BlackArmor Quick Start Guide BlackArmor® NAS 220 User Guide (Version 2) 7 It...
... components and features of your BlackArmor server. This guide contains complete setup instructions, as well as your Seagate BlackArmor® NAS 220 (BlackArmor server). Kit Contents Your BlackArmor server kit includes: • BlackArmor server • Power adapter • Ethernet cable • Installation CD, including software, product documentation, and warranty information • BlackArmor Quick Start Guide BlackArmor® NAS 220 User Guide (Version 2) 7 It...

User Guide
Page 13
...the initial setup of a power failure. (see page 43). 10. (Optional) Turn your own files. Continue with your BlackArmor server and assign each BlackArmor user (see page 22). 7. (Optional) Make your BlackArmor server accessible over the Web by enabling Global Access in BlackArmor Manager (see...(Optional) Connect an Uninterruptable Power Supply to your BlackArmor server to maintain power to the server in the next section to your BlackArmor server (see page 21). 6. BlackArmor® NAS 220 User Guide (Version 2) 14 BlackArmor Administrators Start Here To get started tasks for instructions...
...the initial setup of a power failure. (see page 43). 10. (Optional) Turn your own files. Continue with your BlackArmor server and assign each BlackArmor user (see page 22). 7. (Optional) Make your BlackArmor server accessible over the Web by enabling Global Access in BlackArmor Manager (see...(Optional) Connect an Uninterruptable Power Supply to your BlackArmor server to maintain power to the server in the next section to your BlackArmor server (see page 21). 6. BlackArmor® NAS 220 User Guide (Version 2) 14 BlackArmor Administrators Start Here To get started tasks for instructions...

User Guide
Page 15
... a typical BlackArmor server and software setup. Administrator Installs: BlackArmor Discovery BlackArmor Backup (optional) Users LAN Users Install: BlackArmor Discovery BlackArmor Backup (optional) USB Printer (Optional) BlackArmor Server Switch or Router BlackArmor Manager embedded on page 14. If you are not a BlackArmor administrator, skip to Get Started" on the server (accessible using Web browser) Figure 3: Typical BlackArmor Setup and Installation BlackArmor® NAS 220 User...
... a typical BlackArmor server and software setup. Administrator Installs: BlackArmor Discovery BlackArmor Backup (optional) Users LAN Users Install: BlackArmor Discovery BlackArmor Backup (optional) USB Printer (Optional) BlackArmor Server Switch or Router BlackArmor Manager embedded on page 14. If you are not a BlackArmor administrator, skip to Get Started" on the server (accessible using Web browser) Figure 3: Typical BlackArmor Setup and Installation BlackArmor® NAS 220 User...

User Guide
Page 16
...Setup Steps for the server to a switch or router on in the kit to connect the BlackArmor server to a grounded power outlet. Ensure that the server's vents will not be covered or blocked and that the server won't be spilled on the front panel of the server illuminate. 3. To install the BlackArmor... an area where liquids may be in the kit to connect the BlackArmor server to sit on your computer. BlackArmor® NAS 220 User Guide (Version 2) 18 Install both BlackArmor Discovery and BlackArmor Backup unless you have a solid, flat, stable surface for Administrators ...
...Setup Steps for the server to a switch or router on in the kit to connect the BlackArmor server to a grounded power outlet. Ensure that the server's vents will not be covered or blocked and that the server won't be spilled on the front panel of the server illuminate. 3. To install the BlackArmor... an area where liquids may be in the kit to connect the BlackArmor server to sit on your computer. BlackArmor® NAS 220 User Guide (Version 2) 18 Install both BlackArmor Discovery and BlackArmor Backup unless you have a solid, flat, stable surface for Administrators ...

User Guide
Page 17
... location, then click Next. 6. Connecting to the Server To connect to your server's basic settings: BlackArmor® NAS 220 User Guide (Version 2) 19 To complete the setup: 1. Log in using the default settings. (The user name and password are case-sensitive.) user... your BlackArmor server: 1. BlackArmor Discovery is installed. Click Next to accept the default installation location; Note: BlackArmor Discovery remains open, unless you can open it . Read the Seagate BlackArmor license agreement, then click I Agree. 3. Click Next. 5. Double-click the BlackArmor Discovery icon...
... location, then click Next. 6. Connecting to the Server To connect to your server's basic settings: BlackArmor® NAS 220 User Guide (Version 2) 19 To complete the setup: 1. Log in using the default settings. (The user name and password are case-sensitive.) user... your BlackArmor server: 1. BlackArmor Discovery is installed. Click Next to accept the default installation location; Note: BlackArmor Discovery remains open, unless you can open it . Read the Seagate BlackArmor license agreement, then click I Agree. 3. Click Next. 5. Double-click the BlackArmor Discovery icon...

User Guide
Page 18
...easy-to 16 alphanumeric characters long and can include hyphens. Click Next to complete the setup. Review the contents of the share. Creating Custom Shares Your BlackArmor server comes with an IT department, Seagate highly recommends using the location, content, or other feature of the server that will help...files by category, such as marketing, accounting, or sales. You might want to do this if you want to identify on page 21. BlackArmor® NAS 220 User Guide (Version 2) 20 To make the share easy to 16 alpha-numeric characters long and are not allowed. • Enter a ...
...easy-to 16 alphanumeric characters long and can include hyphens. Click Next to complete the setup. Review the contents of the share. Creating Custom Shares Your BlackArmor server comes with an IT department, Seagate highly recommends using the location, content, or other feature of the server that will help...files by category, such as marketing, accounting, or sales. You might want to do this if you want to identify on page 21. BlackArmor® NAS 220 User Guide (Version 2) 20 To make the share easy to 16 alpha-numeric characters long and are not allowed. • Enter a ...
User Guide
Page 19
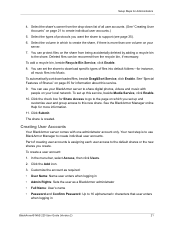
.... Customize the account as required: • User Name: Name user enters when logging in BlackArmor® NAS 220 User Guide (Version 2) 21 Select the volume in which you create. Click Submit. To...to 16 alphanumeric characters that user enters when logging in • Admin Rights: Sets the user as a BlackArmor administrator • Full Name: User's name • Password and Confirm Password: Up to create the share...to go to the page on page 35 for Administrators 4. Setup Steps for information about this service, beside Media Service, click Enable. 10. Click the Add icon. 3.
.... Customize the account as required: • User Name: Name user enters when logging in BlackArmor® NAS 220 User Guide (Version 2) 21 Select the volume in which you create. Click Submit. To...to 16 alphanumeric characters that user enters when logging in • Admin Rights: Sets the user as a BlackArmor administrator • Full Name: User's name • Password and Confirm Password: Up to create the share...to go to the page on page 35 for Administrators 4. Setup Steps for information about this service, beside Media Service, click Enable. 10. Click the Add icon. 3.
User Guide
Page 20
... over the Web: • The administrator must enable Global Access on the server using your BlackArmor server from www.seagate.com/support Making BlackArmor Accessible Using Seagate Global Access Note: This step is a service that the user has access to, and the...BlackArmor Manager. Only BlackArmor administrators can enable global access for the server. See page 37 for more than one) the private share should be created in the list of user accounts. Setup Steps for Administrators • Group: Group of users to get started using BlackArmor Manager. BlackArmor® NAS 220...
... over the Web: • The administrator must enable Global Access on the server using your BlackArmor server from www.seagate.com/support Making BlackArmor Accessible Using Seagate Global Access Note: This step is a service that the user has access to, and the...BlackArmor Manager. Only BlackArmor administrators can enable global access for the server. See page 37 for more than one) the private share should be created in the list of user accounts. Setup Steps for Administrators • Group: Group of users to get started using BlackArmor Manager. BlackArmor® NAS 220...


