

User Manual
Page 3
...symbol mark, this chemical symbol means that electrical and electronic equipment, batteries and accumulators, at a certain concentration. SANYO FISHER Sales (Europe) GmbH Stahlgruberring 4, D-81829 München, Germany SANYO Electric Co., Ltd. 1-1, Sanyo-cho, Daito City, Osaka 574-8534, Japan FOR RUSSIAN USERS This... cadmium, Pb: lead In the European Union there are separate collection systems for used electrical and electronic equipment, batteries and accumulators. Your SANYO product is designed and manufactured with Canadian ICES-003. Please, dispose of the world. FOR EU USERS The ...
...symbol mark, this chemical symbol means that electrical and electronic equipment, batteries and accumulators, at a certain concentration. SANYO FISHER Sales (Europe) GmbH Stahlgruberring 4, D-81829 München, Germany SANYO Electric Co., Ltd. 1-1, Sanyo-cho, Daito City, Osaka 574-8534, Japan FOR RUSSIAN USERS This... cadmium, Pb: lead In the European Union there are separate collection systems for used electrical and electronic equipment, batteries and accumulators. Your SANYO product is designed and manufactured with Canadian ICES-003. Please, dispose of the world. FOR EU USERS The ...

User Manual
Page 23
...the warranty. After 60 minutes of a splash, immediately wipe off any moisture. i Do not immerse in water. i Do not open and close the battery cover, card slot cover, or DC IN terminal cover with JIS IPX8 (formerly JIS protection grade 8) waterproof standard and can be used in water. i... water. i Do not jolt the camera while it . Please take the time to carefully read and heed the following precautions may cause the battery cover, card slot cover, or DC IN terminal cover to dry for longer than 60 minutes. English xxii Concerning your camera's waterproof feature This...
...the warranty. After 60 minutes of a splash, immediately wipe off any moisture. i Do not immerse in water. i Do not open and close the battery cover, card slot cover, or DC IN terminal cover with JIS IPX8 (formerly JIS protection grade 8) waterproof standard and can be used in water. i... water. i Do not jolt the camera while it . Please take the time to carefully read and heed the following precautions may cause the battery cover, card slot cover, or DC IN terminal cover to dry for longer than 60 minutes. English xxii Concerning your camera's waterproof feature This...

User Manual
Page 24
... camera's waterproof capability. i Waterproof seals are used in salt water or if salt water is adhering to severe jolts, as doing so may deform the battery cover, card slot cover, DC IN terminal cover, or the camera body, thus compromising its waterproof capability. For replacing the seals, please consult your dealer...
... camera's waterproof capability. i Waterproof seals are used in salt water or if salt water is adhering to severe jolts, as doing so may deform the battery cover, card slot cover, DC IN terminal cover, or the camera body, thus compromising its waterproof capability. For replacing the seals, please consult your dealer...

User Manual
Page 25
When closing the battery cover, card slot cover, and DC IN terminal cover, make sure that the battery cover (page 25), the card slot cover (page 22), and the DC IN terminal cover (page 27) are closed. Card slot cover (page 22) DC IN terminal cover (page 27) Battery cover (page 25) Englishxxiv BEFORE RECORDING IN WATER Make sure that no foreign object such as sand, hair, dust, etc. is open, water will get inside the camera and damage it. If a cover is caught in the rubber seal.
When closing the battery cover, card slot cover, and DC IN terminal cover, make sure that the battery cover (page 25), the card slot cover (page 22), and the DC IN terminal cover (page 27) are closed. Card slot cover (page 22) DC IN terminal cover (page 27) Battery cover (page 25) Englishxxiv BEFORE RECORDING IN WATER Make sure that no foreign object such as sand, hair, dust, etc. is open, water will get inside the camera and damage it. If a cover is caught in the rubber seal.

User Manual
Page 26
... Lots of accessories for optimal use of your captured images ....... 18 SYSTEM MAP 19 „ SETUP PARTS NAMES 20 INSTALLING THE CARD 22 CHARGING THE BATTERY PACK 24 About recharging 30 About the temperature alert icon 30 TURNING THE CAMERA ON AND OFF 31 Turning on the camera 31 Turning on...
... Lots of accessories for optimal use of your captured images ....... 18 SYSTEM MAP 19 „ SETUP PARTS NAMES 20 INSTALLING THE CARD 22 CHARGING THE BATTERY PACK 24 About recharging 30 About the temperature alert icon 30 TURNING THE CAMERA ON AND OFF 31 Turning on the camera 31 Turning on...

User Manual
Page 29
... 133 CHECKING THE REMAINING CARD MEMORY 134 Checking the remaining number of images and video recording time 134 For audio recordings 135 CHECKING THE REMAINING BATTERY PACK CHARGE 136 „ OTHER DEVICES AND CONNECTIONS CONNECTING TO A TV CONNECTING TO A TV 138 Connecting to a standard video input terminal 139 Connect to the...
... 133 CHECKING THE REMAINING CARD MEMORY 134 Checking the remaining number of images and video recording time 134 For audio recordings 135 CHECKING THE REMAINING BATTERY PACK CHARGE 136 „ OTHER DEVICES AND CONNECTIONS CONNECTING TO A TV CONNECTING TO A TV 138 Connecting to a standard video input terminal 139 Connect to the...

User Manual
Page 30
CONTENTS „ APPENDICES COMMONLY ASKED QUESTIONS 146 TROUBLESHOOTING 154 Camera 154 Notes regarding the Scene Select feature and filters 162 SPECIFICATIONS 164 Camera 164 Camera connectors 168 Battery life 168 Possible No. of Images/Possible Shooting Time/ Possible Recording Time 169 Concerning the multi-indicator 170 Supplied AC adaptor 171 Supplied Li-ion battery pack 171 Others 172 Before capturing those important shots, be sure to first take a test shot to comfirm that your camera is set up and ready to go 173 HINTS FOR TAKING PICTURES 174 5 English
CONTENTS „ APPENDICES COMMONLY ASKED QUESTIONS 146 TROUBLESHOOTING 154 Camera 154 Notes regarding the Scene Select feature and filters 162 SPECIFICATIONS 164 Camera 164 Camera connectors 168 Battery life 168 Possible No. of Images/Possible Shooting Time/ Possible Recording Time 169 Concerning the multi-indicator 170 Supplied AC adaptor 171 Supplied Li-ion battery pack 171 Others 172 Before capturing those important shots, be sure to first take a test shot to comfirm that your camera is set up and ready to go 173 HINTS FOR TAKING PICTURES 174 5 English

User Manual
Page 36
CHECKING THE INCLUDED ACCESSORIES i Xacti Software CD (CD-ROM) (page 4 in the Xacti Software CD INSTRUCTION MANUAL): 1 i Grip belt (page 12): 1 i Dedicated USB interface cable (page 7 in the Xacti Software CD INSTRUCTION MANUAL): 1 i Li-ion battery pack (page 25): 1 i AC adaptor and power cord (page 27): 1 i Dedicated AV interface cable (page 139): 1 i Core (page 141): 1 For HDMI cable i Quick Guide i "SAFETY MANUAL" (safety precautions booklet) Please read this booklet carefully before using the camera. 11 English
CHECKING THE INCLUDED ACCESSORIES i Xacti Software CD (CD-ROM) (page 4 in the Xacti Software CD INSTRUCTION MANUAL): 1 i Grip belt (page 12): 1 i Dedicated USB interface cable (page 7 in the Xacti Software CD INSTRUCTION MANUAL): 1 i Li-ion battery pack (page 25): 1 i AC adaptor and power cord (page 27): 1 i Dedicated AV interface cable (page 139): 1 i Core (page 141): 1 For HDMI cable i Quick Guide i "SAFETY MANUAL" (safety precautions booklet) Please read this booklet carefully before using the camera. 11 English
User Manual
Page 38
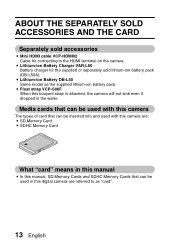
... for connecting to as the supplied lithium-ion battery pack. i Lithium-ion Battery DB-L50 Same model as "card". 13 English Media cards that can be used with this camera The types of card that can be inserted .... ABOUT THE SEPARATELY SOLD ACCESSORIES AND THE CARD Separately sold accessories i Mini HDMI cable VCP-HDMI02 Cable for the supplied or separately sold lithium-ion battery pack (DB-L50A).
... for connecting to as the supplied lithium-ion battery pack. i Lithium-ion Battery DB-L50 Same model as "card". 13 English Media cards that can be used with this camera The types of card that can be inserted .... ABOUT THE SEPARATELY SOLD ACCESSORIES AND THE CARD Separately sold accessories i Mini HDMI cable VCP-HDMI02 Cable for the supplied or separately sold lithium-ion battery pack (DB-L50A).

User Manual
Page 45
To care for your camera after using in the camera where water might accumulate, but this will not affect its waterproof properties. SETUP SETUP SETUP PARTS NAMES Front Zoom switch Lens Monitor unit Grip belt holder Microphone Flash Microphone Bottom Battery cover lock Tripod stand hole Battery cover There are places in water, see page 70. English 20
To care for your camera after using in the camera where water might accumulate, but this will not affect its waterproof properties. SETUP SETUP SETUP PARTS NAMES Front Zoom switch Lens Monitor unit Grip belt holder Microphone Flash Microphone Bottom Battery cover lock Tripod stand hole Battery cover There are places in water, see page 70. English 20

User Manual
Page 49
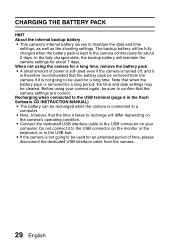
Install the battery pack in the camera, and connect the AC adaptor to the camera can also be supplied from a power outlet when the AC adaptor is connected. 1 While pressing the small orange button on the battery cover lock, push the battery cover lock (1), and unlatch the battery cover lock (2). 1 Orange button 2 English 24 SETUP LOOK OPEN CHARGING THE BATTERY PACK Please charge the supplied battery pack before using it. Power to charge the battery.
Install the battery pack in the camera, and connect the AC adaptor to the camera can also be supplied from a power outlet when the AC adaptor is connected. 1 While pressing the small orange button on the battery cover lock, push the battery cover lock (1), and unlatch the battery cover lock (2). 1 Orange button 2 English 24 SETUP LOOK OPEN CHARGING THE BATTERY PACK Please charge the supplied battery pack before using it. Power to charge the battery.

User Manual
Page 50
h Close the battery cover lock firmly until it is in the [LOCK] position. 1 2 25 English CHARGING THE BATTERY PACK 2 Open the battery cover (3), and insert the battery pack (4). 3 4 3 Close the battery cover (1), and latch the battery cover lock (2).
h Close the battery cover lock firmly until it is in the [LOCK] position. 1 2 25 English CHARGING THE BATTERY PACK 2 Open the battery cover (3), and insert the battery pack (4). 3 4 3 Close the battery cover (1), and latch the battery cover lock (2).

User Manual
Page 51
English 26 SETUP h Raise the edge of the battery pack to remove it.
English 26 SETUP h Raise the edge of the battery pack to remove it.

User Manual
Page 52
h Charging begins. 1 Unlock the DC IN terminal cover. AC adaptor To power outlet 27 English CHARGING THE BATTERY PACK 4 Use the power cord to connect the AC adaptor to a power outlet. DC IN 5V 1 2 2 Open the DC IN terminal cover.
h Charging begins. 1 Unlock the DC IN terminal cover. AC adaptor To power outlet 27 English CHARGING THE BATTERY PACK 4 Use the power cord to connect the AC adaptor to a power outlet. DC IN 5V 1 2 2 Open the DC IN terminal cover.

User Manual
Page 53
...is defective or is approx. 200 minutes. Make sure that no longer be possible to charge the battery pack. Wait until the battery pack has cooled down before attempting to charge the battery pack in the rubber seal. is correctly installed. h The charging time is not installed correctly. ...camera may not be waterproof. SETUP h During charging, the multi-indicator is not closed or is lit red. English 28 i The lithium-ion battery used in this state, the multiindicator may flash red and it . When charging is not a safety hazard. If you attempt to charge it...
...is defective or is approx. 200 minutes. Make sure that no longer be possible to charge the battery pack. Wait until the battery pack has cooled down before attempting to charge the battery pack in the rubber seal. is correctly installed. h The charging time is not installed correctly. ...camera may not be waterproof. SETUP h During charging, the multi-indicator is not closed or is lit red. English 28 i The lithium-ion battery used in this state, the multiindicator may flash red and it . When charging is not a safety hazard. If you attempt to charge it...
User Manual
Page 54
... is still used even if the camera is turned off, and it takes to confirm that the time it is therefore recommended that when the battery pack is not going to the USB terminal (page 6 in the camera continuously for a long time. In the fully charged state, the backup... battery will be fully charged when the battery pack is kept in the Xacti Software CD INSTRUCTION MANUAL) i The battery can be recharged while the camera is not going to be removed from the camera. 29 English...
... is still used even if the camera is turned off, and it takes to confirm that the time it is therefore recommended that when the battery pack is not going to the USB terminal (page 6 in the camera continuously for a long time. In the fully charged state, the backup... battery will be fully charged when the battery pack is kept in the Xacti Software CD INSTRUCTION MANUAL) i The battery can be recharged while the camera is not going to be removed from the camera. 29 English...

User Manual
Page 55
...rises further, the \ icon will show the time starting about 15 seconds before resuming use , if the temperature of the battery or inside the camera (excluding the battery) rises, a \ icon lights on again until the temperature has dropped (or as long as the \ icon remains flashing...place when the camera is turned off while the temperature is high (that you discontinue use , if the temperature of the battery or inside the camera (excluding the battery) rises, a temperature alert icon \ will turn the camera off automatically. h During video recording, a countdown indicator will ...
...rises further, the \ icon will show the time starting about 15 seconds before resuming use , if the temperature of the battery or inside the camera (excluding the battery) rises, a \ icon lights on again until the temperature has dropped (or as long as the \ icon remains flashing...place when the camera is turned off while the temperature is high (that you discontinue use , if the temperature of the battery or inside the camera (excluding the battery) rises, a temperature alert icon \ will turn the camera off automatically. h During video recording, a countdown indicator will ...

User Manual
Page 57
... playback (factory-preset setting). h Open the monitor unit. SETUP Turning on the camera when the power save (sleep) mode is active In order to preserve battery pack power, the power save (sleep) function will switch to the standby mode.
... playback (factory-preset setting). h Open the monitor unit. SETUP Turning on the camera when the power save (sleep) mode is active In order to preserve battery pack power, the power save (sleep) function will switch to the standby mode.

User Manual
Page 61
... you wish to change, and make the correction. h To display the Recording or Playback Screen, press the MENU button. HINT i Under normal conditions, while the battery pack is a small chance the settings may be lost (the backup will maintain the date and time settings. However, there is being replaced, an internal... last for about 7 days). It is completed. h The current date and time settings are still correct after replacing the battery pack and before shooting or recording of any type (follow step 1). To correct the date and time settings 1 Turn on the camera. 2 Display the Option ...
... you wish to change, and make the correction. h To display the Recording or Playback Screen, press the MENU button. HINT i Under normal conditions, while the battery pack is a small chance the settings may be lost (the backup will maintain the date and time settings. However, there is being replaced, an internal... last for about 7 days). It is completed. h The current date and time settings are still correct after replacing the battery pack and before shooting or recording of any type (follow step 1). To correct the date and time settings 1 Turn on the camera. 2 Display the Option ...

User Manual
Page 69
.../sec. i: The video clip size is 1600 × 1200 (4:3) pixels. SETUP 1 Recording size (page 59) h Select the video clip size to the NORMAL mode. 5 Remaining battery power indication (page 136) English 44
.../sec. i: The video clip size is 1600 × 1200 (4:3) pixels. SETUP 1 Recording size (page 59) h Select the video clip size to the NORMAL mode. 5 Remaining battery power indication (page 136) English 44


