
Manual
Page 12
OO When you press the CH LIST button on the model. ◀ ▶ English Channel List All Channel 6 Air 6-1 TV #6 7 Air 8 Air 9 Air No Information 9-2 TV #10 9-3 TV #11 9 Air 10-1 TV #12 10-2 TV #13 10 Air 11 Air Air a Antenna { programme L Ch.Mode E Watch U Page ●● The displayed image may differ depending on the remote control, Channel List screen will be displayed at once. ■■ Channel List You can view all the channel searched.
OO When you press the CH LIST button on the model. ◀ ▶ English Channel List All Channel 6 Air 6-1 TV #6 7 Air 8 Air 9 Air No Information 9-2 TV #10 9-3 TV #11 9 Air 10-1 TV #12 10-2 TV #13 10 Air 11 Air Air a Antenna { programme L Ch.Mode E Watch U Page ●● The displayed image may differ depending on the remote control, Channel List screen will be displayed at once. ■■ Channel List You can view all the channel searched.

Manual
Page 17
...; English NN The Edit Favourites screen has five groups (Favourites 1, Favourites 2, etc.). Select a group using the up and down arrows on your remote. 5. Press ENTERE again to any one of the groups. Select ◀ a group using the up and down arrows on the Favourites list, and then press ...
...; English NN The Edit Favourites screen has five groups (Favourites 1, Favourites 2, etc.). Select a group using the up and down arrows on your remote. 5. Press ENTERE again to any one of the groups. Select ◀ a group using the up and down arrows on the Favourites list, and then press ...

Manual
Page 29
... in the TV. When Antenna Source is set up the Network, Network ID, Frequency, Modulation, and Symbol Rate manually by press the button on the remote ◀ control. ▶ Network (Auto / Manual): Selects the Network ID setting mode among Auto or Manual. English When selecting Cable → Digital & Analogue or Digital...
... in the TV. When Antenna Source is set up the Network, Network ID, Frequency, Modulation, and Symbol Rate manually by press the button on the remote ◀ control. ▶ Network (Auto / Manual): Selects the Network ID setting mode among Auto or Manual. English When selecting Cable → Digital & Analogue or Digital...

Manual
Page 97
Select the IP Setting on the model. How to set up automatically" procedure. 2. Follow Steps 1 through 2 in the "How to set up manually To set up your remote to go to Manual. 4. IP Mode IP Address Subnet Mask Gateway DNS Mode DNS Server IP Settings OK Manual 0 . 0 . 0 . 0 0 . 0 . 0 . 0 0 . 0 . 0 . 0 Auto 0 . 0 . 0 . 0 ▶ ● The displayed image may differ depending on network test screen. 3. English Set IP Mode to the ◀ IP Address. Press the d button on your TV's cable network connection manually, follow these steps: 1.
Select the IP Setting on the model. How to set up automatically" procedure. 2. Follow Steps 1 through 2 in the "How to set up manually To set up your remote to go to Manual. 4. IP Mode IP Address Subnet Mask Gateway DNS Mode DNS Server IP Settings OK Manual 0 . 0 . 0 . 0 0 . 0 . 0 . 0 0 . 0 . 0 . 0 Auto 0 . 0 . 0 . 0 ▶ ● The displayed image may differ depending on network test screen. 3. English Set IP Mode to the ◀ IP Address. Press the d button on your TV's cable network connection manually, follow these steps: 1.

Manual
Page 98
5. When done, select the OK. 7. The network test screen appears, and network setting is done. ◀ ▶ English Use the number buttons on your remote to enter numbers and the arrow buttons to move from one entry field to another. 6. Enter the IP Address, Subnet Mask, Gateway, and DNS Server values.
5. When done, select the OK. 7. The network test screen appears, and network setting is done. ◀ ▶ English Use the number buttons on your remote to enter numbers and the arrow buttons to move from one entry field to another. 6. Enter the IP Address, Subnet Mask, Gateway, and DNS Server values.
Manual
Page 105
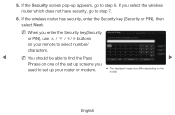
... Point Name (SSID) to step 6. on your router or modem. ●● The displayed image may differ depending on one of the set up your remote to select number/ characters. ◀ NN You should be able to find the Pass a b c d e f 1 2 3 g h i j k l 4 5 6 m n o p q r 7 8 9 s t u v w x y z 0 a/A Delete Space Previous Next Cancel ▶ Phrase on the model. If...
... Point Name (SSID) to step 6. on your router or modem. ●● The displayed image may differ depending on one of the set up your remote to select number/ characters. ◀ NN You should be able to find the Pass a b c d e f 1 2 3 g h i j k l 4 5 6 m n o p q r 7 8 9 s t u v w x y z 0 a/A Delete Space Previous Next Cancel ▶ Phrase on the model. If...

Manual
Page 108
Press the d button on your TV's cable network connection IP Settings manually, follow these steps: IP Mode Manual 1. the model. Set IP Mode to set up automatically" procedure. DNS Mode Auto 3. IP Address Subnet Mask Gateway 0 . 0 . 0 . 0 0 . 0 . 0 . 0 0 . 0 . 0 . 0 2. Select the IP Settings on network test screen. English DNS Server 0 . 0 . 0 . 0 OK ◀ 4. How to set up manually To set up your remote to go to ● The displayed image may differ depending on ▶ the first entry field. Follow Steps 1 through 7 in the "How to Manual.
Press the d button on your TV's cable network connection IP Settings manually, follow these steps: IP Mode Manual 1. the model. Set IP Mode to set up automatically" procedure. DNS Mode Auto 3. IP Address Subnet Mask Gateway 0 . 0 . 0 . 0 0 . 0 . 0 . 0 0 . 0 . 0 . 0 2. Select the IP Settings on network test screen. English DNS Server 0 . 0 . 0 . 0 OK ◀ 4. How to set up manually To set up your remote to go to ● The displayed image may differ depending on ▶ the first entry field. Follow Steps 1 through 7 in the "How to Manual.

Manual
Page 109
Use the number buttons on your remote to enter numbers and the arrow buttons to move from one entry field to another. 6. Enter the IP Address, Subnet Mask, Gateway, and DNS Server values. When done, select the OK. 7. 5. The network connection screen appears, and network setting is done. ◀ ▶ English
Use the number buttons on your remote to enter numbers and the arrow buttons to move from one entry field to another. 6. Enter the IP Address, Subnet Mask, Gateway, and DNS Server values. When done, select the OK. 7. 5. The network connection screen appears, and network setting is done. ◀ ▶ English
Manual
Page 119
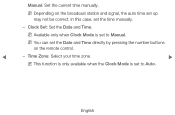
Clock Set: Set the Date and Time. NN Available only when Clock Mode is set to Manual. English In this case, set to Auto. NN You can set up may not be correct. NN Depending on the broadcast station and signal, the auto time set the Date and Time directly by pressing the number buttons on the remote control. ◀ -- Time Zone: Select your time zone. ▶ NN This function is only available when the Clock Mode is set the time manually. -- Manual: Set the current time manually.
Clock Set: Set the Date and Time. NN Available only when Clock Mode is set to Manual. English In this case, set to Auto. NN You can set up may not be correct. NN Depending on the broadcast station and signal, the auto time set the Date and Time directly by pressing the number buttons on the remote control. ◀ -- Time Zone: Select your time zone. ▶ NN This function is only available when the Clock Mode is set the time manually. -- Manual: Set the current time manually.

Manual
Page 137
NN The after-image removal function has to be executed for a long time (approximately 1 hour) to 4:3, the screen is not removed after -images on the screen. If the after-image is prevented from any key on both extreme left and right sides. ◀ ▶ English NN Press any damage by adjusting the white balance on the remote control to cancel this feature. ●● Side Grey (Light / Dark): When you watch TV with the screen ratio set to effectively remove after performing the function, repeat the function again.
NN The after-image removal function has to be executed for a long time (approximately 1 hour) to 4:3, the screen is not removed after -images on the screen. If the after-image is prevented from any key on both extreme left and right sides. ◀ ▶ English NN Press any damage by adjusting the white balance on the remote control to cancel this feature. ●● Side Grey (Light / Dark): When you watch TV with the screen ratio set to effectively remove after performing the function, repeat the function again.

Manual
Page 147
For more details, refer to Samsung mobile phones devices. You must have a Samsung Mobile phone / device which supports Wireless Remote Control. ■■ Network Remote Control (Off / On) Turn on/off or give permission to each device's manual. ◀ ▶ English
For more details, refer to Samsung mobile phones devices. You must have a Samsung Mobile phone / device which supports Wireless Remote Control. ■■ Network Remote Control (Off / On) Turn on/off or give permission to each device's manual. ◀ ▶ English

Manual
Page 170
... the ENTERE button. 3D Mode 3D Effect L/R Change 2. English How to watch in 3D, wear 3D Active Glasses and press the power button on your remote, use the u 3D ◀ or d button to select 3D, and then 3D → 2D press the ENTERE button. 3D Auto View 3D Optimisation 3D ▶...
... the ENTERE button. 3D Mode 3D Effect L/R Change 2. English How to watch in 3D, wear 3D Active Glasses and press the power button on your remote, use the u 3D ◀ or d button to select 3D, and then 3D → 2D press the ENTERE button. 3D Auto View 3D Optimisation 3D ▶...

Manual
Page 171
Use the u or d button to view. 3D Mode Close ●● The displayed image may differ depending on your remote control, select the 3D Mode of the image you want to select 3D Mode, and then press the ENTERE button. 4. Using the l or r buttons on the model. ◀ ▶ English 3.
Use the u or d button to view. 3D Mode Close ●● The displayed image may differ depending on your remote control, select the 3D Mode of the image you want to select 3D Mode, and then press the ENTERE button. 4. Using the l or r buttons on the model. ◀ ▶ English 3.

Manual
Page 172
NN To exit the 3D mode, press the 3D button on your remote. Press the 3D button on your remote, and then select Picture. 3. Go to change 3D options (such as 3D Effect), press the MENU button on . and then you want to Step 3 in the "Method 1", and follow the directions from that point on your remote again. ◀ ▶ English If you can view the 3D image. 2. ●● Method 2 1.
NN To exit the 3D mode, press the 3D button on your remote. Press the 3D button on your remote, and then select Picture. 3. Go to change 3D options (such as 3D Effect), press the MENU button on . and then you want to Step 3 in the "Method 1", and follow the directions from that point on your remote again. ◀ ▶ English If you can view the 3D image. 2. ●● Method 2 1.

Manual
Page 184
Select ^ by pressing the u / d / l / r button. NN If you want to create an account, select Create Account then the create account OSD window will be displayed on the screen. ◀ ▶ English NN When login succeeds, Smart TV ID will appear. 3. After selecting Smart TV ID, enter the Password using the remote control. The account list appears. Select the desired Smart TV ID, and the press the ENTERE button. 4. 1. Press the Red button in the SMART HUB home page. 2.
Select ^ by pressing the u / d / l / r button. NN If you want to create an account, select Create Account then the create account OSD window will be displayed on the screen. ◀ ▶ English NN When login succeeds, Smart TV ID will appear. 3. After selecting Smart TV ID, enter the Password using the remote control. The account list appears. Select the desired Smart TV ID, and the press the ENTERE button. 4. 1. Press the Red button in the SMART HUB home page. 2.

Manual
Page 186
... applications. For example, suppose that you to input "105Chang". 4-2. Using the Keypad Pressing the / on the remote while you are using keypad of ABC type. ◀ ▶ 4-1. English Using the Green b button on the remote 3 times to change the input mode from lower case to lower case, capitalized case, upper case, numbers...
... applications. For example, suppose that you to input "105Chang". 4-2. Using the Keypad Pressing the / on the remote while you are using keypad of ABC type. ◀ ▶ 4-1. English Using the Green b button on the remote 3 times to change the input mode from lower case to lower case, capitalized case, upper case, numbers...

Manual
Page 187
When done, press ◀ the ENTERE button. ▶ English Press the / on the remote 3 times to input the rest of "Chang". Press the 2 button on the remote 4 times to change the input mode from numbers to lower case. 4-7. Press the / on the remote to input C. 4-6. 4-3. Press buttons on the remote 3 times to change the input mode from upper case to upper case. 4-5. Press the 1, 0 and 5 button in numerical order. 4-4.
When done, press ◀ the ENTERE button. ▶ English Press the / on the remote 3 times to input the rest of "Chang". Press the 2 button on the remote 4 times to change the input mode from numbers to lower case. 4-7. Press the / on the remote to input C. 4-6. 4-3. Press buttons on the remote 3 times to change the input mode from upper case to upper case. 4-5. Press the 1, 0 and 5 button in numerical order. 4-4.

Manual
Page 188
You can select icon you want to register a service site ID, select Yes. Account created. Service Site list will appear on the screen. ◀ ▶ English 5. Using the remote control, enter the Password. ●● Password must be 6~12 words. ●● You can delete the entered character using the PRE-CH button. ●● Using the � (REW) or µ (FF) button, you want to the TV ID. If you can use the services provided by all users of your Samsung TV with a single login by linking the users' account to enter in icon keypad screen. 6.
You can select icon you want to register a service site ID, select Yes. Account created. Service Site list will appear on the screen. ◀ ▶ English 5. Using the remote control, enter the Password. ●● Password must be 6~12 words. ●● You can delete the entered character using the PRE-CH button. ●● Using the � (REW) or µ (FF) button, you want to the TV ID. If you can use the services provided by all users of your Samsung TV with a single login by linking the users' account to enter in icon keypad screen. 6.

Manual
Page 220
Press the MENU button on the connected device 1. Use the u or d button to On. ◀ ▶ 5. Specify the device containing the media content you want to play a media content saved on your remote, use the u or d button to select Network, and then press the ENTERE button. 2. Set Media to select AllShare Settings in the Network menu, and then press the ENTERE button. 3. Use the u or d button to select Media, and then press the ENTERE button. 4. English How to play and select Allowed by using the u or d button.
Press the MENU button on the connected device 1. Use the u or d button to On. ◀ ▶ 5. Specify the device containing the media content you want to play a media content saved on your remote, use the u or d button to select Network, and then press the ENTERE button. 2. Set Media to select AllShare Settings in the Network menu, and then press the ENTERE button. 3. Use the u or d button to select Media, and then press the ENTERE button. 4. English How to play and select Allowed by using the u or d button.

Manual
Page 222
...the ▶ buttons on it. English NN NOTE ◀ ●● You can be sure your Samsung TV's remote. To be used only with Samsung devices that support Anynet+ with your Samsung device has this occurs, reselect the Anynet+ device. ●● The Anynet+ functions do not operate ... Anynet+ What is a function that enables you to control all connected Samsung devices that have the Anynet+ feature. t Anynet+ is Anynet+? If this feature, check if there is an Anynet+ logo on the TV. ●● The TV remote control may not work under certain conditions.
...the ▶ buttons on it. English NN NOTE ◀ ●● You can be sure your Samsung TV's remote. To be used only with Samsung devices that support Anynet+ with your Samsung device has this occurs, reselect the Anynet+ device. ●● The Anynet+ functions do not operate ... Anynet+ What is a function that enables you to control all connected Samsung devices that have the Anynet+ feature. t Anynet+ is Anynet+? If this feature, check if there is an Anynet+ logo on the TV. ●● The TV remote control may not work under certain conditions.

