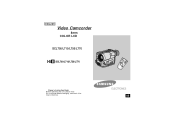
User Manual (user Manual) (ver.1.0) (English)
Page 1
ENGLISH Video Camcorder 8mm COLOR LCD SCL700/L710/L750/L770 Hi SCL700/L710/L750/L770 SSTTOAPRT/ TIMSEELRF STIDLLISPRLEATZYUERRON CROESUENTTER WIDE TELE Owner's Instruction Book Before operating the unit, please read this instruction book thoroughly, and retain it for future reference. ELECTRONICS US
User Manual (user Manual) (ver.1.0) (English)
Page 2
... ...12 Descriptions s Front View/Side View/Rear View ...13, 14, 15 s OSD (On Screen Display) ...16 Accessories Supplied with the Camcorder...18 Remote Control (SCL710/L750/L770 only) ...19 s Self Timer Recording ...19 Preparing Adjusting the Hand Strap and Shoulder Strap ...20 Lithium Battery Installation ...21 ...
User Manual (user Manual) (ver.1.0) (English)
Page 3
...60 DSE in PLAYER mode ...60 Multi Playback (Using the PAL60 System)...61 USB interface (SCL770 only)...62 Installing USB Media 2.0 Program ...63 Maintenance Cleaning and Taking care of the Camcorder...66 s Cleaning the Viewfinder ...66 s Cleaning the LCD Panel ...66 s Cleaning the... Video Heads ...66 s Storing the Camcorder ...66 Using Your Camcorder Abroad...67 Troubleshooting Self Diagnosis Display ...68 Checking...69 Moisture Condensation...
User Manual (user Manual) (ver.1.0) (English)
Page 4
...). 4 ENGLISH Notices and Safety Instructions Notices regarding the LENS 1 Do not let the LENS point toward the sun. Unintended rotation may cause damage to the Camcorder. 1) LCD screen closed. 2) 2) Standard recording by using the LCD screen. 3) 3) Making a recording by looking at the LCD screen from the top. 90° 4) 4) Making a recording...
User Manual (user Manual) (ver.1.0) (English)
Page 5
...reinstall the battery pack and lithium battery. Please make sure that the viewfinder is activated unexpectedly, and you take the camcorder from cold temperature outside during the winter. Notices and Safety Instructions Notices regarding moisture condensation 1) A sudden rise in atmospheric... temperature may cause damage to warm temperature inside during the summer. 2) If the "DEW" protection feature is activated, leave the camcorder in a dry, warm room with the cassette compartment opened and the battery removed. 3) If the "DEW" protection feature is pointing ...
User Manual (user Manual) (ver.1.0) (English)
Page 6
... in STANDBY for more battery power. 1 Make sure that the battery pack is charged before recording outdoors. 1 To preserve battery power, keep your camcorder turned off when you set the power switch to be swallowed, consult a doctor immediately. 1 The lithium battery maintains the clock function, TITLE, CUSTOM...battery pack 1 Make sure that the battery pack is a good idea to use the viewfinder instead of the LCD when recording for the camcorder lasts about 8~10 months under normal operation from time of installation. 1 When the lithium battery becomes weak or dead, the date/time indicator...
User Manual (user Manual) (ver.1.0) (English)
Page 7
..., clean the video heads. If this occurs, use a wet type cassette cleaner. It may damage the video heads. (see page 20) 1 Do not insert your camcorder will automatically turn off timer in STANDBY mode 1 To protect against tape and head-drum wear, your hand in the forward direction. When playing back...
User Manual (user Manual) (ver.1.0) (English)
Page 8
... instructions should be retained for dusting cabinets. 6. Any mounting of important operating and maintenance instructions in the literature accompanying this CAMCORDER on the CAMCORDER and in a wet basement, near water; A. WATER AND MOISTURE: Do not use attachments not recommended by the manufacturer or... sold with care. ATTACHMENTS: Do not use this CAMCORDER from the wall outlet before the CAMCORDER is operated. 2. To prevent electric shock, match wide blade of plug to the presence of the unit ...
User Manual (user Manual) (ver.1.0) (English)
Page 9
...you are unable to protect it from the type of power supply at your home, consult your appliance dealer or local power company. A CAMCORDER is intended to be sure the antenna or cable system is grounded to provide some protection against them, paying particular attention to . 10....for the grounding electrode. VENTILATION: Slots and openings in installation such as a bookcase or rack unless proper ventilation is connected to replace your CAMCORDER on or pinched by items placed upon or against voltage surges and built-up static charges, Section 810 of the polarized plug. 12....
User Manual (user Manual) (ver.1.0) (English)
Page 10
...with them might be taken to lightning and power-line surges. 15. Should spillage occur, unplug uni and have fallen into the CAMCORDER. e. f. This will often require extensive work by a technician before use. 18. SERVICING: Do not attempt to qualified service personnel...lines or circuits. b. c. REPLACEMENT PARTS: When replacement parts are covered by the manufacturer and having the same characteristics as this CAMCORDER yourself. Refer all servicing to its normal operation. ENGLISH Notices and Safety Instructions 14. LIGHTNING: For added protection of overhead power...
User Manual (user Manual) (ver.1.0) (English)
Page 12
...Camera mode. (see page 51) BLC When you record a subject with the light source behind the subject or a subject with which a tape recorded on this camcorder (NTSC format) can be filmed. (see page 42) DIS (SCL750/L770 only) The DIS compensates for unstable images caused by adding various special effects. (... (SCL750/L770 only) The PIP function shows where the center of the image is while recording in the picture. Hi8 Hi8 is inserted, the camcorder will automatically select the Hi-8 format for record or playback. 12 Snap Shot (SCL750/L770 only) The Snap Shot function lets you to adapt the...
User Manual (user Manual) (ver.1.0) (English)
Page 13
Getting to Know Your Camcorder Front View ENGLISH 3. PLAY/STILL (LIGHT) 6. REC SEARCH (FF) 5. LCD 11. EASY 1. LIGHT works in CAMERA mode. 9. TAPE EJECT (see page 59) 4. Remote Sensor (SCL710/...
User Manual (user Manual) (ver.1.0) (English)
Page 14
.../DOWN Dial (VOLUME) 17. P.AE 19. DSE 14. MENU ON/OFF 15. ENTER (MF) 16. SPEAKER (see page 21) 22. ENGLISH Getting to Know Your Camcorder Side View 24. BLC 23.
User Manual (user Manual) (ver.1.0) (English)
Page 15
... Jack (see page 72) 34. Recharging Indicator (see page 20) 31. START/STOP 35. Battery Pack Compartment 38. POWER Switch 39. USB JACK (SCL770 only) MIC 33. Hand Strap (see page 23) 39. POWER Switch (see page 23) 36. OFF : Select to record. - Battery Pack Compartment...37. Cassette Compartment 27. LENS Cap 30. CAMERA : Select to turn off the camcorder. - USB Jack (SCL770 only) (see page 34) 26. ZOOM 26. Hooks for shoulder strap 25. PLAYER : Select to Know Your Camcorder Rear View ENGLISH 36. Getting to playback. 32. BATTERY EJECT 27. Hooks for Shoulder...
User Manual (user Manual) (ver.1.0) (English)
Page 16
... 10 second timer. b. Self record waiting timer. (SCL710/L750/L770 only) (see page 46) Indicates the date of the recording. i. ENGLISH Getting to Know Your Camcorder OSD (On Screen Display) 1 You can turn the OSD on/off by setting the Display menu on . Battery level (see page 42) Indicates Program AE...
User Manual (user Manual) (ver.1.0) (English)
Page 17
... AUTO, INDOOR( ) and OUTDOOR( ). Self diagnosis (see page 58) Indicates you have set. t. y. Getting to Know Your Camcorder ENGLISH OSD (On Screen Display) j. Hi8 (see page 68) Displays different diagnostic indicators concerning the camcorder's operation. Snap Shot (see page 71) Monitors the moisture condensation. PB DSE Shows that the zero return is...
User Manual (user Manual) (ver.1.0) (English)
Page 18
Software CD (SCL770 only) 10. AUDIO/VIDEO Cable 5. USB Cable AD43-10130H 11. AC cord 3. AC Power Adapter. (see page 23) 4. Instruction Book. 7. Instruction Book Video Camcorder 8mm COLOR LCD AD39-40200A 7. Battery Pack. (see page 22) 2. Software CD AD59-00062A 10. S-...RETZUERRNO CROESUENTTER WIDE TELE AD63-00202A 8. USB AUDIO Cable (SCL770 only) AD44-00038A AD39-00028A 4. S-VIDEO cable AD39-00074A AC39-42001Z 18 ENGLISH Getting to Know Your Camcorder Accessories Supplied with Camcorder Make sure that the following basic accessories are supplied with ...
User Manual (user Manual) (ver.1.0) (English)
Page 19
... when: - Display (see page 16) 7. (Play) (see page 58) 8. (FF) (see page 59) 9. (REW) (see page 59) 10. (Stop) (see page 59) 4. You purchase the camcorder. - WAIT-10S/SELF-30S: wait 10 seconds, followed by recording until you to start and stop recording automatically. Still (see page 58) 11. Example: recording...
User Manual (user Manual) (ver.1.0) (English)
Page 20
... start the timer. : After waiting for better recording. 1 The hand strap enables you can press START/STOP button again to CAMERA mode. 1 CAMERA 2. Hold the camcorder in a stable, comfortable position. - Press Self Timer button until the appropriate indicator is very important to adjust the hand strap for 10 seconds, recording starts...
User Manual (user Manual) (ver.1.0) (English)
Page 21
...function, title and preset contents of the holder. 3. Preparing Shoulder Strap 1 The Shoulder Strap allows you set the power switch to carry your camcorder with type CR2025. 1. When this occurs, replace the lithium battery with complete safety. 1. Insert each strap through the buckle, adjust the ...The lithium battery for about 8~10 months under normal operation from the lithium battery compartment. 2. Reinsert the holder into the hooks on the camcorder. 2. Insert the side of the lithium battery toward the bottom of the memory; even if the battery pack or AC power adapter is...