
User Manual (user Manual) (ver.f7) (English)
Page 5
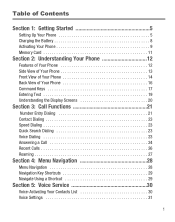
... Phone 12 Features of Your Phone 12 Side View of Your Phone 13 Front View of Your Phone 14 Back View of Your Phone 16 Command Keys 17 Entering Text 19 Understanding the Display Screens 20 Section 3: Call Functions 21 Number Entry Dialing 21 Contact Dialing 23 Speed Dialing 23 Quick Search Dialing 23 Voice Dialing 23 Answering a Call 24 Recent Calls 26 Roaming 27 Section 4: Menu Navigation 28 Menu Navigation 28 Navigation Key Shortcuts 29 Navigate Using a Shortcut 29 Section 5: Voice Service 30 Voice-Activating Your Contacts List 30 Voice Settings...
... Phone 12 Features of Your Phone 12 Side View of Your Phone 13 Front View of Your Phone 14 Back View of Your Phone 16 Command Keys 17 Entering Text 19 Understanding the Display Screens 20 Section 3: Call Functions 21 Number Entry Dialing 21 Contact Dialing 23 Speed Dialing 23 Quick Search Dialing 23 Voice Dialing 23 Answering a Call 24 Recent Calls 26 Roaming 27 Section 4: Menu Navigation 28 Menu Navigation 28 Navigation Key Shortcuts 29 Navigate Using a Shortcut 29 Section 5: Voice Service 30 Voice-Activating Your Contacts List 30 Voice Settings...
User Manual (user Manual) (ver.f7) (English)
Page 7
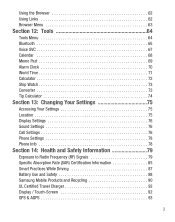
... 64 Tools Menu 64 Bluetooth 65 Voice SVC 67 Calendar 68 Memo Pad 69 Alarm Clock 70 World Time 71 Calculator 72 Stop Watch 73 Converter 73 Tip Calculator 74 Section 13: Changing Your Settings 75 Accessing Your Settings 75 Location 75 Display Settings 76 Sound Settings 76 Call Settings 76 Phone Settings 78 Phone Info 78 Section 14: Health and Safety Information 79 Exposure to Radio Frequency (RF) Signals 79 Specific Absorption Rate...
... 64 Tools Menu 64 Bluetooth 65 Voice SVC 67 Calendar 68 Memo Pad 69 Alarm Clock 70 World Time 71 Calculator 72 Stop Watch 73 Converter 73 Tip Calculator 74 Section 13: Changing Your Settings 75 Accessing Your Settings 75 Location 75 Display Settings 76 Sound Settings 76 Call Settings 76 Phone Settings 78 Phone Info 78 Section 14: Health and Safety Information 79 Exposure to Radio Frequency (RF) Signals 79 Specific Absorption Rate...
User Manual (user Manual) (ver.f7) (English)
Page 9
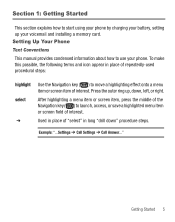
...; Use the Navigation key ( ) to use your phone. Used in place of interest. To make this possible, the following terms and icon appear in long "drill down , left, or right. Press the outer ring up your voicemail and installing a memory card. Example: "...Settings ➔ Call Settings ➔ Call Answer..." Section 1: Getting Started This section explains how to start using your phone by charging your battery, setting up , down " procedure steps. After highlighting a menu item or screen...
...; Use the Navigation key ( ) to use your phone. Used in place of interest. To make this possible, the following terms and icon appear in long "drill down , left, or right. Press the outer ring up your voicemail and installing a memory card. Example: "...Settings ➔ Call Settings ➔ Call Answer..." Section 1: Getting Started This section explains how to start using your phone by charging your battery, setting up , down " procedure steps. After highlighting a menu item or screen...
User Manual (user Manual) (ver.f7) (English)
Page 13
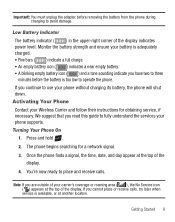
... your phone supports. Once the phone finds a signal, the time, date, and day appear at the top of the display indicates power level. You're now ready to avoid damage. Note: If you cannot place or receive calls, try later when service is too low to use your Wireless Carrier and follow their instructions for a network signal. 3. Important!: You must unplug the adapter before the battery...
... your phone supports. Once the phone finds a signal, the time, date, and day appear at the top of the display indicates power level. You're now ready to avoid damage. Note: If you cannot place or receive calls, try later when service is too low to use your Wireless Carrier and follow their instructions for a network signal. 3. Important!: You must unplug the adapter before the battery...
User Manual (user Manual) (ver.f7) (English)
Page 14
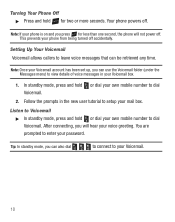
... setup your mail box. After connecting, you can use the Voicemail folder (under the Messages menu) to view details of voice messages in the new user tutorial to dial Voicemail. Tip: In standby mode, you will not power off. Note: Once your Voicemail account has been set up, you press for two or more seconds. Listen to Voicemail ᮣ In standby mode, press and hold or dial your own mobile number to your Voicemail. 10 Turning...
... setup your mail box. After connecting, you can use the Voicemail folder (under the Messages menu) to view details of voice messages in the new user tutorial to dial Voicemail. Tip: In standby mode, you will not power off. Note: Once your Voicemail account has been set up, you press for two or more seconds. Listen to Voicemail ᮣ In standby mode, press and hold or dial your own mobile number to your Voicemail. 10 Turning...
User Manual (user Manual) (ver.f7) (English)
Page 16
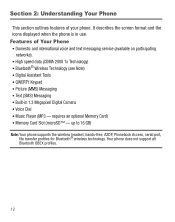
... phone supports the wireless headset, hands-free, A2DP, Phonebook Access, serial port, file transfer profiles for Bluetooth® wireless technology. Section 2: Understanding Your Phone This section outlines features of Your Phone • Domestic and international voice and text messaging service (available on participating networks). • High speed data (CDMA 2000 1x Technology) • Bluetooth® Wireless Technology (see Note) • Digital Assistant Tools • QWERTY Keypad • Picture (MMS) Messaging • Text (SMS) Messaging • Built-in use...
... phone supports the wireless headset, hands-free, A2DP, Phonebook Access, serial port, file transfer profiles for Bluetooth® wireless technology. Section 2: Understanding Your Phone This section outlines features of Your Phone • Domestic and international voice and text messaging service (available on participating networks). • High speed data (CDMA 2000 1x Technology) • Bluetooth® Wireless Technology (see Note) • Digital Assistant Tools • QWERTY Keypad • Picture (MMS) Messaging • Text (SMS) Messaging • Built-in use...

User Manual (user Manual) (ver.f7) (English)
Page 18
Used to access the Main menu from the Idle screen and to turn Speakerphone mode On and Off. 4. Press to send your phone. 2. Provides information about calls, messages, features, functions and the status of your call or to enter numbers, characters and symbols. 14 Press and hold to navigate through menus and applications. Display Screen - Left Soft Key - In standby mode, press to select the function indicated at the...
Used to access the Main menu from the Idle screen and to turn Speakerphone mode On and Off. 4. Press to send your phone. 2. Provides information about calls, messages, features, functions and the status of your call or to enter numbers, characters and symbols. 14 Press and hold to navigate through menus and applications. Display Screen - Left Soft Key - In standby mode, press to select the function indicated at the...

User Manual (user Manual) (ver.f7) (English)
Page 19
... power goes On or Off. In text entry mode, deletes characters from the display. 16. Understanding Your Phone 15 Sym /Lock Key - Press and hold to enter a space between mixed case (Abc), uppercase (ABC), and lowercase (abc). END Key - Press to accept a text entry or, in text entry mode, press to access the Messages menu. 14. Ends a call. 6. Enter Key - Select a symbol by pressing the associated number key. In standby mode, press to enter...
... power goes On or Off. In text entry mode, deletes characters from the display. 16. Understanding Your Phone 15 Sym /Lock Key - Press and hold to enter a space between mixed case (Abc), uppercase (ABC), and lowercase (abc). END Key - Press to accept a text entry or, in text entry mode, press to access the Messages menu. 14. Ends a call. 6. Enter Key - Select a symbol by pressing the associated number key. In standby mode, press to enter...
User Manual (user Manual) (ver.f7) (English)
Page 24
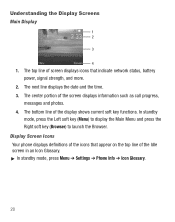
.... ᮣ In standby mode, press Menu ➔ Settings ➔ Phone Info ➔ Icon Glossary. 20 The bottom line of the screen displays information such as call progress, messages and photos. 4. The center portion of the display shows current soft key functions. The top line of screen displays icons that appear on the top line of the icons that indicate network status, battery power, signal strength, and more. 2. Understanding the Display Screens Main Display 1 2 3 4 1.
.... ᮣ In standby mode, press Menu ➔ Settings ➔ Phone Info ➔ Icon Glossary. 20 The bottom line of the screen displays information such as call progress, messages and photos. 4. The center portion of the display shows current soft key functions. The top line of screen displays icons that appear on the top line of the icons that indicate network status, battery power, signal strength, and more. 2. Understanding the Display Screens Main Display 1 2 3 4 1.

User Manual (user Manual) (ver.f7) (English)
Page 27
.... Voice Dialing Your phone includes state-of-the-art voice recognition software that contact's location number in the display. 2. In the Go to find and dial any contact in your Contacts list by entering the first few letters of a Contacts list entry name. Highlight the Contact you entered. 3. Contact Dialing You can store phone numbers and contact names in standby mode, you can assign and change location (speed dial) numbers for your contacts. Quick Search Dialing While in your Contacts list. Call Functions 23 To turn...
.... Voice Dialing Your phone includes state-of-the-art voice recognition software that contact's location number in the display. 2. In the Go to find and dial any contact in your Contacts list by entering the first few letters of a Contacts list entry name. Highlight the Contact you entered. 3. Contact Dialing You can store phone numbers and contact names in standby mode, you can assign and change location (speed dial) numbers for your contacts. Quick Search Dialing While in your Contacts list. Call Functions 23 To turn...

User Manual (user Manual) (ver.f7) (English)
Page 29
The following options: Messages, Contacts, Recent Calls, Send DTMF, Voice Privacy and Location. This can reduce noise on or off by pressing and holding . Note: Muting the ringer does not forward an incoming call , press the Quiet soft key. Note: If the call is sent to voicemail. ᮣ During an incoming call, press the Ignore soft key to send the call immediately to voicemail. Exit the menu by pressing the...
The following options: Messages, Contacts, Recent Calls, Send DTMF, Voice Privacy and Location. This can reduce noise on or off by pressing and holding . Note: Muting the ringer does not forward an incoming call , press the Quiet soft key. Note: If the call is sent to voicemail. ᮣ During an incoming call, press the Ignore soft key to send the call immediately to voicemail. Exit the menu by pressing the...
User Manual (user Manual) (ver.f7) (English)
Page 34
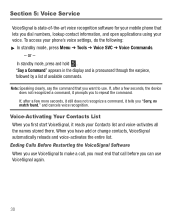
... make a call, you must end that lets you dial numbers, lookup contact information, and open applications using your voice. Section 5: Voice Service VoiceSignal is pronounced through the earpiece, followed by a list of -the-art voice recognition software for your mobile phone that call before you can use . If, after a few more seconds, it still does not recognize a command, it reads your phone's voice settings, do the following: ᮣ In standby mode...
... make a call, you must end that lets you dial numbers, lookup contact information, and open applications using your voice. Section 5: Voice Service VoiceSignal is pronounced through the earpiece, followed by a list of -the-art voice recognition software for your mobile phone that call before you can use . If, after a few more seconds, it still does not recognize a command, it reads your phone's voice settings, do the following: ᮣ In standby mode...
User Manual (user Manual) (ver.f7) (English)
Page 37
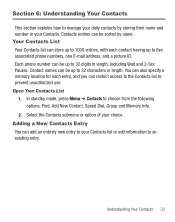
... five associated phone numbers, one E-mail address, and a picture ID. You can also specify a memory location for each contact having up to 32 characters in length, including Wait and 2-Sec Pauses. In standby mode, press Menu ➔ Contacts to choose from the following options: Find, Add New Contact, Speed Dial, Group and Memory Info. 2. Adding a New Contacts Entry You can restrict access to the Contacts list to prevent unauthorized use. Select the Contacts submenu...
... five associated phone numbers, one E-mail address, and a picture ID. You can also specify a memory location for each contact having up to 32 characters in length, including Wait and 2-Sec Pauses. In standby mode, press Menu ➔ Contacts to choose from the following options: Find, Add New Contact, Speed Dial, Group and Memory Info. 2. Adding a New Contacts Entry You can restrict access to the Contacts list to prevent unauthorized use. Select the Contacts submenu...

User Manual (user Manual) (ver.f7) (English)
Page 38
The My Images screen display. In standby mode, press Menu ➔ Contacts ➔ Add New Contact. If desired, select a unique Ringtone. 7. Select an image and press OK ( ). 9. Enter a phone number (Mobile, Home, Work, Mobile 2 or Fax) or an E-mail address (Email) for the new Contacts entry. 5. If desired, select an identifying image by highlighting the photo ID field and pressing the Set soft key. Use the Up and Down navigation keys to "My Images" on page 60...
The My Images screen display. In standby mode, press Menu ➔ Contacts ➔ Add New Contact. If desired, select a unique Ringtone. 7. Select an image and press OK ( ). 9. Enter a phone number (Mobile, Home, Work, Mobile 2 or Fax) or an E-mail address (Email) for the new Contacts entry. 5. If desired, select an identifying image by highlighting the photo ID field and pressing the Set soft key. Use the Up and Down navigation keys to "My Images" on page 60...
User Manual (user Manual) (ver.f7) (English)
Page 39
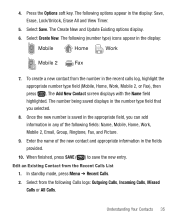
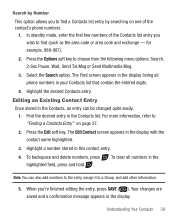
...: Name, Mobile, Home, Work, Mobile 2, Email, Group, Ringtone, Fax, and Picture. 9. Select Create New. To create a new contact from the number in the display: Save, Erase, Lock/Unlock, Erase All and View Timer. 5. Enter the name of the new contact and appropriate information in any of the following options appear in the recent calls log, highlight the appropriate number type field (Mobile, Home, Work, Mobile 2, or Fax), then press . Edit an Existing Contact from the following (number type) icons appear in the number type field...
...: Name, Mobile, Home, Work, Mobile 2, Email, Group, Ringtone, Fax, and Picture. 9. Select Create New. To create a new contact from the number in the display: Save, Erase, Lock/Unlock, Erase All and View Timer. 5. Enter the name of the new contact and appropriate information in any of the following options appear in the recent calls log, highlight the appropriate number type field (Mobile, Home, Work, Mobile 2, or Fax), then press . Edit an Existing Contact from the following (number type) icons appear in the number type field...
User Manual (user Manual) (ver.f7) (English)
Page 43
... wish to "Finding a Contacts Entry" on one of the Contacts list entry you 're finished editing the entry, press SAVE ( ). Press the Edit soft key. Note: You can be changed quite easily. 1. In standby mode, enter the first few numbers of the contact's phone numbers. 1. for example, 888-987). 2. The Find screen appears in the display listing all numbers in the Contacts, an entry can also add numbers to the entry...
... wish to "Finding a Contacts Entry" on one of the Contacts list entry you 're finished editing the entry, press SAVE ( ). Press the Edit soft key. Note: You can be changed quite easily. 1. In standby mode, enter the first few numbers of the contact's phone numbers. 1. for example, 888-987). 2. The Find screen appears in the display listing all numbers in the Contacts, an entry can also add numbers to the entry...
User Manual (user Manual) (ver.f7) (English)
Page 46
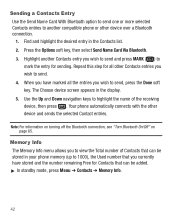
... Contacts list. 2. Press the Options soft key, then select Send Name Card Via Bluetooth. 3. Repeat this step for all the entries you wish to send, press the Done soft key. Use the Up and Down navigation keys to mark the entry for Contacts that you currently have marked all other Contacts entries you to view the Total number of the receiving device, then press . Your phone automatically connects...
... Contacts list. 2. Press the Options soft key, then select Send Name Card Via Bluetooth. 3. Repeat this step for all the entries you wish to send, press the Done soft key. Use the Up and Down navigation keys to mark the entry for Contacts that you currently have marked all other Contacts entries you to view the Total number of the receiving device, then press . Your phone automatically connects...
User Manual (user Manual) (ver.f7) (English)
Page 47
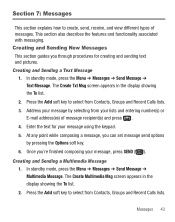
... soft key. 6. Enter the text for creating and sending text and pictures. Once you can set message send options by selecting from Contacts, Groups and Recent Calls lists. 3. This section also describes the features and functionality associated with messaging. Section 7: Messages This section explains how to create, send, receive, and view different types of message recipient(s) and press . 4. Creating and Sending New Messages This section guides you through procedures for your lists and entering number(s) or E-mail address...
... soft key. 6. Enter the text for creating and sending text and pictures. Once you can set message send options by selecting from Contacts, Groups and Recent Calls lists. 3. This section also describes the features and functionality associated with messaging. Section 7: Messages This section explains how to create, send, receive, and view different types of message recipient(s) and press . 4. Creating and Sending New Messages This section guides you through procedures for your lists and entering number(s) or E-mail address...

User Manual (user Manual) (ver.f7) (English)
Page 49
... the Text field is highlighted. You can be sent to recipients with a voice memo or preloaded sound. 1. Press Send ( ) to save the picture and begin delivery process. Messages 45 Using the display as a viewfinder, when the image that you wish to insert a sound into your Multimedia message, use the Down navigation key to send the message. Send Multimedia Messages in Camera Mode Multimedia messages can even accompany a Multimedia message with compatible phones or devices.
... the Text field is highlighted. You can be sent to recipients with a voice memo or preloaded sound. 1. Press Send ( ) to save the picture and begin delivery process. Messages 45 Using the display as a viewfinder, when the image that you wish to insert a sound into your Multimedia message, use the Down navigation key to send the message. Send Multimedia Messages in Camera Mode Multimedia messages can even accompany a Multimedia message with compatible phones or devices.
User Manual (user Manual) (ver.f7) (English)
Page 58
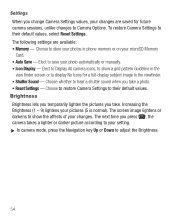
... Display All camera icons, to show the affects of your changes. Choose to restore Camera Settings to their default values, select Reset Settings. Settings When you press , the camera takes a lighter or darker picture according to your setting. ᮣ In camera mode, press the Navigation key Up or Down to adjust the Brightness. 54 The following settings are saved for a full-display subject image in phone memory or on your microSD Memory Card. • Auto Save...
... Display All camera icons, to show the affects of your changes. Choose to restore Camera Settings to their default values, select Reset Settings. Settings When you press , the camera takes a lighter or darker picture according to your setting. ᮣ In camera mode, press the Navigation key Up or Down to adjust the Brightness. 54 The following settings are saved for a full-display subject image in phone memory or on your microSD Memory Card. • Auto Save...


