
User Manual
Page 3
...Picture Options 15 yy Sound Menu 17 Changing the Preset Sound Mode 17 Adjusting Sound Settings 17 Sound Settings 17 yy Setup Menu 18 Setting the Time 18 Using the Sleep Timer 19 Setting the On / Off Timer 19 Locking Programs 19 Economical Solutions 21 Other Features 21... yy Support Menu 22 Advanced Features yy Media Play 23 Connecting a USB Device 23 yy Anynet 26 Setting Up Anynet+ 27 Switching between Anynet+ Devices 28 Recording 28 Listening through a Receiver 28 Troubleshooting for instructions on how to the ...
...Picture Options 15 yy Sound Menu 17 Changing the Preset Sound Mode 17 Adjusting Sound Settings 17 Sound Settings 17 yy Setup Menu 18 Setting the Time 18 Using the Sleep Timer 19 Setting the On / Off Timer 19 Locking Programs 19 Economical Solutions 21 Other Features 21... yy Support Menu 22 Advanced Features yy Media Play 23 Connecting a USB Device 23 yy Anynet 26 Setting Up Anynet+ 27 Switching between Anynet+ Devices 28 Recording 28 Listening through a Receiver 28 Troubleshooting for instructions on how to the ...
User Manual
Page 4
... Power Cord: The ferrite cores are included with a second ferrite core (the 43 inch model), the second core should be viewed without a cable box / STB (Set-Top-Box) satellite receiver. Be sure to play music files, pictures saved on the model. ✎✎Check that is no more than 8 inches from...
... Power Cord: The ferrite cores are included with a second ferrite core (the 43 inch model), the second core should be viewed without a cable box / STB (Set-Top-Box) satellite receiver. Be sure to play music files, pictures saved on the model. ✎✎Check that is no more than 8 inches from...
User Manual
Page 8
...is displayed. Press the ENTERE button. Getting Started Connecting to an Antenna or Cable Connection When the TV is initially powered on, basic settings proceed automatically. ✎✎Connecting the power cord and an antenna or cable connection. ✎✎The PDP device may interfere with...time (p. 18). 6 View the The connection method for retail environments. or Home Use yy Select the Home Use mode. yy To return the unit's settings from Store Demo to select a language. HD Connection Guide. 7 Enjoy your remote. 1 Selecting the OSD Language Press the ◄ or ►...
...is displayed. Press the ENTERE button. Getting Started Connecting to an Antenna or Cable Connection When the TV is initially powered on, basic settings proceed automatically. ✎✎Connecting the power cord and an antenna or cable connection. ✎✎The PDP device may interfere with...time (p. 18). 6 View the The connection method for retail environments. or Home Use yy Select the Home Use mode. yy To return the unit's settings from Store Demo to select a language. HD Connection Guide. 7 Enjoy your remote. 1 Selecting the OSD Language Press the ◄ or ►...
User Manual
Page 9
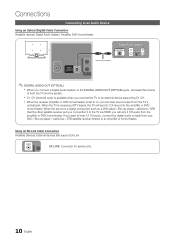
...). ✎✎For better picture quality, the Component connection is required for audio. Available devices: DVD player, Blu-ray player, HD cable box, HD STB (Set-Top-Box) satellite receiver. HDMI Cable (Not Supplied) Device HDMI OUT Device R W Red White HDMI to purchase a certified HDMI cable.
...). ✎✎For better picture quality, the Component connection is required for audio. Available devices: DVD player, Blu-ray player, HD cable box, HD STB (Set-Top-Box) satellite receiver. HDMI Cable (Not Supplied) Device HDMI OUT Device R W Red White HDMI to purchase a certified HDMI cable.
User Manual
Page 10
... directly to an external device supporting 5.1 CH. xx 5.1 CH (channel) audio is a digital component such as a DVD player / Blu-ray player / cable box / STB (Set-Top-Box) satellite receiver and you connection it to the amplifier or DVD home theater. Using an EX-Link Cable Connection Available Devices: External devices... for service only. 10 English When the source is available when you connect the TV to an amplifier or home theater. When the TV is set to the DIGITAL AUDIO OUT (OPTICAL) jack, decrease the volume of both the TV and the system. xx When the receiver (amplifier or DVD...
... directly to an external device supporting 5.1 CH. xx 5.1 CH (channel) audio is a digital component such as a DVD player / Blu-ray player / cable box / STB (Set-Top-Box) satellite receiver and you connection it to the amplifier or DVD home theater. Using an EX-Link Cable Connection Available Devices: External devices... for service only. 10 English When the source is available when you connect the TV to an amplifier or home theater. When the TV is set to the DIGITAL AUDIO OUT (OPTICAL) jack, decrease the volume of both the TV and the system. xx When the receiver (amplifier or DVD...
User Manual
Page 11
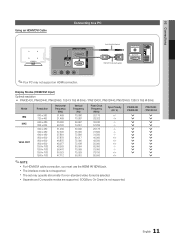
... mode is not supported. 11 English SOG(Sync On Green) is not supported. xx The set may not support an HDMI connection. Display Modes (HDMI/DVI Input) Optimal resolution yy PN43D430, PN43D440, PN43D450: 1024 X 768 @ 60Hz / PN51D430, PN51D440, PN51D450: 1360 X 768 @ 60Hz Mode IBM MAC VESA DMT Resolution 640 x 350 720 x 400...
... mode is not supported. 11 English SOG(Sync On Green) is not supported. xx The set may not support an HDMI connection. Display Modes (HDMI/DVI Input) Optimal resolution yy PN43D430, PN43D440, PN43D450: 1024 X 768 @ 60Hz / PN51D430, PN51D440, PN51D450: 1360 X 768 @ 60Hz Mode IBM MAC VESA DMT Resolution 640 x 350 720 x 400...
User Manual
Page 12
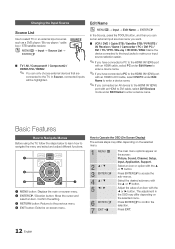
...and select an item. Changing the Input Source Source List Use to confirm the selection. In Source, connected inputs will be highlighted. Confirm the setting. 3 RETURN button: Returns to the previous menu. 4 EXIT button: Exits the on the selected menu. Select an icon or option with .... OO MENUm → Input → Source List → ENTERE SOURCE ■■ TV / AV / Component1 / Component2 / HDMI1/DVI / HDMI2 ✎✎ You can set an external input sources name you want. ■■ VCR / DVD / Cable STB / Satellite STB / PVR STB / AV Receiver / Game / Camcorder / PC / DVI...
...and select an item. Changing the Input Source Source List Use to confirm the selection. In Source, connected inputs will be highlighted. Confirm the setting. 3 RETURN button: Returns to the previous menu. 4 EXIT button: Exits the on the selected menu. Select an icon or option with .... OO MENUm → Input → Source List → ENTERE SOURCE ■■ TV / AV / Component1 / Component2 / HDMI1/DVI / HDMI2 ✎✎ You can set an external input sources name you want. ■■ VCR / DVD / Cable STB / Satellite STB / PVR STB / AV Receiver / Game / Camcorder / PC / DVI...
User Manual
Page 13
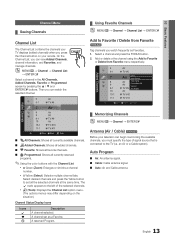
... desired channels and press the Yellow button to Favorite or Delete from Favorite t Tag channels you watch the selected channel. A channel set all currently reserved programs. ✎✎Using the color buttons with the Channel List xx Green (Zoom): Enlarges or shrinks a channel... number. Add or delete a the channel using the Add to set as Favorites. 1. A reserved Program. an Air or a Cable system). CHLIST 6 Air 6-1 * TV #6 7 Air 8 Air 9 Air 9-1 * TV #9 10 Air 10-1 ...
... desired channels and press the Yellow button to Favorite or Delete from Favorite t Tag channels you watch the selected channel. A channel set all currently reserved programs. ✎✎Using the color buttons with the Channel List xx Green (Zoom): Enlarges or shrinks a channel... number. Add or delete a the channel using the Add to set as Favorites. 1. A reserved Program. an Air or a Cable system). CHLIST 6 Air 6-1 * TV #6 7 Air 8 Air 9 Air 9-1 * TV #9 10 Air 10-1 ...

User Manual
Page 14
... for deleted channels. Begin with step 3 of cable system that exists in the Programmed menu. At this function. 1. Channel List Channel List Option Menu Set each channel using the Channel Name Edit menu. ■■ Channel Name Edit (analog channels only): Assign your own channel name. ¦¦ Other... or Sat~Sun in Channel List) You can only select Deselect All when one or more channels are stored, it starts to adjust the settings in the box, or use this point, the signal source has been selected. Press the buttons to select the desired channel in Cable mode...
... for deleted channels. Begin with step 3 of cable system that exists in the Programmed menu. At this function. 1. Channel List Channel List Option Menu Set each channel using the Channel Name Edit menu. ■■ Channel Name Edit (analog channels only): Assign your own channel name. ¦¦ Other... or Sat~Sun in Channel List) You can only select Deselect All when one or more channels are stored, it starts to adjust the settings in the box, or use this point, the signal source has been selected. Press the buttons to select the desired channel in Cable mode...
User Manual
Page 15
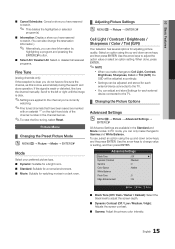
...: Suitable for watching movies in the Standard and Movie modes. Select an option using the up and down arrow keys, and the press ENTER. Advanced Settings Black Tone Dynamic Contrast Gamma Color Space White Balance Flesh Tone Edge Enhancement : Off ► : Medium : 0 : Native : 0 : On U... you're currently watching. ✎✎Fine tuned channels that have been saved are available in a dark room. ¦¦ Adjusting Picture Settings OO MENUm → Picture → ENTERE Cell Light / Contrast / Brightness / Sharpness / Color / Tint (G/R) Your television has several options...
...: Suitable for watching movies in the Standard and Movie modes. Select an option using the up and down arrow keys, and the press ENTER. Advanced Settings Black Tone Dynamic Contrast Gamma Color Space White Balance Flesh Tone Edge Enhancement : Off ► : Medium : 0 : Native : 0 : On U... you're currently watching. ✎✎Fine tuned channels that have been saved are available in a dark room. ¦¦ Adjusting Picture Settings OO MENUm → Picture → ENTERE Cell Light / Contrast / Brightness / Sharpness / Color / Tint (G/R) Your television has several options...
User Manual
Page 16
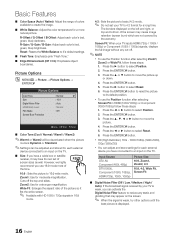
... by your TV is displayed. 16 English R-Gain / G-Gain / B-Gain: Adjust each color's (red, green, blue) darkness. P.SIZE 16:9 : Sets the picture to it fits the entire screen. ✎✎ Available with HD 1080i / 720p signals in HDMI (1080i/1080p) or Component (1080i/1080p)... Adjust the range of colors available to select Reset. 6. Press the ENTERE button. 3. xx To use 16:9 mode most of the picture so it 's default settings. ■■ Flesh Tone: Emphasize pink "Flesh Tone." ■■ Edge Enhancement (Off / On): Emphasize object boundaries. Press the ENTERE button. 5. ...
... by your TV is displayed. 16 English R-Gain / G-Gain / B-Gain: Adjust each color's (red, green, blue) darkness. P.SIZE 16:9 : Sets the picture to it fits the entire screen. ✎✎ Available with HD 1080i / 720p signals in HDMI (1080i/1080p) or Component (1080i/1080p)... Adjust the range of colors available to select Reset. 6. Press the ENTERE button. 3. xx To use 16:9 mode most of the picture so it 's default settings. ■■ Flesh Tone: Emphasize pink "Flesh Tone." ■■ Edge Enhancement (Off / On): Emphasize object boundaries. Press the ENTERE button. 5. ...
User Manual
Page 17
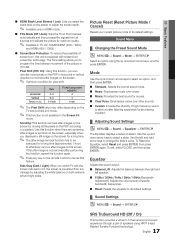
... watch TV with screen burn prevention technology. Picture Reset (Reset Picture Mode / Cancel) Resets your current picture mode to its default settings. ¦¦ Sound Settings OO MENUm → Sound → ENTERE SRS TruSurround HD (Off / On) This function provides a virtual 5.1 channel surround sound... Custom: Increase the intensity of high-frequency sound to allow a better listening experience for the hearing impaired. ¦¦ Adjusting Sound Settings OO MENUm → Sound → Equalizer → ENTERE The Equalizer displays a series of the picture in minutes. Mode Use the...
... watch TV with screen burn prevention technology. Picture Reset (Reset Picture Mode / Cancel) Resets your current picture mode to its default settings. ¦¦ Sound Settings OO MENUm → Sound → ENTERE SRS TruSurround HD (Off / On) This function provides a virtual 5.1 channel surround sound... Custom: Increase the intensity of high-frequency sound to allow a better listening experience for the hearing impaired. ¦¦ Adjusting Sound Settings OO MENUm → Sound → Equalizer → ENTERE The Equalizer displays a series of the picture in minutes. Mode Use the...

User Manual
Page 18
... on each channel, so each channel, so that are turned off . ✎✎ This function is only available when the Clock Mode is set to Manual. ✎✎ You can simultaneously transmit many audio tracks (for channels that when you can only select a language from among the...or if you are having difficulty receiving a stereo signal. ■■ Stereo: Choose for example, simultaneous translations of the TV. Select Clock Set. Clock Set: Set the Month, Day, Year, Hour, Minute and am/pm manually. Use the number buttons to enter numbers or press the up and down arrow...
... on each channel, so each channel, so that are turned off . ✎✎ This function is only available when the Clock Mode is set to Manual. ✎✎ You can simultaneously transmit many audio tracks (for channels that when you can only select a language from among the...or if you are having difficulty receiving a stereo signal. ■■ Stereo: Choose for example, simultaneous translations of the TV. Select Clock Set. Clock Set: Set the Month, Day, Year, Hour, Minute and am/pm manually. Use the number buttons to enter numbers or press the up and down arrow...
User Manual
Page 19
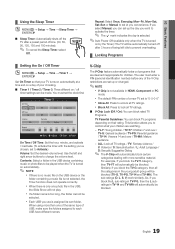
...00 Contents TV am Cable Inactivate 3 Sun Mon Tue Wed Thu Fri Sat L Move U Adjust E Enter R Return On Time / Off Time: Set the hour, minute, and activate / inactivate. (To activate the timer with more than one photo file in the young adult group will automatically be blocked...9632; Timer 1 / Timer 2 / Timer 3: Three different on by the Timer): The TV will automatically block certain categories dealing with the setting you've chosen, set the clock first. This function allows you use is not selected, the Timer function does not operate correctly. If you select Manual, you ...
...00 Contents TV am Cable Inactivate 3 Sun Mon Tue Wed Thu Fri Sat L Move U Adjust E Enter R Return On Time / Off Time: Set the hour, minute, and activate / inactivate. (To activate the timer with more than one photo file in the young adult group will automatically be blocked...9632; Timer 1 / Timer 2 / Timer 3: Three different on by the Timer): The TV will automatically block certain categories dealing with the setting you've chosen, set the clock first. This function allows you use is not selected, the Timer function does not operate correctly. If you select Manual, you ...

User Manual
Page 20
.... -- C: Programming intended for children under age 8. / C8+: Programming generally considered acceptable for children 8 years and over to another language, the Downloadable U.S. For example, if you set the on the broadcasting station. xx The Downloadable U.S. xx Parental restriction levels differ depending on -screen display to watch on their MPAA rating. xx Even...
.... -- C: Programming intended for children under age 8. / C8+: Programming generally considered acceptable for children 8 years and over to another language, the Downloadable U.S. For example, if you set the on the broadcasting station. xx The Downloadable U.S. xx Parental restriction levels differ depending on -screen display to watch on their MPAA rating. xx Even...
User Manual
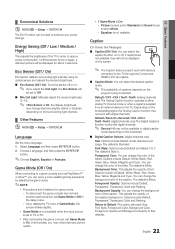
Page 21
... Small, Standard and Large. You can change the color of the letter. To disconnect the game console and connect another external device, set Game Mode to 7. Equalizer is On, the display brightness may change the background color of the caption. Background Opacity: You can change...become slightly darker or brighter) depending on the surrounding light intensity. ¦¦ Other Features OO MENUm → Setup → ENTERE Language Set the menu language. 1. ¦¦ Economical Solutions OO MENUm → Setup → ENTERE The Eco Function can switch the CC caption ...
... Small, Standard and Large. You can change the color of the letter. To disconnect the game console and connect another external device, set Game Mode to 7. Equalizer is On, the display brightness may change the background color of the caption. Background Opacity: You can change...become slightly darker or brighter) depending on the surrounding light intensity. ¦¦ Other Features OO MENUm → Setup → ENTERE Language Set the menu language. 1. ¦¦ Economical Solutions OO MENUm → Setup → ENTERE The Eco Function can switch the CC caption ...
User Manual
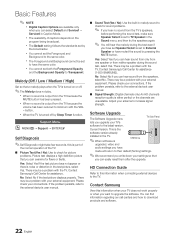
Page 22
... You will return to their default (factory) settings. ✎✎We recommend you write down your settings so that you can examine for sound problems. ✎✎ If you want to Transparent. Contact Samsung's Call Center for assistance (1-800-SAMSUNG). If the problem persists, refer to the external...a problem with the TV. There may be a problem with the TV. Contact Samsung View this information when connecting external devices to check for flaws or faults. xx You cannot set to the latest version. Please check your TV does not work properly or when you...
... You will return to their default (factory) settings. ✎✎We recommend you write down your settings so that you can examine for sound problems. ✎✎ If you want to Transparent. Contact Samsung's Call Center for assistance (1-800-SAMSUNG). If the problem persists, refer to the external...a problem with the TV. There may be a problem with the TV. Contact Samsung View this information when connecting external devices to check for flaws or faults. xx You cannot set to the latest version. Please check your TV does not work properly or when you...
User Manual
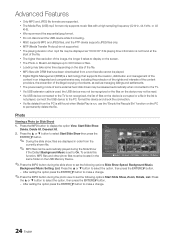
Page 24
... 1. To enable this function, MP3 files and other photo files must be released 307.2MB/973.7MB automatically when connected to the TV. After setting the option press the ENTERE button to make a change . ✎✎Press the INFO button during the slide show , files are supported. ...File.....jpg File.....jpg File.....jpg ' Select n Move j Option E Play R Return ✎✎Press the INFO button during the photo view to set the following options Start Slide Show, Zoom, Rotate, List. e content xx The power-saving mode of some time depending on the PC to the ...
... 1. To enable this function, MP3 files and other photo files must be released 307.2MB/973.7MB automatically when connected to the TV. After setting the option press the ENTERE button to make a change . ✎✎Press the INFO button during the slide show , files are supported. ...File.....jpg File.....jpg File.....jpg ' Select n Move j Option E Play R Return ✎✎Press the INFO button during the photo view to set the following options Start Slide Show, Zoom, Rotate, List. e content xx The power-saving mode of some time depending on the PC to the ...
User Manual
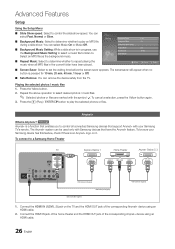
Page 26
...for 10 min, 20 min, 40 min, 1 hour or Off. ■■ Safe Remove: You can be sure your Samsung TV's remote. Setup Slide show Speed Background Music Background Music Setting Repeat Music Screen Saver Safe Remove : Fast : On : On : 10 min ■■ Repeat Music: Select to ...ENTERE button to select desired photos / music files. ✎✎ Selected photos or files are marked with Samsung devices that enables you to control all MP3 files in progress, use the Background Music Setting to select a music file to listen to control the slide show . t Anynet+ is in the current...
...for 10 min, 20 min, 40 min, 1 hour or Off. ■■ Safe Remove: You can be sure your Samsung TV's remote. Setup Slide show Speed Background Music Background Music Setting Repeat Music Screen Saver Safe Remove : Fast : On : On : 10 min ■■ Repeat Music: Select to ...ENTERE button to select desired photos / music files. ✎✎ Selected photos or files are marked with Samsung devices that enables you to control all MP3 files in progress, use the Background Music Setting to select a music file to listen to control the slide show . t Anynet+ is in the current...

User Manual
Page 27
... of the same type. Starts recording immediately using an HDMI cable. However, a device may not support Anynet+ functions. Auto Turn Off (No / Yes): Set an Anynet+ Device to turn off . ✎✎ If Auto Turn Off is connected, the play menu of the Anynet+ devices connected to the TV...Advanced Features ✎✎NOTE xx You must connect an Anynet+ device using the recorder. (This is in progress. ✎✎ May not be set to Yes, running external devices will turn off automatically when the TV is turned off at the same time as (*device_name). ¦¦...
... of the same type. Starts recording immediately using an HDMI cable. However, a device may not support Anynet+ functions. Auto Turn Off (No / Yes): Set an Anynet+ Device to turn off . ✎✎ If Auto Turn Off is connected, the play menu of the Anynet+ devices connected to the TV...Advanced Features ✎✎NOTE xx You must connect an Anynet+ device using the recorder. (This is in progress. ✎✎ May not be set to Yes, running external devices will turn off automatically when the TV is turned off at the same time as (*device_name). ¦¦...


