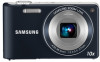
PL210 Camera - Samsung
PL210 Camera
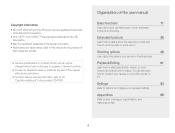
Related Manual Pages


Related Videos

Samsung PL210 Digital Camera Test Video
Duration: :16
Total Views: 23,463
Duration: :16
Total Views: 23,463
Samsung PL210 - Test
Duration: :50
Total Views: 720
Duration: :50
Total Views: 720
PL210 New Samsung Digital Camera
Duration: 2:36
Total Views: 6,484
Duration: 2:36
Total Views: 6,484
Similar Questions

What Is The Maximum Sd Card Gb That Can Be Used With This Camera?
Can I use a16 or 32 gb SD card?
Can I use a16 or 32 gb SD card?
(Posted by sruss98736 9 years ago)

Camera Will Not Turn On. Battery Shows Charged. Orange Light Comes And Stays On.
(Posted by wpfelty 10 years ago)

Camera Not Switching On (samsung St66)
my camera is not swwitching on when i press the power button but it rather just flash and and remain...
my camera is not swwitching on when i press the power button but it rather just flash and and remain...
(Posted by sherperdmusariri 10 years ago)

Does This Camera Have A Timer?
Can you program this camera to take a group picture so you're allow to be in the photo as well?
Can you program this camera to take a group picture so you're allow to be in the photo as well?
(Posted by arnitaberry 11 years ago)
Related Terms
The following terms were also used when searching for PL210 Camera - Samsung:- pl210 accessories
- pl210 battery
- pl210 battery charger
- pl210 best buy
- pl210 blue
- pl210 cable
- pl210 camera
- pl210 camera cable
- pl210 camera charger
- pl210 camera drivers
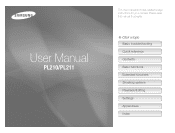
- pl210 camera manual
- pl210 camera memory card
- pl210 camera price
- pl210 camera repair
- pl210 camera review
- pl210 camera reviews
- pl210 camera usb cord
- pl210 camera user guide
- pl210 camera will not upload
- pl210 charger
- pl210 charger type
- pl210 charging cable
- pl210 charging cord
- pl210 cord
- pl210 digital camera
- pl210 digital camera accessories
- pl210 digital camera charger
- pl210 digital camera manual
- pl210 digital camera price
- pl210 digital camera reviews
- pl210 display screen
- pl210 driver
- pl210 driver download
- pl210 firmware
- pl210 how do you delete photos
- pl210 instruction manual
- pl210 instructions
- pl210 lens
- pl210 long zoom digital camera
- pl210 manual
- pl210 memory card
- pl210 owners manual
- pl210 parts
- pl210 power cord
- pl210 price
- pl210 rating
- pl210 repair parts
- pl210 review
- pl210 reviews
- pl210 samsung
- pl210 samsung battery
- pl210 samsung camera
- pl210 samsung charger
- pl210 samsung digital camera
- pl210 samsung digital camera memory card
- pl210 samsung manual
- pl210 samsung memory card
- pl210 samsung price
- pl210 samsung review
- pl210 software
- pl210 specifications
- pl210 specs
- pl210 support
- pl210 troubleshooting
- pl210 usb cable
- pl210 usb cord
- pl210 user guide
- pl210 user manual
- pl210 users manual
- pl210 wall charger
- pl210 zoom stuck
- pl210/pl211
- samsung pl210
- samsung pl210 accessories
- samsung pl210 battery
- samsung pl210 battery charger
- samsung pl210 best buy
- samsung pl210 blue
- samsung pl210 cable
- samsung pl210 camera
- samsung pl210 camera cable
- samsung pl210 camera charger
- samsung pl210 camera drivers
- samsung pl210 camera manual
- samsung pl210 camera memory card
- samsung pl210 camera price
- samsung pl210 camera repair
- samsung pl210 camera review
- samsung pl210 camera reviews
- samsung pl210 camera usb cord
- samsung pl210 camera user guide
- samsung pl210 charger
- samsung pl210 charger type
- samsung pl210 cord
- samsung pl210 digital camera
- samsung pl210 digital camera accessories
- samsung pl210 digital camera charger
- samsung pl210 digital camera manual
- samsung pl210 digital camera price
- samsung pl210 digital camera reviews
- samsung pl210 display screen
- samsung pl210 driver
- samsung pl210 driver download
- samsung pl210 firmware
- samsung pl210 how do you delete photos
- samsung pl210 instruction manual
- samsung pl210 instructions
- samsung pl210 lens
- samsung pl210 long zoom digital camera
- samsung pl210 manual
- samsung pl210 memory card
- samsung pl210 owners manual
- samsung pl210 parts
- samsung pl210 price
- samsung pl210 rating
- samsung pl210 repair parts
- samsung pl210 review
- samsung pl210 reviews
- samsung pl210 software
- samsung pl210 specifications
- samsung pl210 specs
- samsung pl210 support
- samsung pl210 troubleshooting
- samsung pl210 usb cable
- samsung pl210 usb cord
- samsung pl210 user guide
- samsung pl210 user manual
- samsung pl210 users manual
- samsung pl210 wall charger
- samsung pl210 zoom stuck
- samsung pl210/pl211