Samsung LN19C350 Research
Related Manual Pages


Related Videos

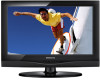
Samsung LN19C350
Duration: :17
Total Views: 114
Duration: :17
Total Views: 114
Similar Questions

Manual Please. How To Set Up Directv On This?
just got this tv and dont know how to hook it up to directv and my blue-ray.
just got this tv and dont know how to hook it up to directv and my blue-ray.
(Posted by whittlegirls 6 years ago)

How Do I Remove The Base So I Can Mount The Tv On The Wall
(Posted by scottraugh 8 years ago)


Save Settings On Samsung Ln19c350
How do I save my settings on Samsung LN19C350? Ichange picture size to zoom1, but when I switch on a...
How do I save my settings on Samsung LN19C350? Ichange picture size to zoom1, but when I switch on a...
(Posted by amirfanai 11 years ago)