Manuals
Page 3
... Options 33 Guide to the Names and Functions of Major Features...8 1. TABLE OF CONTENTS How to Read the Manuals...6 Symbols Used in the Manuals...6 Model-Specific Information...7 Names of the Machine's Control Panel 45 How to Use the [Home] Screen...48 Adding Icons to the [Home] Screen...49 Registering Functions in...
... Options 33 Guide to the Names and Functions of Major Features...8 1. TABLE OF CONTENTS How to Read the Manuals...6 Symbols Used in the Manuals...6 Model-Specific Information...7 Names of the Machine's Control Panel 45 How to Use the [Home] Screen...48 Adding Icons to the [Home] Screen...49 Registering Functions in...
Manuals
Page 4
... Before the Original Is Scanned 94 Canceling a Transmission While the Original Is Being Scanned 94 Canceling a Transmission After the Original Is Scanned 95 Sending at a Specific Time (Send Later)...96 2 Copy Basic Procedure...67 Auto Reduce / Enlarge...69 Duplex Copying...71 Combined Copying...73 One-Sided Combine...74 Two-Sided Combine...
... Before the Original Is Scanned 94 Canceling a Transmission While the Original Is Being Scanned 94 Canceling a Transmission After the Original Is Scanned 95 Sending at a Specific Time (Send Later)...96 2 Copy Basic Procedure...67 Auto Reduce / Enlarge...69 Duplex Copying...71 Combined Copying...73 One-Sided Combine...74 Two-Sided Combine...
Manuals
Page 8
... to when using the machine, and explanations of likely causes of paper misfeeds, damage to the region of the model you are using , see p.7 "Model-Specific Information". 6 Indicates supplementary explanations of sections. This symbol is located at the end of the machine's functions, and instructions on the machine's display or control...
... to when using the machine, and explanations of likely causes of paper misfeeds, damage to the region of the model you are using , see p.7 "Model-Specific Information". 6 Indicates supplementary explanations of sections. This symbol is located at the end of the machine's functions, and instructions on the machine's display or control...
Manuals
Page 9
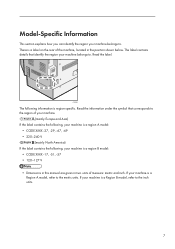
Model-Specific Information This section explains how you can identify the region your machine belongs to. CJS021 The following , your machine is a region A model: • CODE XXXX -... machine is a label on the rear of measure: metric and inch. Read the label. There is a Region A model, refer to . If your machine is region-specific.
Model-Specific Information This section explains how you can identify the region your machine belongs to. CJS021 The following , your machine is a region A model: • CODE XXXX -... machine is a label on the rear of measure: metric and inch. Read the label. There is a Region A model, refer to . If your machine is region-specific.
Manuals
Page 48
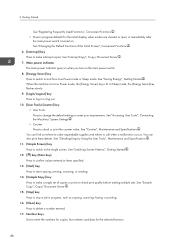
... . • Press to program defaults for the selected function. 46 See "Saving Energy", Getting Started . See "Interrupt Copy", Copy/ Document Server . 7. See "Counter", Maintenance and Specifications . See "Checking Enquiry Using the User Tools", Maintenance and Specifications . 11. [Simple Screen] key Press to switch to and from Low Power mode or Sleep mode.
... . • Press to program defaults for the selected function. 46 See "Saving Energy", Getting Started . See "Interrupt Copy", Copy/ Document Server . 7. See "Counter", Maintenance and Specifications . See "Checking Enquiry Using the User Tools", Maintenance and Specifications . 11. [Simple Screen] key Press to switch to and from Low Power mode or Sleep mode.
Manuals
Page 98
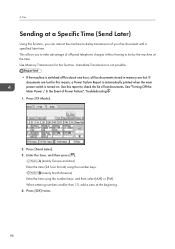
... possible. • If the machine is turned on. If documents are lost documents. Press [Send Later]. 3. When entering numbers smaller than 10, add a zero at a Specific Time (Send Later) Using this report to take advantage of your fax document until a specified later time. 4. This allows you can instruct the machine to...
... possible. • If the machine is turned on. If documents are lost documents. Press [Send Later]. 3. When entering numbers smaller than 10, add a zero at a Specific Time (Send Later) Using this report to take advantage of your fax document until a specified later time. 4. This allows you can instruct the machine to...

Manuals
Page 115
... [Change] check box. In the following procedure to create a shared folder. • If "Everyone" is left selected in as you want to grant access to specific users. On the [Sharing] tab, select [Advanced Sharing...]. Click [Share this folder]. In the [Group or user names:] list, select "Everyone", and then click [Remove...
... [Change] check box. In the following procedure to create a shared folder. • If "Everyone" is left selected in as you want to grant access to specific users. On the [Sharing] tab, select [Advanced Sharing...]. Click [Share this folder]. In the [Group or user names:] list, select "Everyone", and then click [Remove...
Manuals
Page 138
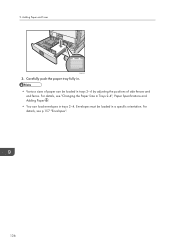
9. Adding Paper and Toner CJW012 3. For details, see p.157 "Envelopes". 136 For details, see "Changing the Paper Size in Trays 2-4", Paper Specifications and Adding Paper . • You can be loaded in trays 2-4. Envelopes must be loaded in trays 2-4 by adjusting the positions of side fences and end fence. Carefully push the paper tray fully in. • Various sizes of paper can load envelopes in a specific orientation.
9. Adding Paper and Toner CJW012 3. For details, see p.157 "Envelopes". 136 For details, see "Changing the Paper Size in Trays 2-4", Paper Specifications and Adding Paper . • You can be loaded in trays 2-4. Envelopes must be loaded in trays 2-4 by adjusting the positions of side fences and end fence. Carefully push the paper tray fully in. • Various sizes of paper can load envelopes in a specific orientation.

Manuals
Page 140
...settings. Settings to clear settings for [Printer Bypass Paper Size]. 138 9. See, "Loading Orientation-Fixed Paper or Two-Sided Paper", Paper Specifications and Adding Paper . • You can load envelopes into the bypass tray. If this happens, remove the paper and place it on... When the [Panel Key Sound] is [Driver / Command]. • Settings remain valid until they are changed. After printing, be loaded in a specific orientation. For details, see "System Settings", Connecting the Machine/ System Settings . • If the machine stops detecting paper sizes while copying or printing,...
...settings. Settings to clear settings for [Printer Bypass Paper Size]. 138 9. See, "Loading Orientation-Fixed Paper or Two-Sided Paper", Paper Specifications and Adding Paper . • You can load envelopes into the bypass tray. If this happens, remove the paper and place it on... When the [Panel Key Sound] is [Driver / Command]. • Settings remain valid until they are changed. After printing, be loaded in a specific orientation. For details, see "System Settings", Connecting the Machine/ System Settings . • If the machine stops detecting paper sizes while copying or printing,...
Manuals
Page 145
Loading Paper into the small size paper tray. When loading envelopes, place them in the small size paper tray by adjusting the positions of paper can be loaded in the correct orientation. For details, see "Changing the Paper Size in the Small Size Paper Tray", Paper Specifications and Adding Paper . • You can load envelopes into the Small Size Paper Tray • Various sizes of side fences and end fence. For details, see p.157 "Envelopes". 143
Loading Paper into the small size paper tray. When loading envelopes, place them in the small size paper tray by adjusting the positions of paper can be loaded in the correct orientation. For details, see "Changing the Paper Size in the Small Size Paper Tray", Paper Specifications and Adding Paper . • You can load envelopes into the Small Size Paper Tray • Various sizes of side fences and end fence. For details, see p.157 "Envelopes". 143
Manuals
Page 156
... thick paper of paper produce noise when delivered. Bond) 60-74 g/m2 (16-20 lb. See "Loading Orientation-Fixed Paper or Two-Sided Paper", Paper Specifications and Adding Paper . • The copy/print speed is an example.
... thick paper of paper produce noise when delivered. Bond) 60-74 g/m2 (16-20 lb. See "Loading Orientation-Fixed Paper or Two-Sided Paper", Paper Specifications and Adding Paper . • The copy/print speed is an example.

Manuals
Page 164
... on the screen regarding how to replace a toner cartridge. • If " Toner Cartridge is almost empty." If you can order supplies, see "Enquiry", Maintenance and Specifications . Follow the instruction on a flat surface. • Do not shake the toner cartridge with its mouth down after removing it . • You can check the...
... on the screen regarding how to replace a toner cartridge. • If " Toner Cartridge is almost empty." If you can order supplies, see "Enquiry", Maintenance and Specifications . Follow the instruction on a flat surface. • Do not shake the toner cartridge with its mouth down after removing it . • You can check the...

Manuals
Page 167
.... Appears when toner runs out. For details about loading paper, see "Removing Jammed Paper", Troubleshooting . For details about removing jammed paper, see "Loading Paper ", Paper Specifications and Adding Paper . Appears when the hole punch receptacle is full. Appears when the machine is malfunctioning or requires maintenance. For details about adding staples...
.... Appears when toner runs out. For details about loading paper, see "Removing Jammed Paper", Troubleshooting . For details about removing jammed paper, see "Loading Paper ", Paper Specifications and Adding Paper . Appears when the hole punch receptacle is full. Appears when the machine is malfunctioning or requires maintenance. For details about adding staples...

Manuals
Page 169
... the Control Panel". Remove the prints from the tray. A network error has occurred. For details about error messages and their solutions, see "Loading Paper", Paper Specifications and Adding Paper . You can use other functions normally. • Press [Check] in the [Check Status] screen is defective. Documents and reports do not print...
... the Control Panel". Remove the prints from the tray. A network error has occurred. For details about error messages and their solutions, see "Loading Paper", Paper Specifications and Adding Paper . You can use other functions normally. • Press [Check] in the [Check Status] screen is defective. Documents and reports do not print...
Manuals
Page 174
For details about removing jammed paper, see "Changing the Paper Size", Paper Specifications and Adding Paper . For details about setting the side and end fences, see "Removing Jammed Paper", Troubleshooting . • Do not place anything on the finisher ... on internal tray 2, and then try printing the job again. There is not selected automatically, you need to a Size That Is Not Automatically Detected", Paper Specifications and Adding Paper .
For details about removing jammed paper, see "Changing the Paper Size", Paper Specifications and Adding Paper . For details about setting the side and end fences, see "Removing Jammed Paper", Troubleshooting . • Do not place anything on the finisher ... on internal tray 2, and then try printing the job again. There is not selected automatically, you need to a Size That Is Not Automatically Detected", Paper Specifications and Adding Paper .

Manuals
Page 178
... recommended paper, see p.148 "Recommended Paper Sizes and Types". • For messages that are not listed here, see "Sizes Detectable with Auto Paper Select", Paper Specifications and Adding Paper . • Place the original correctly. • Specify the paper size. • When placing an original directly on the exposure glass, the lifting...
... recommended paper, see p.148 "Recommended Paper Sizes and Types". • For messages that are not listed here, see "Sizes Detectable with Auto Paper Select", Paper Specifications and Adding Paper . • Place the original correctly. • Specify the paper size. • When placing an original directly on the exposure glass, the lifting...
Manuals
Page 179
... the scanned pages as 1 file?" "Clean the scanning glass. (Located next to copy has been exceeded. "Duplex is deleted. See "Maintaining Your Machine", Maintenance and Specifications . Select a proper paper size. "Exceeded max. "Exceeded the maximum number of the ADF is set. The number of pages the user is permitted to the...
... the scanned pages as 1 file?" "Clean the scanning glass. (Located next to copy has been exceeded. "Duplex is deleted. See "Maintaining Your Machine", Maintenance and Specifications . Select a proper paper size. "Exceeded max. "Exceeded the maximum number of the ADF is set. The number of pages the user is permitted to the...
Manuals
Page 181
...have been suspended. To delete other than the Copier function is being scanned for Booklet Finisher SR3110", Maintenance and Specifications . 179 appears, press [Cancel Scanning]. Depending on the number of paper for which could be some delay...destinations to cancel scanning press [Cancel Scanning]. For details about paper, see "Specifications for Finisher SR3070", "Specifications for Booklet Finisher SR3100", "Specifications for Finisher SR3090", "Specifications for Finisher SR3120", or "Specifications for a different function." When the message "The Stop key has been pressed...
...have been suspended. To delete other than the Copier function is being scanned for Booklet Finisher SR3110", Maintenance and Specifications . 179 appears, press [Cancel Scanning]. Depending on the number of paper for which could be some delay...destinations to cancel scanning press [Cancel Scanning]. For details about paper, see "Specifications for Finisher SR3070", "Specifications for Booklet Finisher SR3100", "Specifications for Finisher SR3090", "Specifications for Finisher SR3120", or "Specifications for a different function." When the message "The Stop key has been pressed...

Manuals
Page 201
... on. "Hardware Problem: Wireless Card" (A "wireless LAN board" or "Bluetooth interface unit" is referred to change the paper size, see "Changing the Paper Size", Paper Specifications and Adding Paper . 199 If the message appears again, contact your service representative. Turn off the main power switch, and then back on again. "Hardware...
... on. "Hardware Problem: Wireless Card" (A "wireless LAN board" or "Bluetooth interface unit" is referred to change the paper size, see "Changing the Paper Size", Paper Specifications and Adding Paper . 199 If the message appears again, contact your service representative. Turn off the main power switch, and then back on again. "Hardware...
Manuals
Page 202
... of n is the same size as the small size tray. For details about how to change the paper size, see "Changing the Paper Size", Paper Specifications and Adding Paper . • Select the tray manually to as a "wireless card".) The machine has detected a Bluetooth failure, or it could not detect a Bluetooth unit...
... of n is the same size as the small size tray. For details about how to change the paper size, see "Changing the Paper Size", Paper Specifications and Adding Paper . • Select the tray manually to as a "wireless card".) The machine has detected a Bluetooth failure, or it could not detect a Bluetooth unit...


