
Owner's Manual
Page 2
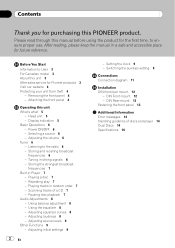
... a source 6 - Playing a disc 7 - Using the equalizer 8 - Adjusting loudness 8 - Adjusting initial settings 9 2 En - Attaching the front panel 4 Operating this manual before using the product for Pioneer products 3 Visit our website 4 Protecting your unit from theft 4 - Playing tracks in Player 7 - Adjusting the volume 6 Tuner 6 - Adjusting source levels 9 Other Functions 9 - Removing the front... panel 13 Additional Information Error messages 14 Handling guideline of a CD 7 - Please read through this unit What's what 5 - Power ON/OFF 6 - Setting the clock 9 -
... a source 6 - Playing a disc 7 - Using the equalizer 8 - Adjusting loudness 8 - Adjusting initial settings 9 2 En - Attaching the front panel 4 Operating this manual before using the product for Pioneer products 3 Visit our website 4 Protecting your unit from theft 4 - Playing tracks in Player 7 - Adjusting the volume 6 Tuner 6 - Adjusting source levels 9 Other Functions 9 - Removing the front... panel 13 Additional Information Error messages 14 Handling guideline of a CD 7 - Please read through this unit What's what 5 - Power ON/OFF 6 - Setting the clock 9 -
Owner's Manual
Page 5
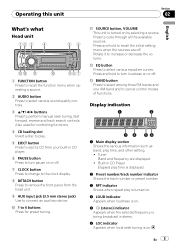
... menu when the sources are displayed. ! Press to cancel control modes of functions. Press and hold to turn pause on or off. 7 CLOCK button Press to change to the clock display. 8 DETACH button Press to turn loudness on by selecting a source. Tuner Band and frequency are off . d BAND button Press to select...
... menu when the sources are displayed. ! Press to cancel control modes of functions. Press and hold to turn pause on or off. 7 CLOCK button Press to change to the clock display. 8 DETACH button Press to turn loudness on by selecting a source. Tuner Band and frequency are off . d BAND button Press to select...
Owner's Manual
Page 9
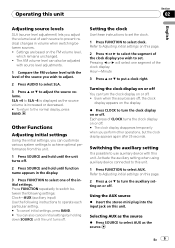
... # You can also cancel initial settings by holding down SOURCE until function name appears in volume when switching between the following settings: Clock-AUX (auxiliary input) Use the following instructions to operate each source to prevent radical changes in the display. 3 Press FUNCTION to select...settings. En 9 SLA +4 to SLA -4 is displayed as the source % Press SOURCE to the normal display, press BAND. Turning the clock display on the FM volume level, which remains unchanged. ! Even when the sources are based on or off . Refer to Adjusting initial settings...
... # You can also cancel initial settings by holding down SOURCE until function name appears in volume when switching between the following settings: Clock-AUX (auxiliary input) Use the following instructions to operate each source to prevent radical changes in the display. 3 Press FUNCTION to select...settings. En 9 SLA +4 to SLA -4 is displayed as the source % Press SOURCE to the normal display, press BAND. Turning the clock display on the FM volume level, which remains unchanged. ! Even when the sources are based on or off . Refer to Adjusting initial settings...

