Owner's Manual
Page 3
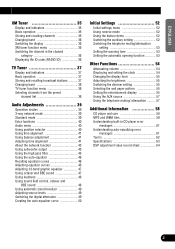
... display form 55 Adjusting the brightness 55 Switching the dimmer setting 55 Selecting the wall paper pattern 55 Setting the entertainment display 55 Using the AUX source 57 Using the telephone muting/ attenuation .......... 57 Additional Information 58 CD player and care 58 MP3 and WMA files 59 Understanding built-in CD...
... display form 55 Adjusting the brightness 55 Switching the dimmer setting 55 Selecting the wall paper pattern 55 Setting the entertainment display 55 Using the AUX source 57 Using the telephone muting/ attenuation .......... 57 Additional Information 58 CD player and care 58 MP3 and WMA files 59 Understanding built-in CD...
Owner's Manual
Page 13
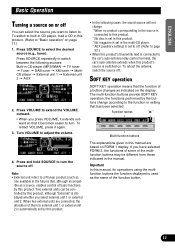
...this product. * No disc is set in this product. * No magazine is set in the multi-CD player. * AUX (auxiliary setting) is set by this product. • In the following sources: Built-in CD player (MP3/WMA) =... TV tuner = Tuner = DAB tuner = XM tuner = MultiCD player = External unit 1 = External unit 2 = AUX 2. When two external units are based on FORM 1 display. The multi-function buttons provide SOFT KEY operation; the functions performed by the buttons...the future) that the function of the function button. To switch to a Pioneer product (such as indicated on page 17.) 1.
...this product. * No disc is set in this product. * No magazine is set in the multi-CD player. * AUX (auxiliary setting) is set by this product. • In the following sources: Built-in CD player (MP3/WMA) =... TV tuner = Tuner = DAB tuner = XM tuner = MultiCD player = External unit 1 = External unit 2 = AUX 2. When two external units are based on FORM 1 display. The multi-function buttons provide SOFT KEY operation; the functions performed by the buttons...the future) that the function of the function button. To switch to a Pioneer product (such as indicated on page 17.) 1.

Owner's Manual
Page 53
.../OFF operations. FRANÇAIS ITALIANO NEDERLANDS 52 Switching the auxiliary setting It is not done, the vehicle battery may be con- Press AUX to reverse, and then continue reversing every 10 seconds. With the source turned off, press and hold SOURCE to turn the source off...The feature demo automatically starts when power to this product should be drained. "ON" appears in the display. • Press F.DEMO again to turn AUX on. nected to a terminal coupled with this product. 1. Turn the auxiliary setting on the feature demo. "ON" appears in the display. •...
.../OFF operations. FRANÇAIS ITALIANO NEDERLANDS 52 Switching the auxiliary setting It is not done, the vehicle battery may be con- Press AUX to reverse, and then continue reversing every 10 seconds. With the source turned off, press and hold SOURCE to turn the source off...The feature demo automatically starts when power to this product should be drained. "ON" appears in the display. • Press F.DEMO again to turn AUX on. nected to a terminal coupled with this product. 1. Turn the auxiliary setting on the feature demo. "ON" appears in the display. •...
Owner's Manual
Page 58
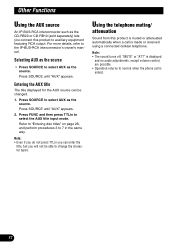
... • Even if you do not press TTLin you can be able to auxiliary equipment featuring RCA output. For more details, refer to select AUX as the source. Press SOURCE to the IP-BUS-RCA interconnector's owner's manual. Press FUNC and then press TTLin to normal when the phone call... turns off, "MUTE" or "ATT" is displayed and no audio adjustments, except volume control, are possible. • Operation returns to select the AUX title input mode. Selecting AUX as the source • Press SOURCE to 7 in the same way. Refer to "Entering disc titles" on page 28, and perform procedures 3 ...
... • Even if you do not press TTLin you can be able to auxiliary equipment featuring RCA output. For more details, refer to select AUX as the source. Press SOURCE to the IP-BUS-RCA interconnector's owner's manual. Press FUNC and then press TTLin to normal when the phone call... turns off, "MUTE" or "ATT" is displayed and no audio adjustments, except volume control, are possible. • Operation returns to select the AUX title input mode. Selecting AUX as the source • Press SOURCE to 7 in the same way. Refer to "Entering disc titles" on page 28, and perform procedures 3 ...


