
Operation Manual
Page 1
English Operation Manual FLASH MEMORY MULTIMEDIA AV NAVIGATION RECEIVER AVIC-X9115BT AVIC-X7115BT Notice to all users: This software requires that the navigation system is properly connected to your vehicle's parking brake and depending on your Authorized Pioneer Electronics retailer or call us at (800) 421-1404. For more information, please contact your vehicle, additional installation may be required.
English Operation Manual FLASH MEMORY MULTIMEDIA AV NAVIGATION RECEIVER AVIC-X9115BT AVIC-X7115BT Notice to all users: This software requires that the navigation system is properly connected to your vehicle's parking brake and depending on your Authorized Pioneer Electronics retailer or call us at (800) 421-1404. For more information, please contact your vehicle, additional installation may be required.
Operation Manual
Page 2
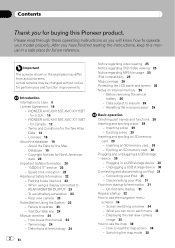
...After you have finished reading the instructions, keep this manual 24 - Terms and Conditions for Canada 12 - About the Data for U.S.A. 10 - Data subject to User 9 License Agreement 10 - Inserting a disc 29 - PIONEER AVIC-X9115BT, AVIC-X7115BT - Failure to use the navigation menu screens 34...36 - Rear view camera 23 Notes Before Using the System 23 - How to termination 31 - PIONEER AVIC-X9115BT, AVIC-X7115BT - When using a display connected to use this manual in a USB storage device 30 - Resetting the microprocessor 26 Basic operation Checking part names and ...
...After you have finished reading the instructions, keep this manual 24 - Terms and Conditions for Canada 12 - About the Data for U.S.A. 10 - Data subject to User 9 License Agreement 10 - Inserting a disc 29 - PIONEER AVIC-X9115BT, AVIC-X7115BT - Failure to use the navigation menu screens 34...36 - Rear view camera 23 Notes Before Using the System 23 - How to termination 31 - PIONEER AVIC-X9115BT, AVIC-X7115BT - When using a display connected to use this manual in a USB storage device 30 - Resetting the microprocessor 26 Basic operation Checking part names and ...

Operation Manual
Page 20
...or other intellectual property rights owned or licensed to the system. ! You will be construed as there are located in the operator's manual included in part from Canadian authorities, including ã Canada Post Corporation and GeoBaseâ, All rights reserved. Also, damage to ...install or service your dealer or the nearest authorized Pioneer Service Station. Electrical shock could expose you notice smoke, a strange noise or odor from the navigation system, or any unauthorized copying or...
...or other intellectual property rights owned or licensed to the system. ! You will be construed as there are located in the operator's manual included in part from Canadian authorities, including ã Canada Post Corporation and GeoBaseâ, All rights reserved. Also, damage to ...install or service your dealer or the nearest authorized Pioneer Service Station. Electrical shock could expose you notice smoke, a strange noise or odor from the navigation system, or any unauthorized copying or...

Operation Manual
Page 21
...is for reference purposes only. p Route and guidance information displayed by the navigation system. p The data encoded in the built-in this manual and follow the actual traffic signs. p Pay close attention to all warnings in memory is the intellectual property of your vehicle. p Never...navigation system to route to use the system unless they have read and fully understand the following safety information: p Read the entire manual before making the necessary adjustments. Stop using your navigation system so high that you cannot hear outside traffic and emergency vehicles. p ...
...is for reference purposes only. p Route and guidance information displayed by the navigation system. p The data encoded in the built-in this manual and follow the actual traffic signs. p Pay close attention to all warnings in memory is the intellectual property of your vehicle. p Never...navigation system to route to use the system unless they have read and fully understand the following safety information: p Read the entire manual before making the necessary adjustments. Stop using your navigation system so high that you cannot hear outside traffic and emergency vehicles. p ...
Operation Manual
Page 24
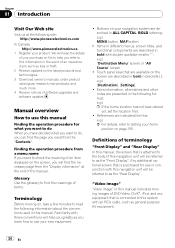
... Canada http://www.pioneerelectronics.ca 1 Register your new equipment. ! Definitions of terminology "Front Display" and "Rear Display" In this manual, the screen that is connected to this information in the event of an insurance claim such as loss or theft. 2 Receive updates... this system with this navigation unit will help you need from the "Display information" at the following information about the conventions used in this manual indicates moving on the screen are described in bold in ALL CAPITAL, BOLD lettering: e.g.) MENU button, MAP button. ! References are described ...
... Canada http://www.pioneerelectronics.ca 1 Register your new equipment. ! Definitions of terminology "Front Display" and "Rear Display" In this manual, the screen that is connected to this information in the event of an insurance claim such as loss or theft. 2 Receive updates... this system with this navigation unit will help you need from the "Display information" at the following information about the conventions used in this manual indicates moving on the screen are described in bold in ALL CAPITAL, BOLD lettering: e.g.) MENU button, MAP button. ! References are described ...

Operation Manual
Page 29
... search controls. Ejecting a disc % Press the EJECT button. If data loss or corruption occurs on the back of small children to perform manual seek tuning, fast forward or reverse. Pioneer accepts no liability for iPod (CD-IU230V), use "AV1" input (RCA) on the storage device for any reason, it again. 8 Bluetooth connection...
... search controls. Ejecting a disc % Press the EJECT button. If data loss or corruption occurs on the back of small children to perform manual seek tuning, fast forward or reverse. Pioneer accepts no liability for iPod (CD-IU230V), use "AV1" input (RCA) on the storage device for any reason, it again. 8 Bluetooth connection...

Operation Manual
Page 74
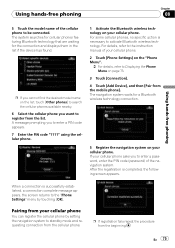
For details, refer to the instruction manual of your cellular phone appears in the list. When a connection is successfully established, a connection complete message appears, the screen returns to Displaying the Phone Menu ... order that the cellular phone is found in the list. 1 Activate the Bluetooth wireless technology on your cellular phone. For details, refer to the instruction manual of your cellular phone. 2 Touch [Phone Settings] on the previous page. 3 Touch [Connection]. 4 Touch [Add Device], and then [Search devices]. A message prompting you to Displaying...
For details, refer to the instruction manual of your cellular phone appears in the list. When a connection is successfully established, a connection complete message appears, the screen returns to Displaying the Phone Menu ... order that the cellular phone is found in the list. 1 Activate the Bluetooth wireless technology on your cellular phone. For details, refer to the instruction manual of your cellular phone. 2 Touch [Phone Settings] on the previous page. 3 Touch [Connection]. 4 Touch [Add Device], and then [Search devices]. A message prompting you to Displaying...
Operation Manual
Page 75
... featuring Bluetooth technology that are waiting for a Bluetooth wireless technology connection. 5 Register the navigation system on your cellular phone. For details, refer to the instruction manual of your cellular phone You can register the cellular phone by setting the navigation system to the "Phone Settings" menu by touching [OK]. After the...
... featuring Bluetooth technology that are waiting for a Bluetooth wireless technology connection. 5 Register the navigation system on your cellular phone. For details, refer to the instruction manual of your cellular phone You can register the cellular phone by setting the navigation system to the "Phone Settings" menu by touching [OK]. After the...

Operation Manual
Page 76
...by touching [OK]. For details, refer to see whether your cellular phone, touch [Cancel]. However, connect the cellular phone manually in the following procedure. The registration is successfully established, a connection complete message appears, the screen returns to the "Phone ... phone. If you want to your cellular phone is deleted, all the phone book entries and call history lists that you start connection manually, carry out the following cases: ! p To cancel the connection to reconnect a disconnected cellular phone. ! Disconnecting a cellular phone 1...
...by touching [OK]. For details, refer to see whether your cellular phone, touch [Cancel]. However, connect the cellular phone manually in the following procedure. The registration is successfully established, a connection complete message appears, the screen returns to the "Phone ... phone. If you want to your cellular phone is deleted, all the phone book entries and call history lists that you start connection manually, carry out the following cases: ! p To cancel the connection to reconnect a disconnected cellular phone. ! Disconnecting a cellular phone 1...

Operation Manual
Page 77
... the received voice. = For more details about "Phone Volume", refer to Answering a call automatically on page 82. 1 When a call comes in , touch . During the call manually.
... the received voice. = For more details about "Phone Volume", refer to Answering a call automatically on page 82. 1 When a call comes in , touch . During the call manually.

Operation Manual
Page 82
...". = For details, refer to [Auto Answer Preference]. Touching [Bluetooth On/Off] switching between [On] and [Off]. Chapter 08 Using hands-free phoning 3 Touch [OK]. Respond manually [Immediately]: Answers immediately [After 3 seconds]: Answers after three seconds 82 En Answering a call on page 73. 2 Touch [Off] next to clear memory that you have...
...". = For details, refer to [Auto Answer Preference]. Touching [Bluetooth On/Off] switching between [On] and [Off]. Chapter 08 Using hands-free phoning 3 Touch [OK]. Respond manually [Immediately]: Answers immediately [After 3 seconds]: Answers after three seconds 82 En Answering a call on page 73. 2 Touch [Off] next to clear memory that you have...
Operation Manual
Page 84
... press the accept button on a phone, you answer the phone by using Bluetooth wireless technology, this navigation system may not be able to the instruction manual that comes first alphabetically is already registered in the received call appears. ! Cellular phone operations vary depending on the other end of -sight distance between...
... press the accept button on a phone, you answer the phone by using Bluetooth wireless technology, this navigation system may not be able to the instruction manual that comes first alphabetically is already registered in the received call appears. ! Cellular phone operations vary depending on the other end of -sight distance between...

Operation Manual
Page 108
... is a playable file on the external storage device. = For details, refer to Plugging in a USB storage device on page 30. = For details, refer to the manual supplied with USB storage device. 1 Source icon Shows which source has been selected. 2 Folder number indicator 3 Track number indicator 4 Play time indicator Shows the elapsed...
... is a playable file on the external storage device. = For details, refer to Plugging in a USB storage device on page 30. = For details, refer to the manual supplied with USB storage device. 1 Source icon Shows which source has been selected. 2 Folder number indicator 3 Track number indicator 4 Play time indicator Shows the elapsed...

Operation Manual
Page 112
... files stored in the external storage device (USB, SD). Folders are skipped if they contains no playable files. (If there are collectively referred to the manual supplied with USB storage device. 1 Source icon Shows which source has been selected. 2 Folder number indicator 3 File number indicator 4 Play time indicator Shows the elapsed...
... files stored in the external storage device (USB, SD). Folders are skipped if they contains no playable files. (If there are collectively referred to the manual supplied with USB storage device. 1 Source icon Shows which source has been selected. 2 Folder number indicator 3 File number indicator 4 Play time indicator Shows the elapsed...

Operation Manual
Page 121
... details concerning operations, refer to Screen switching overview on the next page. 3 Select a preset channel [c] or [d] can be used to switch preset channels. 4 Perform manual tuning To tune manually, touch [c] or [d] briefly. p You can cancel seek tuning by using the navigation system. p This function is being broadcast in stereo. 7 Signal level indicator...
... details concerning operations, refer to Screen switching overview on the next page. 3 Select a preset channel [c] or [d] can be used to switch preset channels. 4 Perform manual tuning To tune manually, touch [c] or [d] briefly. p You can cancel seek tuning by using the navigation system. p This function is being broadcast in stereo. 7 Signal level indicator...

Operation Manual
Page 124
... channel [c] or [d] can cancel seek tuning by using the navigation system. p You can be used to switch presets channels. 4 Perform manual tuning To tune manually, touch [c] or [d] briefly. Seek tuning will scan the frequencies until the desired band is displayed: FM1, FM2, FM3 or AM. ...a broadcast strong enough for each band. 6 Display the map screen 124 En p For details concerning operation, refer to the HD Radio tuner's operation manual. % Touch [Digital Radio] on the next page. Otherwise, "A" appears. 9 Seek type indicator = For details, refer to Switching the display on ...
... channel [c] or [d] can cancel seek tuning by using the navigation system. p You can be used to switch presets channels. 4 Perform manual tuning To tune manually, touch [c] or [d] briefly. Seek tuning will scan the frequencies until the desired band is displayed: FM1, FM2, FM3 or AM. ...a broadcast strong enough for each band. 6 Display the map screen 124 En p For details concerning operation, refer to the HD Radio tuner's operation manual. % Touch [Digital Radio] on the next page. Otherwise, "A" appears. 9 Seek type indicator = For details, refer to Switching the display on ...

Operation Manual
Page 127
..." menu % Touch [Preset] (or [Detail]). Using the radio (AM) Chapter 20 Using the radio (AM) You can be used to switch presets. 4 Perform manual tuning To tune manually, touch [c] or [d] briefly. This section describes operations for about one step at a time. Perform seek tuning To perform seek tuning, touch and hold [c] or...
..." menu % Touch [Preset] (or [Detail]). Using the radio (AM) Chapter 20 Using the radio (AM) You can be used to switch presets. 4 Perform manual tuning To tune manually, touch [c] or [d] briefly. This section describes operations for about one step at a time. Perform seek tuning To perform seek tuning, touch and hold [c] or...

Operation Manual
Page 130
... XM broadcast station name the tuner is displayed. Chapter 21 Using the XM tuner You can use the navigation system to the XM tuner's operation manuals. p Any changes made by XM Satellite Radio as of the broadcast station in the future may be connected: GEX-P900XM, GEX-P910XM Reading the screen... of December 2008. The following XM satellite digital tuner units cannot be displayed, the following substitute icon is currently tuned in the XM tuner's operation manual.
... XM broadcast station name the tuner is displayed. Chapter 21 Using the XM tuner You can use the navigation system to the XM tuner's operation manuals. p Any changes made by XM Satellite Radio as of the broadcast station in the future may be connected: GEX-P900XM, GEX-P910XM Reading the screen... of December 2008. The following XM satellite digital tuner units cannot be displayed, the following substitute icon is currently tuned in the XM tuner's operation manual.

Operation Manual
Page 131
... select mode You can select an XM channel directly by entering the desired channel number. 1 Touch [Direct]. 2 Touch [0] to [9] to recall the preset channel. 5 Perform manual tuning The channels move up or down one at a time. This is displayed: XM 1, XM 2 or XM 3. nel directly on this function.
... select mode You can select an XM channel directly by entering the desired channel number. 1 Touch [Direct]. 2 Touch [0] to [9] to recall the preset channel. 5 Perform manual tuning The channels move up or down one at a time. This is displayed: XM 1, XM 2 or XM 3. nel directly on this function.

Operation Manual
Page 135
...the next page. For details concerning operation, refer to the owner's manual of Pioneer SIRIUS BUS INTERFACE and SiriusConnect universal tuner. For details concerning operation, refer to the SIRIUS tuner's operation manuals. You can use the SiriusConnect universal tuner (sold separately) with ...been selected. 3 Preset number indicator 5 6 7 8 9a b c En 135 This section provides information on SIRIUS operations with this navigation system, Pioneer SIRIUS BUS INTERFACE is required. Using the touch panel keys % Touch [SIRIUS] on page 34. All Ch Mode 12 3 4 Using the ...
...the next page. For details concerning operation, refer to the owner's manual of Pioneer SIRIUS BUS INTERFACE and SiriusConnect universal tuner. For details concerning operation, refer to the SIRIUS tuner's operation manuals. You can use the SiriusConnect universal tuner (sold separately) with ...been selected. 3 Preset number indicator 5 6 7 8 9a b c En 135 This section provides information on SIRIUS operations with this navigation system, Pioneer SIRIUS BUS INTERFACE is required. Using the touch panel keys % Touch [SIRIUS] on page 34. All Ch Mode 12 3 4 Using the ...


