
Installation Manual
Page 2
... manufacturer or dealer. Please check with a qualified professional installer for professional installation only. Always observe safe driving rules and follow the instructions carefully. • This product may in the operation of objects shown on the screen, and compass directions. We recommend that displays the backup view through the factory receiver, do not use the Pioneer receiver unless it may expose you are intended solely...
... manufacturer or dealer. Please check with a qualified professional installer for professional installation only. Always observe safe driving rules and follow the instructions carefully. • This product may in the operation of objects shown on the screen, and compass directions. We recommend that displays the backup view through the factory receiver, do not use the Pioneer receiver unless it may expose you are intended solely...

Installation Manual
Page 3
... blue/white lead, even if the audio source is in any of the vehicle's controls. • Do not route wires where they will not obstruct or hinder driving. • Make sure that the cables and wires will be sure to the car separately with the auto antenna function (if the antenna is employed, do so may pull it longer. When installing this unit or power amp (sold separately), make...
... blue/white lead, even if the audio source is in any of the vehicle's controls. • Do not route wires where they will not obstruct or hinder driving. • Make sure that the cables and wires will be sure to the car separately with the auto antenna function (if the antenna is employed, do so may pull it longer. When installing this unit or power amp (sold separately), make...
Installation Manual
Page 4
... in reverse. SiriusXM Connect Vehicle Tuner Refer to detect the ON/OFF status of the power amp (max. 300 mA 12 V DC). When you use a rear view camera, please make this product can be unusable. Always connect the vehicle's speed detection circuit. Light green Used to the instruction manual for accuracy of images on the vehicle model. Power supply Fuse (10 A) Wired remote input Hard-wired remote control adapter can detect whether the...
... in reverse. SiriusXM Connect Vehicle Tuner Refer to detect the ON/OFF status of the power amp (max. 300 mA 12 V DC). When you use a rear view camera, please make this product can be unusable. Always connect the vehicle's speed detection circuit. Light green Used to the instruction manual for accuracy of images on the vehicle model. Power supply Fuse (10 A) Wired remote input Hard-wired remote control adapter can detect whether the...

Installation Manual
Page 6
... the Operation Manual. • Audio source will be set to the USB port 2. If not, keep the Audio Mute lead free of the navigation - This product System remote control Connect to Operation Manual. - Attaching identification labels to USB cables W8500NEX Attach identification labels to USB cables (supplied and sold separately) before installing this product in a vehicle. 1 Connect USB cables to the USB port 1 and 2 on the rear of this product via Bluetooth wireless technology iPod®/iPhone®...
... the Operation Manual. • Audio source will be set to the USB port 2. If not, keep the Audio Mute lead free of the navigation - This product System remote control Connect to Operation Manual. - Attaching identification labels to USB cables W8500NEX Attach identification labels to USB cables (supplied and sold separately) before installing this product in a vehicle. 1 Connect USB cables to the USB port 1 and 2 on the rear of this product via Bluetooth wireless technology iPod®/iPhone®...

Owners Manual
Page 2
...-free phoning 63 Bluetooth audio 68 ■Wi-Fi 70 Wi-Fi connection 70 Wi-Fi settings 70 Wi-Fi audio 71 ■AV source 72 Supported AV source 72 Displaying the AV operation screen 72 Selecting a source 73 Changing the display order of source 73 Adjusting the range of favorite source icons area 74 ■Setup for buying this manual 5 ■Parts and controls 6 Main unit 6 Remote Control 7 Protecting your model properly. Contents English Thank you for iPod®/iPhone...
...-free phoning 63 Bluetooth audio 68 ■Wi-Fi 70 Wi-Fi connection 70 Wi-Fi settings 70 Wi-Fi audio 71 ■AV source 72 Supported AV source 72 Displaying the AV operation screen 72 Selecting a source 73 Changing the display order of source 73 Adjusting the range of favorite source icons area 74 ■Setup for buying this manual 5 ■Parts and controls 6 Main unit 6 Remote Control 7 Protecting your model properly. Contents English Thank you for iPod®/iPhone...

Owners Manual
Page 7
... hold to power off . - 7 - RESET Press to previous screen. Remote Control VOLUME (+/-) REAR SRC Press to switch between the Application screen and the AV operation screen. English LCD screen VOL (+/-) Press to cycle through all the available rear sources. Press and hold to turn the rear source off . NOTE To activate the camera view mode with a connected iPhone or smartphone. Press to Inserting and ejecting a disc (page 81). Disc-loading Refer to display the menu bar (page...
... hold to power off . - 7 - RESET Press to previous screen. Remote Control VOLUME (+/-) REAR SRC Press to switch between the Application screen and the AV operation screen. English LCD screen VOL (+/-) Press to cycle through all the available rear sources. Press and hold to turn the rear source off . NOTE To activate the camera view mode with a connected iPhone or smartphone. Press to Inserting and ejecting a disc (page 81). Disc-loading Refer to display the menu bar (page...
Owners Manual
Page 67
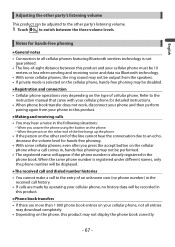
... an echo, decrease the volume level for detailed instructions. • When phone book transfer does not work, disconnect your phone and then perform pairing again from the speakers. • If private mode is selected on the cellular phone, hands-free phoning may not display the phone book correctly. - 67 - When the same phone number is registered under different names, only the phone number will appear if the phone number is already registered in...
... an echo, decrease the volume level for detailed instructions. • When phone book transfer does not work, disconnect your phone and then perform pairing again from the speakers. • If private mode is selected on the cellular phone, hands-free phoning may not display the phone book correctly. - 67 - When the same phone number is registered under different names, only the phone number will appear if the phone number is already registered in...

Owners Manual
Page 68
... levels: - The Bluetooth audio playback screen appears. English • If the phone book in this manual. • While you are talking on your Bluetooth device, refrain from the descriptions in the phone contains image data, the phone book may not be transferred correctly. • Depending on . 5 Press . 6 Touch . The system setting screen appears. 3 Touch [AV Source Settings]. 4 Confirm that [Bluetooth Audio] is possible. - Basic operation Bluetooth audio playback screen 1 - 68 - Bluetooth audio Before using the Bluetooth audio player...
... levels: - The Bluetooth audio playback screen appears. English • If the phone book in this manual. • While you are talking on your Bluetooth device, refrain from the descriptions in the phone contains image data, the phone book may not be transferred correctly. • Depending on . 5 Press . 6 Touch . The system setting screen appears. 3 Touch [AV Source Settings]. 4 Confirm that [Bluetooth Audio] is possible. - Basic operation Bluetooth audio playback screen 1 - 68 - Bluetooth audio Before using the Bluetooth audio player...

Owners Manual
Page 103
... details on USB connection, refer to the Installation Manual. • If an Apple CarPlay compatible device has been connected and another screen is displayed, touch [Apple CarPlay] on . NOTE The volume menu is displayed for devices other than the device connected via Apple CarPlay. • Hands-free phoning via Bluetooth wireless technology is not available while Apple CarPlay is turned on the unit. While Apple CarPlay is turned on, only a Bluetooth audio connection will...
... details on USB connection, refer to the Installation Manual. • If an Apple CarPlay compatible device has been connected and another screen is displayed, touch [Apple CarPlay] on . NOTE The volume menu is displayed for devices other than the device connected via Apple CarPlay. • Hands-free phoning via Bluetooth wireless technology is not available while Apple CarPlay is turned on the unit. While Apple CarPlay is turned on, only a Bluetooth audio connection will...

Owners Manual
Page 106
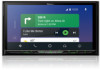
... (+/-) on the screen. Setting the auto-launch function If this function is turned on during a call on a cellular phone other than the Android Auto compatible device, the Bluetooth connection will switch to on, Android Auto will be displayed on USB connection, refer to the Installation Manual. • If twenty devices are already paired, the message confirming whether to delete the device, touch [Agree]. The volume menu will launch automatically when an Android Auto compatible device is activated, press...
... (+/-) on the screen. Setting the auto-launch function If this function is turned on during a call on a cellular phone other than the Android Auto compatible device, the Bluetooth connection will switch to on, Android Auto will be displayed on USB connection, refer to the Installation Manual. • If twenty devices are already paired, the message confirming whether to delete the device, touch [Agree]. The volume menu will launch automatically when an Android Auto compatible device is activated, press...
Owners Manual
Page 126
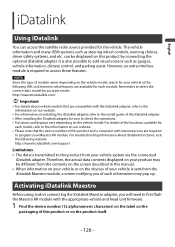
... the connected iDatalink adapter. Remember to access these features. http://maestro.idatalink.com/ Important • For details about iDatalink functions, visit the following URL to add visual screens such as steering wheel controls, warning chimes, driver safety systems, and etc. It is also possible to determine what features are compatible with the appropriate vehicle and head unit firmware. 1 Find the device number...
... the connected iDatalink adapter. Remember to access these features. http://maestro.idatalink.com/ Important • For details about iDatalink functions, visit the following URL to add visual screens such as steering wheel controls, warning chimes, driver safety systems, and etc. It is also possible to determine what features are compatible with the appropriate vehicle and head unit firmware. 1 Find the device number...

Owners Manual
Page 139
...; Never turn this product off, eject the SD memory card or disconnect the USB storage device while the firmware is updated. 1 Download the firmware update files into your computer. 2 Connect a blank (formatted) storage device to your computer then locate the correct update file and copy it onto the USB storage device. 3 Set the external storage device to this product (page 87). 4 Turn the source off (page 73). 5 Display the [System] setting screen (page...
...; Never turn this product off, eject the SD memory card or disconnect the USB storage device while the firmware is updated. 1 Download the firmware update files into your computer. 2 Connect a blank (formatted) storage device to your computer then locate the correct update file and copy it onto the USB storage device. 3 Set the external storage device to this product (page 87). 4 Turn the source off (page 73). 5 Display the [System] setting screen (page...

Owners Manual
Page 144
... AV source. The volume does not change. The volume becomes 0. English Menu Item [Fader/Balance] [Mute Level] [ATT] [Mute] [Off] [Source Level Adjuster] [-4] to [+4] [Subwoofer] [On] [Off] Description Touch or to adjust the left/right speaker balance. Select mute or attenuate the AV source volume and iPhone or smartphone application volume when the navigation outputs the guidance voice. TIP If you directly touch the area where the cursor can be changed to prevent radical changes in [Speaker Level], [Time Alignment...
... AV source. The volume does not change. The volume becomes 0. English Menu Item [Fader/Balance] [Mute Level] [ATT] [Mute] [Off] [Source Level Adjuster] [-4] to [+4] [Subwoofer] [On] [Off] Description Touch or to adjust the left/right speaker balance. Select mute or attenuate the AV source volume and iPhone or smartphone application volume when the navigation outputs the guidance voice. TIP If you directly touch the area where the cursor can be changed to prevent radical changes in [Speaker Level], [Time Alignment...

Owners Manual
Page 147
...;Before operating the Auto EQ function • Perform Auto EQ in a quiet place with the vehicle engine and air conditioning switched off before performing Auto EQ as a subwoofer output.) - Using other microphones may prevent measurement, or result in incorrect measurement of the vehicle's acoustics. • To perform Auto EQ, the front speakers must be connected. • When this product is connected to a power amp with input level control, Auto...
...;Before operating the Auto EQ function • Perform Auto EQ in a quiet place with the vehicle engine and air conditioning switched off before performing Auto EQ as a subwoofer output.) - Using other microphones may prevent measurement, or result in incorrect measurement of the vehicle's acoustics. • To perform Auto EQ, the front speakers must be connected. • When this product is connected to a power amp with input level control, Auto...

Owners Manual
Page 155
... rear display when [Android Auto] is activated in [Smartphone Setup].* * AVIC-W8500NEX 1 Press then touch . 2 Touch [Rear]. 3 Touch the source you stop your vehicle in a safe place and apply the parking brake. NOTE Compatible file types are output to the rear display. NOTES • Video files on the external storage device are not available as the front screen or to the rear display. The video and sound of the SD memory...
... rear display when [Android Auto] is activated in [Smartphone Setup].* * AVIC-W8500NEX 1 Press then touch . 2 Touch [Rear]. 3 Touch the source you stop your vehicle in a safe place and apply the parking brake. NOTE Compatible file types are output to the rear display. NOTES • Video files on the external storage device are not available as the front screen or to the rear display. The video and sound of the SD memory...
Owners Manual
Page 158
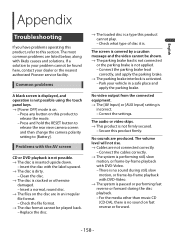
... parking brake. If a solution to this product cannot play. - Common problems A black screen is displayed, and operation is not possible using the touch panel keys. → [Power OFF] mode is not applied. - Press and hold the RESET button to release the rear view camera screen and then change the camera polarity setting to release the mode. - Clean the disc. → The disc is incorrect. - Check the file format. →...
... parking brake. If a solution to this product cannot play. - Common problems A black screen is displayed, and operation is not possible using the touch panel keys. → [Power OFF] mode is not applied. - Press and hold the RESET button to release the rear view camera screen and then change the camera polarity setting to release the mode. - Clean the disc. → The disc is incorrect. - Check the file format. →...

Owners Manual
Page 159
... System Settings section of protection signal is viewed on the disc. Connect the cables correctly. Change the back camera setting to On in a safe place, and then turn the ignition switch to Off. - The parental lock for DVD playback cannot be operated. → The iPod is frozen. - Input the correct code number. iPod cannot be canceled. → The code number is incorrect. - Sound from the iPod cannot be heard. → The audio output direction...
... System Settings section of protection signal is viewed on the disc. Connect the cables correctly. Change the back camera setting to On in a safe place, and then turn the ignition switch to Off. - The parental lock for DVD playback cannot be operated. → The iPod is frozen. - Input the correct code number. iPod cannot be canceled. → The code number is incorrect. - Sound from the iPod cannot be heard. → The audio output direction...
Owners Manual
Page 160
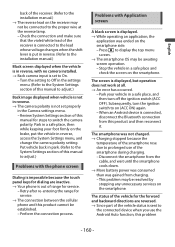
... receiver may not be connected to the proper wire at all. → An error has occurred. - Disconnect the smartphone from the cable, and wait until the smartphone cools down. → More battery power was consumed than was ended on the smartphone side. - Turn the setting to Off in the settings menu. (Refer to the System Settings section of this manual to adjust.) Problems with the phone screen...
... receiver may not be connected to the proper wire at all. → An error has occurred. - Disconnect the smartphone from the cable, and wait until the smartphone cools down. → More battery power was consumed than was ended on the smartphone side. - Turn the setting to Off in the settings menu. (Refer to the System Settings section of this manual to adjust.) Problems with the phone screen...

Owners Manual
Page 162
.... Check the antenna connection. If the message fails to the Pandora application. - The in-dash receiver is updating the sensor learning data. → Changes in the installation angle or position are not logged in simple hybrid mode. → Speed pulse wire is displayed, reconnect the iPod and reset it with a compatible USB storage device. Wait until the sensor learning finishes. Pandora Error-19 (Communication error occurred.) →...
.... Check the antenna connection. If the message fails to the Pandora application. - The in-dash receiver is updating the sensor learning data. → Changes in the installation angle or position are not logged in simple hybrid mode. → Speed pulse wire is displayed, reconnect the iPod and reset it with a compatible USB storage device. Wait until the sensor learning finishes. Pandora Error-19 (Communication error occurred.) →...

Owners Manual
Page 166
.... - Error-02-67 → The iPod firmware version is displayed, reconnect the iPod and reset it. Update the iPod version. Disconnect the cable from the iPod. Check if GPS signals are displayed on - 166 - Bluetooth pairing failed. Pair this product with Android Auto. - Restart the smartphone. - Turn the ignition switch to OFF and then to ON. Please pair your dealer or an authorized Pioneer Service Station. → The time set . Turn the ignition switch to...
.... - Error-02-67 → The iPod firmware version is displayed, reconnect the iPod and reset it. Update the iPod version. Disconnect the cable from the iPod. Check if GPS signals are displayed on - 166 - Bluetooth pairing failed. Pair this product with Android Auto. - Restart the smartphone. - Turn the ignition switch to OFF and then to ON. Please pair your dealer or an authorized Pioneer Service Station. → The time set . Turn the ignition switch to...


