Owner's Manual
Page 3
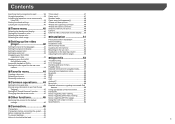
... MirrorLink device 49 Camera 49 External video component and the display......50 ■ Installation 51 Precautions before installation 51 Before installing 51 Installation notes 51 DIN front/rear-mount 51 Installing the microphone 52 Mounting on the sun visor 52 Installation on the steering column 53 Adjusting the microphone angle 53...
... MirrorLink device 49 Camera 49 External video component and the display......50 ■ Installation 51 Precautions before installation 51 Before installing 51 Installation notes 51 DIN front/rear-mount 51 Installing the microphone 52 Mounting on the sun visor 52 Installation on the steering column 53 Adjusting the microphone angle 53...

Owner's Manual
Page 51
... horizontally on top of side brackets (small). This is necessary to allow the amplifiers to radiate freely. 1 2 3 1 Dashboard 2 Leave gap 3 LCD panel DIN front/rear-mount This unit can be opened and closed without contacting with the surface tilted more 1 1 Do not cover this product in front of... the manner specified after you have the parts' compatibility checked by using a screwdriver to bend the metal tabs (90°) into place. 51 DIN Front-mount 1 Decide the position of this unit so the LCD panel can be sure to safely operate the vehicle. ● Never install this...
... horizontally on top of side brackets (small). This is necessary to allow the amplifiers to radiate freely. 1 2 3 1 Dashboard 2 Leave gap 3 LCD panel DIN front/rear-mount This unit can be opened and closed without contacting with the surface tilted more 1 1 Do not cover this product in front of... the manner specified after you have the parts' compatibility checked by using a screwdriver to bend the metal tabs (90°) into place. 51 DIN Front-mount 1 Decide the position of this unit so the LCD panel can be sure to safely operate the vehicle. ● Never install this...

Owner's Manual
Page 52
... supplied frame to detach the front panel, the front panel can be fastened with supplied screw. 2 3 4 1 Dashboard 2 Mounting sleeve 3 Side bracket 4 Screw (2 mm × 3 mm) DIN Rear-mount 1 Determine the appropriate position where the holes on the bracket and the side of the unit match. If this happens, use the following...
... supplied frame to detach the front panel, the front panel can be fastened with supplied screw. 2 3 4 1 Dashboard 2 Mounting sleeve 3 Side bracket 4 Screw (2 mm × 3 mm) DIN Rear-mount 1 Determine the appropriate position where the holes on the bracket and the side of the unit match. If this happens, use the following...

Owner's Manual
Page 62
... power source 14.4 V DC ( 10.8 V to 15.1 V allowable) Grounding system Negative type Maximum current consumption 10.0 A Dimensions (W × H × D): DIN Chassis 180 mm × 50 mm × 160 mm (7-1/8 in. ×2 in. ×6-1/4 in.) Nose 188 mm × 58 mm × 32 mm...MAX: 8 192 (H) x 7 680 (W), MIN: 32 (H) x 32 (W) H.264 video decoding format Base Line Profile MPEG4 video decoding format Simple Profile Bluetooth (AVH-X7700BT) Version Bluetooth 3.0 certified Output power 4 dBm Max. (Power class 2) FM tuner Frequency range 87.9 MHz to 107.9 MHz Usable sensitivity 12 dBf (0.8 ...
... power source 14.4 V DC ( 10.8 V to 15.1 V allowable) Grounding system Negative type Maximum current consumption 10.0 A Dimensions (W × H × D): DIN Chassis 180 mm × 50 mm × 160 mm (7-1/8 in. ×2 in. ×6-1/4 in.) Nose 188 mm × 58 mm × 32 mm...MAX: 8 192 (H) x 7 680 (W), MIN: 32 (H) x 32 (W) H.264 video decoding format Base Line Profile MPEG4 video decoding format Simple Profile Bluetooth (AVH-X7700BT) Version Bluetooth 3.0 certified Output power 4 dBm Max. (Power class 2) FM tuner Frequency range 87.9 MHz to 107.9 MHz Usable sensitivity 12 dBf (0.8 ...


