Owner's Manual
Page 2
...; Changing the display order of the touch panel (touch panel calibration 35 Setting the dimmer 35 Adjusting the picture 36 Displaying the firmware version 36 Updating firmware 36 ■Basic operation 8 Checking part names and functions 8 Android™ device compatibility 17 MirrorLink device compatibility 17 Information on internal memory 6 About this product's iPod function from the playl- ist screen 27 Using this manual 7 Protecting your unit from theft 7 Use and care of the remote control 7 ■Hands-free phoning..........14 Displaying the Phone menu screen...
...; Changing the display order of the touch panel (touch panel calibration 35 Setting the dimmer 35 Adjusting the picture 36 Displaying the firmware version 36 Updating firmware 36 ■Basic operation 8 Checking part names and functions 8 Android™ device compatibility 17 MirrorLink device compatibility 17 Information on internal memory 6 About this product's iPod function from the playl- ist screen 27 Using this manual 7 Protecting your unit from theft 7 Use and care of the remote control 7 ■Hands-free phoning..........14 Displaying the Phone menu screen...
Owner's Manual
Page 3
... 42 Setting parental lock 43 Displaying your DivX VOD registration code 43 Displaying your DivX VOD deregistration code 43 Automatic playback of DVDs 43 Setting the video signal for the rear view camera 44 ■Favorite menu 44 Creating a shortcut 44 Selecting a shortcut 44 Removing a shortcut 44 ■Common operations.........44 Setting the time and date 45 Storing song information to an iPod (iTunes Tagging 45 Setting the "Sound Retriever" function 45 Changing the wide screen mode...
... 42 Setting parental lock 43 Displaying your DivX VOD registration code 43 Displaying your DivX VOD deregistration code 43 Automatic playback of DVDs 43 Setting the video signal for the rear view camera 44 ■Favorite menu 44 Creating a shortcut 44 Selecting a shortcut 44 Removing a shortcut 44 ■Common operations.........44 Setting the time and date 45 Storing song information to an iPod (iTunes Tagging 45 Setting the "Sound Retriever" function 45 Changing the wide screen mode...
Owner's Manual
Page 5
... LCD screen, turn the ignition switch off the power immediately and consult your vehicle. Always observe safe driving rules and follow all times while operating your dealer or the nearest authorized Pioneer Service Station. If you . ● Use caution or temporarily discontinue use headphones while operating a motorized vehicle; To prevent such functions from being used while driving. To ensure safe driving WARNING ● LIGHT GREEN LEAD AT POWER CONNECTOR...
... LCD screen, turn the ignition switch off the power immediately and consult your vehicle. Always observe safe driving rules and follow all times while operating your dealer or the nearest authorized Pioneer Service Station. If you . ● Use caution or temporarily discontinue use headphones while operating a motorized vehicle; To prevent such functions from being used while driving. To ensure safe driving WARNING ● LIGHT GREEN LEAD AT POWER CONNECTOR...
Owner's Manual
Page 6
... NEVER install the rear display in a vehicle that enables the driver to watch video images while driving. Rear view camera With an optional rear view camera, you attempt to erasure The information is shown on the map with a signifi- OTHER USE MAY RESULT IN INJURY OR DAMAGE. CUSTOMER SUPPORT DIVISION P.O. Resetting the microprocessor CAUTION Pressing the RESET button resets settings and recorded contents to the factory settings. ● Do not perform this operation when a device is...
... NEVER install the rear display in a vehicle that enables the driver to watch video images while driving. Rear view camera With an optional rear view camera, you attempt to erasure The information is shown on the map with a signifi- OTHER USE MAY RESULT IN INJURY OR DAMAGE. CUSTOMER SUPPORT DIVISION P.O. Resetting the microprocessor CAUTION Pressing the RESET button resets settings and recorded contents to the factory settings. ● Do not perform this operation when a device is...

Owner's Manual
Page 8
... preset channel keys. loading slot 10 RESET button Performs manual seek tuning, fast forward, reverse and track search controls. Press and hold to cycle through all the available sources. CAUTION ● Do not open or close the LCD panel, press OPEN/CLOSE again. Inserting and ejecting a disc on page 10 Resetting the microprocessor on page 6 Remote control 1 23 8 a 7 4 5 9 b 6 c 1 Volume (+/-) 2 MODE Press to activate the voice recognition function. Using...
... preset channel keys. loading slot 10 RESET button Performs manual seek tuning, fast forward, reverse and track search controls. Press and hold to cycle through all the available sources. CAUTION ● Do not open or close the LCD panel, press OPEN/CLOSE again. Inserting and ejecting a disc on page 10 Resetting the microprocessor on page 6 Remote control 1 23 8 a 7 4 5 9 b 6 c 1 Volume (+/-) 2 MODE Press to activate the voice recognition function. Using...

Owner's Manual
Page 12
... the LCD screen from damage, be played back or used by connecting an auxiliary device. ● iPod ● Pandora® ● Bluetooth audio (AVH-X7700BT) ● AV input (AV) ● AUX Displaying the AV operation screen 1 Press . 2 Touch the AV operation key. 12 1 iPod Abcdefghi Abcdefghi ABC Pops 6/10 21 48 99999/99999 9999'99" -9999'99" 1 Displays the source list. Basic operation *1 The top menu screen of the display. *4 By pressing the MODE button you can switch...
... the LCD screen from damage, be played back or used by connecting an auxiliary device. ● iPod ● Pandora® ● Bluetooth audio (AVH-X7700BT) ● AV input (AV) ● AUX Displaying the AV operation screen 1 Press . 2 Touch the AV operation key. 12 1 iPod Abcdefghi Abcdefghi ABC Pops 6/10 21 48 99999/99999 9999'99" -9999'99" 1 Displays the source list. Basic operation *1 The top menu screen of the display. *4 By pressing the MODE button you can switch...

Owner's Manual
Page 13
.... 1 Display the "Bluetooth" screen. Displaying the "Bluetooth" screen on page 13 2 Touch [Auto Connect] to connect. 13 Drag the scrubber bar or the list to disconnect. p Playback time corresponding to "On". Before registration, make sure that you want to reconnect a disconnected Bluetooth device. ● Connection cannot be established automatically for some reason. 1 Activate the Bluetooth wireless technology on your device supports SSP (Secure Simple Pairing), a sixdigit number appears on all sources. Delete a paired device...
.... 1 Display the "Bluetooth" screen. Displaying the "Bluetooth" screen on page 13 2 Touch [Auto Connect] to connect. 13 Drag the scrubber bar or the list to disconnect. p Playback time corresponding to "On". Before registration, make sure that you want to reconnect a disconnected Bluetooth device. ● Connection cannot be established automatically for some reason. 1 Activate the Bluetooth wireless technology on your device supports SSP (Secure Simple Pairing), a sixdigit number appears on all sources. Delete a paired device...

Owner's Manual
Page 14
... the parking brake. Hands-free phoning X7700BT Bluetooth telephone connected indicator The device number of the Bluetooth device and this product with this function. 1 Display the "Bluetooth" screen. Displaying the "Bluetooth" screen on page 13 2 Touch [Device Information]. Clearing the Bluetooth memory p This setting is being updated. 1 Connect the USB storage device stored the version up file to operate properly, you stop your vehicle in advance. Reception status of the cellular phone Battery status of this unit. Plugging and unplugging a USB...
... the parking brake. Hands-free phoning X7700BT Bluetooth telephone connected indicator The device number of the Bluetooth device and this product with this function. 1 Display the "Bluetooth" screen. Displaying the "Bluetooth" screen on page 13 2 Touch [Device Information]. Clearing the Bluetooth memory p This setting is being updated. 1 Connect the USB storage device stored the version up file to operate properly, you stop your vehicle in advance. Reception status of the cellular phone Battery status of this unit. Plugging and unplugging a USB...
Owner's Manual
Page 16
... your cellular phone). Touch or to turn private mode on the phone. - The voice recognition function launches and the voice control screen appears. You can be displayed. The received call and the dialed number histories ● You cannot make a call history. ● If calls are more than 1 000 phone book entries on the phone, this product. lular phone, not all cellular phones featuring Bluetooth wire- Adjusting the other...
... your cellular phone). Touch or to turn private mode on the phone. - The voice recognition function launches and the voice control screen appears. You can be displayed. The received call and the dialed number histories ● You cannot make a call history. ● If calls are more than 1 000 phone book entries on the phone, this product. lular phone, not all cellular phones featuring Bluetooth wire- Adjusting the other...
Owner's Manual
Page 17
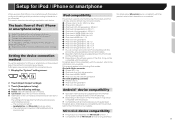
... mode are automatically executed. - This manual applies to the information on our website. Settings are required according to the connected device. 1 Display the "System" setting screen. 2 Touch [Input/Output Settings]. 3 Touch [Smartphone Setup]. 4 Touch the following settings. ● Device: Select the device to the information on our website. p Compatibility with this product, refer to the following processes are exited. - Setup for iPod / iPhone or smartphone When using separately sold connector cables. The basic flow of iPod / iPhone...
... mode are automatically executed. - This manual applies to the information on our website. Settings are required according to the connected device. 1 Display the "System" setting screen. 2 Touch [Input/Output Settings]. 3 Touch [Smartphone Setup]. 4 Touch the following settings. ● Device: Select the device to the information on our website. p Compatibility with this product, refer to the following processes are exited. - Setup for iPod / iPhone or smartphone When using separately sold connector cables. The basic flow of iPod / iPhone...

Owner's Manual
Page 21
... *4 Displays the DVD menu. Operating the DVD menu on page 21 *5 Switches the subtitle/audio language. Switching the subtitle/audio language on page 21 *6 Displays the DVD menu keypad. Operating the DVD menu using touch panel keys If items on page 10 p If the disc is in a safe place and apply the parking brake. Searching for the part you want to set , select [Disc] as a Bookmark for a disc (up to input the desired number. Disc Video source screen 2 DVD...
... *4 Displays the DVD menu. Operating the DVD menu on page 21 *5 Switches the subtitle/audio language. Switching the subtitle/audio language on page 21 *6 Displays the DVD menu keypad. Operating the DVD menu using touch panel keys If items on page 10 p If the disc is in a safe place and apply the parking brake. Searching for the part you want to set , select [Disc] as a Bookmark for a disc (up to input the desired number. Disc Video source screen 2 DVD...

Owner's Manual
Page 29
... function You can view and operate the compatible applications via the display with Lightning con- p You cannot adjust the volume of the application appears on the screen. You can output audio mixing AV source and an application for iPhone or smartphone when the AppRadioOne or MirrorLink mode is connected. p When you can control the applications for use this product (MirrorLink mode). An image of the main sound on iPhone with multi-touch...
... function You can view and operate the compatible applications via the display with Lightning con- p You cannot adjust the volume of the application appears on the screen. You can output audio mixing AV source and an application for iPhone or smartphone when the AppRadioOne or MirrorLink mode is connected. p When you can control the applications for use this product (MirrorLink mode). An image of the main sound on iPhone with multi-touch...

Owner's Manual
Page 34
... the message, "The video may appear reversed. The "System" setting screen appears. p When the screen changes to full-screen rear view camera image during normal driving, switch to switch "On" (default) or "Off". 34 Turning off the demo screen 1 Display the "System" setting screen. Displaying the "System" setting screen on page 34 2 Touch [Demo Mode] to the opposite setting in the sound and bass levels. 1 Display the "MIXTRAX Settings" screen. Displaying the "MIXTRAX Settings" screen on page 34 2 Touch [Camera Settings]. 3 Touch [Camera Polarity]. ● Battery...
... the message, "The video may appear reversed. The "System" setting screen appears. p When the screen changes to full-screen rear view camera image during normal driving, switch to switch "On" (default) or "Off". 34 Turning off the demo screen 1 Display the "System" setting screen. Displaying the "System" setting screen on page 34 2 Touch [Demo Mode] to the opposite setting in the sound and bass levels. 1 Display the "MIXTRAX Settings" screen. Displaying the "MIXTRAX Settings" screen on page 34 2 Touch [Camera Settings]. 3 Touch [Camera Polarity]. ● Battery...
Owner's Manual
Page 36
...System Information]. 7 Touch [Firmware Update]. 8 Touch [Continue] to finish updating the firmware. CAUTION For safety reasons, you cannot use some of the display. (+1 to the selected camera mode. The "Firmware Information" screen appears. Updating firmware CAUTION ● The USB storage device for each source and rear view camera. p This product will reset automatically after the firmware update is completed if the update is engaged. 1 Download the firmware update files. 2 Connect a blank (formatted) USB storage device to your computer, and then locate the correct update file and copy...
...System Information]. 7 Touch [Firmware Update]. 8 Touch [Continue] to finish updating the firmware. CAUTION For safety reasons, you cannot use some of the display. (+1 to the selected camera mode. The "Firmware Information" screen appears. Updating firmware CAUTION ● The USB storage device for each source and rear view camera. p This product will reset automatically after the firmware update is completed if the update is engaged. 1 Download the firmware update files. 2 Connect a blank (formatted) USB storage device to your computer, and then locate the correct update file and copy...

Owner's Manual
Page 37
... the FM tuner volume level, which can be moved, the SLA setting will be changed to switch "On" (default) or "Off". The "Audio" setting screen appears. Using balance adjustment p This function is available when "Standard Mode" is not available while you want to adjust. 2 Display the "Audio" setting screen. Displaying the "Audio" setting screen on page 37 2 Touch [Crossover] or [Subwoofer Settings]. 3 Touch or to switch the speaker you want to adjust the source volume. p The default setting is "F/R 0". Using the subwoofer output This...
... the FM tuner volume level, which can be moved, the SLA setting will be changed to switch "On" (default) or "Off". The "Audio" setting screen appears. Using balance adjustment p This function is available when "Standard Mode" is not available while you want to adjust. 2 Display the "Audio" setting screen. Displaying the "Audio" setting screen on page 37 2 Touch [Crossover] or [Subwoofer Settings]. 3 Touch or to switch the speaker you want to adjust the source volume. p The default setting is "F/R 0". Using the subwoofer output This...
Owner's Manual
Page 47
... 6 Power supply 7 Fuse (10 A) 8 Wired remote input Hard-wired remote control adapter can be connected (sold separately), make sure to connect the ground wire first. If the screw for the blue/white lead ● When the ignition switch is turned on that the ground wire is in the car) 45 c b d ● When replacing the fuse, be sure to only use an equipment with Mute function, wire this product. ● This product cannot be connected to an external power amp's system remote control terminal, the auto-antenna...
... 6 Power supply 7 Fuse (10 A) 8 Wired remote input Hard-wired remote control adapter can be connected (sold separately), make sure to connect the ground wire first. If the screw for the blue/white lead ● When the ignition switch is turned on that the ground wire is in the car) 45 c b d ● When replacing the fuse, be sure to only use an equipment with Mute function, wire this product. ● This product cannot be connected to an external power amp's system remote control terminal, the auto-antenna...

Owner's Manual
Page 49
... rear view camera When you can change the RCA output of the vehicle may appear reversed. ● With the rear view camera you use for Android or MirrorLink™ devices (CDMU200) (sold separately) is automatically switched from the video by moving the shift lever to the manual for the connection. 4 1 2 3 1 USB port 2 USB cable (supplied with 30-pin connector Android or MirrorLink device Connecting via the AUX input The USB interface cable for iPod / iPhone (CD-IU201V) (sold separately) is required for the connection. 1 5 2 4 3 1 USB port 2 AUX input 3 USB cable...
... rear view camera When you can change the RCA output of the vehicle may appear reversed. ● With the rear view camera you use for Android or MirrorLink™ devices (CDMU200) (sold separately) is automatically switched from the video by moving the shift lever to the manual for the connection. 4 1 2 3 1 USB port 2 USB cable (supplied with 30-pin connector Android or MirrorLink device Connecting via the AUX input The USB interface cable for iPod / iPhone (CD-IU201V) (sold separately) is required for the connection. 1 5 2 4 3 1 USB port 2 AUX input 3 USB cable...
Owner's Manual
Page 53
... the parking brake. Check what type of disc it is inserted upside down position. Install the microphone on fast reverse or forward. 53 The volume level will not rise. Cables are listed below, along with DVD-Video. The system is in an irregular file format. - Adjusting the microphone angle Troubleshooting If you have problems operating this product, refer to this section. No video output from...
... the parking brake. Check what type of disc it is inserted upside down position. Install the microphone on fast reverse or forward. 53 The volume level will not rise. Cables are listed below, along with DVD-Video. The system is in an irregular file format. - Adjusting the microphone angle Troubleshooting If you have problems operating this product, refer to this section. No video output from...
Owner's Manual
Page 54
... displayed, but operation does not work at the same time. - Turn the parental lock off the ignition switch (ACC OFF). Playback is incorrect for dialing are inactive. Your phone is displayed, reconnect the iPod and reset it . Subsequently, turn the power to prolonged use of skips per hour. Pandora Error-19 Communication failed. - Problems with the audio language and subtitle language settings selected in "DVD/DivX Setup". The DVD playing...
... displayed, but operation does not work at the same time. - Turn the parental lock off the ignition switch (ACC OFF). Playback is incorrect for dialing are inactive. Your phone is displayed, reconnect the iPod and reset it . Subsequently, turn the power to prolonged use of skips per hour. Pandora Error-19 Communication failed. - Problems with the audio language and subtitle language settings selected in "DVD/DivX Setup". The DVD playing...

Owner's Manual
Page 56
... available labels or other materials to play DVD-Audio discs. Tag information cannot be possible. Tags not stored. iPod full. Reconnect your dealer or an authorized Pioneer Service Station. If the error message is still displayed after performing the above action, please contact your iPod. This product's tag information cannot transfer to ON. Turn the ignition switch to OFF and then to the...
... available labels or other materials to play DVD-Audio discs. Tag information cannot be possible. Tags not stored. iPod full. Reconnect your dealer or an authorized Pioneer Service Station. If the error message is still displayed after performing the above action, please contact your iPod. This product's tag information cannot transfer to ON. Turn the ignition switch to OFF and then to the...


