
Owner's Manual
Page 2
... Replacing the Front Panel 17 • Theft Protection Key Finder 18 • DVD Player • Setting the Remote Control for AV Receiver Operation • Setting the Remote Control for DVD Player Operation Using the Remote Control 21 • Batteries Operation of the Display 22 Deploying the Display 22 Screen Angle Adjustment 23 Closing...
... Replacing the Front Panel 17 • Theft Protection Key Finder 18 • DVD Player • Setting the Remote Control for AV Receiver Operation • Setting the Remote Control for DVD Player Operation Using the Remote Control 21 • Batteries Operation of the Display 22 Deploying the Display 22 Screen Angle Adjustment 23 Closing...

Owner's Manual
Page 4
... ASPECT 114 Setting Angle Mark Display (ANGLE 115 Setting for Digital Output (DIGITAL OUTPUT) .... 116 Setting Digital and Analog Audio Output (OUTPUT SELECTION 117 Setting Remote Control Code Type (REMOTE CODE SELECT 118 3
... ASPECT 114 Setting Angle Mark Display (ANGLE 115 Setting for Digital Output (DIGITAL OUTPUT) .... 116 Setting Digital and Analog Audio Output (OUTPUT SELECTION 117 Setting Remote Control Code Type (REMOTE CODE SELECT 118 3

Owner's Manual
Page 5
... Small Fluorescent Tube If You Forget Your Code Number 129 Error Message 129 Language Code Chart 130 Setting the Remote Control 131 • Setting the Dipswitches • Using it as a Navigation System Remote Control Troubleshooting 133 Terms 137 Installation 139 Connecting the Units 139 • Connecting the Power Cord of AV Receiver...) • Installing the DVD Player (DIN Front-mount) • Installing the DVD Player (DIN Rear-mount) • Installing the Voice Guidance Speaker • Installing the Remote Control Unit Specifications 157 Continued overleaf. 4
... Small Fluorescent Tube If You Forget Your Code Number 129 Error Message 129 Language Code Chart 130 Setting the Remote Control 131 • Setting the Dipswitches • Using it as a Navigation System Remote Control Troubleshooting 133 Terms 137 Installation 139 Connecting the Units 139 • Connecting the Power Cord of AV Receiver...) • Installing the DVD Player (DIN Front-mount) • Installing the DVD Player (DIN Rear-mount) • Installing the Voice Guidance Speaker • Installing the Remote Control Unit Specifications 157 Continued overleaf. 4

Owner's Manual
Page 8
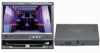
...Canadian model] This Class B digital apparatus complies with the operation mode switch set the operation mode switch to "DVD". (Refer to "Setting the Remote Control for DVD Player Operation" on page 20.) The tuner frequencies on page 29.) This equipment has been tested and found to "Virtual Theater... the equipment off and on a circuit different from that interference will be able to which can be performed with the AV Receiver, using the remote control with Canadian ICES-003. 7 The basic structure of an AV Receiver and a DVD Player featuring a 7-inch wide display. However, there...
...Canadian model] This Class B digital apparatus complies with the operation mode switch set the operation mode switch to "DVD". (Refer to "Setting the Remote Control for DVD Player Operation" on page 20.) The tuner frequencies on page 29.) This equipment has been tested and found to "Virtual Theater... the equipment off and on a circuit different from that interference will be able to which can be performed with the AV Receiver, using the remote control with Canadian ICES-003. 7 The basic structure of an AV Receiver and a DVD Player featuring a 7-inch wide display. However, there...

Owner's Manual
Page 20
...;/2/3 buttons y DISPLAY button u RETURN button i VOLUME Move upward or downward to "AUDIO". Before Using This Product Setting the Remote Control for AV Receiver Operation To operate this system's AV Receiver, set the remote control's operation mode switch to adjust the volume. If it is pressed, the volume is reduced (by about 90...
...;/2/3 buttons y DISPLAY button u RETURN button i VOLUME Move upward or downward to "AUDIO". Before Using This Product Setting the Remote Control for AV Receiver Operation To operate this system's AV Receiver, set the remote control's operation mode switch to adjust the volume. If it is pressed, the volume is reduced (by about 90...

Owner's Manual
Page 21
...t !2 y !3 !4 !7 u !5 !8 !6 q NEXT/PREV button w Joystick e Remote control operation mode switch r MENU button t STOP (7) button y POWER button u DISPLAY button i Control stick o RETURN button !0 VOLUME Move upward or downward to "DVD". Setting the Remote Control for DVD Player Operation To operate this system's DVD Player, set the... remote control's operation mode switch to adjust the volume. Press once more to return to...
...t !2 y !3 !4 !7 u !5 !8 !6 q NEXT/PREV button w Joystick e Remote control operation mode switch r MENU button t STOP (7) button y POWER button u DISPLAY button i Control stick o RETURN button !0 VOLUME Move upward or downward to "DVD". Setting the Remote Control for DVD Player Operation To operate this system's DVD Player, set the... remote control's operation mode switch to adjust the volume. Press once more to return to...

Owner's Manual
Page 22
... under the brake or accelerator pedal. Before Using This Product Using the Remote Control This product is equipped with a remote control for a month or longer. • Do not attempt to recharge the batteries supplied with remote control. • Do not mix new and used batteries. •...• When disposing of used for convenient operation. • Point the control in the direction of the signal reception on the back of the remote control and insert the batteries with governmental regulations or environ- Precaution: • Use only UM-4, AAA or IEC LR03 1.5 V batteries. •...
... under the brake or accelerator pedal. Before Using This Product Using the Remote Control This product is equipped with a remote control for a month or longer. • Do not attempt to recharge the batteries supplied with remote control. • Do not mix new and used batteries. •...• When disposing of used for convenient operation. • Point the control in the direction of the signal reception on the back of the remote control and insert the batteries with governmental regulations or environ- Precaution: • Use only UM-4, AAA or IEC LR03 1.5 V batteries. •...

Owner's Manual
Page 28
... product, although "External" is connected to the car's Auto-antenna relay control ter- Initially, set the remote control's operation mode switch to "AUDIO". (Refer to "Setting the Remote Control for Each Source Unit To Listen to Music The following cases, the sound source will not change: ... = VIDEO = Tuner = MD Player = CD Player = Multi-CD Player = External 1 = External 2 = AUX = Speaker Input Note: • External Unit refers to a Pioneer product (such as one available in the MD player. * When the AUX (auxiliary input), VIDEO and Speaker Input are connected, the allocation of them to...
... product, although "External" is connected to the car's Auto-antenna relay control ter- Initially, set the remote control's operation mode switch to "AUDIO". (Refer to "Setting the Remote Control for Each Source Unit To Listen to Music The following cases, the sound source will not change: ... = VIDEO = Tuner = MD Player = CD Player = Multi-CD Player = External 1 = External 2 = AUX = Speaker Input Note: • External Unit refers to a Pioneer product (such as one available in the MD player. * When the AUX (auxiliary input), VIDEO and Speaker Input are connected, the allocation of them to...

Owner's Manual
Page 31
... icon appears only when the selected source is highlighted in that rooms screen, then click the joystick, or simply press the RETURN button on the remote controller. Move to select the Return option in green. Animation Select "Set Up", then click the joystick to display the Function Menu Screen. Either use...
... icon appears only when the selected source is highlighted in that rooms screen, then click the joystick, or simply press the RETURN button on the remote controller. Move to select the Return option in green. Animation Select "Set Up", then click the joystick to display the Function Menu Screen. Either use...

Owner's Manual
Page 32
... playing a CD TEXT disc The Disc Title and Track Title are displayed. Virtual Theater Quick Tour Information Screen By pressing the DISPLAY button on this remote control unit you can also switch the titles displayed on the Flip-Down Plate.
... playing a CD TEXT disc The Disc Title and Track Title are displayed. Virtual Theater Quick Tour Information Screen By pressing the DISPLAY button on this remote control unit you can also switch the titles displayed on the Flip-Down Plate.

Owner's Manual
Page 74
... switches OFF. Depending on the connection method, the picture on the rear display may be sure not to forget to switch power to "Setting the Remote Control for DVD Player Operation" on the rear display. • Regardless of DVD Player Selecting the DVD 1. Set the... remote control's operation mode switch to "DVD". (Refer to DVD Player OFF. Press repeatedly until DVD is loaded in DVD player, the AV Receiver will not ...
... switches OFF. Depending on the connection method, the picture on the rear display may be sure not to forget to switch power to "Setting the Remote Control for DVD Player Operation" on the rear display. • Regardless of DVD Player Selecting the DVD 1. Set the... remote control's operation mode switch to "DVD". (Refer to DVD Player OFF. Press repeatedly until DVD is loaded in DVD player, the AV Receiver will not ...

Owner's Manual
Page 92
... "Function" highlighted in green. 2. The main menu icons whirl down,with the Audio Menu, set the remote control's operation mode switch to "AUDIO". (Refer to detailed operation of each function. Refer to "Setting the Remote Control for AV Receiver Operation" on page 19.) 1. Press the MENU button. Exit from the Audio Menu...
... "Function" highlighted in green. 2. The main menu icons whirl down,with the Audio Menu, set the remote control's operation mode switch to "AUDIO". (Refer to detailed operation of each function. Refer to "Setting the Remote Control for AV Receiver Operation" on page 19.) 1. Press the MENU button. Exit from the Audio Menu...

Owner's Manual
Page 102
... the Initial Settings Menu • Press the RETURN button. The Initial Settings Menu appears, with the AV Receiver's Initial Setting Menu, set the remote control's operation mode switch to "AUDIO". (Refer to detailed operation of Plate (See page 104.) 3. Select the option by pressing the SOURCE ...button for 1 second. 2. Refer to "Setting the Remote Control for 2 seconds. Click the joystick. Exit from the Initial Settings Menu and switch power off by moving the joystick. Press the MENU ...
... the Initial Settings Menu • Press the RETURN button. The Initial Settings Menu appears, with the AV Receiver's Initial Setting Menu, set the remote control's operation mode switch to "AUDIO". (Refer to detailed operation of Plate (See page 104.) 3. Select the option by pressing the SOURCE ...button for 1 second. 2. Refer to "Setting the Remote Control for 2 seconds. Click the joystick. Exit from the Initial Settings Menu and switch power off by moving the joystick. Press the MENU ...

Owner's Manual
Page 106
... for DVD Player Operation" on page 20.) 1. Before operating with the DVD Player's SET UP MENU, set the remote control's operation mode switch to "DVD". (Refer to change Audio, Subtitle, Parental Lock and other DVD settings. Press the MENU button when the disc is ...
... for DVD Player Operation" on page 20.) 1. Before operating with the DVD Player's SET UP MENU, set the remote control's operation mode switch to "DVD". (Refer to change Audio, Subtitle, Parental Lock and other DVD settings. Press the MENU button when the disc is ...

Owner's Manual
Page 119
... the joystick is displayed. 3. Note: • Pressing the RETURN button takes you back to select the "REMOTE CODE SELECT" . When using this product with a DVD navigation unit, select CODE TYPE A. "REMOTE CODE SELECT" is indicated in blue. 4. Switch to the third SET UP MENU to the previous display. ...Move the joystick up/down to enable operation of DVD Player 118 Click the joystick. Setting Remote Control Code Type (REMOTE CODE SELECT) VD When using this product with a Pioneer DVD player, set code type is indicated the mark " ".
... the joystick is displayed. 3. Note: • Pressing the RETURN button takes you back to select the "REMOTE CODE SELECT" . When using this product with a DVD navigation unit, select CODE TYPE A. "REMOTE CODE SELECT" is indicated in blue. 4. Switch to the third SET UP MENU to the previous display. ...Move the joystick up/down to enable operation of DVD Player 118 Click the joystick. Setting Remote Control Code Type (REMOTE CODE SELECT) VD When using this product with a Pioneer DVD player, set code type is indicated the mark " ".

Owner's Manual
Page 120
... button again for 2 seconds 2. Setting the Display Setting the Display Operating the Setting Menu Entering the Display Setting Menu Perform display and picture setting with remote controller. Use the Display buttons. 1. Select the desired mode in the following order: Each press changes the Mode ...
... button again for 2 seconds 2. Setting the Display Setting the Display Operating the Setting Menu Entering the Display Setting Menu Perform display and picture setting with remote controller. Use the Display buttons. 1. Select the desired mode in the following order: Each press changes the Mode ...

Owner's Manual
Page 132
... switch to the ON position. It's convenient if you have changed the DVD Player's remote control code type (see the dipswitches as shown in the following illustration. You can set each dipswitch using a Pioneer Navigation Unit, if you set switch 3 to control the Navigation Unit. Also, when... using the tip of the remote control, you remove the battery cover of a ballpoint pen. When the code type is...
... switch to the ON position. It's convenient if you have changed the DVD Player's remote control code type (see the dipswitches as shown in the following illustration. You can set each dipswitch using a Pioneer Navigation Unit, if you set switch 3 to control the Navigation Unit. Also, when... using the tip of the remote control, you remove the battery cover of a ballpoint pen. When the code type is...

Owner's Manual
Page 133
Using it as a Navigation System Remote Control q y w u e i r o t !0 !1 !2 !3 !4 q Scale controller w Joystick/OK button e Remote control operation mode switch r NAVI button t DETOUR button y TALK button u BACK button i VOL dial o MENU button !0 GUIDE button !1 CANCEL ROUTE button !2 Numeric keypad !3 DELETE button !4 OK button for numeric keypad Others 132
Using it as a Navigation System Remote Control q y w u e i r o t !0 !1 !2 !3 !4 q Scale controller w Joystick/OK button e Remote control operation mode switch r NAVI button t DETOUR button y TALK button u BACK button i VOL dial o MENU button !0 GUIDE button !1 CANCEL ROUTE button !2 Numeric keypad !3 DELETE button !4 OK button for numeric keypad Others 132

Owner's Manual
Page 134
... in microprocessor to pages 118 and 131.) Battery power is low. Request repairs. 7 General Symptom Power doesn't switch ON. The remote control operation mode is incorrect. Noise and other factors are not connected correctly. Load new batteries. (See page 21.) Some operations ...incorrectly connected. Cause Leads and connectors are prohibited Check using another disc. Cables are causing the built-in level balance. The remote control code is incorrect. Adjust the relative levels between the speakers correctly. (See page 94.) 133 Troubleshooting Troubleshooting If you think...
... in microprocessor to pages 118 and 131.) Battery power is low. Request repairs. 7 General Symptom Power doesn't switch ON. The remote control operation mode is incorrect. Noise and other factors are not connected correctly. Load new batteries. (See page 21.) Some operations ...incorrectly connected. Cause Leads and connectors are prohibited Check using another disc. Cables are causing the built-in level balance. The remote control code is incorrect. Adjust the relative levels between the speakers correctly. (See page 94.) 133 Troubleshooting Troubleshooting If you think...

Owner's Manual
Page 140
... the wiring shortcircuiting to the vehicle body. • Don't pass the yellow lead through the blue/white lead. Connect to an external power amp's system remote control or the car's Auto-antenna relay control terminal (max. 300 mA 12 V DC). Such connection could cause excessive current drain and malfunction. • To...
... the wiring shortcircuiting to the vehicle body. • Don't pass the yellow lead through the blue/white lead. Connect to an external power amp's system remote control or the car's Auto-antenna relay control terminal (max. 300 mA 12 V DC). Such connection could cause excessive current drain and malfunction. • To...


