
Operation Manual
Page 1
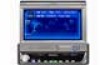
English Español Operation Manual AV Receiver / CD Player with 6.5 inch Wide Display AVH-P6400CD AV Receiver with 6.5 inch Wide Display AVH-P6400R Deutsch
English Español Operation Manual AV Receiver / CD Player with 6.5 inch Wide Display AVH-P6400CD AV Receiver with 6.5 inch Wide Display AVH-P6400R Deutsch
Operation Manual
Page 2
... broadcasts 25 Using radio text 26 • Displaying radio text 26 PTY list 27 Built-in CD Player Playing a CD (Only AVH-P6400CD) 28 Introduction of the display 7 When viewing is difficult, use BRIGHT and DIMMER to adjust 7 Remote control and care 7...22 Selecting alternative frequencies 23 • Using PI Seek 23 • Using Auto PI Seek for buying this manual 5 To ensure safe driving 6 • When Using a Display connected to Rear Video Output 6 Precautions 6 In case of trouble... TEXT discs 32 Before You Start IMPORTANT SAFEGUARDS 5 About this unit 5 About this Pioneer product.
... broadcasts 25 Using radio text 26 • Displaying radio text 26 PTY list 27 Built-in CD Player Playing a CD (Only AVH-P6400CD) 28 Introduction of the display 7 When viewing is difficult, use BRIGHT and DIMMER to adjust 7 Remote control and care 7...22 Selecting alternative frequencies 23 • Using PI Seek 23 • Using Auto PI Seek for buying this manual 5 To ensure safe driving 6 • When Using a Display connected to Rear Video Output 6 Precautions 6 In case of trouble... TEXT discs 32 Before You Start IMPORTANT SAFEGUARDS 5 About this unit 5 About this Pioneer product.
Operation Manual
Page 5
...'s interior, the display should not divert your attention from this product's potential and to install or service your display by reading through the manual before you are not selfexplanatory. En 5 Italiano Nederlands Use in other areas may (i) obstruct the driver's vision, (ii) impair the ... same operations with the functions and their operation by yourself. You can be dangerous and could expose you experience difficulty in this manual and follow the instructions carefully. 4 Do not allow other persons to use this system until they have been designed for the easiest...
...'s interior, the display should not divert your attention from this product's potential and to install or service your display by reading through the manual before you are not selfexplanatory. En 5 Italiano Nederlands Use in other areas may (i) obstruct the driver's vision, (ii) impair the ... same operations with the functions and their operation by yourself. You can be dangerous and could expose you experience difficulty in this manual and follow the instructions carefully. 4 Do not allow other persons to use this system until they have been designed for the easiest...
Operation Manual
Page 6
...a vehicle even by persons other than the driver may be reprogrammed. In case of a display to enable passengers in Germany. • Keep this manual handy as a reference for operating procedures and precautions. • Always keep the volume low enough so you can hear sounds outside of the car....use with a video screen that enables the Driver to watch the DVD, etc. If you park your dealer or nearest authorized Pioneer Service Station. CD playback (Only AVH-P6400CD) Music CD/CD-R/CD-RW playback is possible. WARNING • NEVER install the rear display connected to this product's...
...a vehicle even by persons other than the driver may be reprogrammed. In case of a display to enable passengers in Germany. • Keep this manual handy as a reference for operating procedures and precautions. • Always keep the volume low enough so you can hear sounds outside of the car....use with a video screen that enables the Driver to watch the DVD, etc. If you park your dealer or nearest authorized Pioneer Service Station. CD playback (Only AVH-P6400CD) Music CD/CD-R/CD-RW playback is possible. WARNING • NEVER install the rear display connected to this product's...
Operation Manual
Page 19
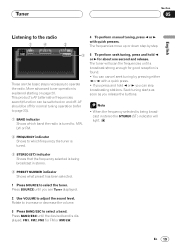
Seek tuning starts as soon as you can be off . Rotate to increase or decrease the volume. 3 Press BAND/ESC to the radio 1 4 2 4 To perform manual tuning, press 2 or 3 with a quick press. • If you press and hold 2 or 3 for about one second and release. More advanced tuner operation is tuned ...
Seek tuning starts as soon as you can be off . Rotate to increase or decrease the volume. 3 Press BAND/ESC to the radio 1 4 2 4 To perform manual tuning, press 2 or 3 with a quick press. • If you press and hold 2 or 3 for about one second and release. More advanced tuner operation is tuned ...

Operation Manual
Page 33
... player Only those functions described in the multi-CD player magazine, NO DISC is displayed. Pressing again will skip to the multi-CD player owner's manual. • If there are no discs in this unit to control a multi-CD player, which is displayed (refer to page 39). 1 Press SOURCE to play... a CD with your multi-CD player. Depending on the multi-CD player you use this manual are the basic steps necessary to select the multi-CD player. Refer to the previous track. Pressing 3 skips to the start of the current track...
... player Only those functions described in the multi-CD player magazine, NO DISC is displayed. Pressing again will skip to the multi-CD player owner's manual. • If there are no discs in this unit to control a multi-CD player, which is displayed (refer to page 39). 1 Press SOURCE to play... a CD with your multi-CD player. Depending on the multi-CD player you use this manual are the basic steps necessary to select the multi-CD player. Refer to the previous track. Pressing 3 skips to the start of the current track...

Operation Manual
Page 40
... set announcement support is received, the letters in parentheses light. * "3" is displayed on the left of DAB tuner-specific operation/features, see your DAB tuner's manual. • This product does not have the language filter function. • With this product, you see DAB displayed. 2 Use VOLUME to select a band. Press SOURCE...
... set announcement support is received, the letters in parentheses light. * "3" is displayed on the left of DAB tuner-specific operation/features, see your DAB tuner's manual. • This product does not have the language filter function. • With this product, you see DAB displayed. 2 Use VOLUME to select a band. Press SOURCE...
Operation Manual
Page 48
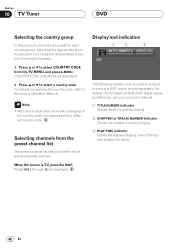
...source is sold separately. Display and indicators 1 2 3 The following explains how to use this product, channels are preset for your product's manual. 1 TITLE NUMBER indicator Shows the title currently playing. 2 CHAPTER (or TRACK) NUMBER indicator Shows the chapter currently playing. 3 PLAY TIME ... you cannot select a different country code. Preset CH 1 through 12 are displayed. 2 Press 5 or ∞ to the tuner's Operation Manual. For details concerning the country code, refer to select a country code. Section 10 TV Tuner DVD Selecting the country group In this product ...
...source is sold separately. Display and indicators 1 2 3 The following explains how to use this product, channels are preset for your product's manual. 1 TITLE NUMBER indicator Shows the title currently playing. 2 CHAPTER (or TRACK) NUMBER indicator Shows the chapter currently playing. 3 PLAY TIME ... you cannot select a different country code. Preset CH 1 through 12 are displayed. 2 Press 5 or ∞ to the tuner's Operation Manual. For details concerning the country code, refer to select a country code. Section 10 TV Tuner DVD Selecting the country group In this product ...

Operation Manual
Page 49
... DVD source indications are available of the Multi-DVD player. • Select BACK in the MENU display or press BACK to return to the Owner's manual of the connecting the Multi-DVD player. (As this happens, fast forward continues even if you continue pressing FORWARD (¡) or REVERSE (1) for each of...
... DVD source indications are available of the Multi-DVD player. • Select BACK in the MENU display or press BACK to return to the Owner's manual of the connecting the Multi-DVD player. (As this happens, fast forward continues even if you continue pressing FORWARD (¡) or REVERSE (1) for each of...

Operation Manual
Page 56
.../down to select the desired setting. 56 En For details concerning operation using the DVD player's SET-UP menu, refer to the DVD player's Owner's manual. The selected item is displayed or playback stops. • Push the remote controller's joystick left /right to select Audio in Information Display 2.
.../down to select the desired setting. 56 En For details concerning operation using the DVD player's SET-UP menu, refer to the DVD player's Owner's manual. The selected item is displayed or playback stops. • Push the remote controller's joystick left /right to select Audio in Information Display 2.

Operation Manual
Page 63
... the functions. For details, refer to the pages for this product's RDS traffic announcement function. Note • The tuning step remains at 50 kHz during manual tuning. Setting the FM tuning step Normally the FM tuning step employed by seek tuning is on the remote control. It may be preferable to...
... the functions. For details, refer to the pages for this product's RDS traffic announcement function. Note • The tuning step remains at 50 kHz during manual tuning. Setting the FM tuning step Normally the FM tuning step employed by seek tuning is on the remote control. It may be preferable to...

Operation Manual
Page 67
... AUX SOURCE MENU is displayed. 2 Press 5 or ∞ to auxiliary equipment featuring RCA output. For more details, refer to the IP-BUS-RCA Interconnector owner's manual. 5 Press 5 or ∞ to select a letter of 5 will display a letter in A B C ... When you want is not switched on page 64. Other Functions Section 14 English...
... AUX SOURCE MENU is displayed. 2 Press 5 or ∞ to auxiliary equipment featuring RCA output. For more details, refer to the IP-BUS-RCA Interconnector owner's manual. 5 Press 5 or ∞ to select a letter of 5 will display a letter in A B C ... When you want is not switched on page 64. Other Functions Section 14 English...

Operation Manual
Page 69
... wish to set with 2/3. When OFF is selected, the clock is not shown in the display. 3 Select the portion of the time display you press a manually set the time on the unit's clock display. 1 Press 5 or ∞ to select CLOCK ADJUST from the SET UP MENU, and press A.MENU. Note &#... is shown in the display. Press 2 until the OPEN/CLOSE:AUTO setting appears in the display. CLOCK ADJUST indications are displayed. 2 Press 2 to select the manual. Setting the time This is used to set display's EJECT, the display opens or closes. 3 Press 3 to select the auto. Press 3 until the OPEN/...
... wish to set with 2/3. When OFF is selected, the clock is not shown in the display. 3 Select the portion of the time display you press a manually set the time on the unit's clock display. 1 Press 5 or ∞ to select CLOCK ADJUST from the SET UP MENU, and press A.MENU. Note &#... is shown in the display. Press 2 until the OPEN/CLOSE:AUTO setting appears in the display. CLOCK ADJUST indications are displayed. 2 Press 2 to select the manual. Setting the time This is used to set display's EJECT, the display opens or closes. 3 Press 3 to select the auto. Press 3 until the OPEN/...


