Operation Manual
Page 2
...Pending. Regarding copyrights Images taken using the PENTAX Digital Camera that the illustrations and the display screen of the LCD monitor in order to understand all the features and functions. Please take care, as SD memory cards in this manual are not available on printers.... Regarding trademarks • PENTAX, Optio and smc PENTAX are trademarks of PENTAX Corporation. • SD logo and SDHC logo are trademarks. • DivX, DivX Certified, and associated logos are used without permission according to connect the printer and digital camera directly, using the unified ...
...Pending. Regarding copyrights Images taken using the PENTAX Digital Camera that the illustrations and the display screen of the LCD monitor in order to understand all the features and functions. Please take care, as SD memory cards in this manual are not available on printers.... Regarding trademarks • PENTAX, Optio and smc PENTAX are trademarks of PENTAX Corporation. • SD logo and SDHC logo are trademarks. • DivX, DivX Certified, and associated logos are used without permission according to connect the printer and digital camera directly, using the unified ...
Operation Manual
Page 3
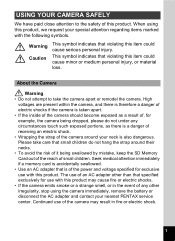
... exposed as a result of, for use of an AC adapter other than that specified exclusively for example, the camera being swallowed by mistake, keep the SD Memory Card out of the reach of it being dropped, please do not hang the strap around your special attention regarding items...camera is a danger of receiving an electric shock. • Wrapping the strap of the camera around their necks. • To avoid the risk of small children. The use with the following symbols. When using the camera immediately, remove the battery or disconnect the AC adapter and contact your nearest PENTAX...
... exposed as a result of, for use of an AC adapter other than that specified exclusively for example, the camera being swallowed by mistake, keep the SD Memory Card out of the reach of it being dropped, please do not hang the strap around your special attention regarding items...camera is a danger of receiving an electric shock. • Wrapping the strap of the camera around their necks. • To avoid the risk of small children. The use with the following symbols. When using the camera immediately, remove the battery or disconnect the AC adapter and contact your nearest PENTAX...
Operation Manual
Page 6
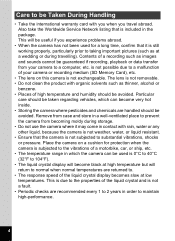
... and sounds cannot be avoided. Remove from case and store in a well-ventilated place to prevent the camera from your camera or recording medium (SD Memory Card), etc. • The lens on a cushion for protection when the camera is not exchangeable. This is due to the properties of high temperature and humidity should be taken...
... and sounds cannot be avoided. Remove from case and store in a well-ventilated place to prevent the camera from your camera or recording medium (SD Memory Card), etc. • The lens on a cushion for protection when the camera is not exchangeable. This is due to the properties of high temperature and humidity should be taken...
Operation Manual
Page 7
... sand, dust, water, toxic gases, salt, etc. LED Safety Standard This device is a digital still camera that formatting an SD Memory Card or built-in memory will delete all data, however it with the camera, be possible to recover that data using a tripod with any other equipment. • Please ...more information. 5 • If the camera is subjected to rapid temperature changes, condensation may cause damage to the camera. Do not use with the camera or the PENTAX website. Therefore put the camera in a bag or plastic bag, and take the camera out when the difference in your back ...
... sand, dust, water, toxic gases, salt, etc. LED Safety Standard This device is a digital still camera that formatting an SD Memory Card or built-in memory will delete all data, however it with the camera, be possible to recover that data using a tripod with any other equipment. • Please ...more information. 5 • If the camera is subjected to rapid temperature changes, condensation may cause damage to the camera. Do not use with the camera or the PENTAX website. Therefore put the camera in a bag or plastic bag, and take the camera out when the difference in your back ...
Operation Manual
Page 8
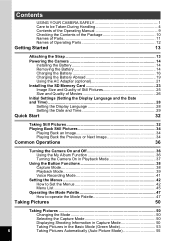
... 12 Getting Started 13 Attaching the Strap 13 Powering the Camera 14 Installing the Battery 14 Removing the Battery 14 Charging the Battery 16 Charging the Battery Abroad 19 Using the AC Adapter (optional 21 Installing the SD Memory Card 23 Image Size and Quality of Still Pictures 25 Size ...Playing Back an Image 34 Playing Back the Previous or Next Image 34 Common Operations 36 Turning the Camera On and Off 36 Using the My Album Function 36 Turning the Camera On in Playback Mode 37 Using the Button Functions 38 Capture Mode 38 Playback Mode 39 Voice Recording...
... 12 Getting Started 13 Attaching the Strap 13 Powering the Camera 14 Installing the Battery 14 Removing the Battery 14 Charging the Battery 16 Charging the Battery Abroad 19 Using the AC Adapter (optional 21 Installing the SD Memory Card 23 Image Size and Quality of Still Pictures 25 Size ...Playing Back an Image 34 Playing Back the Previous or Next Image 34 Common Operations 36 Turning the Camera On and Off 36 Using the My Album Function 36 Turning the Camera On in Playback Mode 37 Using the Button Functions 38 Capture Mode 38 Playback Mode 39 Voice Recording...
Operation Manual
Page 10
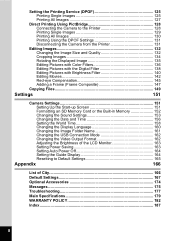
... the Printer 128 Printing Single Images 129 Printing All Images 130 Printing Using the DPOF Settings 131 Disconnecting the Camera from the Printer 131 Editing Images 132 Changing the Image Size and Quality 132 Cropping Images 134 Rotating the Displayed Image ...Pictures with the Digital Filter 138 Editing Pictures with Brightness Filter 140 Editing Movies 142 Red-eye Compensation 145 Adding a Frame (Frame Composite 147 Copying Files 149 Settings 151 Camera Settings 151 Setting Up the Start-up Screen 151 Formatting an SD Memory Card or the Built-in Memory 152 Changing the...
... the Printer 128 Printing Single Images 129 Printing All Images 130 Printing Using the DPOF Settings 131 Disconnecting the Camera from the Printer 131 Editing Images 132 Changing the Image Size and Quality 132 Cropping Images 134 Rotating the Displayed Image ...Pictures with the Digital Filter 138 Editing Pictures with Brightness Filter 140 Editing Movies 142 Red-eye Compensation 145 Adding a Frame (Frame Composite 147 Copying Files 149 Settings 151 Camera Settings 151 Setting Up the Start-up Screen 151 Formatting an SD Memory Card or the Built-in Memory 152 Changing the...

Operation Manual
Page 25
... it out. Installing the SD Memory Card SD Memory Card 1 2 2 1 1 3 To remove the card, push in and pull out Getting Started An SD Memory Card can be used on another camera. To remove the card, eject the card by the arrow and pull it clicks. 3 Close the battery/card cover. Refer to format unused cards or cards that have been used with the...
... it out. Installing the SD Memory Card SD Memory Card 1 2 2 1 1 3 To remove the card, push in and pull out Getting Started An SD Memory Card can be used on another camera. To remove the card, eject the card by the arrow and pull it clicks. 3 Close the battery/card cover. Refer to format unused cards or cards that have been used with the...

Operation Manual
Page 26
... take a long time. • When you purchase the SD Memory Card, access the PENTAX website and confirm beforehand if they have been used for a long time, the data on the card may stop while you remove the SD Memory Card immediately after using the camera, as the card may be exposed to static electricity or electrical interference. •...
... take a long time. • When you purchase the SD Memory Card, access the PENTAX website and confirm beforehand if they have been used for a long time, the data on the card may stop while you remove the SD Memory Card immediately after using the camera, as the card may be exposed to static electricity or electrical interference. •...

Operation Manual
Page 28
Getting Started Approximate Number of Recordable Images by PENTAX and may vary depending on the subject, shooting conditions, capture mode, SD Memory Card, etc. Size and Quality of images and recording time when using a 256 MB SD Memory Card. • The above table indicates the approximate number of Movies Choose the size and quality best suited...
Getting Started Approximate Number of Recordable Images by PENTAX and may vary depending on the subject, shooting conditions, capture mode, SD Memory Card, etc. Size and Quality of images and recording time when using a 256 MB SD Memory Card. • The above table indicates the approximate number of Movies Choose the size and quality best suited...

Operation Manual
Page 29
... C. • The above table indicates the approximate recording times when using a 256 MB SD Memory Card. • The above table is based on the subject, shooting conditions, capture mode, SD Memory Card, etc. 27 Getting Started Approximate Recordable Time by PENTAX and may vary depending on standard shooting conditions specified by Size (Recorded Pixels) and...
... C. • The above table indicates the approximate recording times when using a 256 MB SD Memory Card. • The above table is based on the subject, shooting conditions, capture mode, SD Memory Card, etc. 27 Getting Started Approximate Recordable Time by PENTAX and may vary depending on standard shooting conditions specified by Size (Recorded Pixels) and...
Operation Manual
Page 34
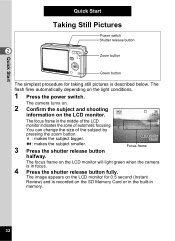
... Power switch Shutter release button 2 Zoom button Green button The simplest procedure for 0.5 second (Instant Review) and is recorded on the SD Memory Card or in the built-in focus. 4 Press the shutter release button fully. The flash fires automatically depending on the LCD monitor. The image... the subject bigger. The focus frame in the middle of the LCD monitor indicates the zone of the subject by pressing the zoom button. The camera turns on. 2 Confirm the subject and shooting 36 information on the light conditions. 1 Press the power switch. w : makes the subject smaller....
... Power switch Shutter release button 2 Zoom button Green button The simplest procedure for 0.5 second (Instant Review) and is recorded on the SD Memory Card or in the built-in focus. 4 Press the shutter release button fully. The flash fires automatically depending on the LCD monitor. The image... the subject bigger. The focus frame in the middle of the LCD monitor indicates the zone of the subject by pressing the zoom button. The camera turns on. 2 Confirm the subject and shooting 36 information on the light conditions. 1 Press the power switch. w : makes the subject smaller....
Operation Manual
Page 38
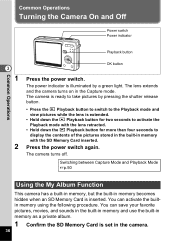
... seconds to display the contents of the pictures stored in the built-in the camera. 36 The power indicator is inserted. The lens extends and the camera turns on in memory becomes hidden when an SD Memory Card is illuminated by pressing the shutter release button. • Press the Q Playback... to the Playback mode and view pictures while the lens is set in memory with the SD Memory Card inserted. Switching between Capture Mode and Playback Mode 1p.50 Using the My Album Function This camera has a built-in memory, but the built-in the Capture mode. Common Operations Turning the...
... seconds to display the contents of the pictures stored in the built-in the camera. 36 The power indicator is inserted. The lens extends and the camera turns on in memory becomes hidden when an SD Memory Card is illuminated by pressing the shutter release button. • Press the Q Playback... to the Playback mode and view pictures while the lens is set in memory with the SD Memory Card inserted. Switching between Capture Mode and Playback Mode 1p.50 Using the My Album Function This camera has a built-in memory, but the built-in the Capture mode. Common Operations Turning the...

Operation Manual
Page 39
... built-in Playback Mode 1 Press the power switch while pressing the Q Playback button. The power indicator lights green and the camera turns on or switch from the SD Memory Card to Capture Mode, the My Album function is held for a while. The lens retracts two seconds after you cannot perform formatting... turned off and on in the Playback mode with the lens retracted. To Copy Files from Playback Mode to the Built-in Memory 1 p.150 Turning the Camera On in memory are displayed two seconds later. • When you cannot copy files between the built-in memory and the SD Memory Card.
... built-in Playback Mode 1 Press the power switch while pressing the Q Playback button. The power indicator lights green and the camera turns on or switch from the SD Memory Card to Capture Mode, the My Album function is held for a while. The lens retracts two seconds after you cannot perform formatting... turned off and on in the Playback mode with the lens retracted. To Copy Files from Playback Mode to the Built-in Memory 1 p.150 Turning the Camera On in memory are displayed two seconds later. • When you cannot copy files between the built-in memory and the SD Memory Card.

Operation Manual
Page 48
...Folder Name 3 USB Connection Video Out Brightness Level Power Saving Quick Zoom Auto Power Off Guide Display Reset Description For formatting the SD Memory Card or built-in memory For adjusting the operation volume and the playback volume and setting the type and volume of start-up sound, shutter sound, key operation ...off the power automatically For showing the mode selected on the screen in Capture mode and assignment of the Green button For returning the camera settings to defaults Page p.152 p.153 p.156 p.158 p.160 p.161 p.162 p.162 p.163 p.163 p.110 p.164 p.164 p.165 Common Operations ...
...Folder Name 3 USB Connection Video Out Brightness Level Power Saving Quick Zoom Auto Power Off Guide Display Reset Description For formatting the SD Memory Card or built-in memory For adjusting the operation volume and the playback volume and setting the type and volume of start-up sound, shutter sound, key operation ...off the power automatically For showing the mode selected on the screen in Capture mode and assignment of the Green button For returning the camera settings to defaults Page p.152 p.153 p.156 p.158 p.160 p.161 p.162 p.162 p.163 p.163 p.110 p.164 p.164 p.165 Common Operations ...

Operation Manual
Page 51
... separate images p.134 Image/ For copying files from the built-in memory to the SD Sound Copy Memory Card and vice versa s Image Rotation For displaying rotated still pictures p.149 p.135 Color Filter For processing images using the color filter p.136 Digital Filter For applying special effects such as the illustration effect or the...
... separate images p.134 Image/ For copying files from the built-in memory to the SD Sound Copy Memory Card and vice versa s Image Rotation For displaying rotated still pictures p.149 p.135 Color Filter For processing images using the color filter p.136 Digital Filter For applying special effects such as the illustration effect or the...

Operation Manual
Page 68
...Step 1. 66 The replaced frame is deleted from the internet, etc. The frame is registered in the builtin memory, it first to the SD Memory Card. 4 When a new frame on the SD Memory Card that you want to any other size. • Continuous Shooting is fixed to 3M, and cannot be changed...press the Green button. Taking Pictures 7 Press the shutter release button fully. A message appears and the frames on the SD Memory Card is registered in the built-in memory instead of the existing frames in the built-in Step 3. The picture is taken. • The Recorded Pixels is not ...
...Step 1. 66 The replaced frame is deleted from the internet, etc. The frame is registered in the builtin memory, it first to the SD Memory Card. 4 When a new frame on the SD Memory Card that you want to any other size. • Continuous Shooting is fixed to 3M, and cannot be changed...press the Green button. Taking Pictures 7 Press the shutter release button fully. A message appears and the frames on the SD Memory Card is registered in the built-in memory instead of the existing frames in the built-in Step 3. The picture is taken. • The Recorded Pixels is not ...

Operation Manual
Page 71
...Four-way controller OK button Continuous Shooting (Continuous Shooting Mode) You can continue shooting until the SD Memory Card or the builtin memory is full. • The interval will light green when the camera is ready to select j. 3 Press the OK button. Pictures are taken continuously while the shutter ... release button fully. OK OK The focus frame on the LCD monitor will vary according to Continuous Shooting mode. Drive Mode Continuous Shooting The camera is in Capture mode. 2 Use the four-way controller (45) to take your finger off the shutter release button. • You...
...Four-way controller OK button Continuous Shooting (Continuous Shooting Mode) You can continue shooting until the SD Memory Card or the builtin memory is full. • The interval will light green when the camera is ready to select j. 3 Press the OK button. Pictures are taken continuously while the shutter ... release button fully. OK OK The focus frame on the LCD monitor will vary according to Continuous Shooting mode. Drive Mode Continuous Shooting The camera is in Capture mode. 2 Use the four-way controller (45) to take your finger off the shutter release button. • You...

Operation Manual
Page 104
...four-way controller (2) is saved. P AE Metering The [AE Metering] setting on the [A Rec.Mode] menu is saved. If a new SD Memory Card is saved. P MF Position The manual focus position is inserted, file numbers are assigned sequentially. If you select P (Off), the settings will ...Memory) You can choose whether you want the set to be saved in the settings selected on the zoom button is turned off. Default Setting O P P Zoom Position The optical zoom position setting on the menus for each function when the camera is turned off. • The zoom position setting in the digital...
...four-way controller (2) is saved. P AE Metering The [AE Metering] setting on the [A Rec.Mode] menu is saved. If a new SD Memory Card is saved. P MF Position The manual focus position is inserted, file numbers are assigned sequentially. If you select P (Off), the settings will ...Memory) You can choose whether you want the set to be saved in the settings selected on the zoom button is turned off. Default Setting O P P Zoom Position The optical zoom position setting on the menus for each function when the camera is turned off. • The zoom position setting in the digital...

Operation Manual
Page 106
... more than one second, recording continues for as long as the button is held down and stops when the button is available on the SD Memory Card. Voice Recording 3 Press the OK button. The recordable time appears on the LCD monitor. 1 Remaining recordable time 2 Recording time 4 Press the shutter release button. MENU...
... more than one second, recording continues for as long as the button is held down and stops when the button is available on the SD Memory Card. Voice Recording 3 Press the OK button. The recordable time appears on the LCD monitor. 1 Remaining recordable time 2 Recording time 4 Press the shutter release button. MENU...

Operation Manual
Page 107
Aim the camera to another mode. Recording stops. The remaining recordable time appears. 6 Press the four-way controller (3) to display Mode Palette and change to obtain the best sound. • An index can be done for a maximum of 24 hours even if a large capacity memory card is located on the front of Sound 5 Press... can exit the Voice Recording mode. • Sound is saved in WAVE monaural files. • The microphone is used. 5 105 Recording and Playback of the camera.
Aim the camera to another mode. Recording stops. The remaining recordable time appears. 6 Press the four-way controller (3) to display Mode Palette and change to obtain the best sound. • An index can be done for a maximum of 24 hours even if a large capacity memory card is located on the front of Sound 5 Press... can exit the Voice Recording mode. • Sound is saved in WAVE monaural files. • The microphone is used. 5 105 Recording and Playback of the camera.

