
Owners Manual - English
Page 1
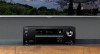
Connecting Speakers ≫ Playback ≫ Setup ≫ Troubleshooting ≫ Appendix ≫ Supplementary Information ≫ Front Panel≫ Rear Panel≫ Remote≫ AV RECEIVER TX-SR393 Instruction Manual En Table of contents ≫ Connections ≫ -
Connecting Speakers ≫ Playback ≫ Setup ≫ Troubleshooting ≫ Appendix ≫ Supplementary Information ≫ Front Panel≫ Rear Panel≫ Remote≫ AV RECEIVER TX-SR393 Instruction Manual En Table of contents ≫ Connections ≫ -

Owners Manual - English
Page 2
Contents ≫ Connections ≫ Playback ≫ Setup ≫ What's in the box 4 Additional Function (Firmware Update) 5 Update Information of the firmware 5 Operation of added new functions 5 Firmware Update Procedure 6 Part Names ...8 Front Panel 8 Display 10 Rear Panel 11 Remote Controller 13 Connections Connecting speakers 15 Speaker Installation 16 Speaker Connections and "Speaker Setup" Settings 21 Speaker combinations 25 Connecting the TV 26 To ARC TV 27 To Non-ARC TV 28 Connecting Playback Devices 29 Connecting an AV...
Contents ≫ Connections ≫ Playback ≫ Setup ≫ What's in the box 4 Additional Function (Firmware Update) 5 Update Information of the firmware 5 Operation of added new functions 5 Firmware Update Procedure 6 Part Names ...8 Front Panel 8 Display 10 Rear Panel 11 Remote Controller 13 Connections Connecting speakers 15 Speaker Installation 16 Speaker Connections and "Speaker Setup" Settings 21 Speaker combinations 25 Connecting the TV 26 To ARC TV 27 To Non-ARC TV 28 Connecting Playback Devices 29 Connecting an AV...

Owners Manual - English
Page 3
Source 71 5. Miscellaneous 76 Quick Menu 77 Menu operations 77 Initial Setup with Auto Start-up Wizard 79 Operations 79 Troubleshooting When the unit is operating erratically 82 Troubleshooting 83 Appendix About HDMI 89 General Specifications 91 3 Front Panel≫ Rear Panel≫ Remote≫ Hardware 73 6. Contents ≫ Connections ≫ Playback ≫ Setup ≫ Input Formats and Selectable Listening Modes 54 Setup Setup Menu 61 Menu list 61 Menu operations 63 1. Audio Adjust 70 4. Speaker 67 3. Input/Output Assign 64 2.
Source 71 5. Miscellaneous 76 Quick Menu 77 Menu operations 77 Initial Setup with Auto Start-up Wizard 79 Operations 79 Troubleshooting When the unit is operating erratically 82 Troubleshooting 83 Appendix About HDMI 89 General Specifications 91 3 Front Panel≫ Rear Panel≫ Remote≫ Hardware 73 6. Contents ≫ Connections ≫ Playback ≫ Setup ≫ Input Formats and Selectable Listening Modes 54 Setup Setup Menu 61 Menu list 61 Menu operations 63 1. Audio Adjust 70 4. Speaker 67 3. Input/Output Assign 64 2.

Owners Manual - English
Page 4
... without prior notice. 4 Front Panel≫ Rear Panel≫ Remote≫ It is an online instruction manual. Remote controller (RC-970R) (1), Batteries (AAA/R03) (2) 3. Speaker setup microphone (1) • Used during Initial Setup. 4. What's in the box 1 2 3 4 5 Contents ≫ Connections ≫ Playback ≫...
... without prior notice. 4 Front Panel≫ Rear Panel≫ Remote≫ It is an online instruction manual. Remote controller (RC-970R) (1), Batteries (AAA/R03) (2) 3. Speaker setup microphone (1) • Used during Initial Setup. 4. What's in the box 1 2 3 4 5 Contents ≫ Connections ≫ Playback ≫...

Owners Manual - English
Page 5
... added and operations to be added from contents described in the Instruction Manual, see the following reference. "Firmware Update" - Contents ≫ Connections ≫ Playback ≫ Setup ≫ Additional Function (Firmware Update) This unit is equipped with a function to update the firmware via USB port when the firmware update is recommended to...
... added and operations to be added from contents described in the Instruction Manual, see the following reference. "Firmware Update" - Contents ≫ Connections ≫ Playback ≫ Setup ≫ Additional Function (Firmware Update) This unit is equipped with a function to update the firmware via USB port when the firmware update is recommended to...
Owners Manual - English
Page 6
...Depending on the unit such as below. Update 1. The number of USB storage devices supports FAT16 or FAT32 file system format. -- The Setup menu is supplied with the hub function are named as turning the power off • Prepare a 128 MB or larger USB storage ... any claim of any kind, including, but not limited to your own risk. Miscellaneous 1. Contents ≫ Connections ≫ Playback ≫ Setup ≫ Firmware Update Procedure Approx. 30 minutes are required for this function. -- Disclaimer: The program and accompanying online documentation are furnished to ...
...Depending on the unit such as below. Update 1. The number of USB storage devices supports FAT16 or FAT32 file system format. -- The Setup menu is supplied with the hub function are named as turning the power off • Prepare a 128 MB or larger USB storage ... any claim of any kind, including, but not limited to your own risk. Miscellaneous 1. Contents ≫ Connections ≫ Playback ≫ Setup ≫ Firmware Update Procedure Approx. 30 minutes are required for this function. -- Disclaimer: The program and accompanying online documentation are furnished to ...
Owners Manual - English
Page 7
"Firmware Update" - Setup 1. Speaker 3. Firmware Update 3. Retry from the download of the firmware file. • Others: After removing the power plug once, insert it to the outlet, and ... until it has its own power supply. • -51: The firmware file is for another model. Contents ≫ Connections ≫ Playback ≫ Setup ≫ 6. Miscellaneous 1. Initial Setup 4. is displayed, the update is not present in order, then press ENTER. Check if the USB storage device or USB cable is turned on...
"Firmware Update" - Setup 1. Speaker 3. Firmware Update 3. Retry from the download of the firmware file. • Others: After removing the power plug once, insert it to the outlet, and ... until it has its own power supply. • -51: The firmware file is for another model. Contents ≫ Connections ≫ Playback ≫ Setup ≫ 6. Miscellaneous 1. Initial Setup 4. is displayed, the update is not present in order, then press ENTER. Check if the USB storage device or USB cable is turned on...

Owners Manual - English
Page 9
... from the remote controller. • The reception range of "TREBLE", "VOCAL" or "BASS" respectively. ( p44) 18. Display ( p10) 10. SETUP button: You can display advanced setting items on the TV and the display to have a more enjoyable experience with the cursors, and press ENTER to... button: Adjusts the sound quality. MASTER VOLUME 14. It cannot be played. 17. Contents ≫ Connections ≫ Playback ≫ Setup ≫ 1. SETUP MIC jack: Connect the supplied speaker setup microphone. ( p80) 9 Front Panel≫ Rear Panel≫ Remote≫ ON/STANDBY button 2.
... from the remote controller. • The reception range of "TREBLE", "VOCAL" or "BASS" respectively. ( p44) 18. Display ( p10) 10. SETUP button: You can display advanced setting items on the TV and the display to have a more enjoyable experience with the cursors, and press ENTER to... button: Adjusts the sound quality. MASTER VOLUME 14. It cannot be played. 17. Contents ≫ Connections ≫ Playback ≫ Setup ≫ 1. SETUP MIC jack: Connect the supplied speaker setup microphone. ( p80) 9 Front Panel≫ Rear Panel≫ Remote≫ ON/STANDBY button 2.

Owners Manual - English
Page 10
... input is selected. 4. HDMI: HDMI signals are connected. : Connected by BLUETOOTH. SLEEP: Sleep timer is set . ( p75) 6. Display 12 3 Contents ≫ Connections ≫ Playback ≫ Setup ≫ 4 5 6 7 1. DIGITAL: Digital signals are input and the digital input is selected. Speaker/Channel display: Displays the output channel that corresponds to both the main...
... input is selected. 4. HDMI: HDMI signals are connected. : Connected by BLUETOOTH. SLEEP: Sleep timer is set . ( p75) 6. Display 12 3 Contents ≫ Connections ≫ Playback ≫ Setup ≫ 4 5 6 7 1. DIGITAL: Digital signals are input and the digital input is selected. Speaker/Channel display: Displays the output channel that corresponds to both the main...

Owners Manual - English
Page 12
... antennas. 7. DIGITAL IN OPTICAL/COAXIAL jacks: Input TV or AV component digital audio signals with an analog audio cable. 8. Contents ≫ Connections ≫ Playback ≫ Setup ≫ 1. POWER OUT port: The power (5 V/1 A) can be supplied to a pre-main amplifier in a separate room (ZONE B). 9. Power cord 5. ZONE B LINE OUT jacks: Output audio...
... antennas. 7. DIGITAL IN OPTICAL/COAXIAL jacks: Input TV or AV component digital audio signals with an analog audio cable. 8. Contents ≫ Connections ≫ Playback ≫ Setup ≫ 1. POWER OUT port: The power (5 V/1 A) can be supplied to a pre-main amplifier in a separate room (ZONE B). 9. Power cord 5. ZONE B LINE OUT jacks: Output audio...

Owners Manual - English
Page 13
...) 8. button: Display advanced setting items on /off completely. 10. Remote Controller Contents ≫ Connections ≫ Playback ≫ Setup ≫ 1. Play buttons: Used for AM/FM stations ( p37). Also, when an HDMI CEC function-enabled AV component is used to cancel muting. ...
...) 8. button: Display advanced setting items on /off completely. 10. Remote Controller Contents ≫ Connections ≫ Playback ≫ Setup ≫ 1. Play buttons: Used for AM/FM stations ( p37). Also, when an HDMI CEC function-enabled AV component is used to cancel muting. ...

Owners Manual - English
Page 14
Contents ≫ Connections ≫ Playback ≫ Setup ≫ Connections Connecting speakers 15 Connecting the TV 26 Connecting Playback Devices 29 Connecting an AV Component in a Separate Room (ZONE B Connection) 31 Connecting Antennas 32 Connecting the Power Cord 33 14 Front Panel≫ Rear Panel≫ Remote≫
Contents ≫ Connections ≫ Playback ≫ Setup ≫ Connections Connecting speakers 15 Connecting the TV 26 Connecting Playback Devices 29 Connecting an AV Component in a Separate Room (ZONE B Connection) 31 Connecting Antennas 32 Connecting the Power Cord 33 14 Front Panel≫ Rear Panel≫ Remote≫

Owners Manual - English
Page 15
Use the following flow chart to be installed from various patterns when using this unit. Yes • 3.1.2 Channel System ( p24) No • 5.1 Channel System ( p23) 15 Front Panel≫ Rear Panel≫ Remote≫ You can select the layout of speakers to select the speaker layout that suits your speakers and usage environment. Use height speakers? Contents ≫ Connections ≫ Playback ≫ Setup ≫ Connecting speakers You can check the connection method and default settings.
Use the following flow chart to be installed from various patterns when using this unit. Yes • 3.1.2 Channel System ( p24) No • 5.1 Channel System ( p23) 15 Front Panel≫ Rear Panel≫ Remote≫ You can select the layout of speakers to select the speaker layout that suits your speakers and usage environment. Use height speakers? Contents ≫ Connections ≫ Playback ≫ Setup ≫ Connecting speakers You can check the connection method and default settings.

Owners Manual - English
Page 16
... sound of the center of the screen, such as dialogs and vocals. Speaker Installation „„5.1 Channel System 23 6 a b 5 Contents ≫ Connections ≫ Playback ≫ Setup ≫ 1 4 This is a basic 5.1 Channel System. Placing the powered subwoofer between the center speaker and the front speaker gives you a natural sound even when playing...
... sound of the center of the screen, such as dialogs and vocals. Speaker Installation „„5.1 Channel System 23 6 a b 5 Contents ≫ Connections ≫ Playback ≫ Setup ≫ 1 4 This is a basic 5.1 Channel System. Placing the powered subwoofer between the center speaker and the front speaker gives you a natural sound even when playing...

Owners Manual - English
Page 17
Select the height speakers that includes front speakers, center speaker and powered subwoofer, and added height speakers. Contents ≫ Connections ≫ Playback ≫ Setup ≫ „„3.1.2 Channel System A 3.1.2 Channel System is a speaker layout consisting of a 3.1 Channel System that suit your speakers and usage environment from the following three ...
Select the height speakers that includes front speakers, center speaker and powered subwoofer, and added height speakers. Contents ≫ Connections ≫ Playback ≫ Setup ≫ „„3.1.2 Channel System A 3.1.2 Channel System is a speaker layout consisting of a 3.1 Channel System that suit your speakers and usage environment from the following three ...

Owners Manual - English
Page 18
... 3'/0.9 m higher than the front speakers. Installing the height speakers will enrich the sound field feeling in the upper space. Contents ≫ Connections ≫ Playback ≫ Setup ≫ ❏❏Front High Speakers Installation Example 5 4 3´ (0.9 m) or more 2 3 1 6 a This is a 3.1-channel system consisting of front speakers, a center speaker, and a powered subwoofer, with...
... 3'/0.9 m higher than the front speakers. Installing the height speakers will enrich the sound field feeling in the upper space. Contents ≫ Connections ≫ Playback ≫ Setup ≫ ❏❏Front High Speakers Installation Example 5 4 3´ (0.9 m) or more 2 3 1 6 a This is a 3.1-channel system consisting of front speakers, a center speaker, and a powered subwoofer, with...

Owners Manual - English
Page 19
... these types of height speaker. Fit top middle speakers on the ceiling directly above the listening position. Contents ≫ Connections ≫ Playback ≫ Setup ≫ ❏❏Ceiling Speakers Installation Example 5 2 3 14 6 a This is a 3.1-channel system consisting of front speakers, a center speaker, and a powered subwoofer, with the addition of ...
... these types of height speaker. Fit top middle speakers on the ceiling directly above the listening position. Contents ≫ Connections ≫ Playback ≫ Setup ≫ ❏❏Ceiling Speakers Installation Example 5 2 3 14 6 a This is a 3.1-channel system consisting of front speakers, a center speaker, and a powered subwoofer, with the addition of ...

Owners Manual - English
Page 20
... (front), a type of height speaker. Installing the height speakers will enrich the sound field feeling in the upper space. Contents ≫ Connections ≫ Playback ≫ Setup ≫ ❏❏Dolby Enabled Speakers (Dolby Speakers) Installation Example 5 4 231 6 a This is heard from overhead by bouncing the sound off the ceiling.
... (front), a type of height speaker. Installing the height speakers will enrich the sound field feeling in the upper space. Contents ≫ Connections ≫ Playback ≫ Setup ≫ ❏❏Dolby Enabled Speakers (Dolby Speakers) Installation Example 5 4 231 6 a This is heard from overhead by bouncing the sound off the ceiling.

Owners Manual - English
Page 21
...malfunction may occur. 21 Front Panel≫ Rear Panel≫ Remote≫ Speaker" - "Configuration" - Contents ≫ Connections ≫ Playback ≫ Setup ≫ Speaker Connections and "Speaker Setup" Settings Connections „„(Note) Speaker Impedance Connect speakers with an impedance of 4 Ω to + side, and - "Speaker Impedance" ( p67)...) Make correct connection between the unit's jacks and speaker's jacks (+ side to 16 Ω. side) for "Speaker Setup" in the Initial Setup section ( p79). If the exposed wires touch the rear panel, or the + side and -
...malfunction may occur. 21 Front Panel≫ Rear Panel≫ Remote≫ Speaker" - "Configuration" - Contents ≫ Connections ≫ Playback ≫ Setup ≫ Speaker Connections and "Speaker Setup" Settings Connections „„(Note) Speaker Impedance Connect speakers with an impedance of 4 Ω to + side, and - "Speaker Impedance" ( p67)...) Make correct connection between the unit's jacks and speaker's jacks (+ side to 16 Ω. side) for "Speaker Setup" in the Initial Setup section ( p79). If the exposed wires touch the rear panel, or the + side and -

Owners Manual - English
Page 22
The same signal is output from each SUBWOOFER PRE OUT jack. 22 Front Panel≫ Rear Panel≫ Remote≫ Up to two powered subwoofers can be connected. „„Connect the Subwoofer Contents ≫ Connections ≫ Playback ≫ Setup ≫ a a Subwoofer cable Connect a powered subwoofer with this unit using a subwoofer cable.
The same signal is output from each SUBWOOFER PRE OUT jack. 22 Front Panel≫ Rear Panel≫ Remote≫ Up to two powered subwoofers can be connected. „„Connect the Subwoofer Contents ≫ Connections ≫ Playback ≫ Setup ≫ a a Subwoofer cable Connect a powered subwoofer with this unit using a subwoofer cable.


