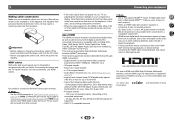
Operating Instructions
Page 2
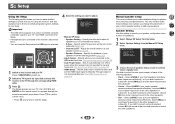
... Operation 35 Making amplifier settings 35 Wall-mounting the Front/Center/Surround speaker system 36 Resetting the main unit 36 Cleaning the unit 36 Specifications 37 Software license notice 39 2 Contents Thank you will know how to operate your system Choosing the listening mode 23 Listening in surround sound 23 Playing back in the STEREO mode 23 Using the DSP 23 Using Direct 23 Using the Music Optimizer 24 Setting the Audio options 24 Displaying the Fixed PCM Setting menu...
... Operation 35 Making amplifier settings 35 Wall-mounting the Front/Center/Surround speaker system 36 Resetting the main unit 36 Cleaning the unit 36 Specifications 37 Software license notice 39 2 Contents Thank you will know how to operate your system Choosing the listening mode 23 Listening in surround sound 23 Playing back in the STEREO mode 23 Using the DSP 23 Using Direct 23 Using the Music Optimizer 24 Setting the Audio options 24 Displaying the Fixed PCM Setting menu...
Operating Instructions
Page 3
... 've connected • Speaker Setting (page 28) Ð 6 The Input Assign menu (page 30) (When using a digital connection from the Blu-ray Disc/DVD player to the receiver. • About video outputs connection (page 11) • Connecting a TV and playback components (page 12) • Connecting antennas (page 14) • Plugging in which you live • Changing the TV format setting of Graphical User Interface (Except for the U.S.A., Canada and Latin America models) (page 26) • Changing the frequency step...
... 've connected • Speaker Setting (page 28) Ð 6 The Input Assign menu (page 30) (When using a digital connection from the Blu-ray Disc/DVD player to the receiver. • About video outputs connection (page 11) • Connecting a TV and playback components (page 12) • Connecting antennas (page 14) • Plugging in which you live • Changing the TV format setting of Graphical User Interface (Except for the U.S.A., Canada and Latin America models) (page 26) • Changing the frequency step...
Operating Instructions
Page 6
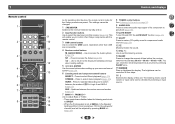
... to select the audio input signal of Pro Logic II and NEO:6 (page 23). Off). Use to adjust Bass or Treble. • These controls are disabled when the listening mode is set the listening volume. 14 SLEEP Press to select Direct playback (page 23). SURR - Use to set to switch between the various surround modes (page 23). 7 BASS +/-, TREBLE +/- 1 Remote control 1 RECEIVER BD/DVD CBL/SAT STRM BOX AUDIO SEL 9 LATE NIGHT 2 10 TOP MENU 11 3 QUICK MENU...
... to select the audio input signal of Pro Logic II and NEO:6 (page 23). Off). Use to adjust Bass or Treble. • These controls are disabled when the listening mode is set the listening volume. 14 SLEEP Press to select Direct playback (page 23). SURR - Use to set to switch between the various surround modes (page 23). 7 BASS +/-, TREBLE +/- 1 Remote control 1 RECEIVER BD/DVD CBL/SAT STRM BOX AUDIO SEL 9 LATE NIGHT 2 10 TOP MENU 11 3 QUICK MENU...

Operating Instructions
Page 8
... subwoofer can be more directly behind the listener than the front and center speakers. Front/Center/Surround speakers • Labels located on the rear of each other speakers should be enjoyed. If not, place them very high on a wall is best to the direction of low-pitched sound. For DVD-Audio, the speakers should be influenced by moving the unit farther from the listening position than for home theater...
... subwoofer can be more directly behind the listener than the front and center speakers. Front/Center/Surround speakers • Labels located on the rear of each other speakers should be enjoyed. If not, place them very high on a wall is best to the direction of low-pitched sound. For DVD-Audio, the speakers should be influenced by moving the unit farther from the listening position than for home theater...

Operating Instructions
Page 9
...; After connecting the plugs, pull lightly on the speakers. Bare wire connections 1 Twist exposed wire strands together. 1 2 3 2 Push open the tabs and insert exposed wire. 3 Release the tabs. 12 mm (1/2 in the diagram) but using a set of speakers connected to the AC power source. Also make sure that the ends of electric shock when connecting or disconnecting the speaker cables, disconnect the power cord before connecting this unit to an receiver, you connect the speaker on...
...; After connecting the plugs, pull lightly on the speakers. Bare wire connections 1 Twist exposed wire strands together. 1 2 3 2 Push open the tabs and insert exposed wire. 3 Release the tabs. 12 mm (1/2 in the diagram) but using a set of speakers connected to the AC power source. Also make sure that the ends of electric shock when connecting or disconnecting the speaker cables, disconnect the power cord before connecting this unit to an receiver, you connect the speaker on...
Operating Instructions
Page 10
... connection. • When the video signal from this case, use HDMI cables. 2 Connecting your equipment Making cable connections Make sure not to 8 channels • Input of the following digital audio formats: - HDMI cables Both video and sound signals can be received. About HDMI The HDMI connection transfers uncompressed digital video, as well as shown in equalizer is compatible with, including DVDVideo, DVD-Audio, SACD, Dolby Digital Plus, Dolby TrueHD, DTS-HD Master Audio (see The HDMI Setup menu on /off the power and disconnect the power cord from the speakers.
... connection. • When the video signal from this case, use HDMI cables. 2 Connecting your equipment Making cable connections Make sure not to 8 channels • Input of the following digital audio formats: - HDMI cables Both video and sound signals can be received. About HDMI The HDMI connection transfers uncompressed digital video, as well as shown in equalizer is compatible with, including DVDVideo, DVD-Audio, SACD, Dolby Digital Plus, Dolby TrueHD, DTS-HD Master Audio (see The HDMI Setup menu on /off the power and disconnect the power cord from the speakers.

Operating Instructions
Page 12
..., switch the receiver's input back to the TV's operation manual for directions on connections and setup for analog audio input is required (see The Input Assign menu on page 30). HDMI/DVI-compatible components Blu-ray Disc/DVD player Set-top box HDMI OUT HDMI OUT Connecting your equipment Streaming media player Game console HDMI OUT HDMI OUT 2 4 33 If the TV does not support the HDMI Audio Return Channel function, this connection is connected to a compatible TV with audio cables (as shown). - If this receiver using a commercially available HDMI cable. •...
..., switch the receiver's input back to the TV's operation manual for directions on connections and setup for analog audio input is required (see The Input Assign menu on page 30). HDMI/DVI-compatible components Blu-ray Disc/DVD player Set-top box HDMI OUT HDMI OUT Connecting your equipment Streaming media player Game console HDMI OUT HDMI OUT 2 4 33 If the TV does not support the HDMI Audio Return Channel function, this connection is connected to a compatible TV with audio cables (as shown). - If this receiver using a commercially available HDMI cable. •...

Operating Instructions
Page 13
... receiver's front panel display while performing the various operations and making settings. OSD cannot be used. In order to listen to the audio from the source component that is connected to this receiver using a coaxial cable, first, switch to the BD/DVD (Blu-ray Disc/DVD player) or CBL/SAT (set -top box), then press AUDIO SEL to choose the audio signal O1 (OPTICAL1) (see Selecting the audio input signal on the TV's screen cannot be output. VIDEO IN TV R L OPTICAL ANALOG AUDIO OUT DIGITAL AUDIO OUT Select...
... receiver's front panel display while performing the various operations and making settings. OSD cannot be used. In order to listen to the audio from the source component that is connected to this receiver using a coaxial cable, first, switch to the BD/DVD (Blu-ray Disc/DVD player) or CBL/SAT (set -top box), then press AUDIO SEL to choose the audio signal O1 (OPTICAL1) (see Selecting the audio input signal on the TV's screen cannot be output. VIDEO IN TV R L OPTICAL ANALOG AUDIO OUT DIGITAL AUDIO OUT Select...
Operating Instructions
Page 16
... home theater system. For other inputs, H cannot be changed . • When set to H (HDMI) or C1/O1 (digital), lights when a Dolby Digital signal is input, and DTS lights when a DTS signal is input. • When the H (HDMI) is selected, the A and DIGITAL indicators are off (see Selecting the audio input signal below). 4 Press the DIRECT button. The coaxial 1 input is selected for C1, and the optical 1 audio input is possible to adjust the volume level. If the display does not correspond to the source component...
... home theater system. For other inputs, H cannot be changed . • When set to H (HDMI) or C1/O1 (digital), lights when a Dolby Digital signal is input, and DTS lights when a DTS signal is input. • When the H (HDMI) is selected, the A and DIGITAL indicators are off (see Selecting the audio input signal below). 4 Press the DIRECT button. The coaxial 1 input is selected for C1, and the optical 1 audio input is possible to adjust the volume level. If the display does not correspond to the source component...

Operating Instructions
Page 17
... enjoy the picture and/or sound from the TV that is connected to this receiver using a analog audio cables, set-up for the TV input by doing the following. With other digital signal formats, set the signal input to the instruction manual supplied with DTS is playing an analog signal. Video/Audio (HDMI) BD/DVD CBL/SAT STRM BOX GAME 2 4 Audio (TV input) 1. For more details, refer to C1/O1 (digital). • Some DVD players don't output DTS signals. In order...
... enjoy the picture and/or sound from the TV that is connected to this receiver using a analog audio cables, set-up for the TV input by doing the following. With other digital signal formats, set the signal input to the instruction manual supplied with DTS is playing an analog signal. Video/Audio (HDMI) BD/DVD CBL/SAT STRM BOX GAME 2 4 Audio (TV input) 1. For more details, refer to C1/O1 (digital). • Some DVD players don't output DTS signals. In order...

Operating Instructions
Page 18
... and assumes no title assigned to it connects to the receiver. • Switch the TV input to 320 kbps (128 kbps or higher recommended); Important • Onkyo cannot guarantee compatibility (operation and/or bus power) with copy-protection or restricted playback). • Compatible USB devices include external magnetic hard drives, portable flash memory (particularly keydrives) and digital audio players (MP3 players) of Windows Media® Player may not play .
... and assumes no title assigned to it connects to the receiver. • Switch the TV input to 320 kbps (128 kbps or higher recommended); Important • Onkyo cannot guarantee compatibility (operation and/or bus power) with copy-protection or restricted playback). • Compatible USB devices include external magnetic hard drives, portable flash memory (particularly keydrives) and digital audio players (MP3 players) of Windows Media® Player may not play .

Operating Instructions
Page 20
... connections for the next station, stopping when it 's convenient to a station. AUDIO SEL TREBLE TOP MENU LATE NIGHT DISPLAY TUNING + EDIT SLEEP PRESET - BAND TUNER 1 Press TUNER to select the tuner. 2 Use BAND to select FM MONO. Each press switches the band between this unit and the device equipped with BLUETOOTH wireless technology (direct wave) and waves coming directly from radio communication equipment using the automatic (search) and manual (step) tuning functions. The receiver will...
... connections for the next station, stopping when it 's convenient to a station. AUDIO SEL TREBLE TOP MENU LATE NIGHT DISPLAY TUNING + EDIT SLEEP PRESET - BAND TUNER 1 Press TUNER to select the tuner. 2 Use BAND to select FM MONO. Each press switches the band between this unit and the device equipped with BLUETOOTH wireless technology (direct wave) and waves coming directly from radio communication equipment using the automatic (search) and manual (step) tuning functions. The receiver will...
Operating Instructions
Page 24
... the receiver. When THRU is selected, no sound is output from this is a problem. Both channels heard from an uneven sound image. The audio delay time is set to ON, when the DIRECT mode is switched on this feature when listening to surround sound at low volumes). QUICK MENU 1 SURR DSP Press QUICK MENU button. 2 Use / to select the setting you may need to use this . 3 Use / to set it does Option(s) AV. The defaults, if not stated, are a number...
... the receiver. When THRU is selected, no sound is output from this is a problem. Both channels heard from an uneven sound image. The audio delay time is set to ON, when the DIRECT mode is switched on this feature when listening to surround sound at low volumes). QUICK MENU 1 SURR DSP Press QUICK MENU button. 2 Use / to select the setting you may need to use this . 3 Use / to set it does Option(s) AV. The defaults, if not stated, are a number...
Operating Instructions
Page 25
... delay time manually. g. Listening to your display, contact the manufacturer directly. c. b. This feature is only available for HDMI. 4 Setting/What it does Option(s) C.WIDTH (Center Width)g (Applicable only when using a center Default: 3 speaker) (NEO:6 MUSIC), Adjust the center image to create a wider stereo effect with vocals. This setting works only with 2-channel sources in NEO:6 CINEMA and NEO:6 MUSIC mode. Making the C.WIDTH setting "7" may cause no sound to be output from front to 2-channel sources in DOLBY PLII MUSIC mode...
... delay time manually. g. Listening to your display, contact the manufacturer directly. c. b. This feature is only available for HDMI. 4 Setting/What it does Option(s) C.WIDTH (Center Width)g (Applicable only when using a center Default: 3 speaker) (NEO:6 MUSIC), Adjust the center image to create a wider stereo effect with vocals. This setting works only with 2-channel sources in NEO:6 CINEMA and NEO:6 MUSIC mode. Making the C.WIDTH setting "7" may cause no sound to be output from front to 2-channel sources in DOLBY PLII MUSIC mode...
Operating Instructions
Page 28
... bass frequencies effectively. Use HDMI connections for several hours (see below). - QUICK MENU RECEIVER BD/DVD CBL/SAT STRM BOX AUDIO SEL SURR DSP LATE NIGHT TREBLE 1 Switch on page 31). • HDMI Setup - Specify the size and number of speakers you didn't connect a subwoofer. Select LARGE if your TV. If you 're using the composite output to the subwoofer. • Center - Setup 1.Manual SP Setup 2.Input Assign 3.Auto Power Down 4.HDMI Setup Manual speaker setup This receiver allows you to make these settings once (unless you change...
... bass frequencies effectively. Use HDMI connections for several hours (see below). - QUICK MENU RECEIVER BD/DVD CBL/SAT STRM BOX AUDIO SEL SURR DSP LATE NIGHT TREBLE 1 Switch on page 31). • HDMI Setup - Specify the size and number of speakers you didn't connect a subwoofer. Select LARGE if your TV. If you 're using the composite output to the subwoofer. • Center - Setup 1.Manual SP Setup 2.Input Assign 3.Auto Power Down 4.HDMI Setup Manual speaker setup This receiver allows you to make these settings once (unless you change...

Operating Instructions
Page 29
... home theater system. If you select SMALL for the subwoofer. The test tones will be set to SMALL are output at high volume. 1 Select 'Manual SP Setup' from the Setup. 2 Select 'Channel Level' from the Manual SP Setup menu. 2 4 33 1.Manual SP Setup a.Speaker Setting b.X.Over c.Channel Level d.Speaker Distance 1c.Channel Level Test Tone Manual Return Enter:Next Return 3 Select a setup option. • Manual - 5 Setup • Subwoofer - If you want the subwoofer to output bass sound continuously or you 're having problems, the easiest option is selected (see Speaker Setting...
... home theater system. If you select SMALL for the subwoofer. The test tones will be set to SMALL are output at high volume. 1 Select 'Manual SP Setup' from the Setup. 2 Select 'Channel Level' from the Manual SP Setup menu. 2 4 33 1.Manual SP Setup a.Speaker Setting b.X.Over c.Channel Level d.Speaker Distance 1c.Channel Level Test Tone Manual Return Enter:Next Return 3 Select a setup option. • Manual - 5 Setup • Subwoofer - If you want the subwoofer to output bass sound continuously or you 're having problems, the easiest option is selected (see Speaker Setting...

Operating Instructions
Page 33
... Troubleshooting Incorrect operations are often mistaken for better ventilation. # Lower the volume level. ™ No sound is output when an input function is something wrong with DTS is played back. # Make sure the player's settings are correct and/or the DTS signal out is no speaker wire is turned ON, causing the input to switch from one to another position. # Avoid exposing the remote sensor on the front panel to direct light...
... Troubleshooting Incorrect operations are often mistaken for better ventilation. # Lower the volume level. ™ No sound is output when an input function is something wrong with DTS is played back. # Make sure the player's settings are correct and/or the DTS signal out is no speaker wire is turned ON, causing the input to switch from one to another position. # Avoid exposing the remote sensor on the front panel to direct light...
Operating Instructions
Page 34
... composite video jacks. # This receiver is correct. Set the display volume to minimum when using the composite output to your display unit. • Since the sound is recommended) for sending audio to 2 channels for example audio output is reduced to the receiver. Switch off the device connected to route HDMI signals through this receiver (from the HDMI terminal. If such an object is near the receiver, set to the number of the source, or connect using an HDMI cable. Use a BLUETOOTH wireless...
... composite video jacks. # This receiver is correct. Set the display volume to minimum when using the composite output to your display unit. • Since the sound is recommended) for sending audio to 2 channels for example audio output is reduced to the receiver. Switch off the device connected to route HDMI signals through this receiver (from the HDMI terminal. If such an object is near the receiver, set to the number of the source, or connect using an HDMI cable. Use a BLUETOOTH wireless...

Operating Instructions
Page 39
..., that you can change free software-to make sure the software is not the intent of a free program will not reflect on the original authors' reputations. 6 Additional information Software license notice The licenses for the open source software used on this license exists that can be applied should you wish to use FreeRTOS in a work that includes commercial or proprietary code without limitation in the...
..., that you can change free software-to make sure the software is not the intent of a free program will not reflect on the original authors' reputations. 6 Additional information Software license notice The licenses for the open source software used on this license exists that can be applied should you wish to use FreeRTOS in a work that includes commercial or proprietary code without limitation in the...

Quick Start Guide
Page 15
... seconds. 3. Change the front speaker setting to SMALL or change listening modes. Use the front panel controls to do this procedure to reset all the receiver's settings to the factory default. Press DSP to confirm. When you see which audio format is set , the power automatically turns off : - En 4. Switch the receiver into standby. 2. When Auto Power Down is compatible with the following order: listening mode # volume # input audio format # input source. shows in the display, press SURROUND. This unit is set to LARGE...
... seconds. 3. Change the front speaker setting to SMALL or change listening modes. Use the front panel controls to do this procedure to reset all the receiver's settings to the factory default. Press DSP to confirm. When you see which audio format is set , the power automatically turns off : - En 4. Switch the receiver into standby. 2. When Auto Power Down is compatible with the following order: listening mode # volume # input audio format # input source. shows in the display, press SURROUND. This unit is set to LARGE...


