ML8480FB User's Guide
Page 4
... Use the Printer Menu 56 Use 1Chr Set Pos 58 Temporary TOF 60 Form Tear Off 61 Turn On Forms Tear Off 61 Move Continuous Forms Up for Tear Off 62 Tests 63 Rolling ASCII Test 63 Font Sample Test 63 Hex Dump Mode 64 Setting the Printhead Gap 65 General Information 65 Printhead Gap Settings 66 Change to a Manual Printhead Gap Setting 67 Troubleshooting 69 Paper Jams: Single Sheet 69 Paper Jams: Continuous Forms 70 Paper Jams: Correcting Repetitive Jams 71 Error Messages 74 Maintenance 76 Replace the Ribbon 76 Clean the Housing 81 Control Codes...
... Use the Printer Menu 56 Use 1Chr Set Pos 58 Temporary TOF 60 Form Tear Off 61 Turn On Forms Tear Off 61 Move Continuous Forms Up for Tear Off 62 Tests 63 Rolling ASCII Test 63 Font Sample Test 63 Hex Dump Mode 64 Setting the Printhead Gap 65 General Information 65 Printhead Gap Settings 66 Change to a Manual Printhead Gap Setting 67 Troubleshooting 69 Paper Jams: Single Sheet 69 Paper Jams: Continuous Forms 70 Paper Jams: Correcting Repetitive Jams 71 Error Messages 74 Maintenance 76 Replace the Ribbon 76 Clean the Housing 81 Control Codes...
ML8480FB User's Guide
Page 6
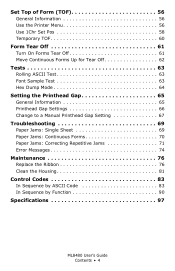
Front View, Outside Front_View with sheet supports.JPG 1 Sheet Guide 2 Cover 3 Platform for Manual Feed 4 Display Panel 5 On/Off Switch 6 Platen Knob 7 Control Panel 8 Sheet Supports Microline 8480FB User's Guide Introduction • 6
Front View, Outside Front_View with sheet supports.JPG 1 Sheet Guide 2 Cover 3 Platform for Manual Feed 4 Display Panel 5 On/Off Switch 6 Platen Knob 7 Control Panel 8 Sheet Supports Microline 8480FB User's Guide Introduction • 6
ML8480FB User's Guide
Page 12
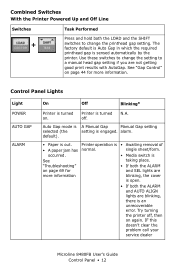
...'t clear the problem call your service dealer Microline 8480FB User's Guide Control Panel • 12 default). • Paper is engaged. occurred. • Media switch is sensed automatically by the printer. Try turning the printer off . The factory default is Auto Gap in which the required printhead gap is See taking place. single sheet/form. See "Gap Control" on page 69 for more information blinking, the cover is open. • If both the LOAD and the SHIFT switches to a manual head gap setting...
...'t clear the problem call your service dealer Microline 8480FB User's Guide Control Panel • 12 default). • Paper is engaged. occurred. • Media switch is sensed automatically by the printer. Try turning the printer off . The factory default is Auto Gap in which the required printhead gap is See taking place. single sheet/form. See "Gap Control" on page 69 for more information blinking, the cover is open. • If both the LOAD and the SHIFT switches to a manual head gap setting...
ML8480FB User's Guide
Page 14
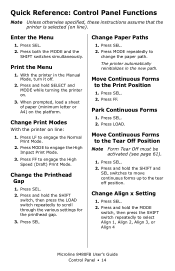
...: Control Panel Functions Note Unless otherwise specified, these instructions assume that the printer is selected (on line: 1. Press and hold the MODE switch, then press the SHIFT switch repeatedly to select Align 1, Align 2, Align 3, or Align 4 Microline 8480FB User's Guide Control Panel • 14 Press LF to change the paper path. Press SEL. 2. Press MODE repeatedly to engage the Normal Print Mode. 2. Press SEL. 2. Press and hold the SHIFT switch, then press the LOAD switch repeatedly to the tear off...
...: Control Panel Functions Note Unless otherwise specified, these instructions assume that the printer is selected (on line: 1. Press and hold the MODE switch, then press the SHIFT switch repeatedly to select Align 1, Align 2, Align 3, or Align 4 Microline 8480FB User's Guide Control Panel • 14 Press LF to change the paper path. Press SEL. 2. Press MODE repeatedly to engage the Normal Print Mode. 2. Press SEL. 2. Press and hold the SHIFT switch, then press the LOAD switch repeatedly to the tear off...
ML8480FB User's Guide
Page 15
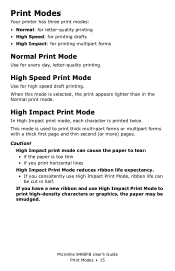
... day, letter-quality printing. Caution! High Impact Print Mode In High Impact print mode, each character is too thin • if you print horizontal lines High Impact Print Mode reduces ribbon life expectancy. • If you have a new ribbon and use High Impact Print Mode, ribbon life can cause the paper to print high-density characters or graphics, the paper may be cut in the Normal print mode. If you consistently use High Impact Print Mode to tear: • if the paper is printed twice. Microline 8480FB User's Guide Print Modes • 15 High Impact print mode can be...
... day, letter-quality printing. Caution! High Impact Print Mode In High Impact print mode, each character is too thin • if you print horizontal lines High Impact Print Mode reduces ribbon life expectancy. • If you have a new ribbon and use High Impact Print Mode, ribbon life can cause the paper to print high-density characters or graphics, the paper may be cut in the Normal print mode. If you consistently use High Impact Print Mode to tear: • if the paper is printed twice. Microline 8480FB User's Guide Print Modes • 15 High Impact print mode can be...
ML8480FB User's Guide
Page 17
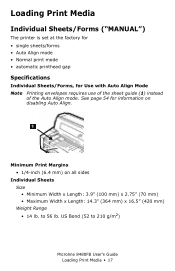
... Sheet_Guide_crop1.JPG Minimum Print Margins • 1/4-inch (6.4 mm) on disabling Auto Align. US Bond (52 to 56 lb. See page 54 for Use with Auto Align Mode Note Printing envelopes requires use of the sheet guide (1) instead of the Auto Align mode. Loading Print Media Individual Sheets/Forms ("MANUAL") The printer is set at the factory for • single sheets/forms • Auto Align mode • Normal print mode • automatic printhead gap Specifications Individual Sheets/Forms, for information on all sides Individual Sheets Size • Minimum Width x Length: 3.9" (100 mm...
... Sheet_Guide_crop1.JPG Minimum Print Margins • 1/4-inch (6.4 mm) on disabling Auto Align. US Bond (52 to 56 lb. See page 54 for Use with Auto Align Mode Note Printing envelopes requires use of the sheet guide (1) instead of the Auto Align mode. Loading Print Media Individual Sheets/Forms ("MANUAL") The printer is set at the factory for • single sheets/forms • Auto Align mode • Normal print mode • automatic printhead gap Specifications Individual Sheets/Forms, for information on all sides Individual Sheets Size • Minimum Width x Length: 3.9" (100 mm...
ML8480FB User's Guide
Page 28
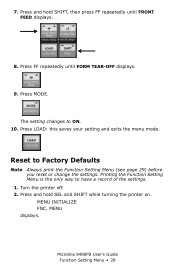
... 9. MODE.JPG The setting changes to Factory Defaults Note Always print the Function Setting Menu (see page 29) before you reset or change the settings. Turn the printer off. 2. MENU INITIALIZE FNC. Printing the Function Setting Menu is the only way to have a record of the settings. 1. Press LOAD: this saves your setting and exits the menu mode. MENU displays. Press MODE. Press and hold SHIFT, then press FF repeatedly until FORM TEAR-OFF displays. Microline 8480FB User's Guide Function Setting Menu...
... 9. MODE.JPG The setting changes to Factory Defaults Note Always print the Function Setting Menu (see page 29) before you reset or change the settings. Turn the printer off. 2. MENU INITIALIZE FNC. Printing the Function Setting Menu is the only way to have a record of the settings. 1. Press LOAD: this saves your setting and exits the menu mode. MENU displays. Press MODE. Press and hold SHIFT, then press FF repeatedly until FORM TEAR-OFF displays. Microline 8480FB User's Guide Function Setting Menu...
ML8480FB User's Guide
Page 29
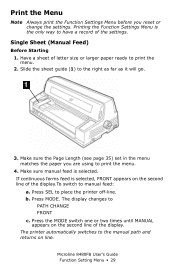
... selected. Have a sheet of the display. b. The printer automatically switches to print the menu. 2. Single Sheet (Manual Feed) Before Starting 1. If continuous forms feed is selected, FRONT appears on line. Make sure the Page Length (see page 35) set in the menu matches the paper you reset or change the settings. Microline 8480FB User's Guide Function Setting Menu • 29 Press SEL to print the menu. 4. Press the MODE switch one or two times until MANUAL appears on the second line of letter size...
... selected. Have a sheet of the display. b. The printer automatically switches to print the menu. 2. Single Sheet (Manual Feed) Before Starting 1. If continuous forms feed is selected, FRONT appears on line. Make sure the Page Length (see page 35) set in the menu matches the paper you reset or change the settings. Microline 8480FB User's Guide Function Setting Menu • 29 Press SEL to print the menu. 4. Press the MODE switch one or two times until MANUAL appears on the second line of letter size...

ML8480FB User's Guide
Page 32
... Set I, Set II American, French, German, British, Danish 1, Swedish, Italian, Spanish I, Japanese, Norwegian, Danish II, Spanish II, Latin American, French Canadian, Dutch, Publisher Slashed, Unslashed USA, Canada French, Multilingual, Portugal, Norway, BRASCII, Abicomp, Multilingual 1858, ISO8859=15, Microline 8480FB User's Guide Function Setting Menu • 32 Menu Summary Note The default setting is in bold blue type. Group Printer Control Font Item Emulation Mode Print Mode Pitch Prop...
... Set I, Set II American, French, German, British, Danish 1, Swedish, Italian, Spanish I, Japanese, Norwegian, Danish II, Spanish II, Latin American, French Canadian, Dutch, Publisher Slashed, Unslashed USA, Canada French, Multilingual, Portugal, Norway, BRASCII, Abicomp, Multilingual 1858, ISO8859=15, Microline 8480FB User's Guide Function Setting Menu • 32 Menu Summary Note The default setting is in bold blue type. Group Printer Control Font Item Emulation Mode Print Mode Pitch Prop...
ML8480FB User's Guide
Page 43
... system uses pin 14 of the parallel interface to turn off the printer's audible alarm. Check Print Area Applies to Invalid, data could print directly on the platen. Code Page Choose the Code Page character set you change this setting to manual feed from printing on the platen and damage the printhead. Choose 3.18 mm (1/8") or 6.35 mm (1/4") [the default]. If you wish to automatically add a line feed, select Yes. Auto Eject Pos. Auto Feed XT The default is Valid: data overflow...
... system uses pin 14 of the parallel interface to turn off the printer's audible alarm. Check Print Area Applies to Invalid, data could print directly on the platen. Code Page Choose the Code Page character set you change this setting to manual feed from printing on the platen and damage the printhead. Choose 3.18 mm (1/8") or 6.35 mm (1/4") [the default]. If you wish to automatically add a line feed, select Yes. Auto Eject Pos. Auto Feed XT The default is Valid: data overflow...
ML8480FB User's Guide
Page 46
... No. To switch low-vibration mode off, change this setting to Auto Interface [the default]. Graphics The default is Yes. The Valid setting will improve the print registration, but slow the print speed. Change to Disable if you wish the printer to Uni-directional will not engage the Hi-Impact mode when the I /F Time Out Appears only if Host Interface is turned on. I -Prime (parallel) or Soft_Reset (USB) commands are received.
... No. To switch low-vibration mode off, change this setting to Auto Interface [the default]. Graphics The default is Yes. The Valid setting will improve the print registration, but slow the print speed. Change to Disable if you wish the printer to Uni-directional will not engage the Hi-Impact mode when the I /F Time Out Appears only if Host Interface is turned on. I -Prime (parallel) or Soft_Reset (USB) commands are received.
ML8480FB User's Guide
Page 49
... line of the form and the bottom of the form. Pitch Choose the character width, in increments of printing (Paper End) when using continuous forms (front feed). Print Dir. Negative values allow printing further down PE Pos. [Paper End Position] This sets when the the printer will recognize a command for unidirectional printing. The default is 0. Microline 8480FB User's Guide • 49 Power Saving Sets whether or not the printer enters the energy-saving Power Save Mode after the interval specified under Power Save...
... line of the form and the bottom of the form. Pitch Choose the character width, in increments of printing (Paper End) when using continuous forms (front feed). Print Dir. Negative values allow printing further down PE Pos. [Paper End Position] This sets when the the printer will recognize a command for unidirectional printing. The default is 0. Microline 8480FB User's Guide • 49 Power Saving Sets whether or not the printer enters the energy-saving Power Save Mode after the interval specified under Power Save...
ML8480FB User's Guide
Page 51
.... Reset Inhibit The default is Single. Choose 12 cpi or 20 cpi [the default]. Change to Invalid if you wish the detection to load into the printer when using preprinted forms with Auto Align disabled. Sets the pitch to be engaged when the printer control panel is set for double width and height printing. Choose Double for 12 cpi and the SI command is received. Skew Detect Detects and corrects paper skew when manual feed through...
.... Reset Inhibit The default is Single. Choose 12 cpi or 20 cpi [the default]. Change to Invalid if you wish the detection to load into the printer when using preprinted forms with Auto Align disabled. Sets the pitch to be engaged when the printer control panel is set for double width and height printing. Choose Double for 12 cpi and the SI command is received. Skew Detect Detects and corrects paper skew when manual feed through...
ML8480FB User's Guide
Page 54
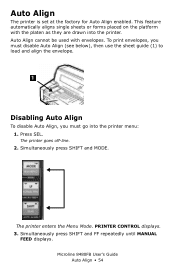
... MANUAL FEED displays. Auto Align cannot be used with the platen as they are drawn into the printer menu: 1. SHIFT plus HIGH IMPACT.jpg The printer enters the Menu Mode. Auto Align The printer is set at the factory for Auto Align enabled. PRINTER CONTROL displays. 3. Sheet_Guide_crop1.JPG Disabling Auto Align To disable Auto Align, you must go into the printer. Simultaneously press SHIFT and MODE. To print envelopes, you must disable Auto Align (see below), then use the sheet guide (1) to load and align the envelope. Press SEL. Microline 8480FB User's Guide Auto Align...
... MANUAL FEED displays. Auto Align cannot be used with the platen as they are drawn into the printer menu: 1. SHIFT plus HIGH IMPACT.jpg The printer enters the Menu Mode. Auto Align The printer is set at the factory for Auto Align enabled. PRINTER CONTROL displays. 3. Sheet_Guide_crop1.JPG Disabling Auto Align To disable Auto Align, you must go into the printer. Simultaneously press SHIFT and MODE. To print envelopes, you must disable Auto Align (see below), then use the sheet guide (1) to load and align the envelope. Press SEL. Microline 8480FB User's Guide Auto Align...
ML8480FB User's Guide
Page 60
... TOF setting in the print path, press SEL to the on -line state. 4. Press SEL to return the printer to put the printer offline. 2. One line at a time: press FF. Temporary TOF Use the Control Panel This TOF setting applies only to 1Chr. With paper loaded in the Manual Feed group to the sheet or continuous form loaded into the printer): - Change the location of the first line of Form (TOF) • 60 Press SEL to return the printer to change...
... TOF setting in the print path, press SEL to the on -line state. 4. Press SEL to return the printer to put the printer offline. 2. One line at a time: press FF. Temporary TOF Use the Control Panel This TOF setting applies only to 1Chr. With paper loaded in the Manual Feed group to the sheet or continuous form loaded into the printer): - Change the location of the first line of Form (TOF) • 60 Press SEL to return the printer to change...

ML8480FB User's Guide
Page 64
... test, send data to the printer while it always uses a left margin of the paper. Microline 8480FB User's Guide Tests • 64 Engaging the Hex Dump Mode 1. HEXDUMP NORMAL displays and "Hex Dump Mode" prints at the top of 5.1 mm (0.2-inch). Note In the ASCII format, all data received, including text and printer commands, will be printed in the Hex Dump Mode. Be sure paper is loaded. 2. Turn the printer off , then on , until RELEASE SW displays. Exiting Hex Dump Mode Turn the printer off . 3. Hex Dump Mode...
... test, send data to the printer while it always uses a left margin of the paper. Microline 8480FB User's Guide Tests • 64 Engaging the Hex Dump Mode 1. HEXDUMP NORMAL displays and "Hex Dump Mode" prints at the top of 5.1 mm (0.2-inch). Note In the ASCII format, all data received, including text and printer commands, will be printed in the Hex Dump Mode. Be sure paper is loaded. 2. Turn the printer off , then on , until RELEASE SW displays. Exiting Hex Dump Mode Turn the printer off . 3. Hex Dump Mode...
ML8480FB User's Guide
Page 71
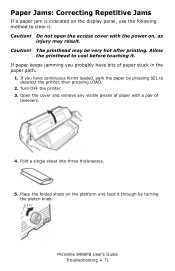
... the printhead to deselect the printer, then pressing LOAD. 2. Turn OFF the printer. 3. F7_08b_back.JPG Microline 8480FB User's Guide Troubleshooting • 71 F2_03_open_cover.JPG 4. If you probably have continuous forms loaded, park the paper by turning the platen knob. Place the folded sheet on , as injury may be very hot after printing. If paper keeps jamming you have bits of tweezers. Open the cover and remove any visible pieces of paper with the power...
... the printhead to deselect the printer, then pressing LOAD. 2. Turn OFF the printer. 3. F7_08b_back.JPG Microline 8480FB User's Guide Troubleshooting • 71 F2_03_open_cover.JPG 4. If you probably have continuous forms loaded, park the paper by turning the platen knob. Place the folded sheet on , as injury may be very hot after printing. If paper keeps jamming you have bits of tweezers. Open the cover and remove any visible pieces of paper with the power...

ML8480FB User's Guide
Page 74
... loaded, but print media is loaded on line. Paper end alignx insert paper Load paper on the tractors. Remove the media from Manual Feed to Front Feed, but the printer is no print media loaded in the selected path. Front Paper End Insert Paper Load continuous forms paper on the platform and press SEL. Microline 8480FB User's Guide Troubleshooting • 74 Path Changing Remove Cut Sheet The printer is attempting to change paper paths from the platform. Paper Jam Remove paper Remove the jammed paper (see page 69) and press SEL. Paper Feed Alarm Re-Set Paper Print...
... loaded, but print media is loaded on line. Paper end alignx insert paper Load paper on the tractors. Remove the media from Manual Feed to Front Feed, but the printer is no print media loaded in the selected path. Front Paper End Insert Paper Load continuous forms paper on the platform and press SEL. Microline 8480FB User's Guide Troubleshooting • 74 Path Changing Remove Cut Sheet The printer is attempting to change paper paths from the platform. Paper Jam Remove paper Remove the jammed paper (see page 69) and press SEL. Paper Feed Alarm Re-Set Paper Print...

ML8480FB User's Guide
Page 75
.... Head Thermal Single Pass The printhead has a thermal sensor which has detected that does not suit the media. Microline 8480FB User's Guide Troubleshooting • 75 The printer has switched to be adjusted for the print media. Left Margin Err Check Margin The left margin setting needs to a manual setting that the printhead is high and the printer has switched to the default Auto Gap before printing. Gap NG Reload The printhead gap has been set to be sure that the Align x Pos. Paper Set Alarm Re-Set Paper...
.... Head Thermal Single Pass The printhead has a thermal sensor which has detected that does not suit the media. Microline 8480FB User's Guide Troubleshooting • 75 The printer has switched to be adjusted for the print media. Left Margin Err Check Margin The left margin setting needs to a manual setting that the printhead is high and the printer has switched to the default Auto Gap before printing. Gap NG Reload The printhead gap has been set to be sure that the Align x Pos. Paper Set Alarm Re-Set Paper...

ML8480FB User's Guide
Page 92
...bit mode ESC # Reset compressed character DC2 pitch Reset emphasized print mode ESC F Reset enhanced/double strike ESC H print mode Reset immediate double width DC4 characters Reset italic characters ESC 5 Reset italics characters ESC % H Reset perforation auto skip ESC 0 Reset print suppress mode DC1 Reset printer ESC CR P Reset super/subscript ESC T Reset tab settings to power-on ESC R default values Reset top margin ESC C Reverse half-line feed ESC D Reverse line feed ESC j n Reverse line feed ESC ] Reverse line feed ESC LF Right margin set ESC Q n Score select...
...bit mode ESC # Reset compressed character DC2 pitch Reset emphasized print mode ESC F Reset enhanced/double strike ESC H print mode Reset immediate double width DC4 characters Reset italic characters ESC 5 Reset italics characters ESC % H Reset perforation auto skip ESC 0 Reset print suppress mode DC1 Reset printer ESC CR P Reset super/subscript ESC T Reset tab settings to power-on ESC R default values Reset top margin ESC C Reverse half-line feed ESC D Reverse line feed ESC j n Reverse line feed ESC ] Reverse line feed ESC LF Right margin set ESC Q n Score select...


