
Reference Manual
Page 4
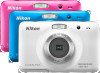
... for cleaning the waterproof packing. • Accessories are for trial use only. 2 The brush is used for purchasing the Nikon COOLPIX S30 digital camera. ii Introduction COOLPIX S30 Digital Camera Camera Strap LR6/L40 (AA-size) USB Cable UC-E16 alkaline batteries (×2)1 Brush2 ViewNX 2 Installer CD Reference Manual CD • User's Manual: Getting to enhance your...
... for cleaning the waterproof packing. • Accessories are for trial use only. 2 The brush is used for purchasing the Nikon COOLPIX S30 digital camera. ii Introduction COOLPIX S30 Digital Camera Camera Strap LR6/L40 (AA-size) USB Cable UC-E16 alkaline batteries (×2)1 Brush2 ViewNX 2 Installer CD Reference Manual CD • User's Manual: Getting to enhance your...

Reference Manual
Page 91
Connection method: Connect the camera directly to the printer's USB input jack with the included USB Cable. • Before connecting to a computer, install ViewNX ...information about using a computer. Connection method: Connect the video and audio plugs of the optional Audio Video Cable EG-CP14 to a PictBridge-compatible printer, you can view the camera's images and movies on a TV... ViewNX 2 Installer CD-ROM and transferring images to the computer's USB input jack with the included USB Cable. Printing images without using a computer E14 If you connect the camera to the TV's...
Connection method: Connect the camera directly to the printer's USB input jack with the included USB Cable. • Before connecting to a computer, install ViewNX ...information about using a computer. Connection method: Connect the video and audio plugs of the optional Audio Video Cable EG-CP14 to a PictBridge-compatible printer, you can view the camera's images and movies on a TV... ViewNX 2 Installer CD-ROM and transferring images to the computer's USB input jack with the included USB Cable. Printing images without using a computer E14 If you connect the camera to the TV's...

Reference Manual
Page 95
...SD card reader: Connect a card reader (available separately from third-party suppliers) to the computer via a USB hub. 69 Playback Features Choose one of the following methods: • Direct USB connection: Turn the camera off and ensure that are saved in the camera's internal memory, remove the memory...insert the memory card. Transferring Images to the Computer 1 Choose how images will be copied to the computer using the supplied USB Cable. B Connecting the USB Cable The connection may not be recognized if the camera is equipped with an SD card slot, the card can be inserted ...
...SD card reader: Connect a card reader (available separately from third-party suppliers) to the computer via a USB hub. 69 Playback Features Choose one of the following methods: • Direct USB connection: Turn the camera off and ensure that are saved in the camera's internal memory, remove the memory...insert the memory card. Transferring Images to the Computer 1 Choose how images will be copied to the computer using the supplied USB Cable. B Connecting the USB Cable The connection may not be recognized if the camera is equipped with an SD card slot, the card can be inserted ...

Reference Manual
Page 97
... 2. If you are displayed in the computer operating system to eject the removable disk corresponding to the computer, turn the camera off and disconnect the USB cable.
... 2. If you are displayed in the computer operating system to eject the removable disk corresponding to the computer, turn the camera off and disconnect the USB cable.

Reference Manual
Page 119
Follow the procedures below to the printer and print images without using Print order option (E31) Connect to the printer (E14) Print images one at a time (E16) Print multiple images (E18) When printing is complete, turn the camera off and disconnect the USB cable Reference Section E13 Connecting the Camera to a Printer (Direct Print) Users of copies using a computer. Take pictures Select images for printing and number of PictBridge-compatible (F21) printers can connect the camera directly to print images.
Follow the procedures below to the printer and print images without using Print order option (E31) Connect to the printer (E14) Print images one at a time (E16) Print multiple images (E18) When printing is complete, turn the camera off and disconnect the USB cable Reference Section E13 Connecting the Camera to a Printer (Direct Print) Users of copies using a computer. Take pictures Select images for printing and number of PictBridge-compatible (F21) printers can connect the camera directly to print images.

Reference Manual
Page 121
Do not attempt to the printer using the included USB cable. • Be sure that connectors are properly oriented. 3 Connect the camera to insert connectors at an angle, and do not use force when connecting or disconnecting the USB cable. 12 3 4 Turn on the camera. • When properly connected, the PictBridge startup screen will be displayed in the camera monitor, followed by the Print selection screen. Print selection E15 Reference Section
Do not attempt to the printer using the included USB cable. • Be sure that connectors are properly oriented. 3 Connect the camera to insert connectors at an angle, and do not use force when connecting or disconnecting the USB cable. 12 3 4 Turn on the camera. • When properly connected, the PictBridge startup screen will be displayed in the camera monitor, followed by the Print selection screen. Print selection E15 Reference Section

Reference Manual
Page 138
... shooting date and shooting information is used. • Shooting information cannot be printed when the camera is connected to a DPOF-compatible printer via the included USB cable. • Note that saved when the image was captured. E32 Print order Date Info When Date is selected B Notes About Printing Shooting Date and Shooting...
... shooting date and shooting information is used. • Shooting information cannot be printed when the camera is connected to a DPOF-compatible printer via the included USB cable. • Note that saved when the image was captured. E32 Print order Date Info When Date is selected B Notes About Printing Shooting Date and Shooting...

Reference Manual
Page 159
... are not waterproof. Reference Section E53 Do not use only Battery Charger MH-72 or MH-73. Optional Accessories Rechargeable battery Battery charger USB cable Audio/video cable Rechargeable Ni-MH batteries EN-MH2-B2 (set of two EN-MH2 batteries)1 Rechargeable Ni-MH batteries EN-MH2-B4 (set of four... MH-72 (includes two rechargeable Ni-MH batteries EN-MH2)1 Battery Charger MH-73 (includes four rechargeable Ni-MH batteries EN-MH2)1 USB Cable UC-E162 Audio Video Cable EG-CP14 1 To charge EN-MH2 batteries, use these battery chargers to charge any other type of battery. 2 Included with the...
... are not waterproof. Reference Section E53 Do not use only Battery Charger MH-72 or MH-73. Optional Accessories Rechargeable battery Battery charger USB cable Audio/video cable Rechargeable Ni-MH batteries EN-MH2-B2 (set of two EN-MH2 batteries)1 Rechargeable Ni-MH batteries EN-MH2-B4 (set of four... MH-72 (includes two rechargeable Ni-MH batteries EN-MH2)1 Battery Charger MH-73 (includes four rechargeable Ni-MH batteries EN-MH2)1 USB Cable UC-E162 Audio Video Cable EG-CP14 1 To charge EN-MH2 batteries, use these battery chargers to charge any other type of battery. 2 Included with the...

Reference Manual
Page 162
...the memory card, press any flexible button and select Copy in camera's internal circuitry. If error persists, contact 18 retailer or Nikon-authorized service representative. E14 Error has occurred in fullframe playback mode. 13 E33 File not created with printer. Display Memory contains no...Reference Section E56 File contains no images. Turn camera off and then on again. All images are hidden. Turn camera off and reconnect USB cable. File cannot be viewed on . Error occurred during communication with this camera. E27 Lens error. Turn camera off, remove and reinsert ...
...the memory card, press any flexible button and select Copy in camera's internal circuitry. If error persists, contact 18 retailer or Nikon-authorized service representative. E14 Error has occurred in fullframe playback mode. 13 E33 File not created with printer. Display Memory contains no...Reference Section E56 File contains no images. Turn camera off and then on again. All images are hidden. Turn camera off and reconnect USB cable. File cannot be viewed on . Error occurred during communication with this camera. E27 Lens error. Turn camera off, remove and reinsert ...

Reference Manual
Page 174
...-record) button. • When flash lamp flashes, wait until flash has charged. • Camera and computer are connected via USB cable. • Camera and TV are connected via audio/video cable. 19 18 2, 19 44 64, 69 64, E11 • Adjust monitor brightness. • Monitor is dirty. Clean monitor...• Camera has turned off automatically to function as expected, check the list of common problems below before consulting your retailer or Nikon-authorized service representative. Troubleshooting If the camera fails to save power. 19 • The camera or battery have become too cold...
...-record) button. • When flash lamp flashes, wait until flash has charged. • Camera and computer are connected via USB cable. • Camera and TV are connected via audio/video cable. 19 18 2, 19 44 64, 69 64, E11 • Adjust monitor brightness. • Monitor is dirty. Clean monitor...• Camera has turned off automatically to function as expected, check the list of common problems below before consulting your retailer or Nikon-authorized service representative. Troubleshooting If the camera fails to save power. 19 • The camera or battery have become too cold...

Reference Manual
Page 176
Disconnect the USB cable. 64, 69, E14 • When camera is too close. the shutter-release button is • When menus are blurred. • Use flash. • Use tripod ... • When flash lamp flashes, flash is charging. 44 Camera cannot focus. • Subject is in the loss of continued malfunction, contact your retailer or Nikon-authorized service representative. Data already saved will not be affected. In most cases, this phenomenon is one with A (auto) mode or setting Choose a style to...
Disconnect the USB cable. 64, 69, E14 • When camera is too close. the shutter-release button is • When menus are blurred. • Use flash. • Use tripod ... • When flash lamp flashes, flash is charging. 44 Camera cannot focus. • Subject is in the loss of continued malfunction, contact your retailer or Nikon-authorized service representative. Data already saved will not be affected. In most cases, this phenomenon is one with A (auto) mode or setting Choose a style to...

Reference Manual
Page 179
... displayed. memory card. • Remove the memory card to print images from the internal memory. - 80, E47 12 Nikon Transfer 2 does not start Nikon Transfer 2 automatically. Replace the memory card. The camera cannot rotate images captured with other than Small picture cannot be added ... • Video mode is not set to start when camera is connected. • Camera is off. • Battery is exhausted. • USB cable is not correctly connected. • Camera is not recognized by the computer. • Confirm system requirements. • Computer is not correctly set ...
... displayed. memory card. • Remove the memory card to print images from the internal memory. - 80, E47 12 Nikon Transfer 2 does not start Nikon Transfer 2 automatically. Replace the memory card. The camera cannot rotate images captured with other than Small picture cannot be added ... • Video mode is not set to start when camera is connected. • Camera is off. • Battery is exhausted. • USB cable is not correctly connected. • Camera is not recognized by the computer. • Confirm system requirements. • Computer is not correctly set ...

Reference Manual
Page 189
Thumbnail display 61 Tripod socket 3, F19 TV 65, E11 U USB cable 64, 69, E15, E53 USB/audio/video output connector 3, 64, 69, E11, E13 Using skin softening 58 V Video mode 80, E47 View 63 ViewNX 2 66, 68 Vividness 34 Volume 78 W Welcome screen 80, E41 Z Zoom 21 Zoom in 21 Zoom out 21 F25 Technical Notes and Index
Thumbnail display 61 Tripod socket 3, F19 TV 65, E11 U USB cable 64, 69, E15, E53 USB/audio/video output connector 3, 64, 69, E11, E13 Using skin softening 58 V Video mode 80, E47 View 63 ViewNX 2 66, 68 Vividness 34 Volume 78 W Welcome screen 80, E41 Z Zoom 21 Zoom in 21 Zoom out 21 F25 Technical Notes and Index


