
Reference Manual
Page 4
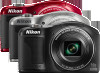
... any items are for purchasing the Nikon COOLPIX L610 digital camera. After reading, please keep this manual. Introduction Read This First Thank you purchased the camera. Introduction COOLPIX L610 Digital Camera Camera Strap LR6/L40 (AA-size) alkaline batteries (×2)* USB Cable UC-E6 ...Audio Video Cable EG-CP16 ViewNX 2 CD Reference Manual CD • Warranty * The included batteries are missing, please contact the ...
... any items are for purchasing the Nikon COOLPIX L610 digital camera. After reading, please keep this manual. Introduction Read This First Thank you purchased the camera. Introduction COOLPIX L610 Digital Camera Camera Strap LR6/L40 (AA-size) alkaline batteries (×2)* USB Cable UC-E6 ...Audio Video Cable EG-CP16 ViewNX 2 CD Reference Manual CD • Warranty * The included batteries are missing, please contact the ...

Reference Manual
Page 6
...trip), take a test shot to ensure that may be held liable for contact information: http://imaging.nikon.com/ Use Only Nikon Brand Electronic Accessories Nikon COOLPIX cameras are engineered and proven to frequently asked questions (FAQs), and general advice on important occasions (...Introduction Information and Precautions Life-Long Learning As part of this electronic circuitry. Only Nikon brand electronic accessories (including battery chargers, batteries, and AC adapters) certified by Nikon specifically for use with the latest product information, tips, answers to operate within the...
...trip), take a test shot to ensure that may be held liable for contact information: http://imaging.nikon.com/ Use Only Nikon Brand Electronic Accessories Nikon COOLPIX cameras are engineered and proven to frequently asked questions (FAQs), and general advice on important occasions (...Introduction Information and Precautions Life-Long Learning As part of this electronic circuitry. Only Nikon brand electronic accessories (including battery chargers, batteries, and AC adapters) certified by Nikon specifically for use with the latest product information, tips, answers to operate within the...

Reference Manual
Page 9
... of flammable gas, as the result of a fall or other accident, take the equipment to a Nikon-authorized service representative for inspection, after unplugging the product and/or removing the batteries. Do not disassemble Touching the internal parts of flammable gas Do not use the product will read before... unusual smell coming from the camera or AC adapter, unplug the AC adapter and remove the batteries immediately, taking care to avoid burns. For Your Safety To prevent damage to your Nikon product or injury to yourself or to others, read the following safety precautions in their entirety...
... of flammable gas, as the result of a fall or other accident, take the equipment to a Nikon-authorized service representative for inspection, after unplugging the product and/or removing the batteries. Do not disassemble Touching the internal parts of flammable gas Do not use the product will read before... unusual smell coming from the camera or AC adapter, unplug the AC adapter and remove the batteries immediately, taking care to avoid burns. For Your Safety To prevent damage to your Nikon product or injury to yourself or to others, read the following safety precautions in their entirety...

Reference Manual
Page 10
... a set. Observe the following precautions when handling batteries for use with Nikon digital cameras only, and are compatible with COOLPIX L610. • Insert batteries in the correct orientation. • Do not short or disassemble batteries or attempt to remove or break battery insulation or casing. • Do not expose batteries to flame or to excessive heat. • Do...
... a set. Observe the following precautions when handling batteries for use with Nikon digital cameras only, and are compatible with COOLPIX L610. • Insert batteries in the correct orientation. • Do not short or disassemble batteries or attempt to remove or break battery insulation or casing. • Do not expose batteries to flame or to excessive heat. • Do...

Reference Manual
Page 11
... this precaution could result in contact with clothing or skin, rinse immediately with plenty of the plug should you notice any change in the batteries, such as discoloration or deformation. • If liquid from one voltage to another or with care Be careful that your fingers or other... objects are not pinched by Nikon for inspection. Failure to observe these precautions could result in fire or electric shock. • Dust on or near the battery charger during lightning storms. Failure to observe this precaution could result in fire ...
... this precaution could result in contact with clothing or skin, rinse immediately with plenty of the plug should you notice any change in the batteries, such as discoloration or deformation. • If liquid from one voltage to another or with care Be careful that your fingers or other... objects are not pinched by Nikon for inspection. Failure to observe these precautions could result in fire or electric shock. • Dust on or near the battery charger during lightning storms. Failure to observe this precaution could result in fire ...

Reference Manual
Page 14
...customers in Canada CAUTION This Class B digital apparatus complies with this product is designated for separate collection at an appropriate collection point. Nikon Inc., 1300 Walt Whitman Road Melville, New York 11747-3064 USA Tel: 631-547-4200 Notice for your equipment. ATTENTION Cet...of as household waste. • For more information, contact the retailer or the local authorities in European Countries This symbol indicates that the battery is to be collected separately. This symbol on this product will expose you to lead, a chemical known to cause birth defects or other...
...customers in Canada CAUTION This Class B digital apparatus complies with this product is designated for separate collection at an appropriate collection point. Nikon Inc., 1300 Walt Whitman Road Melville, New York 11747-3064 USA Tel: 631-547-4200 Notice for your equipment. ATTENTION Cet...of as household waste. • For more information, contact the retailer or the local authorities in European Countries This symbol indicates that the battery is to be collected separately. This symbol on this product will expose you to lead, a chemical known to cause birth defects or other...
Reference Manual
Page 15
... and Lowering the Flash 5 Using Menus (d Button 6 The Monitor 8 Shooting Mode 8 Playback Mode 10 The Basics of Shooting and Playback ... 13 Preparation 1 Insert the Batteries 14 Applicable Batteries 14 Preparation 2 Insert a Memory Card.......... 16 Internal Memory and Memory Cards......... 17 Preparation 3 Set the Display Language, Date, and Time 18 Step 1 Turn the...
... and Lowering the Flash 5 Using Menus (d Button 6 The Monitor 8 Shooting Mode 8 Playback Mode 10 The Basics of Shooting and Playback ... 13 Preparation 1 Insert the Batteries 14 Applicable Batteries 14 Preparation 2 Insert a Memory Card.......... 16 Internal Memory and Memory Cards......... 17 Preparation 3 Set the Display Language, Date, and Time 18 Step 1 Turn the...

Reference Manual
Page 17
... Settings E80 Auto Off E81 Format Memory/Format Card E82 Language E83 TV Settings E84 Blink Warning E85 Eye-Fi Upload E87 Reset All E88 Battery Type E92 Firmware Version E92 File and Folder Names E93 Optional Accessories E95 Attaching the AN-CP23 Camera Strap ... E96 Error Messages E97 xv Introduction...
... Settings E80 Auto Off E81 Format Memory/Format Card E82 Language E83 TV Settings E84 Blink Warning E85 Eye-Fi Upload E87 Reset All E88 Battery Type E92 Firmware Version E92 File and Folder Names E93 Optional Accessories E95 Attaching the AN-CP23 Camera Strap ... E96 Error Messages E97 xv Introduction...

Reference Manual
Page 18
Introduction Technical Notes and Index F1 Caring for the Product F2 The Camera F2 Batteries F3 Memory Cards F5 Cleaning and Storage F6 Cleaning F6 Storage F7 Troubleshooting F8 Specifications F17 Approved Memory Cards F21 Supported Standards F21 Index F24 xvi
Introduction Technical Notes and Index F1 Caring for the Product F2 The Camera F2 Batteries F3 Memory Cards F5 Cleaning and Storage F6 Cleaning F6 Storage F7 Troubleshooting F8 Specifications F17 Approved Memory Cards F21 Supported Standards F21 Index F24 xvi

Reference Manual
Page 21
1 2 13 12 11 3 4 5 6 7 8 9 10 Parts of the Camera 1 K (flash pop-up) control 5, 53 2 Flash lamp 55 3 b (e movie-record) button 90 4 A (shooting mode) button 36, 37, 46, 48, 51 5 c (playback) button 30, 76 6 Multi selector 7 k (apply selection) button 8 l (delete) button 32 9 d button 6, 63, 78, 93, 98 10 Battery-chamber/ memory card slot cover 14, 16 11 Tripod socket F19 12 Monitor 8 13 Speaker 79, 94 3
1 2 13 12 11 3 4 5 6 7 8 9 10 Parts of the Camera 1 K (flash pop-up) control 5, 53 2 Flash lamp 55 3 b (e movie-record) button 90 4 A (shooting mode) button 36, 37, 46, 48, 51 5 c (playback) button 30, 76 6 Multi selector 7 k (apply selection) button 8 l (delete) button 32 9 d button 6, 63, 78, 93, 98 10 Battery-chamber/ memory card slot cover 14, 16 11 Tripod socket F19 12 Monitor 8 13 Speaker 79, 94 3

Reference Manual
Page 27
..., 37, 46, 48, 51 2 Macro mode 58 3 Zoom indicator 27, 58 4 Focus indicator 28 5 AE/AF-L indicator 44 6 Flash mode 53 7 Eye-Fi indicator 99 8 Battery level indicator 22 9 Vibration reduction icon 98 10 Print date 98 11 Motion detection icon 98 12 Wind noise reduction 93 13 "Date not set...
..., 37, 46, 48, 51 2 Macro mode 58 3 Zoom indicator 27, 58 4 Focus indicator 28 5 AE/AF-L indicator 44 6 Flash mode 53 7 Eye-Fi indicator 99 8 Battery level indicator 22 9 Vibration reduction icon 98 10 Print date 98 11 Motion detection icon 98 12 Wind noise reduction 93 13 "Date not set...

Reference Manual
Page 29
... indicator 79, E59 4 Album icon in favorite pictures mode 76, E7 5 Category icon in auto sort mode 76, E11 6 List by date icon 76, E13 7 Battery level indicator 22 8 Protect icon 78, E56 9 Eye-Fi indicator 99, E87 10 Small picture icon 78, E24 11 Cropped image icon 74, E25 12...
... indicator 79, E59 4 Album icon in favorite pictures mode 76, E7 5 Category icon in auto sort mode 76, E11 6 List by date icon 76, E13 7 Battery level indicator 22 8 Protect icon 78, E56 9 Eye-Fi indicator 99, E87 10 Small picture icon 78, E24 11 Cropped image icon 74, E25 12...

Reference Manual
Page 31
The Basics of Shooting and Playback The Basics of Shooting and Playback Preparation Preparation 1 Insert the Batteries 14 Preparation 2 Insert a Memory Card 16 Preparation 3 Set the Display Language, Date, and Time 18 Shooting Step 1 Turn the Camera On 22 Step 2 Select a Shooting Mode 24 Step 3 Frame a Picture ...26 Step 4 Focus and Shoot...28 Playback Step 5 Play Back Images ...30 Step 6 Delete Images...32 13
The Basics of Shooting and Playback The Basics of Shooting and Playback Preparation Preparation 1 Insert the Batteries 14 Preparation 2 Insert a Memory Card 16 Preparation 3 Set the Display Language, Date, and Time 18 Shooting Step 1 Turn the Camera On 22 Step 2 Select a Shooting Mode 24 Step 3 Frame a Picture ...26 Step 4 Focus and Shoot...28 Playback Step 5 Play Back Images ...30 Step 6 Delete Images...32 13

Reference Manual
Page 32
... (-) terminals are oriented correctly as described on the label at the entrance of the battery chamber, and insert the batteries. 3 2 3 Close the battery-chamber/memory card slot cover. Applicable Batteries • LR6/L40 (AA-size) alkaline battery × 2 (included batteries) • FR6/L91 (AA-size) lithium battery × 2 • EN-MH2 rechargeable Ni-MH (nickel metal hydride...
... (-) terminals are oriented correctly as described on the label at the entrance of the battery chamber, and insert the batteries. 3 2 3 Close the battery-chamber/memory card slot cover. Applicable Batteries • LR6/L40 (AA-size) alkaline battery × 2 (included batteries) • FR6/L91 (AA-size) lithium battery × 2 • EN-MH2 rechargeable Ni-MH (nickel metal hydride...

Reference Manual
Page 33
... change the setting. Observe caution when removing the batteries or memory card. E95) to the camera. 15 C Alkaline Batteries Performance of batteries inserted in the camera, the batteries can use another make or model of battery is the type of battery included with a flat negative terminal B Battery Type By setting Battery type in the setup menu (A 99) to...
... change the setting. Observe caution when removing the batteries or memory card. E95) to the camera. 15 C Alkaline Batteries Performance of batteries inserted in the camera, the batteries can use another make or model of battery is the type of battery included with a flat negative terminal B Battery Type By setting Battery type in the setup menu (A 99) to...

Reference Manual
Page 34
...card into the camera, press the d button, and select Format card (E82) in the correct orientation. 3 2 The Basics of Shooting and Playback 3 Close the battery-chamber/memory card slot cover. 1 2 B Formatting a Memory Card • The first time you insert a memory card that you wish to keep to format it... has been used in another device into this camera. • All data stored on lamp and the monitor turn off the camera and open the battery- chamber/memory card slot cover. • When the camera turns off, the power-on a memory card is permanently deleted when the card is ...
...card into the camera, press the d button, and select Format card (E82) in the correct orientation. 3 2 The Basics of Shooting and Playback 3 Close the battery-chamber/memory card slot cover. 1 2 B Formatting a Memory Card • The first time you insert a memory card that you wish to keep to format it... has been used in another device into this camera. • All data stored on lamp and the monitor turn off the camera and open the battery- chamber/memory card slot cover. • When the camera turns off, the power-on a memory card is permanently deleted when the card is ...

Reference Manual
Page 35
Observe caution when removing the batteries or memory card. The Basics of Shooting and Playback 17 Internal Memory and Memory Cards Camera data, including images and movies, can be saved either ..., and then remove the card (2). Removing the Memory Card Turn the camera off before opening the battery-chamber/ memory card slot cover. Do not pull it at an angle. 12 B High Temperature Caution The camera, batteries, and memory card may be sure that the power-on a memory card. Gently push the memory...
Observe caution when removing the batteries or memory card. The Basics of Shooting and Playback 17 Internal Memory and Memory Cards Camera data, including images and movies, can be saved either ..., and then remove the card (2). Removing the Memory Card Turn the camera off before opening the battery-chamber/ memory card slot cover. Do not pull it at an angle. 12 B High Temperature Caution The camera, batteries, and memory card may be sure that the power-on a memory card. Gently push the memory...

Reference Manual
Page 39
... or when the camera is displayed. When enabled, the clock moves forward one hour. when disabled, the clock moves back one hour; C The Clock Battery • The camera's clock is turned on. The Basics of Shooting and Playback C Changing the Language Setting and the Date and Time Setting •...to an optional AC adapter, and can provide several days of backup power after about 10 hours of charging. • If the camera's backup battery becomes exhausted, the date and time setting screen is displayed when the camera is powered by selecting the z setup menu > Time zone and date ...
... or when the camera is displayed. When enabled, the clock moves forward one hour. when disabled, the clock moves back one hour; C The Clock Battery • The camera's clock is turned on. The Basics of Shooting and Playback C Changing the Language Setting and the Date and Time Setting •...to an optional AC adapter, and can provide several days of backup power after about 10 hours of charging. • If the camera's backup battery becomes exhausted, the date and time setting screen is displayed when the camera is powered by selecting the z setup menu > Time zone and date ...

Reference Manual
Page 40
...Raise the flash (A 5, 53) in situations where you want to replace the batteries. Description Battery level high. C Notes About the Flash The flash does not pop-up ) control to raise the flash (A 5). 2 Check the battery level indicator and the number of exposures remaining. The Basics of Shooting and ...power switch. • The lens extends and the monitor turns on the image quality and image size (determined by the image mode setting; Battery level indicator 29m 0s 860 Number of exposures remaining Number of Exposures Remaining The number of pictures that can be taken is displayed. •...
...Raise the flash (A 5, 53) in situations where you want to replace the batteries. Description Battery level high. C Notes About the Flash The flash does not pop-up ) control to raise the flash (A 5). 2 Check the battery level indicator and the number of exposures remaining. The Basics of Shooting and ...power switch. • The lens extends and the monitor turns on the image quality and image size (determined by the image mode setting; Battery level indicator 29m 0s 860 Number of exposures remaining Number of Exposures Remaining The number of pictures that can be taken is displayed. •...

Reference Manual
Page 73
... is charging. In these cases, select another flash mode and take pictures. • Off: The flash does not fire when a picture is taken. If the battery level is low, the monitor turns off . Note the following when shooting: • More time than usual is charging. Shooting Features B Lowering the Flash Push...
... is charging. In these cases, select another flash mode and take pictures. • Off: The flash does not fire when a picture is taken. If the battery level is low, the monitor turns off . Note the following when shooting: • More time than usual is charging. Shooting Features B Lowering the Flash Push...


