
User Guide
Page 3
... 8 Connection to a Wireless Ad-Hoc Network for Setup 8 Moving the Camera to a Different Network 9 Chapter 5: Setting up and Mounting the Wireless-B Internet Video Camera 10 Setup Wizard 10 Placement Options 16 Chapter 6: Installing and Using the Wireless-B Internet Video Camera Viewer & Recorder Utility 17 Overview 17 Installing the Viewer & Recorder Utility 17 Using the Viewer & Recorder Utility 19 Chapter 7: Setting up the Linksys SoloLink™ DDNS...
... 8 Connection to a Wireless Ad-Hoc Network for Setup 8 Moving the Camera to a Different Network 9 Chapter 5: Setting up and Mounting the Wireless-B Internet Video Camera 10 Setup Wizard 10 Placement Options 16 Chapter 6: Installing and Using the Wireless-B Internet Video Camera Viewer & Recorder Utility 17 Overview 17 Installing the Viewer & Recorder Utility 17 Using the Viewer & Recorder Utility 19 Chapter 7: Setting up the Linksys SoloLink™ DDNS...

User Guide
Page 5
Wireless-B Internet Video Camera List of Figures Figure 3-1: Camera LEDs 6 Figure 3-2: Camera Head 6 Figure 3-3: Camera Ports 7 Figure 4-1: Connect the Ethernet Network Cable 8 Figure 4-2: Connect the Power Adapter 8 Figure 5-1: Welcome 10 Figure 5-2: Connection for Setup 10 Figure 5-3: Cameras Found 11 Figure 5-4:... Install Viewer & Recorder Utility 17 Figure 6-2: Install Viewer & Recorder Utility Welcome 17 Figure 6-3: Choose Destination Location 18 Figure 6-4: Select Program Folder 18 Figure 6-5: OCX Plug-in 18 Figure 6-6: Setup Complete 18 Figure 6-7: Viewer & ...
Wireless-B Internet Video Camera List of Figures Figure 3-1: Camera LEDs 6 Figure 3-2: Camera Head 6 Figure 3-3: Camera Ports 7 Figure 4-1: Connect the Ethernet Network Cable 8 Figure 4-2: Connect the Power Adapter 8 Figure 5-1: Welcome 10 Figure 5-2: Connection for Setup 10 Figure 5-3: Cameras Found 11 Figure 5-4:... Install Viewer & Recorder Utility 17 Figure 6-2: Install Viewer & Recorder Utility Welcome 17 Figure 6-3: Choose Destination Location 18 Figure 6-4: Select Program Folder 18 Figure 6-5: OCX Plug-in 18 Figure 6-6: Setup Complete 18 Figure 6-7: Viewer & ...

User Guide
Page 8
... the Linksys Wireless-B Internet Video Camera. If you want the video to a web browser anywhere in the house, while the video stream is placed on Security Mode, which tells the Camera to send you can then log onto the live video through the Internet to ...data is secured from outside world, hidden behind your network. The advanced MPEG-4 video compression produces a high-quality, high-framerate, 320 x 240 video stream. Wireless-B Internet Video Camera Chapter 1: Introduction Welcome Thank you . The included Viewer & Recorder utility lets you can connect directly to ...
... the Linksys Wireless-B Internet Video Camera. If you want the video to a web browser anywhere in the house, while the video stream is placed on Security Mode, which tells the Camera to send you can then log onto the live video through the Internet to ...data is secured from outside world, hidden behind your network. The advanced MPEG-4 video compression produces a high-quality, high-framerate, 320 x 240 video stream. Wireless-B Internet Video Camera Chapter 1: Introduction Welcome Thank you . The included Viewer & Recorder utility lets you can connect directly to ...

User Guide
Page 17
...Wireless-B Internet Video Camera Setup Wizard Figure 5-2: Connection for Setup 10 Insert the Setup CD-ROM into your CD-ROM drive). • Setup. In the field provided, enter D:\wvc11b.exe (if "D" is properly connected to install the Camera's Viewer & Recorder Utility on the Welcome screen. 3. Click this button to either a wired or wireless network.... Then click the Next button to configure and use Linksys's...
...Wireless-B Internet Video Camera Setup Wizard Figure 5-2: Connection for Setup 10 Insert the Setup CD-ROM into your CD-ROM drive). • Setup. In the field provided, enter D:\wvc11b.exe (if "D" is properly connected to install the Camera's Viewer & Recorder Utility on the Welcome screen. 3. Click this button to either a wired or wireless network.... Then click the Next button to configure and use Linksys's...
User Guide
Page 22
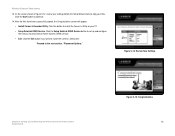
...button to set up and Mounting the Wireless-B Internet Video Camera Setup Wizard Figure 5-13: Congratulations 15 Click the Save button to the next section, "Placement Options." Figure 5-12: Review New Settings Chapter 5: Setting up and configure the Linksys Dynamic Domain Name System (DDNS) ... the Congratulations screen will appear. • Install Viewer & Recorder Utility. On the screen shown in Figure 5-12, review your settings before the Setup Wizard starts to install the Camera's Utility later. Wireless-B Internet Video Camera 13. Click the Exit button if you want to...
...button to set up and Mounting the Wireless-B Internet Video Camera Setup Wizard Figure 5-13: Congratulations 15 Click the Save button to the next section, "Placement Options." Figure 5-12: Review New Settings Chapter 5: Setting up and configure the Linksys Dynamic Domain Name System (DDNS) ... the Congratulations screen will appear. • Install Viewer & Recorder Utility. On the screen shown in Figure 5-12, review your settings before the Setup Wizard starts to install the Camera's Utility later. Wireless-B Internet Video Camera 13. Click the Exit button if you want to...

User Guide
Page 23
...-based Utility, then proceed to stand the Camera vertically on the opposite side of the Wireless-B Internet Video Camera is 80 mm (3.15 inches). 1. Wall Mount Option The Camera has two wall-mount slots on a surface (see Figure 5-15). Wireless-B Internet Video Camera Placement Options There are three ways to "Chapter 6: Installing the Wireless-B Internet Video Camera Viewer & Recorder Utility." The second way is to...
...-based Utility, then proceed to stand the Camera vertically on the opposite side of the Wireless-B Internet Video Camera is 80 mm (3.15 inches). 1. Wall Mount Option The Camera has two wall-mount slots on a surface (see Figure 5-15). Wireless-B Internet Video Camera Placement Options There are three ways to "Chapter 6: Installing the Wireless-B Internet Video Camera Viewer & Recorder Utility." The second way is to...

User Guide
Page 24
... Welcome screen shown in Figure 6-2 will not work with Netscape. Click the Next button to install and use the Viewer & Recorder Utility on how to proceed. Wireless-B Internet Video Camera Chapter 6: Installing and Using the Wireless-B Internet Video Camera Viewer & Recorder Utility Overview This chapter will instruct you on your PC. On the Welcome or Congratulations screen of the Setup...
... Welcome screen shown in Figure 6-2 will not work with Netscape. Click the Next button to install and use the Viewer & Recorder Utility on how to proceed. Wireless-B Internet Video Camera Chapter 6: Installing and Using the Wireless-B Internet Video Camera Viewer & Recorder Utility Overview This chapter will instruct you on your PC. On the Welcome or Congratulations screen of the Setup...

User Guide
Page 25
...-based Utility, go to "Chapter 7: Setting up the Linksys SoloLink Service, go to the next section, "Using the Viewer & Recorder Utility." The Select Program Folder screen will appear. Figure 6-3: Choose Destination Location Chapter 6: Installing and Using the Wireless-B Internet Video Camera Viewer & Recorder Utility Installing the Viewer & Recorder Utility Figure 6-4: Select Program Folder Figure 6-5: OCX Plug-in the...
...-based Utility, go to "Chapter 7: Setting up the Linksys SoloLink Service, go to the next section, "Using the Viewer & Recorder Utility." The Select Program Folder screen will appear. Figure 6-3: Choose Destination Location Chapter 6: Installing and Using the Wireless-B Internet Video Camera Viewer & Recorder Utility Installing the Viewer & Recorder Utility Figure 6-4: Select Program Folder Figure 6-5: OCX Plug-in the...

User Guide
Page 26
...: • Double-click the icon on your desktop and one on your desktop's taskbar. The identification name of the Camera. Wireless-B Internet Video Camera Using the Viewer & Recorder Utility After the Viewer & Recorder Utility has been installed, the Viewer & Recorder Utility icon, shown in Figure 6-7, will see the Utility's main screen (see Figure 6-8). To close the Utility, right...
...: • Double-click the icon on your desktop and one on your desktop's taskbar. The identification name of the Camera. Wireless-B Internet Video Camera Using the Viewer & Recorder Utility After the Viewer & Recorder Utility has been installed, the Viewer & Recorder Utility icon, shown in Figure 6-7, will see the Utility's main screen (see Figure 6-8). To close the Utility, right...

User Guide
Page 27
... button. Enter the login Password. Password. Figure 6-9: Find Camera from LAN Chapter 6: Installing and Using the Wireless-B Internet Video Camera Viewer & Recorder Utility 20 Using the Viewer & Recorder Utility The port number the Camera uses for Cameras on the local area network and display a list in the Cameras on your local area network, along with a name and password, then you will need...
... button. Enter the login Password. Password. Figure 6-9: Find Camera from LAN Chapter 6: Installing and Using the Wireless-B Internet Video Camera Viewer & Recorder Utility 20 Using the Viewer & Recorder Utility The port number the Camera uses for Cameras on the local area network and display a list in the Cameras on your local area network, along with a name and password, then you will need...

User Guide
Page 28
.... Click the Test button to find the Camera. Chapter 6: Installing and Using the Wireless-B Internet Video Camera Viewer & Recorder Utility Using the Viewer & Recorder Utility Figure 6-10: Find Camera from Internet Figure 6-11: Change Settings 21 Address. See Figure 6-11. To add the Camera to the Camera Info section. If you set up the Camera with a name and password, then you wish...
.... Click the Test button to find the Camera. Chapter 6: Installing and Using the Wireless-B Internet Video Camera Viewer & Recorder Utility Using the Viewer & Recorder Utility Figure 6-10: Find Camera from Internet Figure 6-11: Change Settings 21 Address. See Figure 6-11. To add the Camera to the Camera Info section. If you set up the Camera with a name and password, then you wish...

User Guide
Page 29
... the login Password. Figure 6-12: Delete Camera Chapter 6: Installing and Using the Wireless-B Internet Video Camera Viewer & Recorder Utility 22 Using the Viewer & Recorder Utility Wireless-B Internet Video Camera For the selected Camera, the following information will be displayed: Camera Info Camera Name. Address. Delete To delete a Camera from the list, select the Camera by clicking its name in the Camera List box, and then click the...
... the login Password. Figure 6-12: Delete Camera Chapter 6: Installing and Using the Wireless-B Internet Video Camera Viewer & Recorder Utility 22 Using the Viewer & Recorder Utility Wireless-B Internet Video Camera For the selected Camera, the following information will be displayed: Camera Info Camera Name. Address. Delete To delete a Camera from the list, select the Camera by clicking its name in the Camera List box, and then click the...

User Guide
Page 30
... 51.6MB 43MB 86MB 43MB 21.5MB 10.75MB 4.3MB Figure 6-13: View Video Figure 6-14: Recording Icon Chapter 6: Installing and Using the Wireless-B Internet Video Camera Viewer & Recorder Utility 23 Using the Viewer & Recorder Utility Wireless-B Internet Video Camera View To view the video seen by a Camera, select the Camera by clicking its name in Figure 6-13. Click the button with the triangle...
... 51.6MB 43MB 86MB 43MB 21.5MB 10.75MB 4.3MB Figure 6-13: View Video Figure 6-14: Recording Icon Chapter 6: Installing and Using the Wireless-B Internet Video Camera Viewer & Recorder Utility 23 Using the Viewer & Recorder Utility Wireless-B Internet Video Camera View To view the video seen by a Camera, select the Camera by clicking its name in Figure 6-13. Click the button with the triangle...

User Guide
Page 31
... are scheduled ones that are currently in progress section (see the screen shown in Progress Figure 6-16: Files Chapter 6: Installing and Using the Wireless-B Internet Video Camera Viewer & Recorder Utility 24 Using the Viewer & Recorder Utility If a recording is one hour long, then multiple files will see Figure 6-15), you gave to view your recordings. The...
... are scheduled ones that are currently in progress section (see the screen shown in Progress Figure 6-16: Files Chapter 6: Installing and Using the Wireless-B Internet Video Camera Viewer & Recorder Utility 24 Using the Viewer & Recorder Utility If a recording is one hour long, then multiple files will see Figure 6-15), you gave to view your recordings. The...

User Guide
Page 32
... Name, and then click the Delete button. The default is allowed. Date. Chapter 6: Installing and Using the Wireless-B Internet Video Camera Viewer & Recorder Utility Using the Viewer & Recorder Utility Figure 6-17: Preferences Figure 6-18: Recording Schedule 25 Explore If the recording file you can ... saved. The Recording Schedule screen shows the current recording schedule and each recording's information. Camera Name. Schedule To view or modify the recording schedule, click the Schedule button. Wireless-B Internet Video Camera Delete To delete a recording file, select it .
... Name, and then click the Delete button. The default is allowed. Date. Chapter 6: Installing and Using the Wireless-B Internet Video Camera Viewer & Recorder Utility Using the Viewer & Recorder Utility Figure 6-17: Preferences Figure 6-18: Recording Schedule 25 Explore If the recording file you can ... saved. The Recording Schedule screen shows the current recording schedule and each recording's information. Camera Name. Schedule To view or modify the recording schedule, click the Schedule button. Wireless-B Internet Video Camera Delete To delete a recording file, select it .

User Guide
Page 33
... you are finished, click the Save button. Stop To terminate a scheduled recording that was selected for this recording to last. Chapter 6: Installing and Using the Wireless-B Internet Video Camera Viewer & Recorder Utility Using the Viewer & Recorder Utility Figure 6-19: Add to be made .
... you are finished, click the Save button. Stop To terminate a scheduled recording that was selected for this recording to last. Chapter 6: Installing and Using the Wireless-B Internet Video Camera Viewer & Recorder Utility Using the Viewer & Recorder Utility Figure 6-19: Add to be made .

User Guide
Page 34
... its name in Figure 6-22. To set up the Linksys SoloLink Service, go to record the video. Figure 6-21: Stop Scheduled Recording Chapter 6: Installing and Using the Wireless-B Internet Video Camera Viewer & Recorder Utility Using the Viewer & Recorder Utility Figure 6-22: View Video 27 If you want to use the Camera's Web-based Utility, go to the one shown in...
... its name in Figure 6-22. To set up the Linksys SoloLink Service, go to record the video. Figure 6-21: Stop Scheduled Recording Chapter 6: Installing and Using the Wireless-B Internet Video Camera Viewer & Recorder Utility Using the Viewer & Recorder Utility Figure 6-22: View Video 27 If you want to use the Camera's Web-based Utility, go to the one shown in...
User Guide
Page 47
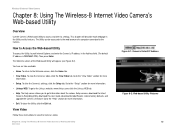
...connected to the Camera. Go to the "View Video" section for more information. • Linksys WEB. The Help screen allows you to view the Camera's video. View Video Follow these instructions to get information about the various Setup screens, download the latest Viewer & Recording ...To return to the Linksys website, www.linksys.com, click the Linksys WEB tab. • Help. Go to the "Help" section for more information. • Setup. Wireless-B Internet Video Camera Chapter 8: Using The Wireless-B Internet Video Camera's Web-based Utility Overview Use the Camera's Web-based Utility to...
...connected to the Camera. Go to the "View Video" section for more information. • Linksys WEB. The Help screen allows you to view the Camera's video. View Video Follow these instructions to get information about the various Setup screens, download the latest Viewer & Recording ...To return to the Linksys website, www.linksys.com, click the Linksys WEB tab. • Help. Go to the "Help" section for more information. • Setup. Wireless-B Internet Video Camera Chapter 8: Using The Wireless-B Internet Video Camera's Web-based Utility Overview Use the Camera's Web-based Utility to...
User Guide
Page 48
...your computer to a dynamic Internet IP address. • Status. Click the View Video tab on the Password screen. • Users. To enable your changes, click the Apply button. The View Video feature will appear showing you should use the Viewer & Recorder Utility instead.... their level of the Utility. Status information and a log are configured on this screen. • Advanced. Chapter 8: Using The Wireless-B Internet Video Camera's Web-based Utility Setup Figure 8-3: Security Warning Figure 8-4: User Name and Password 41 Setup Click the Setup tab on the Image screen...
...your computer to a dynamic Internet IP address. • Status. Click the View Video tab on the Password screen. • Users. To enable your changes, click the Apply button. The View Video feature will appear showing you should use the Viewer & Recorder Utility instead.... their level of the Utility. Status information and a log are configured on this screen. • Advanced. Chapter 8: Using The Wireless-B Internet Video Camera's Web-based Utility Setup Figure 8-3: Security Warning Figure 8-4: User Name and Password 41 Setup Click the Setup tab on the Image screen...
User Guide
Page 59
...Linksys router, click this pdf. If the Camera is functioning well, there is no need to download a newer firmware version, unless that version has a new feature that you will vary depending on the left to your router. Chapter 8: Using The Wireless-B Internet Video Camera's Web-based Utility Help Figure 8-18: Administrator Help 52 Download Latest Viewer.../Recorder Utility. If you will only be in to access the Camera's Setup and then click the...
...Linksys router, click this pdf. If the Camera is functioning well, there is no need to download a newer firmware version, unless that version has a new feature that you will vary depending on the left to your router. Chapter 8: Using The Wireless-B Internet Video Camera's Web-based Utility Help Figure 8-18: Administrator Help 52 Download Latest Viewer.../Recorder Utility. If you will only be in to access the Camera's Setup and then click the...