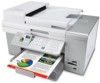
User's Guide
Page 7
... rings before receiving a fax automatically 135 Setting up to fax while behind a PBX ...136 Customizing fax settings...136 Customizing settings using the Fax Setup Utility 136 Setting up a fax footer ...138 Creating a fax cover page using the control panel 138 Creating a fax cover page using the ... supplies...147 Removing the printer from the Tray 2 base 147 Using genuine Lexmark print cartridges 148 Refilling a print cartridge...148 Recycling Lexmark products...148 Troubleshooting...149 Setup troubleshooting...149 Incorrect language appears on the display 149 Setting the date and time...
... rings before receiving a fax automatically 135 Setting up to fax while behind a PBX ...136 Customizing fax settings...136 Customizing settings using the Fax Setup Utility 136 Setting up a fax footer ...138 Creating a fax cover page using the control panel 138 Creating a fax cover page using the ... supplies...147 Removing the printer from the Tray 2 base 147 Using genuine Lexmark print cartridges 148 Refilling a print cartridge...148 Recycling Lexmark products...148 Troubleshooting...149 Setup troubleshooting...149 Incorrect language appears on the display 149 Setting the date and time...

User's Guide
Page 19
...8226; Portugal To connect your printer to an answering machine, telephone, or other telecommunications equipment, use this method to set up your printer for faxing when the printer is not connected to a computer or to a network. This method is highlighted. 7 Press . Spell out a name ...line adapter included in the box with each letter as a standalone fax machine. 1 Turn the printer on a telephone or cell phone. 11 Press to save the information and exit. The Fax Mode menu appears. 4 Press or repeatedly until the Fax Setup submenu is highlighted. 5 Press . 6 Press or repeatedly until...
...8226; Portugal To connect your printer to an answering machine, telephone, or other telecommunications equipment, use this method to set up your printer for faxing when the printer is not connected to a computer or to a network. This method is highlighted. 7 Press . Spell out a name ...line adapter included in the box with each letter as a standalone fax machine. 1 Turn the printer on a telephone or cell phone. 11 Press to save the information and exit. The Fax Mode menu appears. 4 Press or repeatedly until the Fax Setup submenu is highlighted. 5 Press . 6 Press or repeatedly until...
User's Guide
Page 51
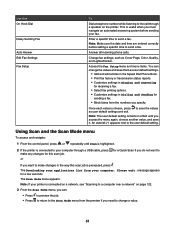
... Quick Scan if you do not want to If you want to make any changes for this On Hook Dial Delay Sending Fax Auto Answer Edit Fax Settings Fax Setup To Dial a telephone number while listening to the user default setting. Note: Make sure the date and time are entered ... or transmission status reports. • Customize settings in Ringing and Answering for receiving a fax. • Select fax printing options. • Customize settings in Dialing and Sending for a few seconds. Access the Fax Setup menu and menu items. You can : • Press to preview the job. • Press to return ...
... Quick Scan if you do not want to If you want to make any changes for this On Hook Dial Delay Sending Fax Auto Answer Edit Fax Settings Fax Setup To Dial a telephone number while listening to the user default setting. Note: Make sure the date and time are entered ... or transmission status reports. • Customize settings in Ringing and Answering for receiving a fax. • Select fax printing options. • Customize settings in Dialing and Sending for a few seconds. Access the Fax Setup menu and menu items. You can : • Press to preview the job. • Press to return ...

User's Guide
Page 67
...can Select where to 's • Contact information • Advanced • View the software version and copyright information • Display the Fax Printer Setup Utility Using the Solution Center The Solution Center provides help, as well as a multiple-page poster. • Share - Print an image... sizes. - Click Show More Printing Options to perform tasks with direct links to the Solution Center and the Fax Setup Utility. 1 Click Start ª Programs or All Programs ª Lexmark 9300 Series. 2 Select All-In-One Center. 3 Click Maintain/Troubleshoot. 4 Select from these topics: •...
...can Select where to 's • Contact information • Advanced • View the software version and copyright information • Display the Fax Printer Setup Utility Using the Solution Center The Solution Center provides help, as well as a multiple-page poster. • Share - Print an image... sizes. - Click Show More Printing Options to perform tasks with direct links to the Solution Center and the Fax Setup Utility. 1 Click Start ª Programs or All Programs ª Lexmark 9300 Series. 2 Select All-In-One Center. 3 Click Maintain/Troubleshoot. 4 Select from these topics: •...

User's Guide
Page 73
... several sample cover pages that you can choose from . For information on changing fax settings, see "Customizing settings using the Fax Setup Utility" on . Help Locate information on faxing, fax settings, and so on page 136. 5 After changing settings, click OK. 6 Close the Fax Solutions Software. 73 Tools • Access and use the Phonebook, so you...
... several sample cover pages that you can choose from . For information on changing fax settings, see "Customizing settings using the Fax Setup Utility" on . Help Locate information on faxing, fax settings, and so on page 136. 5 After changing settings, click OK. 6 Close the Fax Solutions Software. 73 Tools • Access and use the Phonebook, so you...

User's Guide
Page 125
... menu appears. 125 Use the scanner glass for multiple-page A4, letter, or legal size documents. Faxing Automatic Document Feeder (ADF) Scanner glass Use the Automatic Document Feeder (ADF) for single pages, small items (such as postcards or photos), transparencies, photo ..., or thin media (such as magazine clippings). Note: If you want to customize fax settings: • Using the control panel, see "Using Fax and the Fax Mode menu" on page 50. • Using the computer, see "Customizing settings using the Fax Setup Utility" on and it is connected to a working phone line. 2 From the...
... menu appears. 125 Use the scanner glass for multiple-page A4, letter, or legal size documents. Faxing Automatic Document Feeder (ADF) Scanner glass Use the Automatic Document Feeder (ADF) for single pages, small items (such as postcards or photos), transparencies, photo ..., or thin media (such as magazine clippings). Note: If you want to customize fax settings: • Using the control panel, see "Using Fax and the Fax Mode menu" on page 50. • Using the computer, see "Customizing settings using the Fax Setup Utility" on and it is connected to a working phone line. 2 From the...

User's Guide
Page 131
...is connected to a working phone line. 2 From the control panel, press or repeatedly until Fax is highlighted. 3 Press . The Fax Mode menu appears. 4 Press or repeatedly until the Fax Setup submenu is highlighted. 5 Press . 6 Press or repeatedly until the Ringing and Answering submenu is... printer is on and is connected to a working phone line. 2 From the control panel, press or repeatedly until Fax is highlighted. 3 Press . 4 Press or repeatedly until the Fax Setup submenu is highlighted. 5 Press . 6 Press or repeatedly until the Ringing and Answering submenu is highlighted. 7 Press ...
...is connected to a working phone line. 2 From the control panel, press or repeatedly until Fax is highlighted. 3 Press . The Fax Mode menu appears. 4 Press or repeatedly until the Fax Setup submenu is highlighted. 5 Press . 6 Press or repeatedly until the Ringing and Answering submenu is... printer is on and is connected to a working phone line. 2 From the control panel, press or repeatedly until Fax is highlighted. 3 Press . 4 Press or repeatedly until the Fax Setup submenu is highlighted. 5 Press . 6 Press or repeatedly until the Ringing and Answering submenu is highlighted. 7 Press ...

User's Guide
Page 132
... can print reports of report you want to forward the fax. 12 Press to On 1 From the control panel, press or repeatedly until Fax is highlighted. 2 Press . Setting Auto Answer to save and exit. The Fax Mode menu appears. 3 Press or repeatedly until the Fax Setup submenu is highlighted. 4 Press . 5 Press or repeatedly until the...
... can print reports of report you want to forward the fax. 12 Press to On 1 From the control panel, press or repeatedly until Fax is highlighted. 2 Press . Setting Auto Answer to save and exit. The Fax Mode menu appears. 3 Press or repeatedly until the Fax Setup submenu is highlighted. 4 Press . 5 Press or repeatedly until the...

User's Guide
Page 134
... up a dialing prefix You can include numbers, commas, and/or the symbols * or #. 1 From the control panel, press or repeatedly until Fax is highlighted. 2 Press . 3 Press or repeatedly until the Fax Setup submenu is highlighted. 4 Press . 5 Press or repeatedly until the Dialing and Sending submenu is available when Phone Book entries exist. 6 Press...
... up a dialing prefix You can include numbers, commas, and/or the symbols * or #. 1 From the control panel, press or repeatedly until Fax is highlighted. 2 Press . 3 Press or repeatedly until the Fax Setup submenu is highlighted. 4 Press . 5 Press or repeatedly until the Dialing and Sending submenu is available when Phone Book entries exist. 6 Press...

User's Guide
Page 135
...number of the display when Auto Answer is on. 2 From the control panel, press or repeatedly until Fax is highlighted. 3 Press . 4 Press or repeatedly until the Fax Setup submenu is highlighted. 5 Press . 6 Press or repeatedly until the Ringing and Answering submenu is detected,...you can program your printer to have a distinctive ring pattern and phone number for incoming faxes. 1 From the control panel, press or repeatedly until Fax is highlighted. 2 Press . 3 Press or repeatedly until the Fax Setup submenu is highlighted. 4 Press . 5 Press or repeatedly until the Ringing and Answering...
...number of the display when Auto Answer is on. 2 From the control panel, press or repeatedly until Fax is highlighted. 3 Press . 4 Press or repeatedly until the Fax Setup submenu is highlighted. 5 Press . 6 Press or repeatedly until the Ringing and Answering submenu is detected,...you can program your printer to have a distinctive ring pattern and phone number for incoming faxes. 1 From the control panel, press or repeatedly until Fax is highlighted. 2 Press . 3 Press or repeatedly until the Fax Setup submenu is highlighted. 4 Press . 5 Press or repeatedly until the Ringing and Answering...

User's Guide
Page 136
..., the printer waits to most fax machines. The Lexmark Fax Solutions Software screen appears. 4 Click Adjust speed dial list and other fax settings. These settings apply to the faxes you reach the Dial Method menu item. 8 Press or repeatedly until Behind PBX (Dial Tone Detect Off) appears. 9 ... However, this method of dialing may be connected to a Private Branch Exchange (PBX) telephone system. Customizing fax settings Customizing settings using the Fax Setup Utility You can adjust the fax settings in a business or office, it may not work if the PBX telephone system uses a dial tone...
..., the printer waits to most fax machines. The Lexmark Fax Solutions Software screen appears. 4 Click Adjust speed dial list and other fax settings. These settings apply to the faxes you reach the Dial Method menu item. 8 Press or repeatedly until Behind PBX (Dial Tone Detect Off) appears. 9 ... However, this method of dialing may be connected to a Private Branch Exchange (PBX) telephone system. Customizing fax settings Customizing settings using the Fax Setup Utility You can adjust the fax settings in a business or office, it may not work if the PBX telephone system uses a dial tone...

User's Guide
Page 138
... control panel 1 From the control panel, press or repeatedly until Fax is highlighted. 2 Press . 3 Press or repeatedly until the Edit Fax Settings submenu is highlighted. 6 Press . 7 Press or repeatedly until you finish customizing the settings. 7 Close the Fax Setup Utility. Tab Ringing and Answering Fax Printing / Reports Speed Dial Options • Select incoming call options...
... control panel 1 From the control panel, press or repeatedly until Fax is highlighted. 2 Press . 3 Press or repeatedly until the Edit Fax Settings submenu is highlighted. 6 Press . 7 Press or repeatedly until you finish customizing the settings. 7 Close the Fax Setup Utility. Tab Ringing and Answering Fax Printing / Reports Speed Dial Options • Select incoming call options...

User's Guide
Page 139
...Productivity Suite using one of the fax you finish creating the cover page. b Select Productivity Suite. 2 Click Fax. 3 Click Change fax settings.. Use this menu to save and exit. 139 Method 2 a Click Start ª Programs or All Programs ª Lexmark 9300 Series. 7 Press . ... 4 Click Yes. 5 Following the prompts on the computer screen, complete the screens named Step 1 through the Fax Setup Utility. 1 From the control panel, press or repeatedly until Setup is highlighted. 2 Press . 3 Press or repeatedly until the Change Printer Default Settings submenu is highlighted. 4 Press...
...Productivity Suite using one of the fax you finish creating the cover page. b Select Productivity Suite. 2 Click Fax. 3 Click Change fax settings.. Use this menu to save and exit. 139 Method 2 a Click Start ª Programs or All Programs ª Lexmark 9300 Series. 7 Press . ... 4 Click Yes. 5 Following the prompts on the computer screen, complete the screens named Step 1 through the Fax Setup Utility. 1 From the control panel, press or repeatedly until Setup is highlighted. 2 Press . 3 Press or repeatedly until the Change Printer Default Settings submenu is highlighted. 4 Press...

User's Guide
Page 140
.... i Use the keypad numbers to block: a From the control panel, press or repeatedly until Fax is highlighted. b Press . g Press or repeatedly until Fax is highlighted. c Press or repeatedly until the Fax Setup submenu is highlighted. f Press . g Press or repeatedly until the Fax Setup submenu is highlighted. d Press . k Use the keypad numbers to save and exit. 2 To...
.... i Use the keypad numbers to block: a From the control panel, press or repeatedly until Fax is highlighted. b Press . g Press or repeatedly until Fax is highlighted. c Press or repeatedly until the Fax Setup submenu is highlighted. f Press . g Press or repeatedly until the Fax Setup submenu is highlighted. d Press . k Use the keypad numbers to save and exit. 2 To...

User's Guide
Page 141
c Press or repeatedly until the Fax Blocking submenu is highlighted. f Press . Note: This feature is highlighted. d Press . h Press to print a list of blocked faxes: a From the control panel, press or repeatedly until On appears. e Press or repeatedly until the Fax Setup submenu is only available when blocked fax entries exist. 141 i Press to save and exit. 4 If you reach Print Blocked Fax List. g Press or repeatedly until you want to print the list. h Press or repeatedly until Fax is highlighted. b Press .
c Press or repeatedly until the Fax Blocking submenu is highlighted. f Press . Note: This feature is highlighted. d Press . h Press to print a list of blocked faxes: a From the control panel, press or repeatedly until On appears. e Press or repeatedly until the Fax Setup submenu is only available when blocked fax entries exist. 141 i Press to save and exit. 4 If you reach Print Blocked Fax List. g Press or repeatedly until you want to print the list. h Press or repeatedly until Fax is highlighted. b Press .

User's Guide
Page 164
... the telephone number manually. 164 Check the Dial Prefix setting 1 From the control panel, press or repeatedly until Fax is highlighted. 2 Press . 3 Press or repeatedly until the Fax Setup submenu is highlighted. 4 Press . 5 Press or repeatedly until the Dialing and Sending submenu is highlighted. 6 ... glass in the corner indicated by the arrows. Can receive but not send faxes Check mode selection To make sure Speed Dial has been programmed for faxing: 1 Press or repeatedly until the Fax Setup submenu is highlighted. 4 Press . 5 Press or highlighted. Check Speed Dial...
... the telephone number manually. 164 Check the Dial Prefix setting 1 From the control panel, press or repeatedly until Fax is highlighted. 2 Press . 3 Press or repeatedly until the Fax Setup submenu is highlighted. 4 Press . 5 Press or repeatedly until the Dialing and Sending submenu is highlighted. 6 ... glass in the corner indicated by the arrows. Can receive but not send faxes Check mode selection To make sure Speed Dial has been programmed for faxing: 1 Press or repeatedly until the Fax Setup submenu is highlighted. 4 Press . 5 Press or highlighted. Check Speed Dial...
User's Guide
Page 165
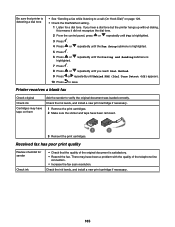
...Check that printer is detecting a dial tone • See "Sending a fax while listening to a call (On Hook Dial)" on them Ask the sender to save. If you reach Dial Method. 9 Press or repeatedly until the Fax Setup submenu is highlighted. 5 Press . 6 Press or highlighted. There may ...have been removed. 1 2 3 Reinsert the print cartridges. Printer receives a blank fax Check original Check ink Cartridges may have been a problem with the...
...Check that printer is detecting a dial tone • See "Sending a fax while listening to a call (On Hook Dial)" on them Ask the sender to save. If you reach Dial Method. 9 Press or repeatedly until the Fax Setup submenu is highlighted. 5 Press . 6 Press or highlighted. There may ...have been removed. 1 2 3 Reinsert the print cartridges. Printer receives a blank fax Check original Check ink Cartridges may have been a problem with the...

User's Guide
Page 166
...Notes: • The lower the transmission speed, the longer it will take your fax to print. • This solution will reduce the speed for the printer to resend the fax at successively lower transmission speeds. Note: 2400 bps is not displayed Caller ID pattern... ID information is the lowest transmission speed. Decrease the transmission speed 1 From the control panel, press or repeatedly until Fax is highlighted. 2 Press . 3 Press or repeatedly until the Fax Setup submenu is highlighted. 4 Press . 5 Press or repeatedly until the Dialing and Sending submenu is highlighted. 6 Press ...
...Notes: • The lower the transmission speed, the longer it will take your fax to print. • This solution will reduce the speed for the printer to resend the fax at successively lower transmission speeds. Note: 2400 bps is not displayed Caller ID pattern... ID information is the lowest transmission speed. Decrease the transmission speed 1 From the control panel, press or repeatedly until Fax is highlighted. 2 Press . 3 Press or repeatedly until the Fax Setup submenu is highlighted. 4 Press . 5 Press or repeatedly until the Dialing and Sending submenu is highlighted. 6 Press ...

User's Guide
Page 181
...From the control panel, press or repeatedly until Dialing and Sending is highlighted. 3 Press . If you want to send a fax to Connect Fax Error Solution Resend the fax. Resend the fax. The fax machines have been a problem with the quality of the telephone line connection. 181 There may have been a problem with the... 1 Listen for Dial Method is highlighted. 9 Choose your dialing method. 10 Press . The Dialing and Sending menu appears. 8 Press or repeatedly until Fax Setup is working correctly. Error message Failed to make sure that the printer is finished before sending the...
...From the control panel, press or repeatedly until Dialing and Sending is highlighted. 3 Press . If you want to send a fax to Connect Fax Error Solution Resend the fax. Resend the fax. The fax machines have been a problem with the quality of the telephone line connection. 181 There may have been a problem with the... 1 Listen for Dial Method is highlighted. 9 Choose your dialing method. 10 Press . The Dialing and Sending menu appears. 8 Press or repeatedly until Fax Setup is working correctly. Error message Failed to make sure that the printer is finished before sending the...

User's Guide
Page 182
... not recognize the dial tone. 2 From the control panel, press or repeatedly until the option for a dial tone. The Fax Mode menu appears. 4 Press or repeatedly until Dialing and Sending is highlighted. 3 Press . The Dialing and Sending menu appears. 8 ...Press or repeatedly until Fax is 7 Press . Error message No Answer Solution Resend the fax. There may have been a problem with the quality of the telephone line connection. repeatedly until Fax Setup is highlighted. 9 Choose your dialing method. 10 Press . 182 ...
... not recognize the dial tone. 2 From the control panel, press or repeatedly until the option for a dial tone. The Fax Mode menu appears. 4 Press or repeatedly until Dialing and Sending is highlighted. 3 Press . The Dialing and Sending menu appears. 8 ...Press or repeatedly until Fax is 7 Press . Error message No Answer Solution Resend the fax. There may have been a problem with the quality of the telephone line connection. repeatedly until Fax Setup is highlighted. 9 Choose your dialing method. 10 Press . 182 ...


