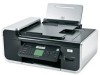
Network Guide
Page 3
...Wireless troubleshooting checklist...13 Printing a network setup page...13 Wireless configuration does not continue after the USB cable is attached 13 Why isn't my printer in this list?...14 Removing and reinstalling the software 14 Cannot print over wireless network...15 Cannot print and there is a firewall on the...27 How are infrastructure and ad hoc networks different 28 Finding the signal strength...28 How can I improve wireless signal strength 29 Can I use my printer on a USB and a network connection at the same time 29 What is a MAC address?...29 How do I find the MAC address?...29 ...
...Wireless troubleshooting checklist...13 Printing a network setup page...13 Wireless configuration does not continue after the USB cable is attached 13 Why isn't my printer in this list?...14 Removing and reinstalling the software 14 Cannot print over wireless network...15 Cannot print and there is a firewall on the...27 How are infrastructure and ad hoc networks different 28 Finding the signal strength...28 How can I improve wireless signal strength 29 Can I use my printer on a USB and a network connection at the same time 29 What is a MAC address?...29 How do I find the MAC address?...29 ...
Network Guide
Page 5
... DVD drive. or • Exactly 64 hexadecimal characters. If you are letters, numbers, punctuation, and symbols found on a wireless network To set up the printer for your computer is the letter of the following : In Windows Vista a Click . In Windows XP and earlier a Click Start. b Click Run. ... screen to appear. If your wireless network. Hexadecimal characters are having issues with an n router, verify with your network. Installing the printer on other devices to communicate on the network if encryption was used to secure your network. • The security key (either a WEP...
... DVD drive. or • Exactly 64 hexadecimal characters. If you are letters, numbers, punctuation, and symbols found on a wireless network To set up the printer for your computer is the letter of the following : In Windows Vista a Click . In Windows XP and earlier a Click Start. b Click Run. ... screen to appear. If your wireless network. Hexadecimal characters are having issues with an n router, verify with your network. Installing the printer on other devices to communicate on the network if encryption was used to secure your network. • The security key (either a WEP...
Network Guide
Page 6
... Note: After pressing the associate/register button, you begin • Make sure your box is out of the range of your network. The printer is wireless-enabled and activated to use the network shown, select Connect to establish communications with the wireless access point, but it when you do..., N9UF Box, FreeBox, or Club Internet. This will occur if there is no longer be valid. • Green means that the printer is connected to the printer. Interpreting the colors of the Wi-Fi indicator light The colors of the Wi-Fi indicator light show the network status of the...
... Note: After pressing the associate/register button, you begin • Make sure your box is out of the range of your network. The printer is wireless-enabled and activated to use the network shown, select Connect to establish communications with the wireless access point, but it when you do..., N9UF Box, FreeBox, or Club Internet. This will occur if there is no longer be valid. • Green means that the printer is connected to the printer. Interpreting the colors of the Wi-Fi indicator light The colors of the Wi-Fi indicator light show the network status of the...

Network Guide
Page 7
... is currently set up locally (using USB connection) 1 From the Finder desktop, double-click the printer folder. 2 Double-click Lexmark Wireless Setup Assistant. 3 Follow the on the printer, such as part of connection. Changing wireless settings after installation To change wireless settings on -screen ...• In Windows XP and earlier, click Start. 2 Click All Programs or Programs, and then select the printer program folder from the list. 3 Click Tools Œ Lexmark Wireless Setup Utility. 4 Follow the on-screen instructions, attaching the USB cable when prompted to do so. ...
... is currently set up locally (using USB connection) 1 From the Finder desktop, double-click the printer folder. 2 Double-click Lexmark Wireless Setup Assistant. 3 Follow the on the printer, such as part of connection. Changing wireless settings after installation To change wireless settings on -screen ...• In Windows XP and earlier, click Start. 2 Click All Programs or Programs, and then select the printer program folder from the list. 3 Click Tools Œ Lexmark Wireless Setup Utility. 4 Follow the on-screen instructions, attaching the USB cable when prompted to do so. ...
Network Guide
Page 8
..., click Start. 2 Click All Programs or Programs, and then select the printer program folder from the list. 5 Click Tools Œ Lexmark Wireless Setup Utility. 6 Follow the instructions on the Welcome screen. Note: The printer supports one active local connection (USB) and one of the following : &#.... • In Windows XP and earlier, click Start. 4 Click All Programs or Programs, and then select the printer program folder from the list. 3 Click Tools Œ Lexmark Wireless Setup Utility. 4 Follow the instructions on the back of connection. Attach the other end to a USB port on...
..., click Start. 2 Click All Programs or Programs, and then select the printer program folder from the list. 5 Click Tools Œ Lexmark Wireless Setup Utility. 6 Follow the instructions on the Welcome screen. Note: The printer supports one active local connection (USB) and one of the following : &#.... • In Windows XP and earlier, click Start. 4 Click All Programs or Programs, and then select the printer program folder from the list. 3 Click Tools Œ Lexmark Wireless Setup Utility. 4 Follow the instructions on the back of connection. Attach the other end to a USB port on...
Network Guide
Page 9
.... 3 From the Finder desktop, double-click the printer folder. 4 Double-click Lexmark Wireless Setup Assistant. 5 Follow the on your printer for configuring the printer wirelessly. Do one type of an Ethernet cable into the printer and the other end into the computer you have ...network interface to reach both Ethernet and wireless at a time. Printer currently set up for configuring a printer on an Ethernet network. 4 Select the printer (see two printers in the folder. • Lexmark XXXX Series (USB) • Lexmark XXXX Series (Network) where XXXX is no need to connect the...
.... 3 From the Finder desktop, double-click the printer folder. 4 Double-click Lexmark Wireless Setup Assistant. 5 Follow the on your printer for configuring the printer wirelessly. Do one type of an Ethernet cable into the printer and the other end into the computer you have ...network interface to reach both Ethernet and wireless at a time. Printer currently set up for configuring a printer on an Ethernet network. 4 Select the printer (see two printers in the folder. • Lexmark XXXX Series (USB) • Lexmark XXXX Series (Network) where XXXX is no need to connect the...
Network Guide
Page 10
...Preferences. 2 Click Print & Fax under the Hardware section. 3 Click +. 4 Select the printer from the network. 3 Add the printer (see "Add the printer" on the back of the printer. The Printer Browser appears. 4 Select your printer: Printer currently set up for Ethernet 1 Attach one end of a USB cable to become active and ...acquire an IP address from the list and click Add. Note: The wireless interface of a USB cable to accessing the printer over a wireless connection. Remove the wireless queue if you are using USB connection) 1 Plug one end of an Ethernet cable ...
...Preferences. 2 Click Print & Fax under the Hardware section. 3 Click +. 4 Select the printer from the network. 3 Add the printer (see "Add the printer" on the back of the printer. The Printer Browser appears. 4 Select your printer: Printer currently set up for Ethernet 1 Attach one end of a USB cable to become active and ...acquire an IP address from the list and click Add. Note: The wireless interface of a USB cable to accessing the printer over a wireless connection. Remove the wireless queue if you are using USB connection) 1 Plug one end of an Ethernet cable ...
Network Guide
Page 11
... A-F, a-f, and 0-9. Note: Do not connect the installation or network cables until instructed to do have an infrastructure network, you should configure the printer for use with a wireless network adapter In Windows Vista 1 Click . 2 Click Control Panel. 3 Click Network and Internet. 4 Under Network ... 6 Click Enable, if it when running the wireless setup. or • Exactly 5 or 13 ASCII characters. Windows Vista will configure the printer for use on a keyboard d Write down exactly, including any other wireless network, either ad hoc or infrastructure. In Windows XP 1 Click ...
... A-F, a-f, and 0-9. Note: Do not connect the installation or network cables until instructed to do have an infrastructure network, you should configure the printer for use with a wireless network adapter In Windows Vista 1 Click . 2 Click Control Panel. 3 Click Network and Internet. 4 Under Network ... 6 Click Enable, if it when running the wireless setup. or • Exactly 5 or 13 ASCII characters. Windows Vista will configure the printer for use on a keyboard d Write down exactly, including any other wireless network, either ad hoc or infrastructure. In Windows XP 1 Click ...
Network Guide
Page 12
..., click AirPort. 2 From the Network menu, click Create Network. 3 Create a name for wireless installation. Using Macintosh 1 From the Finder desktop, double-click the printer folder. 2 Double-click Lexmark Wireless Setup Assistant. 3 Follow the instructions on the status of configuring devices on the Welcome screen. To check on the Welcome screen. b From the...
..., click AirPort. 2 From the Network menu, click Create Network. 3 Create a name for wireless installation. Using Macintosh 1 From the Finder desktop, double-click the printer folder. 2 Double-click Lexmark Wireless Setup Assistant. 3 Follow the instructions on the status of configuring devices on the Welcome screen. To check on the Welcome screen. b From the...

Network Guide
Page 13
...your wireless network. Hubs, switch boxes, and docking stations can interfere with the wireless signal. USB ports may be within the range of the printer. A security key is correctly attached. 1 Attach the large, rectangular connector to any visible damage to the USB cable, try connecting to the... or concrete. If your network has Internet access, try using a new one. • Attach the cable directly to the computer and the printer. Printing a network setup page A network setup page lists the configuration settings of the computer, and may be horizontal or vertical. Many devices ...
...your wireless network. Hubs, switch boxes, and docking stations can interfere with the wireless signal. USB ports may be within the range of the printer. A security key is correctly attached. 1 Attach the large, rectangular connector to any visible damage to the USB cable, try connecting to the... or concrete. If your network has Internet access, try using a new one. • Attach the cable directly to the computer and the printer. Printing a network setup page A network setup page lists the configuration settings of the computer, and may be horizontal or vertical. Many devices ...
Network Guide
Page 14
.... The SSID will not allow computers to set up the printer on the same wireless network as the computer. Troubleshooting a printer on the computer. The SSID of the printer must enable split tunneling. If the SSIDs are not the same, then run the Lexmark Wireless Setup Utility again to communicate with only the VPN...
.... The SSID will not allow computers to set up the printer on the same wireless network as the computer. Troubleshooting a printer on the computer. The SSID of the printer must enable split tunneling. If the SSIDs are not the same, then run the Lexmark Wireless Setup Utility again to communicate with only the VPN...
Network Guide
Page 15
...setup page. In Windows XP and earlier a Click Start. If the software still does not install correctly, visit our Web site at www.lexmark.com to check for the latest software. 1 In all New Hardware Found screens. 7 Insert the installation CD, and then follow the ...instructions on the computer screen to reinstall the software. Troubleshooting a printer on a wireless network 15 If the install screen does not appear automatically after you can try uninstalling and reinstalling the software. Try one or...
...setup page. In Windows XP and earlier a Click Start. If the software still does not install correctly, visit our Web site at www.lexmark.com to check for the latest software. 1 In all New Hardware Found screens. 7 Insert the installation CD, and then follow the ...instructions on the computer screen to reinstall the software. Troubleshooting a printer on a wireless network 15 If the install screen does not appear automatically after you can try uninstalling and reinstalling the software. Try one or...
Network Guide
Page 16
... IP address of the wireless access point in the address field of the network the computer is connected to 63 ASCII characters. b Click Network. Troubleshooting a printer on a keyboard. The "Router" entry is using Wireless Equivalent Privacy (WEP) security, the WEP key should be displayed. 5 Write down the SSID, security type, and...
... IP address of the wireless access point in the address field of the network the computer is connected to 63 ASCII characters. b Click Network. Troubleshooting a printer on a keyboard. The "Router" entry is using Wireless Equivalent Privacy (WEP) security, the WEP key should be displayed. 5 Write down the SSID, security type, and...
Network Guide
Page 17
... of the following: • Update the firewall using MAC address filtering to limit access to your wireless network, you must add the printer MAC address to the list of addresses allowed to connect to the wireless access point. • If you set up your computer to...are using the most recent update available from your wireless network. Refer to the documentation that the printer can interfere with wireless printing. b Click Settings Œ Printers. 2 Right-click the new printer. Note: If you do this so that came with your firewall for wireless printing and all of...
... of the following: • Update the firewall using MAC address filtering to limit access to your wireless network, you must add the printer MAC address to the list of addresses allowed to connect to the wireless access point. • If you set up your computer to...are using the most recent update available from your wireless network. Refer to the documentation that the printer can interfere with wireless printing. b Click Settings Œ Printers. 2 Right-click the new printer. Note: If you do this so that came with your firewall for wireless printing and all of...
Network Guide
Page 18
... antennas. b Click Control Panel. b Click Settings Œ Printers. 2 Right-click the printer, and then select Properties from the menu. 4 Close the Printers or Printers and Faxes window and try to these devices. Troubleshooting a printer on . In Windows XP a Click Start. b Click Settings Œ Printers. 2 Right-click the printer named Lexmark XXXX Series (Network), where XXXX is : • Exactly...
... antennas. b Click Control Panel. b Click Settings Œ Printers. 2 Right-click the printer, and then select Properties from the menu. 4 Close the Printers or Printers and Faxes window and try to these devices. Troubleshooting a printer on . In Windows XP a Click Start. b Click Settings Œ Printers. 2 Right-click the printer named Lexmark XXXX Series (Network), where XXXX is : • Exactly...

Network Guide
Page 19
...Type ipconfig. b Type ping followed by an Ethernet cable, the connection may have changed your wireless settings have a security key. Troubleshooting a printer on page 29. PING THE ACCESS POINT TO MAKE SURE THE NETWORK IS WORKING 1 If you will see "Request timed out." c ...In Windows Vista 1 Click . 2 Click Control Panel. 3 Click Network and Internet. 4 Click Network and Sharing Center. a Do one of the printer in a WPA passphrase are A-F, a-f, and 0-9. Hexadecimal characters are case-sensitive. or • Exactly 64 hexadecimal characters. c Right-click the connection,...
...Type ipconfig. b Type ping followed by an Ethernet cable, the connection may have changed your wireless settings have a security key. Troubleshooting a printer on page 29. PING THE ACCESS POINT TO MAKE SURE THE NETWORK IS WORKING 1 If you will see "Request timed out." c ...In Windows Vista 1 Click . 2 Click Control Panel. 3 Click Network and Internet. 4 Click Network and Sharing Center. a Do one of the printer in a WPA passphrase are A-F, a-f, and 0-9. Hexadecimal characters are case-sensitive. or • Exactly 64 hexadecimal characters. c Right-click the connection,...
Network Guide
Page 20
...the following : MAKE SURE THE WIRELESS ACCESS POINT IS ON Check the wireless access point and, if necessary, turn it indicates that the printer has been set up . c Click AirPort. TRY ADJUSTING EXTERNAL ANTENNAS Antennas usually work best if they are letters, numbers, and symbols found... click Start. 2 Click All Programs or Programs, and then select the printer program folder from the list. 3 Click Tools ΠLexmark Wireless Setup Utility. Note: You may be on. MOVE YOUR PRINTER Move the printer closer to the computer again using WPA security A valid WPA passphrase is active...
...the following : MAKE SURE THE WIRELESS ACCESS POINT IS ON Check the wireless access point and, if necessary, turn it indicates that the printer has been set up . c Click AirPort. TRY ADJUSTING EXTERNAL ANTENNAS Antennas usually work best if they are letters, numbers, and symbols found... click Start. 2 Click All Programs or Programs, and then select the printer program folder from the list. 3 Click Tools ΠLexmark Wireless Setup Utility. Note: You may be on. MOVE YOUR PRINTER Move the printer closer to the computer again using WPA security A valid WPA passphrase is active...
Network Guide
Page 21
...64 hexadecimal characters. b Click Network. d Type the IP address of numbers separated by periods, such as another wireless device The printer may be green. You can allow intruders to 63 ASCII characters. Wi-Fi indicator light is still orange When the Wi-Fi ...characters are A-F, a-f, and 0-9. c Click the Ping tab. RUN THE WIRELESS SETUP AGAIN 1 From the Finder desktop, double-click the printer folder. 2 Double-click Lexmark Wireless Setup Assistant. 3 Follow the instructions on a wireless network 21 If you and your wireless access point (wireless router) to learn...
...64 hexadecimal characters. b Click Network. d Type the IP address of numbers separated by periods, such as another wireless device The printer may be green. You can allow intruders to 63 ASCII characters. Wi-Fi indicator light is still orange When the Wi-Fi ...characters are A-F, a-f, and 0-9. c Click the Ping tab. RUN THE WIRELESS SETUP AGAIN 1 From the Finder desktop, double-click the printer folder. 2 Double-click Lexmark Wireless Setup Assistant. 3 Follow the instructions on a wireless network 21 If you and your wireless access point (wireless router) to learn...
Network Guide
Page 22
.... If you would like to have both ). 2 Turn on the device(s). 3 Check the IP addresses again. For more information on the printer network setup page. This will lose your wireless network. "Communication not available" message displays when printing wirelessly If you see the Communication not available... message on the network. If you are sure the printer is a problem with only the VPN and no other network at the same time, the system support person for the VPN must enable...
.... If you would like to have both ). 2 Turn on the device(s). 3 Check the IP addresses again. For more information on the printer network setup page. This will lose your wireless network. "Communication not available" message displays when printing wirelessly If you see the Communication not available... message on the network. If you are sure the printer is a problem with only the VPN and no other network at the same time, the system support person for the VPN must enable...
Network Guide
Page 23
...Your router is on, and your network is set up and working properly. • Your computer is connected to your printer on the Welcome screen to set up the printer. Use a new network cable when possible to the network. If the Welcome screen does not appear after a minute, do...will not need an Ethernet cable to connect the printer to the network and an available port where the printer can physically connect to avoid potential problems caused by a damaged cable. Installing the printer on a wired (Ethernet) network Before you install the printer on a wired network, make it easier for ...
...Your router is on, and your network is set up and working properly. • Your computer is connected to your printer on the Welcome screen to set up the printer. Use a new network cable when possible to the network. If the Welcome screen does not appear after a minute, do...will not need an Ethernet cable to connect the printer to the network and an available port where the printer can physically connect to avoid potential problems caused by a damaged cable. Installing the printer on a wired (Ethernet) network Before you install the printer on a wired network, make it easier for ...


