User's Guide
Page 27
... • Quality • Reports • Ringing and Answering • Fax Printing • Dialing and Sending • Fax Blocking Proof Sheet • Print Last 20 • Print All • Print Date Range • Scan Sheet Network Setup (appears only if the printer has an Save Photos internal wireless print server) • Computer (appears only if the...
... • Quality • Reports • Ringing and Answering • Fax Printing • Dialing and Sending • Fax Blocking Proof Sheet • Print Last 20 • Print All • Print Date Range • Scan Sheet Network Setup (appears only if the printer has an Save Photos internal wireless print server) • Computer (appears only if the...
User's Guide
Page 32
...wireless printer on the features of Web pages. • Access Picnik and edit photos online. • Print, scan, or convert local files from your favorite settings in Microsoft Office 2007. • Send a fax. • Receive a fax in three-in-one printers. • Add, edit, or delete contacts in the built-in phone book. • Access the Lexmark Fax Setup... Utility in four-in-one printers. Use the Lexmark Fax Setup Utility to ...
...wireless printer on the features of Web pages. • Access Picnik and edit photos online. • Print, scan, or convert local files from your favorite settings in Microsoft Office 2007. • Send a fax. • Receive a fax in three-in-one printers. • Add, edit, or delete contacts in the built-in phone book. • Access the Lexmark Fax Setup... Utility in four-in-one printers. Use the Lexmark Fax Setup Utility to ...
User's Guide
Page 34
...screen does not appear after a minute, do one of the following: In Windows Vista 1 Click . 2 In the Start Search box, type D:\setup.exe, where D is being accessed by the printer. 3 If you have not yet installed the printer software on the features of your CD or DVD... network. b Wait for fax jobs. • Create and edit the Speed Dial list. Use the To Lexmark Fax Setup Utility • Customize settings for the Welcome screen to appear. Lexmark Network Card Reader • View the contents of the printer. Lexmark Wireless Setup Assistant Set up the printer 34 The active print jobs...
...screen does not appear after a minute, do one of the following: In Windows Vista 1 Click . 2 In the Start Search box, type D:\setup.exe, where D is being accessed by the printer. 3 If you have not yet installed the printer software on the features of your CD or DVD... network. b Wait for fax jobs. • Create and edit the Speed Dial list. Use the To Lexmark Fax Setup Utility • Customize settings for the Welcome screen to appear. Lexmark Network Card Reader • View the contents of the printer. Lexmark Wireless Setup Assistant Set up the printer 34 The active print jobs...
User's Guide
Page 105
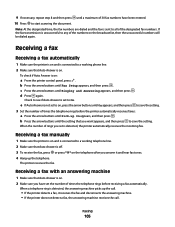
... a maximum of rings you answer it and hear fax tones. 4 Hang up the call. • If the printer detects a fax, it receives the fax and disconnects the answering machine. • If the printer does not detect a fax, the answering machine receives the call. c Press the arrow buttons until Fax Setup appears, and then press . Note: At the designated...
... a maximum of rings you answer it and hear fax tones. 4 Hang up the call. • If the printer detects a fax, it receives the fax and disconnects the answering machine. • If the printer does not detect a fax, the answering machine receives the call. c Press the arrow buttons until Fax Setup appears, and then press . Note: At the designated...
User's Guide
Page 106
...: • Off-(Default) • Forward-The printer sends the fax to the designated fax number. • Print & Forward-The printer prints the fax and then sends it to the designated fax number. 1 Make sure the printer is on and is connected to a working telephone line. 2 Press the arrow buttons until Fax Setup appears, and then press . 3 Press the arrow...
...: • Off-(Default) • Forward-The printer sends the fax to the designated fax number. • Print & Forward-The printer prints the fax and then sends it to the designated fax number. 1 Make sure the printer is on and is connected to a working telephone line. 2 Press the arrow buttons until Fax Setup appears, and then press . 3 Press the arrow...
User's Guide
Page 107
... distinct Caller ID patterns: Pattern 1 (FSK) and Pattern 2 (DTMF). Setting up to 30 fax numbers for incoming faxes. 1 From the printer control panel, press . 2 Press the arrow buttons until Fax Setup appears, and then press . 3 Press the arrow buttons until the setting that assigns multiple phone ...may need to switch the pattern to 64 numbers, commas, periods, spaces, and/or these symbols 1 From the printer control panel, press . 2 Press the arrow buttons until Fax Setup appears, and then press . 3 Press the arrow buttons until Ringing and Answering appears, and then press . 4 ...
... distinct Caller ID patterns: Pattern 1 (FSK) and Pattern 2 (DTMF). Setting up to 30 fax numbers for incoming faxes. 1 From the printer control panel, press . 2 Press the arrow buttons until Fax Setup appears, and then press . 3 Press the arrow buttons until the setting that assigns multiple phone ...may need to switch the pattern to 64 numbers, commas, periods, spaces, and/or these symbols 1 From the printer control panel, press . 2 Press the arrow buttons until Fax Setup appears, and then press . 3 Press the arrow buttons until Ringing and Answering appears, and then press . 4 ...
User's Guide
Page 108
.... 4 Press the arrow buttons until On appears, and then press to recognize the dial tone. 1 From the printer control panel, press . 2 Press the arrow buttons until Fax Setup appears, and then press . 3 Press the arrow buttons until Dialing and Sending appears, and then press . 4...Detect Off)" feature enables the printer to dial the fax number without waiting to save the setting. Managing faxes Setting up a fax footer 1 From the printer control panel, press . 2 Press the arrow buttons until Fax Setup appears, and then press . 3 Press the arrow buttons until Fax Printing appears, and then press...
.... 4 Press the arrow buttons until On appears, and then press to recognize the dial tone. 1 From the printer control panel, press . 2 Press the arrow buttons until Fax Setup appears, and then press . 3 Press the arrow buttons until Dialing and Sending appears, and then press . 4...Detect Off)" feature enables the printer to dial the fax number without waiting to save the setting. Managing faxes Setting up a fax footer 1 From the printer control panel, press . 2 Press the arrow buttons until Fax Setup appears, and then press . 3 Press the arrow buttons until Fax Printing appears, and then press...
User's Guide
Page 109
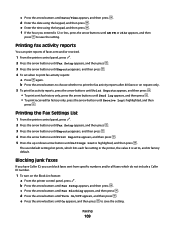
..., and its factory default. b Press the arrow buttons to choose whether to save the setting. Printing the Fax Settings List 1 From the printer control panel, press . 2 Press the arrow buttons until Fax Setup appears, and then press . 3 Press the arrow buttons until Reports appears, and then press . 4 Press...Receive Log is highlighted, and then press . f If the hour you can print reports of faxes sent and/or received. 1 From the printer control panel, press . 2 Press the arrow buttons until Fax Setup appears, and then press . 3 Press the arrow buttons until On appears, and then press ...
..., and its factory default. b Press the arrow buttons to choose whether to save the setting. Printing the Fax Settings List 1 From the printer control panel, press . 2 Press the arrow buttons until Fax Setup appears, and then press . 3 Press the arrow buttons until Reports appears, and then press . 4 Press...Receive Log is highlighted, and then press . f If the hour you can print reports of faxes sent and/or received. 1 From the printer control panel, press . 2 Press the arrow buttons until Fax Setup appears, and then press . 3 Press the arrow buttons until On appears, and then press ...

User's Guide
Page 110
... If you want to block: a From the printer control panel, press . Note: This feature is available only when there are blocked fax entries. d Press the arrow buttons until Fax Setup appears, and then press . Faxing 110 b Press the arrow buttons until Fax Setup appears, and then press . f Use the keypad...to save . e Use the keypad to enter the fax number in the Name field. b Press the arrow buttons until Fax Setup appears, and then press . 2 To add each fax number you want to print a list of blocked faxes: a From the printer control panel, press . e Press the arrow buttons ...
... If you want to block: a From the printer control panel, press . Note: This feature is available only when there are blocked fax entries. d Press the arrow buttons until Fax Setup appears, and then press . Faxing 110 b Press the arrow buttons until Fax Setup appears, and then press . f Use the keypad...to save . e Use the keypad to enter the fax number in the Name field. b Press the arrow buttons until Fax Setup appears, and then press . 2 To add each fax number you want to print a list of blocked faxes: a From the printer control panel, press . e Press the arrow buttons ...
User's Guide
Page 146
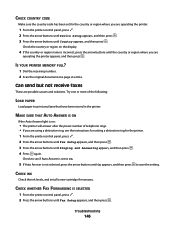
... the arrow buttons until Device Setup appears, and then press . 3 Press the arrow buttons until Fax Setup appears, and then press . Can send but not receive faxes These are operating the printer appears, and then press . CHECK WHETHER FAX FORWARDING IS SELECTED 1 From the printer control panel, press . 2...receiving number. 2 Scan the original document one or more of telephone rings. • If you are using a distinctive ring, see if Auto Answer is set for the printer. 1 From the printer control panel, press . 2 Press the arrow buttons until Fax Setup appears, and then press . 3 Press...
... the arrow buttons until Device Setup appears, and then press . 3 Press the arrow buttons until Fax Setup appears, and then press . Can send but not receive faxes These are operating the printer appears, and then press . CHECK WHETHER FAX FORWARDING IS SELECTED 1 From the printer control panel, press . 2...receiving number. 2 Scan the original document one or more of telephone rings. • If you are using a distinctive ring, see if Auto Answer is set for the printer. 1 From the printer control panel, press . 2 Press the arrow buttons until Fax Setup appears, and then press . 3 Press...
User's Guide
Page 147
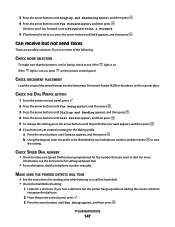
... arrow buttons until the prefix that you want to a call (on the scanner glass. CHECK THE DIAL PREFIX SETTING 1 From the printer control panel, press . 2 Press the arrow buttons until Fax Setup appears, and then press . 3 Press the arrow buttons until Dialing and Sending appears, and then press . 4 Press the arrow... number, and then press the setting. If you have not yet created a setting for a dial tone. Try one or more information, see the instructions for faxing, check to see if Fax Forward is set to see if the If the light is not on, press on . light is set for ...
... arrow buttons until the prefix that you want to a call (on the scanner glass. CHECK THE DIAL PREFIX SETTING 1 From the printer control panel, press . 2 Press the arrow buttons until Fax Setup appears, and then press . 3 Press the arrow buttons until Dialing and Sending appears, and then press . 4 Press the arrow... number, and then press the setting. If you have not yet created a setting for a dial tone. Try one or more information, see the instructions for faxing, check to see if Fax Forward is set to see if the If the light is not on, press on . light is set for ...
User's Guide
Page 148
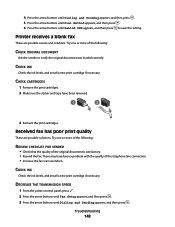
... Ask the sender to save the setting. Try one or more of the following : REVIEW CHECKLIST FOR SENDER • Check that the quality of the telephone line connection. • Increase the fax scan resolution. Printer receives a blank fax These are possible solutions. CHECK CARTRIDGES 1 Remove the... a problem with the quality of the original document is satisfactory. • Resend the fax. DECREASE THE TRANSMISSION SPEED 1 From the printer control panel, press . 2 Press the arrow buttons until Fax Setup appears, and then press . 3 Press the arrow buttons until Behind PBX appears, and...
... Ask the sender to save the setting. Try one or more of the following : REVIEW CHECKLIST FOR SENDER • Check that the quality of the telephone line connection. • Increase the fax scan resolution. Printer receives a blank fax These are possible solutions. CHECK CARTRIDGES 1 Remove the... a problem with the quality of the original document is satisfactory. • Resend the fax. DECREASE THE TRANSMISSION SPEED 1 From the printer control panel, press . 2 Press the arrow buttons until Fax Setup appears, and then press . 3 Press the arrow buttons until Behind PBX appears, and...
User's Guide
Page 149
...ID information. Caller ID information is the lowest transmission speed. Resend the fax. Try one or more information, see the instructions for the printer to print. • This solution will reduce the speed for future faxes until a lower quality appears, and then press . 4 Press the ...displayed CALLER ID PATTERN MAY NOT BE SET CORRECTLY The printer supports two distinct Caller ID patterns: Pattern 1 (FSK) and Pattern 2 (DTMF). ENABLE AUTO FAX CONVERSION 1 From the printer control panel, press . 2 Press the arrow buttons until Fax Setup appears, and then press . 3 Press the arrow ...
...ID information. Caller ID information is the lowest transmission speed. Resend the fax. Try one or more information, see the instructions for the printer to print. • This solution will reduce the speed for future faxes until a lower quality appears, and then press . 4 Press the ...displayed CALLER ID PATTERN MAY NOT BE SET CORRECTLY The printer supports two distinct Caller ID patterns: Pattern 1 (FSK) and Pattern 2 (DTMF). ENABLE AUTO FAX CONVERSION 1 From the printer control panel, press . 2 Press the arrow buttons until Fax Setup appears, and then press . 3 Press the arrow ...

User's Guide
Page 150
... solutions. DECREASE THE TRANSMISSION SPEED 1 From the printer control panel, press . 2 Press the arrow buttons until Fax Setup appears, and then press . 3 Press the arrow buttons until Dialing and Sending appears, and then press . 4 Press the arrow buttons until Redial Attempts appears, and then press . Try one or more of the following : CHANGE REDIAL...
... solutions. DECREASE THE TRANSMISSION SPEED 1 From the printer control panel, press . 2 Press the arrow buttons until Fax Setup appears, and then press . 3 Press the arrow buttons until Dialing and Sending appears, and then press . 4 Press the arrow buttons until Redial Attempts appears, and then press . Try one or more of the following : CHANGE REDIAL...

User's Guide
Page 152
...Resend the fax. Try one or more of the telephone line connection. • Place a test call to the telephone number to which you want to send a fax to make sure that it did not recognize the dial tone. 2 From the printer control panel, press . 3 Press the arrow buttons until Fax Setup appears,...buttons until the dialing method that you hear a dial tone but the printer hangs up without dialing, this means it did not recognize the dial tone. 2 From the printer control panel, press . 3 Press the arrow buttons until Fax Setup appears, and then press . 4 Press the arrow buttons until Dialing...
...Resend the fax. Try one or more of the telephone line connection. • Place a test call to the telephone number to which you want to send a fax to make sure that it did not recognize the dial tone. 2 From the printer control panel, press . 3 Press the arrow buttons until Fax Setup appears,...buttons until the dialing method that you hear a dial tone but the printer hangs up without dialing, this means it did not recognize the dial tone. 2 From the printer control panel, press . 3 Press the arrow buttons until Fax Setup appears, and then press . 4 Press the arrow buttons until Dialing...
User's Guide
Page 172
...10 WEP 55 ad hoc 51 WEP key key index 64 locating 54 Windows installing printer on wireless network 45 Windows software Abbyy Sprint OCR 32 Fast Pics 32 Fax Setup Utility 32 Fax Solutions software 32 Printing Preferences 32 Productivity Studio 32 Service Center 32 Toolbar 32 Tools... for Office 32 Wireless Setup Utility 32 wireless 49, 62 Macintosh 50 printer does not print 134 troubleshooting 135, 144 wireless installation will not continue after ...
...10 WEP 55 ad hoc 51 WEP key key index 64 locating 54 Windows installing printer on wireless network 45 Windows software Abbyy Sprint OCR 32 Fast Pics 32 Fax Setup Utility 32 Fax Solutions software 32 Printing Preferences 32 Productivity Studio 32 Service Center 32 Toolbar 32 Tools... for Office 32 Wireless Setup Utility 32 wireless 49, 62 Macintosh 50 printer does not print 134 troubleshooting 135, 144 wireless installation will not continue after ...
Fax Guide
Page 3
Contents Introduction 4 Finding information about the printer...4 Understanding the parts of the printer 6 Understanding the parts of the printer...6 Fax Setup 8 Getting the printer ready to fax...8 Setting up the printer as a copier only or fax only 8 Using an RJ11 adapter ...12 Choosing a fax connection...14 Connecting to an answering machine...14 Connecting directly to a telephone wall jack 15 Connecting directly...
Contents Introduction 4 Finding information about the printer...4 Understanding the parts of the printer 6 Understanding the parts of the printer...6 Fax Setup 8 Getting the printer ready to fax...8 Setting up the printer as a copier only or fax only 8 Using an RJ11 adapter ...12 Choosing a fax connection...14 Connecting to an answering machine...14 Connecting directly to a telephone wall jack 15 Connecting directly...
Fax Guide
Page 8
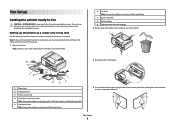
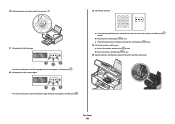
... or cabling connections, such as the power supply cord or telephone, during a lightning storm. Fax Setup 8 Note: If you do not want to connect the printer to a computer. Do not set up the printer as the number of print cartridges, may vary by model. 6 Fax Guide Note: Your printer model may not come with a USB cable.
... or cabling connections, such as the power supply cord or telephone, during a lightning storm. Fax Setup 8 Note: If you do not want to connect the printer to a computer. Do not set up the printer as the number of print cartridges, may vary by model. 6 Fax Guide Note: Your printer model may not come with a USB cable.

Fax Guide
Page 9
Fax Setup 9 The paper guides should rest against the edges of the printer control panel, and then press down on overlays. 8 Load paper, and then pull up the paper adjustment lever to the printer. 2 1 CAUTION-SHOCK HAZARD: Read the safety information included with this product before connecting power or making any cabling connections. 5 Place the...
Fax Setup 9 The paper guides should rest against the edges of the printer control panel, and then press down on overlays. 8 Load paper, and then pull up the paper adjustment lever to the printer. 2 1 CAUTION-SHOCK HAZARD: Read the safety information included with this product before connecting power or making any cabling connections. 5 Place the...
Fax Guide
Page 10
...want appears, and then press . b Enter a fax name, and then press to save . a Enter a fax number, and then press to save . 14 Set the fax number and fax name. Fax Setup 10 b Enter the time, and then press to save . a Using the keypad of the printer control panel, enter the month, day, and year,... and then press to save . 10 If the printer does not automatically turn on the print ...
...want appears, and then press . b Enter a fax name, and then press to save . a Enter a fax number, and then press to save . 14 Set the fax number and fax name. Fax Setup 10 b Enter the time, and then press to save . a Using the keypad of the printer control panel, enter the month, day, and year,... and then press to save . 10 If the printer does not automatically turn on the print ...


