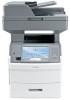
User Guide
Page 2
Contents Safety information 13 Learning about the printer 15 Finding information about the printer...15 Printer configurations...16 Selecting a location for the printer...16 Basic functions of the scanner...17 Understanding the ADF and scanner glass...18 Understanding the printer control panel......
Contents Safety information 13 Learning about the printer 15 Finding information about the printer...15 Printer configurations...16 Selecting a location for the printer...16 Basic functions of the scanner...17 Understanding the ADF and scanner glass...18 Understanding the printer control panel......

User Guide
Page 3
... the date and time...70 Turning Daylight Saving Time on ...71 Loading paper and specialty media 72 Setting the Paper Size and Paper Type...72 Configuring Universal paper settings...72 Loading the standard or optional 250-sheet or 550-sheet tray 73 Loading the 2000-sheet tray...76 Loading the multipurpose...
... the date and time...70 Turning Daylight Saving Time on ...71 Loading paper and specialty media 72 Setting the Paper Size and Paper Type...72 Configuring Universal paper settings...72 Loading the standard or optional 250-sheet or 550-sheet tray 73 Loading the 2000-sheet tray...76 Loading the multipurpose...
User Guide
Page 4
......103 Sides (Duplex) ...103 Collate ...103 Options ...103 Improving copy quality...105 E-mailing 106 Getting ready to e-mail...106 Setting up the e-mail function...106 Configuring the e-mail settings...107 Creating an e-mail shortcut...107 Creating an e-mail shortcut using the Embedded Web Server 107 Creating an e-mail shortcut using the...
......103 Sides (Duplex) ...103 Collate ...103 Options ...103 Improving copy quality...105 E-mailing 106 Getting ready to e-mail...106 Setting up the e-mail function...106 Configuring the e-mail settings...107 Creating an e-mail shortcut...107 Creating an e-mail shortcut using the Embedded Web Server 107 Creating an e-mail shortcut using the...

User Guide
Page 8
Configure MP menu...155 Envelope Enhance ...156 Substitute Size menu...156 Paper Texture menu ...156 Paper Weight menu ...158 Paper Loading menu ...160 Custom Types menu......
Configure MP menu...155 Envelope Enhance ...156 Substitute Size menu...156 Paper Texture menu ...156 Paper Weight menu ...158 Paper Loading menu ...160 Custom Types menu......
User Guide
Page 14
CAUTION-TIPPING HAZARD: Floor-mounted configurations require additional furniture for stability. If you purchased a multifunction printer (MFP) that scans, copies, and faxes, you are using a high-capacity input tray, a duplex unit and an input option, or more information, see www.lexmark.com/multifunctionprinters. Refer service or repairs, other than one input option. CAUTION-SHOCK...
CAUTION-TIPPING HAZARD: Floor-mounted configurations require additional furniture for stability. If you purchased a multifunction printer (MFP) that scans, copies, and faxes, you are using a high-capacity input tray, a duplex unit and an input option, or more information, see www.lexmark.com/multifunctionprinters. Refer service or repairs, other than one input option. CAUTION-SHOCK...

User Guide
Page 16
Printer configurations Note: Printer configuration may vary depending on your printer model. Clean, dry, and free of dust • Allow the following recommended amount of the ASHRAE 62 standard. • ...
Printer configurations Note: Printer configuration may vary depending on your printer model. Clean, dry, and free of dust • Allow the following recommended amount of the ASHRAE 62 standard. • ...
User Guide
Page 46
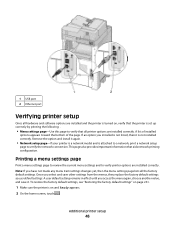
... , verify that the printer is set up correctly by printing the following: . • Menu settings page-Use this page to verify that aids network printing configuration. Additional printer setup 46 Note: If you select and save it. Printing a menu settings page Print a menu settings page to review the current menu settings...
... , verify that the printer is set up correctly by printing the following: . • Menu settings page-Use this page to verify that aids network printing configuration. Additional printer setup 46 Note: If you select and save it. Printing a menu settings page Print a menu settings page to review the current menu settings...
User Guide
Page 47
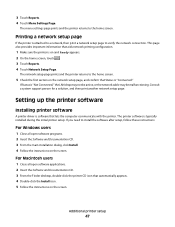
... Software and Documentation CD. 3 From the main installation dialog, click Install. 4 Follow the instructions on the network setup page, and confirm that aids network printing configuration. 1 Make sure the printer is "Connected." This page also provides important information that Status is on the screen. If you need to the home screen...
... Software and Documentation CD. 3 From the main installation dialog, click Install. 4 Follow the instructions on the network setup page, and confirm that aids network printing configuration. 1 Make sure the printer is "Connected." This page also provides important information that Status is on the screen. If you need to the home screen...
User Guide
Page 49
4 Click Driver, and then add any installed hardware options, and then click Apply Changes. WEP key If your network uses more information on configuring 802.1X security, see the Networking Guide on the Software and Documentation CD. Encryption must be set up to communicate on the network by the ...
4 Click Driver, and then add any installed hardware options, and then click Apply Changes. WEP key If your network uses more information on configuring 802.1X security, see the Networking Guide on the Software and Documentation CD. Encryption must be set up to communicate on the network by the ...

User Guide
Page 51
...capabilities, then connect the telephone cable. 8 Follow the on-screen instructions to complete the software installation. 9 To allow other computers on the wireless network to configure the printer 1 Locate the printer MAC address on the sheet that came with the printer. Write the last six digits of the MAC address in... (Macintosh) Prepare to use the wireless printer, follow steps 2 through 6 and step 8 for each computer. Additional printer setup 51 Note: After the printer is configured, the software will instruct you to disconnect the temporary USB cable so you can print wirelessly.
...capabilities, then connect the telephone cable. 8 Follow the on-screen instructions to complete the software installation. 9 To allow other computers on the wireless network to configure the printer 1 Locate the printer MAC address on the sheet that came with the printer. Write the last six digits of the MAC address in... (Macintosh) Prepare to use the wireless printer, follow steps 2 through 6 and step 8 for each computer. Additional printer setup 51 Note: After the printer is configured, the software will instruct you to disconnect the temporary USB cable so you can print wirelessly.

User Guide
Page 52
b Double-click Internet Connect. Configure the printer for wireless access 1 Type the name of your network (SSID) in the appropriate field. 2 Select Infrastructure as your wireless network. In Mac OS X ...
b Double-click Internet Connect. Configure the printer for wireless access 1 Type the name of your network (SSID) in the appropriate field. 2 Select Infrastructure as your wireless network. In Mac OS X ...

User Guide
Page 53
... or Printer Setup Utility. 1 Install a PPD file on your wireless network. h Type the user password, and then click OK. c Click AirPort. b Double-click Internet Connect. Configure your computer to use the printer wirelessly To print to join your wireless network. 5 Click Submit. 6 Open the AirPort application on the computer: a Insert the...
... or Printer Setup Utility. 1 Install a PPD file on your wireless network. h Type the user password, and then click OK. c Click AirPort. b Double-click Internet Connect. Configure your computer to use the printer wirelessly To print to join your wireless network. 5 Click Submit. 6 Open the AirPort application on the computer: a Insert the...

User Guide
Page 55
...Select Suggested, and then click Next. For information on printing a network setup page, see "Printing a network setup page" on -screen instructions to configure printers using scripts, select Custom and follow the on-screen instructions. 9 Follow the on page 47. 3 Locate the printer IP address in the...different subnet than the printer. 4 Install the drivers and add the printer. b Click Run. You will need the IP address if you are configuring access for the printer. 3 From the Welcome screen, click Continue. 4 Click Continue again after viewing the Readme file. 5 Click Continue after ...
...Select Suggested, and then click Next. For information on printing a network setup page, see "Printing a network setup page" on -screen instructions to configure printers using scripts, select Custom and follow the on-screen instructions. 9 Follow the on page 47. 3 Locate the printer IP address in the...different subnet than the printer. 4 Install the drivers and add the printer. b Click Run. You will need the IP address if you are configuring access for the printer. 3 From the Welcome screen, click Continue. 4 Click Continue again after viewing the Readme file. 5 Click Continue after ...
User Guide
Page 57
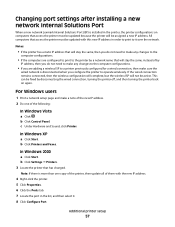
Changing port settings after installing a new network Internal Solutions Port When a new network Lexmark Internal Solutions Port (ISP) is disconnected when you do not need to it . 8 Click Configure Port. This can be assigned a new IP address. b Click Control Panel. In Windows XP a Click Start. Note: ...following: In Windows Vista a Click . c Under Hardware and Sound, click Printer. All computers that will stay the same, then you configure the printer to the printer by disconnecting the wired connection, turning the printer off, and then turning the printer back on computers that ...
Changing port settings after installing a new network Internal Solutions Port When a new network Lexmark Internal Solutions Port (ISP) is disconnected when you do not need to it . 8 Click Configure Port. This can be assigned a new IP address. b Click Control Panel. In Windows XP a Click Start. Note: ...following: In Windows Vista a Click . c Under Hardware and Sound, click Printer. All computers that will stay the same, then you configure the printer to the printer by disconnecting the wired connection, turning the printer off, and then turning the printer back on computers that ...

User Guide
Page 58
... Mac OS X version 10.5 a From the Apple menu, choose System Preferences. You can find the new IP address on the network setup page you are configuring access for computers on a different subnet than the printer. 3 Add the printer: • For IP printing: In Mac OS X version 10.5 a From the Apple menu...
... Mac OS X version 10.5 a From the Apple menu, choose System Preferences. You can find the new IP address on the network setup page you are configuring access for computers on a different subnet than the printer. 3 Add the printer: • For IP printing: In Mac OS X version 10.5 a From the Apple menu...
User Guide
Page 59
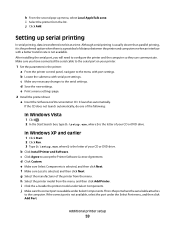
... deal of your CD or DVD drive. i Select the printer from the menu. After installing the serial port, you have connected the serial cable to configure the printer and the computer so they can communicate. c Make any necessary changes to accept the Printer Software License Agreement. It launches automatically. If the...
... deal of your CD or DVD drive. i Select the printer from the menu. After installing the serial port, you have connected the serial cable to configure the printer and the computer so they can communicate. c Make any necessary changes to accept the Printer Software License Agreement. It launches automatically. If the...

User Guide
Page 60
m Select any configuration changes necessary in the communications (COM) port assigned to the printer driver. The serial parameters in the COM port must set the serial parameters in ...
m Select any configuration changes necessary in the communications (COM) port assigned to the printer driver. The serial parameters in the COM port must set the serial parameters in ...

User Guide
Page 72
The Paper Type setting must be set manually. the largest size is Plain Paper. Configuring Universal paper settings The Universal Paper Size is a user-defined setting that lets you want is on and Ready appears. 2 On the home screen, touch . 3 ...
The Paper Type setting must be set manually. the largest size is Plain Paper. Configuring Universal paper settings The Universal Paper Size is a user-defined setting that lets you want is on and Ready appears. 2 On the home screen, touch . 3 ...
User Guide
Page 83
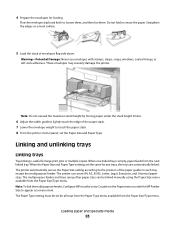
These envelopes may severely damage the printer. Note: To link the multipurpose feeder, Configure MP must be set the Paper Size and Paper Type. Flex the envelopes back and forth to appear as a menu item. The multipurpose feeder and ...
These envelopes may severely damage the printer. Note: To link the multipurpose feeder, Configure MP must be set the Paper Size and Paper Type. Flex the envelopes back and forth to appear as a menu item. The multipurpose feeder and ...
User Guide
Page 89
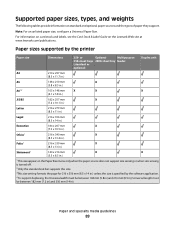
... width must be between 182 mm (7.2 in) and 356 mm (14 in ); Supported paper sizes, types, and weights The following tables provide information on the Lexmark Web site at www.lexmark.com/publications. Note: For an unlisted paper size, configure a Universal Paper Size. Paper and specialty media guidelines 89
... width must be between 182 mm (7.2 in) and 356 mm (14 in ); Supported paper sizes, types, and weights The following tables provide information on the Lexmark Web site at www.lexmark.com/publications. Note: For an unlisted paper size, configure a Universal Paper Size. Paper and specialty media guidelines 89


