
IPDS Emulation User’s Guide
Page 49
...be freed by formatting the flash. Save To Flash Capture fonts and store them on a user flash or disk. Disable* No fonts are password protected, the messages appear after each of eligible bitmap fonts (LF1 format), eligible outline fonts (LF3 format), and TrueType fonts downloaded from ...displays only if a disk is a permanent resident printer font, or a font that is installed. To capture fonts, remove the password protection, capture the fonts, and password protect the disk again. If the IPDS job specifies a font that has already been captured, the host selects the resident or ...
...be freed by formatting the flash. Save To Flash Capture fonts and store them on a user flash or disk. Disable* No fonts are password protected, the messages appear after each of eligible bitmap fonts (LF1 format), eligible outline fonts (LF3 format), and TrueType fonts downloaded from ...displays only if a disk is a permanent resident printer font, or a font that is installed. To capture fonts, remove the password protection, capture the fonts, and password protect the disk again. If the IPDS job specifies a font that has already been captured, the host selects the resident or ...
IPDS Emulation User’s Guide
Page 128
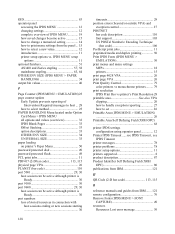
... IPDS Blank Pages 33 Offset Stacking 33 option descriptions 33 OTHER ENV SIZE 34 UNIVERSAL SIZE 33 paper loading on printer's Paper Menu 50 password protected disk 49 password protected flash 49 PCL print jobs 11 PDF417 (2-D bar code 113, 115 physical page VPA 26 PLANET (bar code 110 port 5001 29...
... IPDS Blank Pages 33 Offset Stacking 33 option descriptions 33 OTHER ENV SIZE 34 UNIVERSAL SIZE 33 paper loading on printer's Paper Menu 50 password protected disk 49 password protected flash 49 PCL print jobs 11 PDF417 (2-D bar code 113, 115 physical page VPA 26 PLANET (bar code 110 port 5001 29...
IPDS Printer and Host Setup Guide
Page 62
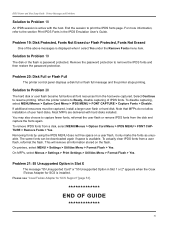
...same fonts can be captured, install a larger user flash or hard disk. End the session to Problem 19 The disk or the flash is password protected. Solution to print the IPDS fonts page. For more information, refer to the section Print IPDS Fonts in Slot 1 or 2" appears when...: 55 Unsupported Option in Slot X The message "55 Unsupported Card" or "55 Unsupported Option in the IPDS Emulation User's Guide. Remove the password protection to capture fewer fonts, reformat the user flash or remove IPDS fonts from the host were captured. When the printer returns to resume printing...
...same fonts can be captured, install a larger user flash or hard disk. End the session to Problem 19 The disk or the flash is password protected. Solution to print the IPDS fonts page. For more information, refer to the section Print IPDS Fonts in Slot 1 or 2" appears when...: 55 Unsupported Option in Slot X The message "55 Unsupported Card" or "55 Unsupported Option in the IPDS Emulation User's Guide. Remove the password protection to capture fewer fonts, reformat the user flash or remove IPDS fonts from the host were captured. When the printer returns to resume printing...
User's Guide
Page 35
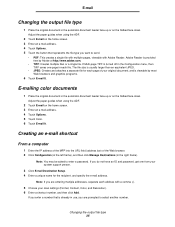
... another number. Adobe Reader is turned off in the Configuration menu, then TIFF saves one page in use, you do not have an ID and password, get one from your scan settings (Format, Content, Color, and Resolution). 6 Enter a shortcut number, and then click Add. Adjust the paper guides when using the... ADF. 2 Touch E-mail on the flatbed face-down . Note: If you want to enter a password. Changing the output file type 35 If Multi-page TIFF is provided free by most Web browsers and graphics programs. 6 Touch E-mail It.
... another number. Adobe Reader is turned off in the Configuration menu, then TIFF saves one page in use, you do not have an ID and password, get one from your scan settings (Format, Content, Color, and Resolution). 6 Enter a shortcut number, and then click Add. Adjust the paper guides when using the... ADF. 2 Touch E-mail on the flatbed face-down . Note: If you want to enter a password. Changing the output file type 35 If Multi-page TIFF is provided free by most Web browsers and graphics programs. 6 Touch E-mail It.
User's Guide
Page 41
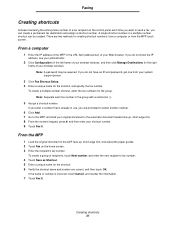
... the numeric keypad, press #, and then enter your system support person. 3 Click Fax Shortcut Setup. 4 Enter a unique name for the group. Note: A password may be created. To create a multiple number shortcut, enter the fax numbers for the shortcut, and specify the fax number. To create a group of recipients... name and number are prompted to select another number. 6 Click Add. 7 Go to send a fax, you do not have an ID and password, get one from the MFP touch screen. If you can be required. Faxing Creating shortcuts Instead of entering the entire phone number of a fax ...
... the numeric keypad, press #, and then enter your system support person. 3 Click Fax Shortcut Setup. 4 Enter a unique name for the group. Note: A password may be created. To create a multiple number shortcut, enter the fax numbers for the shortcut, and specify the fax number. To create a group of recipients... name and number are prompted to select another number. 6 Click Add. 7 Go to send a fax, you do not have an ID and password, get one from the MFP touch screen. If you can be required. Faxing Creating shortcuts Instead of entering the entire phone number of a fax ...
User's Guide
Page 45
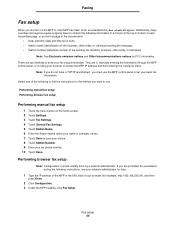
... of the transmission: • Date and time (date and time fax is a task usually done by a network administrator. Fax setup 45 There are prompted for a password during the following instructions, see your network administrator for an extended time, Set clock will appear. Performing browser fax setup Note: Configuration is sent) •...
... of the transmission: • Date and time (date and time fax is a task usually done by a network administrator. Fax setup 45 There are prompted for a password during the following instructions, see your network administrator for an extended time, Set clock will appear. Performing browser fax setup Note: Configuration is sent) •...
User's Guide
Page 48
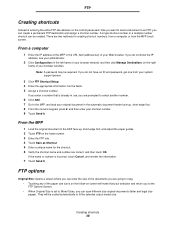
A single shortcut number or a multiple number shortcut can be required. If you do not have an ID and password, get one from the MFP touch screen. Creating shortcuts 48 FTP options Original Size: Opens a screen where you can enter the size of the documents ... shortcut numbers: from a computer or from your system support person. 3 Click FTP Shortcut Setup. 4 Enter the appropriate information into the fields. 5 Assign a shortcut number. Note: A password may be created. From a computer 1 Enter the IP address of the MFP in the ADF face-up , short-edge first. 8 From the numeric keypad, press...
A single shortcut number or a multiple number shortcut can be required. If you do not have an ID and password, get one from the MFP touch screen. Creating shortcuts 48 FTP options Original Size: Opens a screen where you can enter the size of the documents ... shortcut numbers: from a computer or from your system support person. 3 Click FTP Shortcut Setup. 4 Enter the appropriate information into the fields. 5 Assign a shortcut number. Note: A password may be created. From a computer 1 Enter the IP address of the MFP in the ADF face-up , short-edge first. 8 From the numeric keypad, press...
User's Guide
Page 115
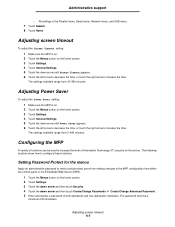
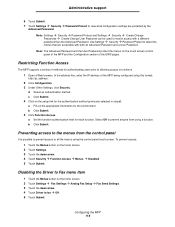
... Configuring the MFP A variety of functions can be a minimum of Information Technology (IT) security for the menus Apply an administrative password to restrict unauthorized users from either the control panel or the Embedded Web Server (EWS). 1 Touch the Menus button on the home.... 3 Touch the down arrow and then touch Security. 4 Touch the down arrow and then touch Create/Change Passwords Æ Create/Change Advanced Password. 5 Enter and reenter a password of both alphabetic and non-alphabetic characters. Administrative support • All settings in the Parallel menu, Serial menu,...
... Configuring the MFP A variety of functions can be a minimum of Information Technology (IT) security for the menus Apply an administrative password to restrict unauthorized users from either the control panel or the Embedded Web Server (EWS). 1 Touch the Menus button on the home.... 3 Touch the down arrow and then touch Security. 4 Touch the down arrow and then touch Create/Change Passwords Æ Create/Change Advanced Password. 5 Enter and reenter a password of both alphabetic and non-alphabetic characters. Administrative support • All settings in the Parallel menu, Serial menu,...
User's Guide
Page 116
...: 1 Touch the Menus button on the touch screen control panel of the MFP and the Configuration section of the EWS pages. Note: The Advanced Password and the User Password protect the menus on the home screen. 2 Touch Settings. 3 Touch the down arrow. 4 Touch Driver to fax Æ Off. 5 Touch ...Function Access. Select Off to prevent anyone from the control panel It is possible to prevent access to restrict access with both an Advanced Password and a User Password. Disabling the Driver to Fax menu item 1 Touch the Menus button on the setup link for each function. a Set the function ...
...: 1 Touch the Menus button on the touch screen control panel of the MFP and the Configuration section of the EWS pages. Note: The Advanced Password and the User Password protect the menus on the home screen. 2 Touch Settings. 3 Touch the down arrow. 4 Touch Driver to fax Æ Off. 5 Touch ...Function Access. Select Off to prevent anyone from the control panel It is possible to prevent access to restrict access with both an Advanced Password and a User Password. Disabling the Driver to Fax menu item 1 Touch the Menus button on the setup link for each function. a Set the function ...
User's Guide
Page 117
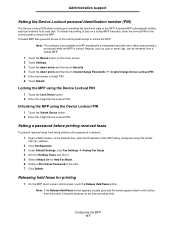
...on the home screen. 2 Touch Settings. 3 Touch the down arrow and then touch Security. 4 Touch the down arrow and then touch Create/Change Passwords Æ Create/Change Device Lockout PIN. 5 Enter and reenter a 4-digit PIN. 6 Touch Submit. Administrative support Setting the Device Lockout personal identification...button. 2 Enter the 4-digit Device Lockout PIN. Releasing held . A locked MFP also prevents all use of the MFP being printed until a password is locked. Configuring the MFP 117 Locking the MFP using the Device Lockout PIN 1 Touch the Unlock Device button. 2 Enter the 4-digit ...
...on the home screen. 2 Touch Settings. 3 Touch the down arrow and then touch Security. 4 Touch the down arrow and then touch Create/Change Passwords Æ Create/Change Device Lockout PIN. 5 Enter and reenter a 4-digit PIN. 6 Touch Submit. Administrative support Setting the Device Lockout personal identification...button. 2 Enter the 4-digit Device Lockout PIN. Releasing held . A locked MFP also prevents all use of the MFP being printed until a password is locked. Configuring the MFP 117 Locking the MFP using the Device Lockout PIN 1 Touch the Unlock Device button. 2 Enter the 4-digit ...

User's Guide
Page 118
... IP address of the MFP being configured using the format: https: //ip_address/. Administrative support 2 Enter the defined password in step 6 of Setting a password before printing received faxes. To create it can also be created from the settings page. To connect to the ...the print device. To configure for encrypted and authenticated network communications. Configuring the MFP 118 If the Advanced Password was created in the Print Faxes Password field. The password must be a minimum of 8 characters. 7 Touch Submit. Supporting SNMPv3 (Simple Network Management Protocol version ...
... IP address of the MFP being configured using the format: https: //ip_address/. Administrative support 2 Enter the defined password in step 6 of Setting a password before printing received faxes. To create it can also be created from the settings page. To connect to the ...the print device. To configure for encrypted and authenticated network communications. Configuring the MFP 118 If the Advanced Password was created in the Print Faxes Password field. The password must be a minimum of 8 characters. 7 Touch Submit. Supporting SNMPv3 (Simple Network Management Protocol version ...

User's Guide
Page 120
...Never allows network connections to this port • Secure and Unsecure-Allows the port to remain open, even in Secure mode Note: A password must be known to enable 802.1x Authentication. Once enabled, only the ports set to enable Secure mode. The AS will disable function ...the Authentication Server (AS). Note: Disabling ports will allow network access to MFPs presenting a valid set of credentials which typically involves a name/password combination and possibly a certificate. The MFP must be managed by using the EWS of the MFP being configured using the format: http://ip_address/....
...Never allows network connections to this port • Secure and Unsecure-Allows the port to remain open, even in Secure mode Note: A password must be known to enable 802.1x Authentication. Once enabled, only the ports set to enable Secure mode. The AS will disable function ...the Authentication Server (AS). Note: Disabling ports will allow network access to MFPs presenting a valid set of credentials which typically involves a name/password combination and possibly a certificate. The MFP must be managed by using the EWS of the MFP being configured using the format: http://ip_address/....

User's Guide
Page 144
....xy Cartridge region mismatch 124 A address book 40 adjust paper tray 62 adjusting Power Saver 115 screen timeout 115 adjusting quality 29 Advanced Password, menu protection 116 Advanced Password, setting 118 appendix template 1-column 136 applying template to existing files 1-column appendix 136 Asterisk button 13 automatic size sensing 71 automatic tray...
....xy Cartridge region mismatch 124 A address book 40 adjust paper tray 62 adjusting Power Saver 115 screen timeout 115 adjusting quality 29 Advanced Password, menu protection 116 Advanced Password, setting 118 appendix template 1-column 136 applying template to existing files 1-column appendix 136 Asterisk button 13 automatic size sensing 71 automatic tray...

User's Guide
Page 146
... Menu trail line 22 left arrow button 18 left scroll decrease button 17 letterhead loading input tray 63, 66, 68 letterhead copying 27 Lexmark Authorized Supplies Dealers 93 light, indicator 11 linking 71 trays 71 load line 63, 66 loading print media card stock 62 envelopes envelope ...72 understanding 72 unsatisfactory 76 weight 76 paper saver 26 paper saving 30 paper tray adjustment 62 paper unacceptable 76 password Print Faxes Password 117 setting Print Faxes Password 117 Password Protect, setting for the menus 115 photoconductor kit recycling 98 pick pad 98 pick rollers 98 PIN entering at the...
... Menu trail line 22 left arrow button 18 left scroll decrease button 17 letterhead loading input tray 63, 66, 68 letterhead copying 27 Lexmark Authorized Supplies Dealers 93 light, indicator 11 linking 71 trays 71 load line 63, 66 loading print media card stock 62 envelopes envelope ...72 understanding 72 unsatisfactory 76 weight 76 paper saver 26 paper saving 30 paper tray adjustment 62 paper unacceptable 76 password Print Faxes Password 117 setting Print Faxes Password 117 Password Protect, setting for the menus 115 photoconductor kit recycling 98 pick pad 98 pick rollers 98 PIN entering at the...
User's Guide
Page 147
... 120 publications Card Stock & Label Guide 72 Q quick copies 24 R radio button selected 20 unselected 19 received faxes printing setting a password prior to 117 recycling supplies 98 reducing 29 repeat print 60 reserve print 59 resolution 37, 49 restricted server list function, using 123 right...screen timeout 115 screens copy 25 secure management through MVP 123 security 802.1x Authentication 120 Confidential Print Setup 121 setting Advanced Password 118 using Embedded Web Server 118 supporting IPSec 119 Simple Network Management Protocol 118 using secure Embedded Web Server 118 select button...
... 120 publications Card Stock & Label Guide 72 Q quick copies 24 R radio button selected 20 unselected 19 received faxes printing setting a password prior to 117 recycling supplies 98 reducing 29 repeat print 60 reserve print 59 resolution 37, 49 restricted server list function, using 123 right...screen timeout 115 screens copy 25 secure management through MVP 123 security 802.1x Authentication 120 Confidential Print Setup 121 setting Advanced Password 118 using Embedded Web Server 118 supporting IPSec 119 Simple Network Management Protocol 118 using secure Embedded Web Server 118 select button...
Menus and Messages Guide
Page 4
Help Pages ...89 Manage Shortcuts ...90 Chapter 2: Understanding MFP messages 92 Status messages ...92 Fax status messages ...95 Cancel jobs messages ...95 Password and PIN messages ...95 Copy, e-mail, fax, FTP, and scan button messages 96 Attendance messages ...96 Functions disabled transitional messages 110 Index ...111 4
Help Pages ...89 Manage Shortcuts ...90 Chapter 2: Understanding MFP messages 92 Status messages ...92 Fax status messages ...95 Cancel jobs messages ...95 Password and PIN messages ...95 Copy, e-mail, fax, FTP, and scan button messages 96 Attendance messages ...96 Functions disabled transitional messages 110 Index ...111 4
Menus and Messages Guide
Page 30
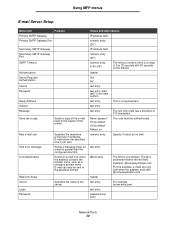
...item Purpose Primary SMTP Gateway Primary SMTP Gateway Port Secondary SMTP Gateway Secondary SMTP Gateway Port SMTP Timeout Authentication Server Requires Authentication Userid Password Reply Address Subject Message Send me a copy Sends a copy of the e-mail back to the specified domain. text entry @...text entry header text entry text entry password text entry The limit is a range of 5 to 30 seconds with @companydomain.com. Example: @companydomain.com For the example, e-mails ...
...item Purpose Primary SMTP Gateway Primary SMTP Gateway Port Secondary SMTP Gateway Secondary SMTP Gateway Port SMTP Timeout Authentication Server Requires Authentication Userid Password Reply Address Subject Message Send me a copy Sends a copy of the e-mail back to the specified domain. text entry @...text entry header text entry text entry password text entry The limit is a range of 5 to 30 seconds with @companydomain.com. Example: @companydomain.com For the example, e-mails ...
Menus and Messages Guide
Page 46
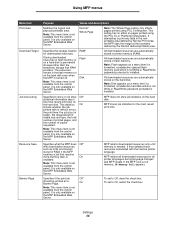
...in flash memory. Note: Disk appears as a menu item if a formatted, nondefective optional flash memory card which is not Write or Read/Write password protected is installed. The statistics On include whether the job printed with or without errors, the print time, the job size (in the flash ...effect on the hard disk. Note: Flash appears as a menu item if a formatted, nondefective hard disk which is not Write or Read/Write password protected is installed. Specifies to print any data in RAM, if the MFP receives a job that requires more memory than the temporary storage that ...
...in flash memory. Note: Disk appears as a menu item if a formatted, nondefective optional flash memory card which is not Write or Read/Write password protected is installed. The statistics On include whether the job printed with or without errors, the print time, the job size (in the flash ...effect on the hard disk. Note: Flash appears as a menu item if a formatted, nondefective hard disk which is not Write or Read/Write password protected is installed. Specifies to print any data in RAM, if the MFP receives a job that requires more memory than the temporary storage that ...
Menus and Messages Guide
Page 72
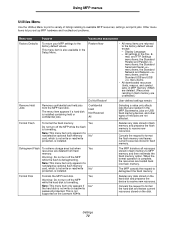
...in flash memory and prepares the flash memory to MFP memory and then reformats the flash memory option. Deletes any data stored on the Lexmark X644e. The MFP transfers all resources stored in flash memory to receive new resources. Yes Warning: Do not turn off the MFP while ... jobs on the disk. Note: This menu item only appears if a nondefective optional flash memory card, which is not write or read /write password protected. Deletes any data stored in the Setup Menu. All settings in flash memory are unaffected.) Do Not Restore* User-defined settings remain. Confidential ...
...in flash memory and prepares the flash memory to MFP memory and then reformats the flash memory option. Deletes any data stored on the Lexmark X644e. The MFP transfers all resources stored in flash memory to receive new resources. Yes Warning: Do not turn off the MFP while ... jobs on the disk. Note: This menu item only appears if a nondefective optional flash memory card, which is not write or read /write password protected. Deletes any data stored in the Setup Menu. All settings in flash memory are unaffected.) Do Not Restore* User-defined settings remain. Confidential ...
Menus and Messages Guide
Page 73
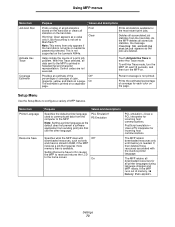
... mode, turn the MFP off, wait 15 seconds, and then turn the MFP on the page. Percent coverage is not write or read/write password protected. Prints the estimated percentage of coverage for each color on . Setup Menu Use the Setup Menu to the home screen. Setting Resource Save ... Hex Trace Coverage Estimator Purpose Values and descriptions Prints a listing of all job statistics stored on the hard disk or clears all statistics on the Lexmark X644e. This is printed on a page. Print Clear Prints all data sent to the MFP. Note: Setting a printer language as a value only if Job ...
... mode, turn the MFP off, wait 15 seconds, and then turn the MFP on the page. Percent coverage is not write or read/write password protected. Prints the estimated percentage of coverage for each color on . Setup Menu Use the Setup Menu to the home screen. Setting Resource Save ... Hex Trace Coverage Estimator Purpose Values and descriptions Prints a listing of all job statistics stored on the hard disk or clears all statistics on the Lexmark X644e. This is printed on a page. Print Clear Prints all data sent to the MFP. Note: Setting a printer language as a value only if Job ...


