
User's Guide
Page 3
... panel buttons and menus 23 Using the printer control panel ...23 Using the printer menus ...26 Saving settings...28 Using the printer software...30 Installing printer software ...30 Installing the optional XPS driver (Windows Vista users only 31 Using the Windows printer software...32 Using the Macintosh printer software...33 Switching between the rear USB port and the Quick Connect...
... panel buttons and menus 23 Using the printer control panel ...23 Using the printer menus ...26 Saving settings...28 Using the printer software...30 Installing printer software ...30 Installing the optional XPS driver (Windows Vista users only 31 Using the Windows printer software...32 Using the Macintosh printer software...33 Switching between the rear USB port and the Quick Connect...
User's Guide
Page 5
...Inserting a memory card ...85 Inserting a flash drive ...86 Printing photos...87 Printing photos using the printer control panel ...87 Printing photos from the computer using the printer software 88 Printing photos from a memory device using the printer software 88 Printing photos from a PictBridge-enabled digital camera 90 Printing photos stored on a memory device ......98 Copying photos...98 Enlarging or reducing images...98 Adjusting copy quality...99 Making a copy lighter or darker...99 Collating copies using the printer control panel 100 Repeating an image on one page...101 Contents 5
...Inserting a memory card ...85 Inserting a flash drive ...86 Printing photos...87 Printing photos using the printer control panel ...87 Printing photos from the computer using the printer software 88 Printing photos from a memory device using the printer software 88 Printing photos from a PictBridge-enabled digital camera 90 Printing photos stored on a memory device ......98 Copying photos...98 Enlarging or reducing images...98 Adjusting copy quality...99 Making a copy lighter or darker...99 Collating copies using the printer control panel 100 Repeating an image on one page...101 Contents 5

User's Guide
Page 10
... you want to make sure that the application that you have this Help. Electronic User's Guide Complete instructions for using the printer software on the menu bar to view the main page of the Help. The Help installs automatically with these publications. The correct ... All Programs or Programs, and then select the printer program folder from the list. 3 From the program, click Help to view the main page of the Help. Additional instructions for using the printer software on a Windows operating system. Note: Your printer may not have several applications open, then make ...
... you want to make sure that the application that you have this Help. Electronic User's Guide Complete instructions for using the printer software on the menu bar to view the main page of the Help. The Help installs automatically with these publications. The correct ... All Programs or Programs, and then select the printer program folder from the list. 3 From the program, click Help to view the main page of the Help. Additional instructions for using the printer software on a Windows operating system. Note: Your printer may not have several applications open, then make ...
User's Guide
Page 13
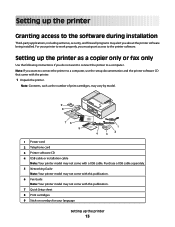
...1 2 3 76 5 1 4 2 3 1 Power cord 2 Telephone cord 3 Printer software CD 4 USB cable or installation cable Note: Your printer model may not come with this publication. 6 Fax Guide Note: Your printer model may alert you about the printer software being installed. Note: If you do not want to connect the... the following instructions if you want to connect the printer to a computer, use the setup documentation and the printer software CD that came with a USB cable. Purchase a USB cable separately. 5 Networking Guide Note: Your printer model may not come with this publication. 7 Quick...
...1 2 3 76 5 1 4 2 3 1 Power cord 2 Telephone cord 3 Printer software CD 4 USB cable or installation cable Note: Your printer model may not come with this publication. 6 Fax Guide Note: Your printer model may alert you about the printer software being installed. Note: If you do not want to connect the... the following instructions if you want to connect the printer to a computer, use the setup documentation and the printer software CD that came with a USB cable. Purchase a USB cable separately. 5 Networking Guide Note: Your printer model may not come with this publication. 7 Quick...
User's Guide
Page 30
....exe, where D is left idle. b Click Run. If you exit Setup, or press another mode button. Using the printer software Installing printer software Using Windows 1 Close all open software programs. 2 Insert the installation software CD. Setting up the printer. Changing the Power Saver timeout You can customize the Power Saver timeout of your CD or DVD drive...
....exe, where D is left idle. b Click Run. If you exit Setup, or press another mode button. Using the printer software Installing printer software Using Windows 1 Close all open software programs. 2 Insert the installation software CD. Setting up the printer. Changing the Power Saver timeout You can customize the Power Saver timeout of your CD or DVD drive...
User's Guide
Page 31
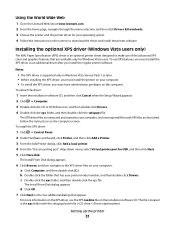
...Click Browse, and then navigate to the XPS driver files on the screens to download the driver and install the printer software. Using the World Wide Web 1 Go to the Lexmark Web site at www.lexmark.com. 2 From the home page, navigate through the menu selection, and then click Drivers & Downloads. 3 ... 1 or later. • Before installing the XPS driver, you install the regular printer software. c Double-click the xps folder, and then double-click the xps file. d Click OK. 7 Click Next on the installation software CD. For more information on the XPS driver, see the XPS readme file on ...
...Click Browse, and then navigate to the XPS driver files on the screens to download the driver and install the printer software. Using the World Wide Web 1 Go to the Lexmark Web site at www.lexmark.com. 2 From the home page, navigate through the menu selection, and then click Drivers & Downloads. 3 ... 1 or later. • Before installing the XPS driver, you install the regular printer software. c Double-click the xps folder, and then double-click the xps file. d Click OK. 7 Click Next on the installation software CD. For more information on the XPS driver, see the XPS readme file on ...
User's Guide
Page 32
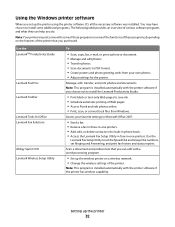
Manage, edit, transfer, and print photos and documents. Note: This program is installed automatically with the printer software if the printer has wireless capability. Access your own photos. • Adjust settings for Office Lexmark Fax Solutions Abbyy Sprint OCR Lexmark Wireless Setup Utility To • Scan, copy, fax, e-mail, or print a photo or document. • Manage...
Manage, edit, transfer, and print photos and documents. Note: This program is installed automatically with the printer software if the printer has wireless capability. Access your own photos. • Adjust settings for Office Lexmark Fax Solutions Abbyy Sprint OCR Lexmark Wireless Setup Utility To • Scan, copy, fax, e-mail, or print a photo or document. • Manage...
User's Guide
Page 33
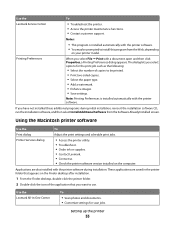
... To Adjust the print settings and schedule print jobs. • Access the printer utility. • Troubleshoot. • Order ink or supplies. • Contact Lexmark. • Contact us. • Check the printer software version installed on your printer model. Applications are saved in the printer folder that appears on the Finder desktop after installation. 1 From the Finder...
... To Adjust the print settings and schedule print jobs. • Access the printer utility. • Troubleshoot. • Order ink or supplies. • Contact Lexmark. • Contact us. • Check the printer software version installed on your printer model. Applications are saved in the printer folder that appears on the Finder desktop after installation. 1 From the Finder...
User's Guide
Page 34
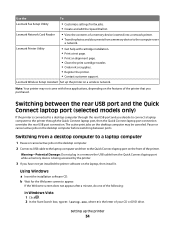
... in or remove the USB cable from a memory device to a desktop computer through the rear USB port and you have not yet installed the printer software on a wireless network. Lexmark Printer Utility • Get help with these applications, depending on the desktop computer may not come with cartridge installation. • Print a test page. •...
... in or remove the USB cable from a memory device to a desktop computer through the rear USB port and you have not yet installed the printer software on a wireless network. Lexmark Printer Utility • Get help with these applications, depending on the desktop computer may not come with cartridge installation. • Print a test page. •...
User's Guide
Page 74
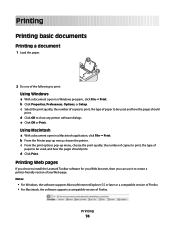
... of paper to be used , and how the pages should print. c From the print options pop-up menu, choose the printer. Printing Web pages If you chose to install the Lexmark Toolbar software for your Web browser, then you can use it to close any Web page. Printing Printing basic documents Printing a document...
... of paper to be used , and how the pages should print. c From the print options pop-up menu, choose the printer. Printing Web pages If you chose to install the Lexmark Toolbar software for your Web browser, then you can use it to close any Web page. Printing Printing basic documents Printing a document...
User's Guide
Page 75
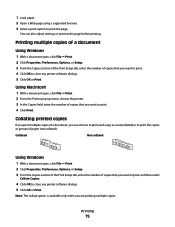
... groups of copies that you are printing multiple copies. Collating printed copies If you print multiple copies of copies that you want to close any printer software dialogs. 5 Click OK or Print. Printing multiple copies of a document Using Windows 1 With a document open, click File ΠPrint. 2 Click ...enter the number of copies that you want to print. 4 Click OK to print the copies as a set (collated) or to close any printer software dialogs. 5 Click OK or Print. Note: The collate option is available only when you want to print, and then select Collate Copies. 4...
... groups of copies that you are printing multiple copies. Collating printed copies If you print multiple copies of copies that you want to close any printer software dialogs. 5 Click OK or Print. Printing multiple copies of a document Using Windows 1 With a document open, click File ΠPrint. 2 Click ...enter the number of copies that you want to print. 4 Click OK to print the copies as a set (collated) or to close any printer software dialogs. 5 Click OK or Print. Note: The collate option is available only when you want to print, and then select Collate Copies. 4...
User's Guide
Page 76
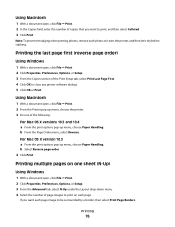
.... Using Macintosh 1 With a document open, click File ΠPrint. 2 In the Copies field, enter the number of copies that you want to close any printer software dialogs. 5 Click OK or Print. b Select Reverse page order. 4 Click Print. Printing the last page first (reverse page order) Using Windows 1 With a ... X versions 10.5 and 10.4 a From the print options pop-up menu, choose Paper Handling. If you want each photo as it exits the printer, and then let it dry before stacking. For Mac OS X version 10.3 a From the print options pop-up menu, choose Paper Handling. Printing...
.... Using Macintosh 1 With a document open, click File ΠPrint. 2 In the Copies field, enter the number of copies that you want to close any printer software dialogs. 5 Click OK or Print. b Select Reverse page order. 4 Click Print. Printing the last page first (reverse page order) Using Windows 1 With a ... X versions 10.5 and 10.4 a From the print options pop-up menu, choose Paper Handling. If you want each photo as it exits the printer, and then let it dry before stacking. For Mac OS X version 10.3 a From the print options pop-up menu, choose Paper Handling. Printing...
User's Guide
Page 77
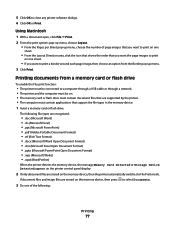
... mode. The following : Printing 77 5 Click OK to a computer through a USB cable or through a network. • The printer and the computer must be connected to close any printer software dialogs. 6 Click OK or Print. Printing documents from the Border pop-up menu. 3 Click Print. Using Macintosh 1 With a ... around each page image, then choose an option from a memory card or flash drive To enable the File print function: • The printer must contain applications that are stored on . • The memory card or flash drive must contain document files that support the file types...
... mode. The following : Printing 77 5 Click OK to a computer through a USB cable or through a network. • The printer and the computer must be connected to close any printer software dialogs. 6 Click OK or Print. Printing documents from the Border pop-up menu. 3 Click Print. Using Macintosh 1 With a ... around each page image, then choose an option from a memory card or flash drive To enable the File print function: • The printer must contain applications that are stored on . • The memory card or flash drive must contain document files that support the file types...
User's Guide
Page 78
... to the computer, see the Help for the printer software associated with your operating system. • If your printer has a numeric keypad, enter the PIN using the keypad, and then press . • If your printer does not have a numeric keypad, use with Lexmark printers, but compatible with all inkjet printers. It is saved in the memory device...
... to the computer, see the Help for the printer software associated with your operating system. • If your printer has a numeric keypad, enter the PIN using the keypad, and then press . • If your printer does not have a numeric keypad, use with Lexmark printers, but compatible with all inkjet printers. It is saved in the memory device...

User's Guide
Page 79
... 1 With a document open , click File ΠPage Setup. 2 From the "Format for" pop-up menu, choose the printer that you want to close any printer software dialogs. Note: To print on a custom-size envelope, select Custom Size, and then specify the height and width of the envelope.... b Click Properties, Preferences, Options, or Setup. Printing envelopes 1 Load the envelopes in the printer. 1 2 2 Do one of the following : ...
... 1 With a document open , click File ΠPage Setup. 2 From the "Format for" pop-up menu, choose the printer that you want to close any printer software dialogs. Note: To print on a custom-size envelope, select Custom Size, and then specify the height and width of the envelope.... b Click Properties, Preferences, Options, or Setup. Printing envelopes 1 Load the envelopes in the printer. 1 2 2 Do one of the following : ...

User's Guide
Page 80
... paper size matches the label sheet size, then create a custom size. Partial sheets (with areas exposed by missing labels) may cause labels to close any printer software dialogs. e Click OK or Print. Using Windows 1 With a document open , click File Œ Print. The Print Setup tab appears. 3 In the Paper Options ... to dry to use . 3 From the print options pop-up menu, choose Quality & Media. 4 From the Paper type pop-up menu, choose the printer that you want to within 1 mm of the edge of the label sheet. • Make sure the paper guide or paper guides rest against the...
... paper size matches the label sheet size, then create a custom size. Partial sheets (with areas exposed by missing labels) may cause labels to close any printer software dialogs. e Click OK or Print. Using Windows 1 With a document open , click File Œ Print. The Print Setup tab appears. 3 In the Paper Options ... to dry to use . 3 From the print options pop-up menu, choose Quality & Media. 4 From the Paper type pop-up menu, choose the printer that you want to within 1 mm of the edge of the label sheet. • Make sure the paper guide or paper guides rest against the...
User's Guide
Page 81
...size pop-up menu, choose the printer that you set by the printer. d From the custom sizes list on the left of the dialog, double-click Untitled, and then type a name for the custom paper size you want to close any printer software dialogs that are set . c ...Under Hardware and Sound, click Printer. Managing print jobs Pausing print jobs Using the printer folder in Step 3d. 5 Click Print. b Click Settings ΠPrinters. 2 Right-click the printer, and then select Pause Printing. 4 Select...
...size pop-up menu, choose the printer that you set by the printer. d From the custom sizes list on the left of the dialog, double-click Untitled, and then type a name for the custom paper size you want to close any printer software dialogs that are set . c ...Under Hardware and Sound, click Printer. Managing print jobs Pausing print jobs Using the printer folder in Step 3d. 5 Click Print. b Click Settings ΠPrinters. 2 Right-click the printer, and then select Pause Printing. 4 Select...
User's Guide
Page 88
...& Media. • From the Paper Type pop-up menu, choose a paper size. 4 Click OK. Printing photos from a memory device using the printer software 1 Load photo paper with the glossy or printable side facing you. (If you are not sure which side is the printable side, then see the...edit and print photos. Note: This program may also view the Help associated with the program. c Select Lexmark Productivity Studio. d Open the photo that you want to install it with the printer software during installation. Note: Manually choosing a paper type, even if you have a paper type sensor, turns ...
...& Media. • From the Paper Type pop-up menu, choose a paper size. 4 Click OK. Printing photos from a memory device using the printer software 1 Load photo paper with the glossy or printable side facing you. (If you are not sure which side is the printable side, then see the...edit and print photos. Note: This program may also view the Help associated with the program. c Select Lexmark Productivity Studio. d Open the photo that you want to install it with the printer software during installation. Note: Manually choosing a paper type, even if you have a paper type sensor, turns ...
User's Guide
Page 93
... to avoid dark edges on scanning and customizing scanned images, see the Help associated with the programs installed with the printer software. Scanning For more options on the scanned image. 2 From the printer control panel, press . Scan to the computer: a Press . e Press . b Wait until the application that you make Scanning 93 each time...
... to avoid dark edges on scanning and customizing scanned images, see the Help associated with the programs installed with the printer software. Scanning For more options on the scanned image. 2 From the printer control panel, press . Scan to the computer: a Press . e Press . b Wait until the application that you make Scanning 93 each time...
User's Guide
Page 94
...the arrow buttons to avoid dark edges on the scanner glass. 2 Close the top cover to decrease or increase the value for the printer software associated with your operating system. - Note: Do not remove the memory device until the application that the file has been saved. &#...Windows Vista, click . • In Windows XP and earlier, click Start. 4 Click All Programs or Programs, and then select the printer program folder from the list. 5 Click Lexmark Productivity Studio. 6 From the main screen, click Scan. 7 Follow the instructions on the computer screen. To assign a computer name and...
...the arrow buttons to avoid dark edges on the scanner glass. 2 Close the top cover to decrease or increase the value for the printer software associated with your operating system. - Note: Do not remove the memory device until the application that the file has been saved. &#...Windows Vista, click . • In Windows XP and earlier, click Start. 4 Click All Programs or Programs, and then select the printer program folder from the list. 5 Click Lexmark Productivity Studio. 6 From the main screen, click Scan. 7 Follow the instructions on the computer screen. To assign a computer name and...


