
User's Guide
Page 73
...Press or repeatedly until Camera Card or the specific type of your computer using Windows 2000: a From the desktop, double-click the Productivity Studio icon. Transferring ..., click the check box and enter a name. 9 Click Next. 10 Remove the CD or flash drive to transfer. 2 Insert a flash drive into ...folder you want to view your computer. 2 If you must select USB as a memory card or digital camera) into the PictBridge port on your... a folder other than the default folder: a Click Browse. The Lexmark Productivity Studio software launches automatically on the front of the photos you ...
...Press or repeatedly until Camera Card or the specific type of your computer using Windows 2000: a From the desktop, double-click the Productivity Studio icon. Transferring ..., click the check box and enter a name. 9 Click Next. 10 Remove the CD or flash drive to transfer. 2 Insert a flash drive into ...folder you want to view your computer. 2 If you must select USB as a memory card or digital camera) into the PictBridge port on your... a folder other than the default folder: a Click Browse. The Lexmark Productivity Studio software launches automatically on the front of the photos you ...
User's Guide
Page 77
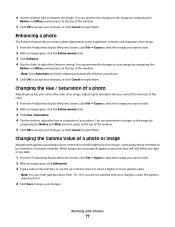
...Productivity Studio Welcome Screen, click File ΠOpen to select the image you to control the overall brightness of the window. 5 Click OK to accept your changes, or click Cancel to the image by comparing the Before and After preview panes...You can preview the changes to your image by comparing the Before and After preview panes at the top of the window. 5 Click OK to accept your changes, or click Cancel to be viewed on a computer monitor. When images are... Use the slider to adjust the Enhance setting. Changing the Gamma Value of the window. You can enter gamma values from...
...Productivity Studio Welcome Screen, click File ΠOpen to select the image you to control the overall brightness of the window. 5 Click OK to accept your changes, or click Cancel to the image by comparing the Before and After preview panes...You can preview the changes to your image by comparing the Before and After preview panes at the top of the window. 5 Click OK to accept your changes, or click Cancel to be viewed on a computer monitor. When images are... Use the slider to adjust the Enhance setting. Changing the Gamma Value of the window. You can enter gamma values from...
User's Guide
Page 79
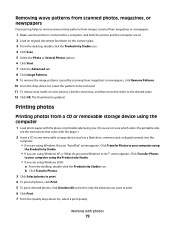
...by scanning from a CD or removable storage device using the Productivity Studio. • If you want Windows to the desired value. 12 Click OK. Click Transfer Photos to print. 6 Click Print. 7... 79 Click Transfer Photos to your computer using the Productivity Studio. • If you are using Windows Vista, an "AutoPlay" screen appears. Working with the paper.) 2 Insert a CD or any..., or digital camera) into the computer. • If you are using Windows XP, a "What do you are using Windows 2000: a From the desktop, double-click the Productivity Studio icon. Printing photos...
...by scanning from a CD or removable storage device using the Productivity Studio. • If you want Windows to the desired value. 12 Click OK. Click Transfer Photos to print. 6 Click Print. 7... 79 Click Transfer Photos to your computer using the Productivity Studio. • If you are using Windows Vista, an "AutoPlay" screen appears. Working with the paper.) 2 Insert a CD or any..., or digital camera) into the computer. • If you are using Windows XP, a "What do you are using Windows 2000: a From the desktop, double-click the Productivity Studio icon. Printing photos...

User's Guide
Page 80
..., select the paper type 8 To select multiple prints of the screen. Working with edits in the bottom right corner to return to the print window. 10 Click Print Now in the bottom right corner of a photo, or to edit your photo(s) before printing, click Edit Photo above the Print Preview... the drop-down list, select a copy quality. 6 From the Paper Size in the table. When you want in the last column to the photo-editing window. Creating Photo Greeting Cards 1 From the desktop, double-click the Productivity Studio icon. 2 Click Photo Greeting Cards. 3 From the Style tab, click to...
..., select the paper type 8 To select multiple prints of the screen. Working with edits in the bottom right corner to return to the print window. 10 Click Print Now in the bottom right corner of a photo, or to edit your photo(s) before printing, click Edit Photo above the Print Preview... the drop-down list, select a copy quality. 6 From the Paper Size in the table. When you want in the last column to the photo-editing window. Creating Photo Greeting Cards 1 From the desktop, double-click the Productivity Studio icon. 2 Click Photo Greeting Cards. 3 From the Style tab, click to...
User's Guide
Page 151
... data. Verify that the printer is plugged in the corner of the scanner glass. Change the scanning resolution to communicate with the printer name. 10 Click OK. The installation screen appears. Printer is on the scanner glass. 2 From the desktop, double-click the Productivity Studio icon. 3 ...original document is placed in the upper left corner of the scanner glass. • Place the item you want to run properly. 1 Start Windows. 2 When the desktop appears, insert the software CD for help attaching the printer. Updating the printer software The printer software needs to be ...
... data. Verify that the printer is plugged in the corner of the scanner glass. Change the scanning resolution to communicate with the printer name. 10 Click OK. The installation screen appears. Printer is on the scanner glass. 2 From the desktop, double-click the Productivity Studio icon. 3 ...original document is placed in the upper left corner of the scanner glass. • Place the item you want to run properly. 1 Start Windows. 2 When the desktop appears, insert the software CD for help attaching the printer. Updating the printer software The printer software needs to be ...
User's Guide
Page 17
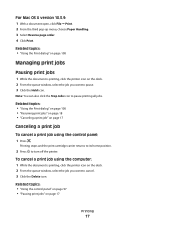
...the printer. Related topics: • "Using the control panel" on page 97 • "Pausing print jobs" on the dock. 2 From the queue window, select the job you want to pause. 3 Click the Hold icon. Printing stops and the print cartridge carrier returns to its home position. 2 Press... to pause printing all jobs. For Mac OS X version 10.3.9: 1 With a document open, click File Œ Print. 2 From the third pop-up menu, choose Paper Handling. 3 Select Reverse page order. 4 Click ...
...the printer. Related topics: • "Using the control panel" on page 97 • "Pausing print jobs" on the dock. 2 From the queue window, select the job you want to pause. 3 Click the Hold icon. Printing stops and the print cartridge carrier returns to its home position. 2 Press... to pause printing all jobs. For Mac OS X version 10.3.9: 1 With a document open, click File Œ Print. 2 From the third pop-up menu, choose Paper Handling. 3 Select Reverse page order. 4 Click ...
User's Guide
Page 120
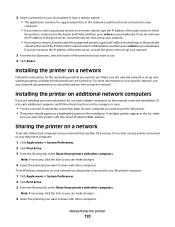
... subnet in the Search by IP field, and then press return on your keyboard. Sharing the printer on a network To let other computers. To let Windows computers on your Macintosh computer: 1 Click Apple menu ΠSystem Preferences. 2 Click Print & Fax. 3 From the Sharing tab, select Share these printers with other computers... computers. Note: If necessary, click the lock so you can make changes. 4 Select the printer(s) you want to your network that use Mac OS X version 10.3 or later use .
... subnet in the Search by IP field, and then press return on your keyboard. Sharing the printer on a network To let other computers. To let Windows computers on your Macintosh computer: 1 Click Apple menu ΠSystem Preferences. 2 Click Print & Fax. 3 From the Sharing tab, select Share these printers with other computers... computers. Note: If necessary, click the lock so you can make changes. 4 Select the printer(s) you want to your network that use Mac OS X version 10.3 or later use .


