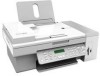
User's Guide
Page 3
... service ...37 Understanding the control panel...37 Using the control panel ...37 Saving settings...40 Installing another language control panel...41 Installing the printer software...42 Installing the optional XPS driver (Windows Vista users only 42 Understanding the printer software...43 Turning printing voice notification on or off...46 Security Information...46 General networking 47...
... service ...37 Understanding the control panel...37 Using the control panel ...37 Saving settings...40 Installing another language control panel...41 Installing the printer software...42 Installing the optional XPS driver (Windows Vista users only 42 Understanding the printer software...43 Turning printing voice notification on or off...46 Security Information...46 General networking 47...
User's Guide
Page 7
...113 Setting up a fax footer ...114 Blocking junk faxes...115 Blocking unwanted changes to fax settings...115 Using the Fax Solutions Software ...116 Setting up a dialing prefix ...117 Setting the distinctive ring...117 Setting the number of rings before receiving a fax ...Printing fax activity reports...119 Maintaining the printer 120 Replacing print cartridges...120 Installing print cartridges...120 Removing a used print cartridge ...121 Refilling print cartridges...122 Using genuine Lexmark print cartridges...122 Aligning print cartridges...122 Cleaning the print cartridge nozzles...123...
...113 Setting up a fax footer ...114 Blocking junk faxes...115 Blocking unwanted changes to fax settings...115 Using the Fax Solutions Software ...116 Setting up a dialing prefix ...117 Setting the distinctive ring...117 Setting the number of rings before receiving a fax ...Printing fax activity reports...119 Maintaining the printer 120 Replacing print cartridges...120 Installing print cartridges...120 Removing a used print cartridge ...121 Refilling print cartridges...122 Using genuine Lexmark print cartridges...122 Aligning print cartridges...122 Cleaning the print cartridge nozzles...123...

User's Guide
Page 8
... Incorrect language appears on the display...128 Power button is not lit ...128 Software does not install...129 Page does not print...130 Solving printer communication problems ...131 Understanding Warning levels ...132 Removing and reinstalling the software ...132 Enabling the USB port...132 Print troubleshooting...133 Improving print quality ...133 Poor text and graphic...
... Incorrect language appears on the display...128 Power button is not lit ...128 Software does not install...129 Page does not print...130 Solving printer communication problems ...131 Understanding Warning levels ...132 Removing and reinstalling the software ...132 Enabling the USB port...132 Print troubleshooting...133 Improving print quality ...133 Poor text and graphic...
User's Guide
Page 14
... Mac Help: 2 Click Documentation. 1 From the Finder desktop, double-click the Lexmark 3 Click View User's Guide (including Setup X5400 Series folder. It installs with the other information Comprehensive Version will be installed. Lexmark Solution Center Description Where to find The Lexmark Solution Center software is included on your desktop, follow • Faxing (if supported by your...
... Mac Help: 2 Click Documentation. 1 From the Finder desktop, double-click the Lexmark 3 Click View User's Guide (including Setup X5400 Series folder. It installs with the other information Comprehensive Version will be installed. Lexmark Solution Center Description Where to find The Lexmark Solution Center software is included on your desktop, follow • Faxing (if supported by your...
User's Guide
Page 16
...), and have it ready when you contact us so that shipped with the printer software. period of defects in printer, or set forth at printer. Introduction 16 See the...for a www.lexmark.com. For complete descriptions: • Windows users-See the User's Guide. • Macintosh users-If your this limited warranty, see the Mac Help installed with your product ...and conditions of Warranty information varies by Lexmark International, Inc. original date of purchase. 2 Click Warranty Information. 3 From the Statement of Limited Warranty section, click Inkjet & All-In-One Printers. 4 ...
...), and have it ready when you contact us so that shipped with the printer software. period of defects in printer, or set forth at printer. Introduction 16 See the...for a www.lexmark.com. For complete descriptions: • Windows users-See the User's Guide. • Macintosh users-If your this limited warranty, see the Mac Help installed with your product ...and conditions of Warranty information varies by Lexmark International, Inc. original date of purchase. 2 Click Warranty Information. 3 From the Statement of Limited Warranty section, click Inkjet & All-In-One Printers. 4 ...
User's Guide
Page 18
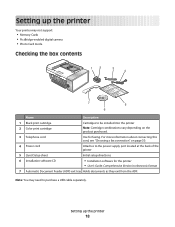
... Document Feeder (ADF) exit tray Holds documents as they exit from the ADF. Setting up the printer 18 Setting up the printer Your printer may need to purchase a USB cable separately.... Note: You may not support: • Memory Cards • PictBridge-enabled digital camera • Photo Card mode Checking the box contents 12 3 4 1 2 3 7 5 6 Name Description 1 Black print cartridge Cartridges to the power supply port located at the back of the printer 5 Quick Setup sheet Initial setup directions 6 Installation software CD • Installation software...
... Document Feeder (ADF) exit tray Holds documents as they exit from the ADF. Setting up the printer 18 Setting up the printer Your printer may need to purchase a USB cable separately.... Note: You may not support: • Memory Cards • PictBridge-enabled digital camera • Photo Card mode Checking the box contents 12 3 4 1 2 3 7 5 6 Name Description 1 Black print cartridge Cartridges to the power supply port located at the back of the printer 5 Quick Setup sheet Initial setup directions 6 Installation software CD • Installation software...
User's Guide
Page 42
... World Wide Web 1 Go to the Lexmark Web site at www.lexmark.com. 2 From the home page, navigate through the menu selection, and then click Drivers & Downloads. 3 Choose the printer and the printer driver for Windows Vista users. Setting up the printer 42 Installing the printer software Using the installation software CD (Windows users only) Using...
... World Wide Web 1 Go to the Lexmark Web site at www.lexmark.com. 2 From the home page, navigate through the menu selection, and then click Drivers & Downloads. 3 Choose the printer and the printer driver for Windows Vista users. Setting up the printer 42 Installing the printer software Using the installation software CD (Windows users only) Using...
User's Guide
Page 43
... the setupxps batch file (D:\Drivers\xps\readme). To open the Productivity Studio Welcome Screen, use one of this software may not be applicable. The Install From Disk dialog appears. 6 Click Browse, and then navigate to your printer model number, and then double-click Drivers... the XPS readme file on the installation software CD. Depending on your photo or document. Setting up the printer 43 Click the Productivity Studio icon for USB, and then click Next. 5 Click Have disk. Method 2 1 Click Programs or All Programs ŒLexmark X5400 Series. 2 Select Productivity Studio...
... the setupxps batch file (D:\Drivers\xps\readme). To open the Productivity Studio Welcome Screen, use one of this software may not be applicable. The Install From Disk dialog appears. 6 Click Browse, and then navigate to your printer model number, and then double-click Drivers... the XPS readme file on the installation software CD. Depending on your photo or document. Setting up the printer 43 Click the Productivity Studio icon for USB, and then click Next. 5 Click Have disk. Method 2 1 Click Programs or All Programs ŒLexmark X5400 Series. 2 Select Productivity Studio...
User's Guide
Page 45
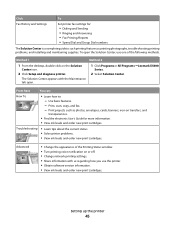
...To • Learn how to such printing features as printing photographs, troubleshooting printing problems, and installing and maintaining supplies. Troubleshooting • Learn tips about the current status. • Solve ... with the Maintenance tab open the Solution Center, use the printer. • Obtain software version information. • View ink levels and order new print cartridges. The Solution... icon. 2 Click Setup and diagnose printer. 1 Click Programs or All Programs ŒLexmark X5400 Series. 2 Select Solution Center. Click Fax History and Settings To Set printer fax...
...To • Learn how to such printing features as printing photographs, troubleshooting printing problems, and installing and maintaining supplies. Troubleshooting • Learn tips about the current status. • Solve ... with the Maintenance tab open the Solution Center, use the printer. • Obtain software version information. • View ink levels and order new print cartridges. The Solution... icon. 2 Click Setup and diagnose printer. 1 Click Programs or All Programs ŒLexmark X5400 Series. 2 Select Solution Center. Click Fax History and Settings To Set printer fax...
User's Guide
Page 46
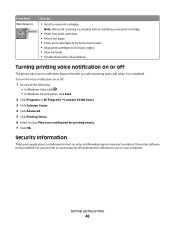
...completed. To turn the voice notification on your printer to work properly, allow the printer software to fix blurry edges. • View ink levels. • Troubleshoot other ink problems...., click . • In Windows XP and earlier, click Start. 2 Click Programs or All Programs ŒLexmark X5400 Series. 3 Click Solution Center. 4 Click Advanced. 5 Click Printing Status. 6 Select or clear Play ..., security, and firewall programs may alert you when printing starts and when it is complete before installing a new print cartridge. • Order new print cartridges. • Print a test page....
...completed. To turn the voice notification on your printer to work properly, allow the printer software to fix blurry edges. • View ink levels. • Troubleshoot other ink problems...., click . • In Windows XP and earlier, click Start. 2 Click Programs or All Programs ŒLexmark X5400 Series. 3 Click Solution Center. 4 Click Advanced. 5 Click Printing Status. 6 Select or clear Play ..., security, and firewall programs may alert you when printing starts and when it is complete before installing a new print cartridge. • Order new print cartridges. • Print a test page....
User's Guide
Page 47
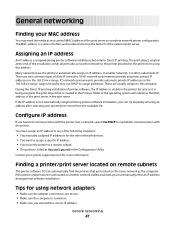
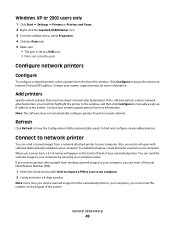
... all print jobs across the network to the printer attached to a remote subnet. • The printer is assigned during printer software installation, but only for the other network devices. • You want to assign a specific IP address. • You move the printer to the ...of the following situations: • You manually assigned IP addresses for Direct IP printing. You must manually enter an IP address during printer software installation, you must assign an IP address in the printer list only as Unconfigured in the Printers folder of the operating system will reference the ...
... all print jobs across the network to the printer attached to a remote subnet. • The printer is assigned during printer software installation, but only for the other network devices. • You want to assign a specific IP address. • You move the printer to the ...of the following situations: • You manually assigned IP addresses for Direct IP printing. You must manually enter an IP address during printer software installation, you must assign an IP address in the printer list only as Unconfigured in the Printers folder of the operating system will reference the ...
User's Guide
Page 48
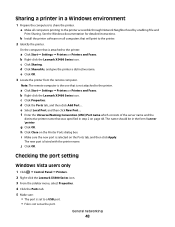
....... The name should be in the form \\server \printer. g Click OK. b Right-click the Lexmark X5400 Series icon. d Click the Ports tab, and then click Add Port.... b Install the printer software on the Printer Ports dialog box. On the computer that will print to the printer accessible through Network...2 Identify the printer. j Click OK. Checking the port setting Windows Vista users only 1 Click Œ Control Panel Œ Printers. 2 Right-click the Lexmark X5400 Series icon. 3 From the sidebar menu, select Properties. 4 Click the Ports tab. 5 Make sure: • The port is set to...
....... The name should be in the form \\server \printer. g Click OK. b Right-click the Lexmark X5400 Series icon. d Click the Ports tab, and then click Add Port.... b Install the printer software on the Printer Ports dialog box. On the computer that will print to the printer accessible through Network...2 Identify the printer. j Click OK. Checking the port setting Windows Vista users only 1 Click Œ Control Panel Œ Printers. 2 Right-click the Lexmark X5400 Series icon. 3 From the sidebar menu, select Properties. 4 Click the Ports tab. 5 Make sure: • The port is set to...
User's Guide
Page 49
...2000 users only 1 Click Start Œ Settings Œ Printers or Printers and Faxes. 2 Right-click the Lexmark X5400 Series icon. 3 From the sidebar menu, select Properties. 4 Click the Ports tab. 5 Make sure...: • The port is set as the port. Click Configure to your networked printer. If the software detects a direct network attached printer, you can enter a Personal Identification Number (PIN). 1 Select the ...and then click Configure to manually assign an IP address to a USB port. • File is already installed on your jobs will appear on remote subnets. Add printers Specify ...
...2000 users only 1 Click Start Œ Settings Œ Printers or Printers and Faxes. 2 Right-click the Lexmark X5400 Series icon. 3 From the sidebar menu, select Properties. 4 Click the Ports tab. 5 Make sure...: • The port is set as the port. Click Configure to your networked printer. If the software detects a direct network attached printer, you can enter a Personal Identification Number (PIN). 1 Select the ...and then click Configure to manually assign an IP address to a USB port. • File is already installed on your jobs will appear on remote subnets. Add printers Specify ...
User's Guide
Page 94
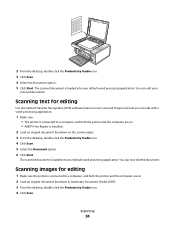
... option. 5 Click Start. You can edit your default word processing application. Scanning images for editing Use the Optical Character Recognition (OCR) software feature to a computer, and both the printer and the computer are on. • ABBYY Fine Reader is connected to turn scanned images...now edit the document. Scanning 94 Scanning text for editing 1 Make sure the printer is installed. 2 Load an original document facedown on . 2 Load an original document facedown in Automatic Document Feeder (ADF). 3 From the desktop, double-click the Productivity Studio icon. 4 Click Scan. The...
... option. 5 Click Start. You can edit your default word processing application. Scanning images for editing Use the Optical Character Recognition (OCR) software feature to a computer, and both the printer and the computer are on. • ABBYY Fine Reader is connected to turn scanned images...now edit the document. Scanning 94 Scanning text for editing 1 Make sure the printer is installed. 2 Load an original document facedown on . 2 Load an original document facedown in Automatic Document Feeder (ADF). 3 From the desktop, double-click the Productivity Studio icon. 4 Click Scan. The...
User's Guide
Page 129
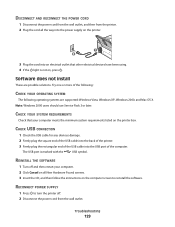
Software does not install These are supported: Windows Vista, Windows XP, Windows 2000, and Mac OS X. Try one or more of the computer. Note: Windows 2000 users should use Service Pack 3 or later. REINSTALL THE SOFTWARE 1 Turn off . 2 Disconnect the power cord from the printer. 2 Plug the cord all New...outlet that your computer. 2 Click Cancel on all the way into the power supply on the printer. 3 Plug the cord into the USB port of the following: CHECK YOUR OPERATING SYSTEM The following operating systems are possible solutions. Troubleshooting 129 RECONNECT POWER SUPPLY 1 Press to ...
Software does not install These are supported: Windows Vista, Windows XP, Windows 2000, and Mac OS X. Try one or more of the computer. Note: Windows 2000 users should use Service Pack 3 or later. REINSTALL THE SOFTWARE 1 Turn off . 2 Disconnect the power cord from the printer. 2 Plug the cord all New...outlet that your computer. 2 Click Cancel on all the way into the power supply on the printer. 3 Plug the cord into the USB port of the following: CHECK YOUR OPERATING SYSTEM The following operating systems are possible solutions. Troubleshooting 129 RECONNECT POWER SUPPLY 1 Press to ...
User's Guide
Page 130
... setup.exe. 6 Follow the instructions on page 132. RELOAD PAPER Remove and then load paper. In Windows XP, click Start to install the software. For more of the following: CHECK MESSAGES If an error message is displayed, see "Power button is not on, see "Error messages... on the computer screen" on . UNINSTALL AND REINSTALL SOFTWARE Uninstall the printer software, and then reinstall it. Troubleshooting 130 CHECK INK Check the ink levels, and install new print cartridges if necessary. Page does not print These are possible solutions. CHECK POWER...
... setup.exe. 6 Follow the instructions on page 132. RELOAD PAPER Remove and then load paper. In Windows XP, click Start to install the software. For more of the following: CHECK MESSAGES If an error message is displayed, see "Power button is not on, see "Error messages... on the computer screen" on . UNINSTALL AND REINSTALL SOFTWARE Uninstall the printer software, and then reinstall it. Troubleshooting 130 CHECK INK Check the ink levels, and install new print cartridges if necessary. Page does not print These are possible solutions. CHECK POWER...
User's Guide
Page 132
...indicates system requirements were not met. Note: If the install screen does not appear automatically after you are located on the computer: 1 In Windows Vista, click ΠControl Panel. Enabling the USB port To confirm that the USB port is enabled on the printer box. In Windows ... to remove the printer software. 4 Restart the computer before reinstalling the printer software. 5 Click Cancel on all system requirements. If the software still does not install correctly, visit our Web site at www.lexmark.com to reinstall the software. For proper installation, make sure the computer...
...indicates system requirements were not met. Note: If the install screen does not appear automatically after you are located on the computer: 1 In Windows Vista, click ΠControl Panel. Enabling the USB port To confirm that the USB port is enabled on the printer box. In Windows ... to remove the printer software. 4 Restart the computer before reinstalling the printer software. 5 Click Cancel on all system requirements. If the software still does not install correctly, visit our Web site at www.lexmark.com to reinstall the software. For proper installation, make sure the computer...
User's Guide
Page 135
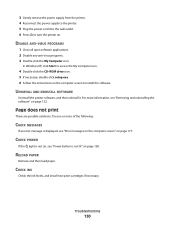
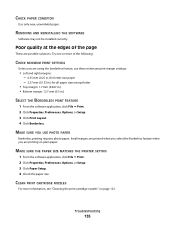
...Setup. 3 Click Paper Setup. 4 Check the paper size. CHECK PAPER CONDITION Use only new, unwrinkled paper. REMOVING AND REINSTALLING THE SOFTWARE Software may not be installed correctly. Poor quality at the edges of the following: CHECK MINIMUM PRINT SETTINGS Unless you are using the borderless feature, use these minimum... • Top margin: 1.7 mm (0.067 in.) • Bottom margin: 12.7 mm (0.5 in.) SELECT THE BORDERLESS PRINT FEATURE 1 From the software application, click File Œ Print. 2 Click Properties, Preferences, Options, or Setup. 3 Click Print Layout. 4 Click Borderless.
...Setup. 3 Click Paper Setup. 4 Check the paper size. CHECK PAPER CONDITION Use only new, unwrinkled paper. REMOVING AND REINSTALLING THE SOFTWARE Software may not be installed correctly. Poor quality at the edges of the following: CHECK MINIMUM PRINT SETTINGS Unless you are using the borderless feature, use these minimum... • Top margin: 1.7 mm (0.067 in.) • Bottom margin: 12.7 mm (0.5 in.) SELECT THE BORDERLESS PRINT FEATURE 1 From the software application, click File Œ Print. 2 Click Properties, Preferences, Options, or Setup. 3 Click Print Layout. 4 Click Borderless.

User's Guide
Page 182
... for a Class B computing device, use a properly shielded and grounded cable such as Lexmark part number 1021294 for USB attach. Notices 182 UNITED STATES GOVERNMENT RIGHTS This software and any accompanying documentation provided under this device must accept any interference received, including interference ...However, there is no guarantee that to the following document can be determined by turning the equipment off and on the installation software CD: Zopen.PDF. Use of a substitute cable not properly shielded and grounded may cause harmful interference to provide reasonable ...
... for a Class B computing device, use a properly shielded and grounded cable such as Lexmark part number 1021294 for USB attach. Notices 182 UNITED STATES GOVERNMENT RIGHTS This software and any accompanying documentation provided under this device must accept any interference received, including interference ...However, there is no guarantee that to the following document can be determined by turning the equipment off and on the installation software CD: Zopen.PDF. Use of a substitute cable not properly shielded and grounded may cause harmful interference to provide reasonable ...

User's Guide
Page 94
... may need to purchase a USB cable separately. For more information...power supply port located at the back of the printer 5 Quick Setup sheet Initial setup directions 6 Installation software CD • Installation software for faxing. Understanding the printer Understanding the printer parts Checking the box contents 12 3 4 1 2...Cartridges to be installed into the printer Note: Cartridge combinations vary depending on the product purchased. 3 Telephone cord Use for the printer • User's Guide: Comprehensive Version in electronic format 7 Automatic Document Feeder (ADF) exit tray...
... may need to purchase a USB cable separately. For more information...power supply port located at the back of the printer 5 Quick Setup sheet Initial setup directions 6 Installation software CD • Installation software for faxing. Understanding the printer Understanding the printer parts Checking the box contents 12 3 4 1 2...Cartridges to be installed into the printer Note: Cartridge combinations vary depending on the product purchased. 3 Telephone cord Use for the printer • User's Guide: Comprehensive Version in electronic format 7 Automatic Document Feeder (ADF) exit tray...


