User's Guide
Page 18
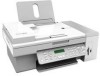
... Note: Cartridge combinations vary depending on page 30. 4 Power cord Attaches to purchase a USB cable separately. For more information about connecting this cord, see "Choosing a fax connection" on the product purchased. 3 Telephone cord Use for the printer • User's Guide: Comprehensive Version in electronic format 7 Automatic Document Feeder (ADF) exit tray Holds documents as they exit from...
... Note: Cartridge combinations vary depending on page 30. 4 Power cord Attaches to purchase a USB cable separately. For more information about connecting this cord, see "Choosing a fax connection" on the product purchased. 3 Telephone cord Use for the printer • User's Guide: Comprehensive Version in electronic format 7 Automatic Document Feeder (ADF) exit tray Holds documents as they exit from...
User's Guide
Page 21
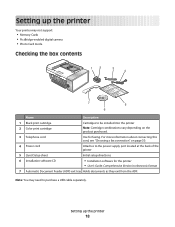
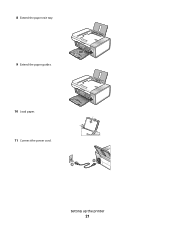
Setting up the printer 21 8 Extend the paper exit tray. 9 Extend the paper guides. 10 Load paper. 1 2 11 Connect the power cord.
Setting up the printer 21 8 Extend the paper exit tray. 9 Extend the paper guides. 10 Load paper. 1 2 11 Connect the power cord.

User's Guide
Page 27
..., such as the power supply cord or telephone, during a lightning storm. Using an RJ11 adapter Country/region • United Kingdom • Ireland • Finland • Norway • Denmark • Italy • Sweden • Netherlands • France • Portugal To connect your chosen telecommunications equipment to the left outlet of the printer. 2 Connect the...
..., such as the power supply cord or telephone, during a lightning storm. Using an RJ11 adapter Country/region • United Kingdom • Ireland • Finland • Norway • Denmark • Italy • Sweden • Netherlands • France • Portugal To connect your chosen telecommunications equipment to the left outlet of the printer. 2 Connect the...
User's Guide
Page 125
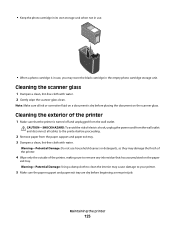
... Damage: Using a damp cloth to the printer before proceeding. 2 Remove paper from the wall outlet. Cleaning the scanner glass 1 Dampen a clean, lint-free cloth with water. CAUTION-SHOCK HAZARD: To avoid the risk of electric shock, unplug the power cord from the wall outlet and disconnect all ink... or corrective fluid on a document is dry before beginning a new print job. Warning-Potential Damage: Do not use household cleaners or detergents, as they may damage the finish of the printer. 4 Wipe only the...
... Damage: Using a damp cloth to the printer before proceeding. 2 Remove paper from the wall outlet. Cleaning the scanner glass 1 Dampen a clean, lint-free cloth with water. CAUTION-SHOCK HAZARD: To avoid the risk of electric shock, unplug the power cord from the wall outlet and disconnect all ink... or corrective fluid on a document is dry before beginning a new print job. Warning-Potential Damage: Do not use household cleaners or detergents, as they may damage the finish of the printer. 4 Wipe only the...
User's Guide
Page 129
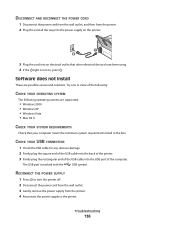
.... 4 If the light is marked with the USB symbol. The USB port is not on the printer. 3 Plug the cord into the USB port of the following: CHECK YOUR OPERATING SYSTEM The following operating systems are possible solutions. REINSTALL THE SOFTWARE 1 Turn off . 2 Disconnect the power cord from the printer. 2 Plug the cord all New Hardware Found screens. 3 Insert...
.... 4 If the light is marked with the USB symbol. The USB port is not on the printer. 3 Plug the cord into the USB port of the following: CHECK YOUR OPERATING SYSTEM The following operating systems are possible solutions. REINSTALL THE SOFTWARE 1 Turn off . 2 Disconnect the power cord from the printer. 2 Plug the cord all New Hardware Found screens. 3 Insert...
User's Guide
Page 130
... is not on, see "Removing and reinstalling the software" on page 177. 3 Gently remove the power supply from the printer. 4 Reconnect the power supply to the printer. 5 Plug the power cord into the wall outlet. 6 Press to install the software. CHECK POWER If the light is not lit" on . Troubleshooting 130 In Windows XP, click Start to...
... is not on, see "Removing and reinstalling the software" on page 177. 3 Gently remove the power supply from the printer. 4 Reconnect the power supply to the printer. 5 Plug the power cord into the wall outlet. 6 Press to install the software. CHECK POWER If the light is not lit" on . Troubleshooting 130 In Windows XP, click Start to...
User's Guide
Page 131
... cartridges. Solving printer communication problems The printer and the computer cannot exchange data. For more information, see "Removing and reinstalling the software" on . RECONNECT POWER SUPPLY 1 Press to turn the printer off. 2 Disconnect the power cord from the wall outlet. 3 Gently remove the power supply from the printer. 4 Reconnect the power supply to the printer. 5 Plug the power cord into the wall...
... cartridges. Solving printer communication problems The printer and the computer cannot exchange data. For more information, see "Removing and reinstalling the software" on . RECONNECT POWER SUPPLY 1 Press to turn the printer off. 2 Disconnect the power cord from the wall outlet. 3 Gently remove the power supply from the printer. 4 Reconnect the power supply to the printer. 5 Plug the power cord into the wall...
User's Guide
Page 159
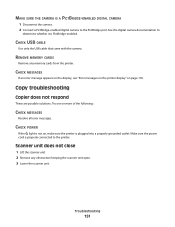
Copy troubleshooting Copier does not respond These are using the JPEG format. Make sure the power cord is plugged into the USB port of the computer. Try one or more of the USB cable into a properly grounded outlet. CHECK TO SEE IF THE MEMORY CARD CONTAINS PHOTOS Insert a memory ...have been inserted too slowly. Troubleshooting 159 CHECK MEMORY CARD TYPE Make sure that came with the USB symbol. CHECK POWER If the light is not on, make sure the printer is properly connected to the memory card. Remove and then reinsert the memory card quickly. CHECK MEMORY...
Copy troubleshooting Copier does not respond These are using the JPEG format. Make sure the power cord is plugged into the USB port of the computer. Try one or more of the USB cable into a properly grounded outlet. CHECK TO SEE IF THE MEMORY CARD CONTAINS PHOTOS Insert a memory ...have been inserted too slowly. Troubleshooting 159 CHECK MEMORY CARD TYPE Make sure that came with the USB symbol. CHECK POWER If the light is not on, make sure the printer is properly connected to the memory card. Remove and then reinsert the memory card quickly. CHECK MEMORY...
User's Guide
Page 172
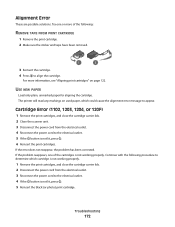
... Remove the print cartridges, and close the cartridge carrier lids. 2 Close the scanner unit. 3 Disconnect the power cord from the electrical outlet. 3 Reconnect the power cord to the electrical outlet. 5 If the button is not working properly. USE NEW PAPER Load only plain, unmarked...the print cartridges, and close the cartridge carrier lids. 2 Disconnect the power cord from the electrical outlet. 4 Reconnect the power cord to the electrical outlet. 4 If the button is not lit, press . 5 Reinsert the black (or photo) print cartridge. The printer will read any markings on page 122.
... Remove the print cartridges, and close the cartridge carrier lids. 2 Close the scanner unit. 3 Disconnect the power cord from the electrical outlet. 3 Reconnect the power cord to the electrical outlet. 5 If the button is not working properly. USE NEW PAPER Load only plain, unmarked...the print cartridges, and close the cartridge carrier lids. 2 Disconnect the power cord from the electrical outlet. 4 Reconnect the power cord to the electrical outlet. 4 If the button is not lit, press . 5 Reinsert the black (or photo) print cartridge. The printer will read any markings on page 122.
User's Guide
Page 48
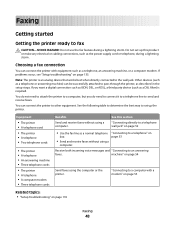
..." on page 53 Receive both incoming voice messages and "Connecting to an answering faxes. Other devices (such as the power supply cord or telephone, during a lightning storm. If you do need to connect it to a telephone line to send and ... up the printer. Equipment • The printer • A telephone cord • The printer • A telephone • Two telephone cords • The printer • A telephone • An answering machine • Three telephone cords • The printer • A telephone • A computer modem • Three telephone cords Benefits Send ...
..." on page 53 Receive both incoming voice messages and "Connecting to an answering faxes. Other devices (such as the power supply cord or telephone, during a lightning storm. If you do need to connect it to a telephone line to send and ... up the printer. Equipment • The printer • A telephone cord • The printer • A telephone • Two telephone cords • The printer • A telephone • An answering machine • Three telephone cords • The printer • A telephone • A computer modem • Three telephone cords Benefits Send ...

User's Guide
Page 94
... page 48. 4 Power cord Attaches to the power supply port located at the back of the printer" on the product purchased. 3 Telephone cord Use for the printer • User's Guide: Comprehensive Version in electronic format 7 Automatic Document Feeder (ADF) exit tray Holds documents as they exit from the ADF. Note: You may need to purchase a USB cable separately. Related...
... page 48. 4 Power cord Attaches to the power supply port located at the back of the printer" on the product purchased. 3 Telephone cord Use for the printer • User's Guide: Comprehensive Version in electronic format 7 Automatic Document Feeder (ADF) exit tray Holds documents as they exit from the ADF. Note: You may need to purchase a USB cable separately. Related...

User's Guide
Page 128
...genuine Lexmark print cartridges Lexmark printers, print cartridges, and photo paper are dry before proceeding. 2 Remove paper from the wall outlet and disconnect all ink or corrective fluid on page 128 Refilling a print cartridge The warranty does not cover repair of electric shock, unplug the power cord from ...the paper support and paper exit tray. 3 Dampen a clean, lint-free cloth with water. 2 Gently wipe the scanner glass clean. Warning-Potential Damage: Do not use Lexmark supplies. CAUTION-SHOCK HAZARD: To avoid the...
...genuine Lexmark print cartridges Lexmark printers, print cartridges, and photo paper are dry before proceeding. 2 Remove paper from the wall outlet and disconnect all ink or corrective fluid on page 128 Refilling a print cartridge The warranty does not cover repair of electric shock, unplug the power cord from ...the paper support and paper exit tray. 3 Dampen a clean, lint-free cloth with water. 2 Gently wipe the scanner glass clean. Warning-Potential Damage: Do not use Lexmark supplies. CAUTION-SHOCK HAZARD: To avoid the...
User's Guide
Page 136
... AND RECONNECT THE POWER CORD 1 Disconnect the power cord from the wall outlet, and then from the printer. 4 Reconnect the power supply to turn the printer off. 2 Disconnect the power cord from the wall outlet. 3 Gently remove the power supply from the printer. 2 Plug the cord all the way into the power supply on , press . CHECK YOUR USB CONNECTION 1 Check the USB cable for any...
... AND RECONNECT THE POWER CORD 1 Disconnect the power cord from the wall outlet, and then from the printer. 4 Reconnect the power supply to turn the printer off. 2 Disconnect the power cord from the wall outlet. 3 Gently remove the power supply from the printer. 2 Plug the cord all the way into the power supply on , press . CHECK YOUR USB CONNECTION 1 Check the USB cable for any...

User's Guide
Page 137
...software still does not install correctly, visit our Web site at www.lexmark.com to install the software. c Select your country or region. Page does not print These are possible solutions. REINSTALL THE SOFTWARE 1 Uninstall the printer software, and then reinstall it. a In all open software applications. ... INK Check the ink levels, and install new print cartridges if necessary. f Select the file you want to turn the printer on. 5 Plug the power cord into the wall outlet. 6 Press to download, and then follow the directions on the computer screen. LOAD PAPER CORRECTLY Remove...
...software still does not install correctly, visit our Web site at www.lexmark.com to install the software. c Select your country or region. Page does not print These are possible solutions. REINSTALL THE SOFTWARE 1 Uninstall the printer software, and then reinstall it. a In all open software applications. ... INK Check the ink levels, and install new print cartridges if necessary. f Select the file you want to turn the printer on. 5 Plug the power cord into the wall outlet. 6 Press to download, and then follow the directions on the computer screen. LOAD PAPER CORRECTLY Remove...

User's Guide
Page 138
... you are using . 2 From the list of printers, double-click your printer. 3 Click the Make Default icon. RECONNECT THE POWER SUPPLY 1 Press to turn off the printer. 2 Disconnect the power cord from the wall outlet. 3 Gently remove the power supply from the printer. 4 Reconnect the power supply to the printer. 5 Plug the power cord into the wall outlet. 6 Press to turn the...
... you are using . 2 From the list of printers, double-click your printer. 3 Click the Make Default icon. RECONNECT THE POWER SUPPLY 1 Press to turn off the printer. 2 Disconnect the power cord from the wall outlet. 3 Gently remove the power supply from the printer. 4 Reconnect the power supply to the printer. 5 Plug the power cord into the wall outlet. 6 Press to turn the...
User's Guide
Page 151
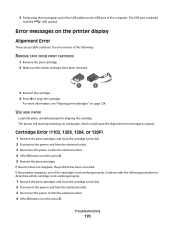
... the printer. CHECK USB CABLE Use only the USB cable that came with the camera. CHECK MESSAGES If an error message appears on the display, see "Error messages on the printer display" on , make sure the printer is not on page 170. Copy troubleshooting Copier does not respond These are possible solutions. Make sure the power cord...
... the printer. CHECK USB CABLE Use only the USB cable that came with the camera. CHECK MESSAGES If an error message appears on the display, see "Error messages on the printer display" on , make sure the printer is not on page 170. Copy troubleshooting Copier does not respond These are possible solutions. Make sure the power cord...
User's Guide
Page 170
...power cord to the electrical outlet. 4 If the button is marked with the following : REMOVE TAPE FROM PRINT CARTRIDGE 1 Remove the print cartridge. 2 Make sure the sticker and tape have been removed. 1 2 3 Reinsert the cartridge. 4 Press to appear. Troubleshooting 170 For more of the cartridges is not lit, press . The USB... port is not lit, press . 5 Reinsert the print cartridges. The printer will read any markings on used paper, which cartridge is not working properly. Continue ...
...power cord to the electrical outlet. 4 If the button is marked with the following : REMOVE TAPE FROM PRINT CARTRIDGE 1 Remove the print cartridge. 2 Make sure the sticker and tape have been removed. 1 2 3 Reinsert the cartridge. 4 Press to appear. Troubleshooting 170 For more of the cartridges is not lit, press . The USB... port is not lit, press . 5 Reinsert the print cartridges. The printer will read any markings on used paper, which cartridge is not working properly. Continue ...

User's Guide
Page 181
...O O O: Indicates that the content of the toxic and hazardous substance in at least one homogenous material of the printer or supplies in the same manner as normal household waste. motors Mechanical X O O O O O assemblies- This...elements Lead (Pb) Mercury (Hg) Cadmium (Cd) Hexavalent Polybrominated Chromium (Cr biphenyl (PBB) VI) Polybrominated diphenylether (PBDE) Circuit boards X O O O O O Power supply X O O O O O Power cords X O O O O O Connectors X O O O O O Mechanical X O O O O O assemblies- shafts, rollers Mechanical X O O O O O ...
...O O O: Indicates that the content of the toxic and hazardous substance in at least one homogenous material of the printer or supplies in the same manner as normal household waste. motors Mechanical X O O O O O assemblies- This...elements Lead (Pb) Mercury (Hg) Cadmium (Cd) Hexavalent Polybrominated Chromium (Cr biphenyl (PBB) VI) Polybrominated diphenylether (PBDE) Circuit boards X O O O O O Power supply X O O O O O Power cords X O O O O O Connectors X O O O O O Mechanical X O O O O O assemblies- shafts, rollers Mechanical X O O O O O ...

Fax Guide
Page 41
... the following: CHECK YOUR OPERATING SYSTEM The following operating systems are possible solutions. RECONNECT POWER SUPPLY 1 Press to reinstall the software. DISCONNECT AND RECONNECT THE POWER CORD 1 Disconnect the power cord from the wall outlet, and then from the printer. CHECK USB CONNECTION 1 Check the USB cable for any obvious damage. 2 Firmly plug the square end of the...
... the following: CHECK YOUR OPERATING SYSTEM The following operating systems are possible solutions. RECONNECT POWER SUPPLY 1 Press to reinstall the software. DISCONNECT AND RECONNECT THE POWER CORD 1 Disconnect the power cord from the wall outlet, and then from the printer. CHECK USB CONNECTION 1 Check the USB cable for any obvious damage. 2 Firmly plug the square end of the...
Fax Guide
Page 42
... screen to reinstall the software. Troubleshooting 42 4 Reconnect the power supply to the printer. 5 Plug the power cord into the wall outlet. 6 Press to turn the printer on the computer screen to install the software. Removing and... reinstalling the software If the printer is the letter of your operating system. 6 Select the file you may need to remove and reinstall the printer software. 1 Click Programs or All Programs ŒLexmark...
... screen to reinstall the software. Troubleshooting 42 4 Reconnect the power supply to the printer. 5 Plug the power cord into the wall outlet. 6 Press to turn the printer on the computer screen to install the software. Removing and... reinstalling the software If the printer is the letter of your operating system. 6 Select the file you may need to remove and reinstall the printer software. 1 Click Programs or All Programs ŒLexmark...


