
User's Guide
Page 10
...Run, and then type D:\setup, where D is not on Windows operating systems) • In Windows Vista, click . • Loading paper • In Windows XP and earlier, click Start. • Printing 2 Click Programs or All Programs Œ Lexmark 5000 • Working with printing, copying, Run. It installs ... the printer to the User's Guide is Note: If your CD. An icon of the following : • In Windows Vista, click . • In Windows XP and earlier, click Start. 2 Click Programs or All Programs Œ Lexmark 5000 Series. 3 Select Lexmark Solution Center. 10
...Run, and then type D:\setup, where D is not on Windows operating systems) • In Windows Vista, click . • Loading paper • In Windows XP and earlier, click Start. • Printing 2 Click Programs or All Programs Œ Lexmark 5000 • Working with printing, copying, Run. It installs ... the printer to the User's Guide is Note: If your CD. An icon of the following : • In Windows Vista, click . • In Windows XP and earlier, click Start. 2 Click Programs or All Programs Œ Lexmark 5000 Series. 3 Select Lexmark Solution Center. 10
User's Guide
Page 71
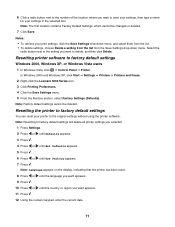
... Save. Note: Language appears on the display, indicating that the printer has been reset. 8 Press or until the language you want appears. 9 Press . 10 Press or until the country or region you selected. 1 Press Settings. 2 Press or until Defaults appears. 3 Press . 4 Press or until Set Defaults...software. Note: The first location contains Factory Default Settings, which cannot be deleted. In Windows 2000 and Windows XP, click Start ΠSettings ΠPrinters or Printers and Faxes. 2 Right-click the Lexmark 5000 Series icon. 3 Click Printing Preferences. 4 Click the Save Settings menu. 5 ...
... Save. Note: Language appears on the display, indicating that the printer has been reset. 8 Press or until the language you want appears. 9 Press . 10 Press or until the country or region you selected. 1 Press Settings. 2 Press or until Defaults appears. 3 Press . 4 Press or until Set Defaults...software. Note: The first location contains Factory Default Settings, which cannot be deleted. In Windows 2000 and Windows XP, click Start ΠSettings ΠPrinters or Printers and Faxes. 2 Right-click the Lexmark 5000 Series icon. 3 Click Printing Preferences. 4 Click the Save Settings menu. 5 ...

User's Guide
Page 90
..., adjust the Despeckle setting. You can preview the changes to your image by comparing the Before and After preview panes at the top of the window. 5 Click OK. Note: You can select sepia, antique brown, black and white, or antique grey. 5 Click OK. 90 The thumbnail is updated. When images ... of the image by comparing the Before and After preview panes at the top of the window. 5 Click OK to accept your changes, or click Cancel to keep your changes. You can enter gamma values from -10-10. Note: You can preview the changes to edit. 2 With an image open , click Enhancements. 3 ...
..., adjust the Despeckle setting. You can preview the changes to your image by comparing the Before and After preview panes at the top of the window. 5 Click OK. Note: You can select sepia, antique brown, black and white, or antique grey. 5 Click OK. 90 The thumbnail is updated. When images ... of the image by comparing the Before and After preview panes at the top of the window. 5 Click OK to accept your changes, or click Cancel to keep your changes. You can enter gamma values from -10-10. Note: You can preview the changes to edit. 2 With an image open , click Enhancements. 3 ...

User's Guide
Page 92
...Work with edits in the bottom right corner to return to the print window. 11 Click Print Now in the bottom right corner of the window. 12 Remove the CD or storage device. Click More Retouch Tools ...size. 7 To select multiple prints of a photo, or to select photo sizes other than 4 x 6 in. (10 x 15 cm), select the options you want to edit your edit(s), click Return with Documents and Photos. 3 Click ..., select the paper type 8 To select multiple prints of a photo, or to select photo sizes other than 10 x 15 cm (4 x 6 in.), select the options you want in the table. Select One-Click Auto ...
...Work with edits in the bottom right corner to return to the print window. 11 Click Print Now in the bottom right corner of the window. 12 Remove the CD or storage device. Click More Retouch Tools ...size. 7 To select multiple prints of a photo, or to select photo sizes other than 4 x 6 in. (10 x 15 cm), select the options you want to edit your edit(s), click Return with Documents and Photos. 3 Click ..., select the paper type 8 To select multiple prints of a photo, or to select photo sizes other than 10 x 15 cm (4 x 6 in.), select the options you want in the table. Select One-Click Auto ...

User's Guide (Mac)
Page 56
... page 57 • "Canceling a print job" on the dock. 2 From the queue window, select the job you want to cancel. 3 Click the Delete icon. Printing the last page first (reverse page order) For Mac OS X version 10.4.2 or later: 1 With a document open , click File Œ Print. 2 From the... third pop-up menu, choose Paper Handling. 3 From the Page Order menu, select Reverse. 4 Click Print. For Mac OS X version 10.3.9: 1 With a document open , click File Œ Print. 2 From the third pop-up menu, choose Paper Handling. 3 Select Reverse page order. 4 Click Print....
... page 57 • "Canceling a print job" on the dock. 2 From the queue window, select the job you want to cancel. 3 Click the Delete icon. Printing the last page first (reverse page order) For Mac OS X version 10.4.2 or later: 1 With a document open , click File Œ Print. 2 From the... third pop-up menu, choose Paper Handling. 3 From the Page Order menu, select Reverse. 4 Click Print. For Mac OS X version 10.3.9: 1 With a document open , click File Œ Print. 2 From the third pop-up menu, choose Paper Handling. 3 Select Reverse page order. 4 Click Print....

User's Guide (Mac)
Page 90
... each computer you want to print to the printer. • The printer should appear as Rendezvous in the installation. Finding your Macintosh) with Windows users. Networking the printer 90 Any printer, as well as computers and other Mac OS X users who also use the Bonjour (formerly known ...as a highlighted printer in Mac OS X version 10.3) technology, is on. Note: In printer sharing, printer maintenance functions are installing your network printer for use with the correct IP address/MAC ...
... each computer you want to print to the printer. • The printer should appear as Rendezvous in the installation. Finding your Macintosh) with Windows users. Networking the printer 90 Any printer, as well as computers and other Mac OS X users who also use the Bonjour (formerly known ...as a highlighted printer in Mac OS X version 10.3) technology, is on. Note: In printer sharing, printer maintenance functions are installing your network printer for use with the correct IP address/MAC ...


